1. Introduction
This manual provides detailed instructions for the assembly, operation, and maintenance of your walnest 6.56x9.84x6.56 FT Spire Roof Chicken Coop. Designed to offer a spacious and secure environment, this metal chicken run is suitable for various poultry and small animals, including chickens, ducks, rabbits, guinea pigs, chinchillas, ferrets, and gerbils. The spire roof design prevents water and snow accumulation, ensuring durability and protection for your animals.
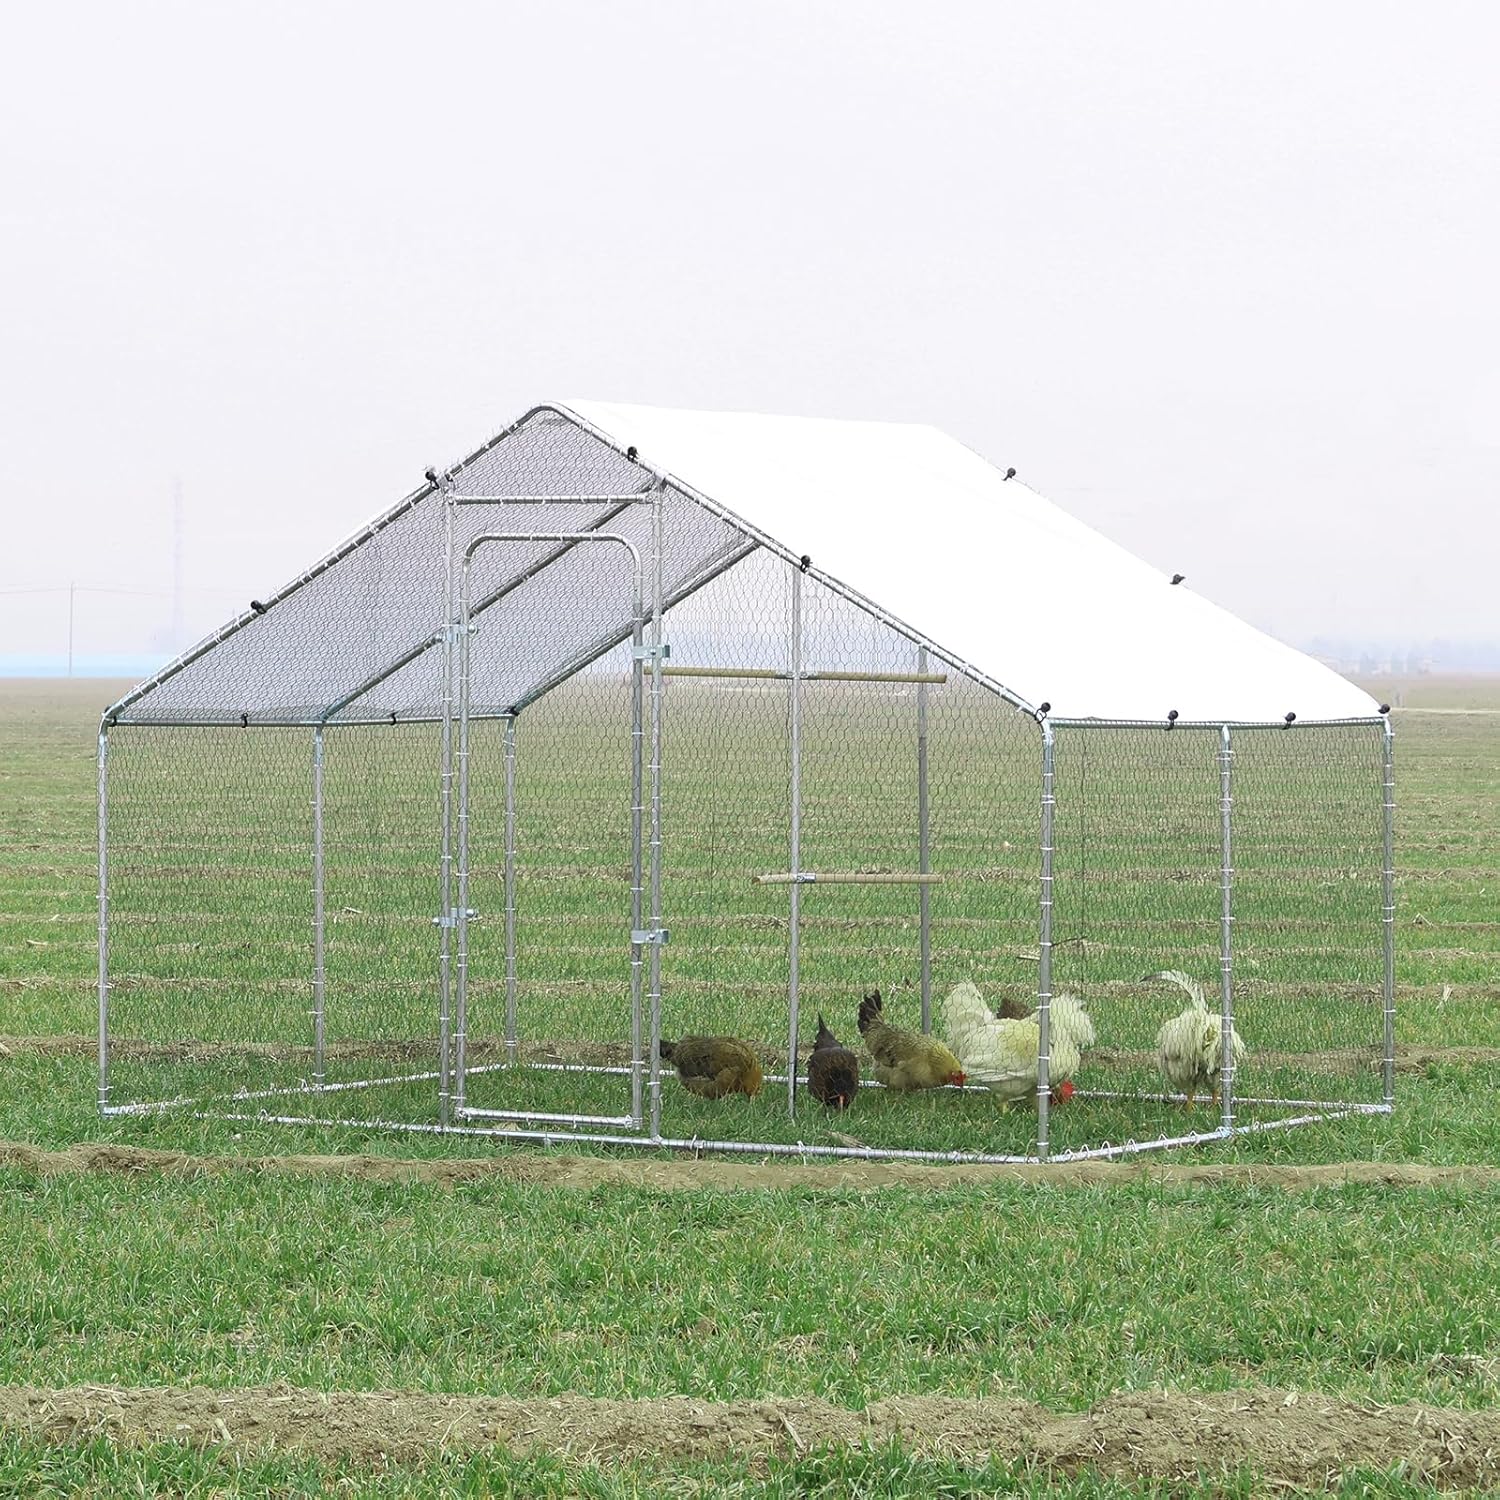
Image 1.1: Fully assembled walnest chicken coop providing a secure outdoor space for poultry.
2. Safety Information
Please read and understand all safety instructions before assembly and use. Failure to follow these instructions may result in injury or damage to the product.
- Adult Assembly Required: This product requires adult assembly. Keep children and pets away during the assembly process.
- Inspect Components: Before assembly, inspect all components for sharp edges or defects. Handle metal parts with care to avoid cuts.
- Secure Installation: Ensure the chicken coop is securely anchored to the ground to prevent tipping or movement, especially in windy conditions. Additional ground anchors may be necessary depending on soil type and weather.
- Locking Mechanism: Always ensure the door's locking mechanism is properly engaged to prevent animals from escaping and to deter predators. Regularly check the integrity of the lock.
- Wire Mesh: The PVC-coated hexagonal wire mesh is designed to contain poultry and deter common predators. However, continuous monitoring and additional predator-proofing measures may be required based on local wildlife.
- Proper Use: This coop is intended for housing poultry and small animals. Do not use it for purposes other than its intended design.
3. Package Contents
Verify that all parts are present before beginning assembly. If any parts are missing or damaged, contact customer support.
- Galvanized Steel Frame Components
- PVC Coated Hexagonal Wire Mesh Roll
- Waterproof and Anti-UV Spire Roof Cover
- Door Assembly (Frame, Hinges, Latch)
- Chicken Perch(es)
- Connectors and Fasteners (e.g., zip ties, bolts)
- Ground Anchors
- Instruction Manual

Image 3.1: Example of PVC coated hexagonal wire mesh included in the package.
4. Setup and Assembly Instructions
Assembly typically requires two adults. Do not begin assembly until all packages have arrived and all components are accounted for. Refer to the included diagram for specific part identification.
- Unpack and Organize: Carefully unpack all components and lay them out. Group similar parts together.
- Assemble the Base Frame: Connect the horizontal and vertical pipes to form the base of the coop. Ensure all connections are secure.
- Construct the Side and Roof Frames: Attach the remaining frame pipes to build the side walls and the spire roof structure. Use the provided connectors to ensure a stable framework.
- Install the Wire Mesh: Unroll the PVC-coated hexagonal wire mesh and attach it to the assembled frame. Start from one end and work your way around, securing the mesh tightly to the frame using the provided zip ties or other fasteners. Ensure there are no gaps that animals could exploit.
- Attach the Door: Install the door frame into the designated opening. Attach the hinges and then the door panel. Ensure the door swings freely and the latch mechanism operates correctly.
- Install the Waterproof Cover: Drape the waterproof and anti-UV cover over the spire roof frame. Secure it firmly to the frame using the elastic ball bungees or ties provided. Ensure the cover is taut to prevent flapping in the wind and to allow water runoff.
- Add Perches: Install the chicken perch(es) inside the coop at appropriate heights.
- Secure to Ground: Use the provided ground anchors to firmly secure the base of the coop to the ground. For added stability, especially in areas prone to strong winds or with soft soil, consider using additional heavy-duty ground stakes or rebar.

Image 4.1: Assembly progression showing the frame structure and the roof cover installation.

Image 4.2: Detail of the durable metal bottom connection point, essential for ground anchoring.
5. Operating Instructions
Your walnest chicken coop is designed for ease of use and animal comfort.
- Accessing the Coop: The large door design allows for easy entry and exit for cleaning, feeding, and interacting with your animals. Simply unlatch the door and push it open.
- Animal Capacity: This coop is designed to comfortably house 8-10 standard-sized chickens, or a comparable number of other small animals, providing ample space for movement and activity.
- Environmental Protection: The spire roof cover offers protection from sun, rain, and light snow, creating a sheltered area within the run.

Image 5.1: The large door design facilitates easy access for caregivers.

Image 5.2: The coop is suitable for a variety of small pets to rest and play.
6. Maintenance
Regular maintenance will extend the life of your chicken coop and ensure the well-being of your animals.
- Cleaning: Periodically clean the interior of the coop, including the perches and ground area, to maintain hygiene. The PVC-coated mesh can be wiped down or hosed off.
- Frame Inspection: Regularly check the galvanized steel frame for any signs of rust, corrosion, or damage. While the frame is galvanized for protection, extreme conditions may cause wear over time.
- Mesh Integrity: Inspect the wire mesh for any tears, holes, or loose sections. Repair or reinforce as needed to prevent escapes or predator entry.
- Cover Condition: Check the waterproof cover for rips, cracks, or fading. Ensure it remains securely attached to the frame. Replace if significant damage occurs to maintain weather protection.
- Door and Latch: Ensure the door hinges are functioning smoothly and the latch provides a secure closure. Lubricate hinges if necessary.
- Ground Anchors: Verify that the ground anchors remain firmly in place. Re-secure or add more anchors if the coop shows signs of instability.

Image 6.1: The waterproof cover effectively repels water, requiring occasional cleaning.
7. Troubleshooting
This section addresses common issues you might encounter.
- Issue: Coop feels unstable or wobbly.
Solution: Ensure all frame connections are fully engaged and tightened. Verify that all ground anchors are deeply and securely set. Consider adding more robust ground stakes or securing the base to a concrete foundation if permanent installation is desired. - Issue: Animals are escaping or predators are gaining entry.
Solution: Thoroughly inspect the entire mesh enclosure for any small gaps, tears, or loose sections. Reinforce weak points with additional zip ties or hardware cloth. Ensure the door latch is fully engaged and consider adding a secondary lock for enhanced security. Check if the mesh extends sufficiently to the ground and is secured to prevent digging underneath. - Issue: Roof cover is accumulating water or snow.
Solution: The spire roof is designed to prevent accumulation. Ensure the cover is taut and properly secured to allow for runoff. If sagging occurs, re-adjust the cover's tension. Clear any debris that might be obstructing water flow. - Issue: Zip ties are breaking.
Solution: While the provided zip ties are functional, for increased durability and security, you may opt to replace them with stronger, UV-resistant zip ties or metal wire ties, especially in critical areas.
8. Specifications
| Feature | Detail |
|---|---|
| Model | 6.56x9.84x6.56 FT Spire Roof Chicken Coop |
| Dimensions (L x W x H) | 78.74" x 118.11" x 78.74" (6.56 ft x 9.84 ft x 6.56 ft) |
| Material | Galvanized Steel Frame, PVC Coated Hexagonal Wire Mesh |
| Weight | Approximately 82.8 pounds |
| Roof Type | Spire Roof with Waterproof & Anti-UV Cover |
| Capacity | Suitable for 8-10 chickens (or comparable small animals) |
| Special Features | Easy to Use, Sun proof, Waterproof, Security Lockable Door |

Image 8.1: Detailed dimensions of the chicken coop.
9. Warranty and Support
walnest products are designed for quality and durability. For any questions, concerns, or assistance with your product, please contact walnest customer support.
- Returns: This product typically includes a 30-day easy return policy. Please refer to your purchase documentation for specific return details.
- Customer Support: For technical assistance, missing parts, or warranty inquiries, please reach out to the seller or manufacturer directly through the platform where the purchase was made.


