1. Product Overview
This manual provides detailed instructions for the installation, operation, and maintenance of your Vikye M-ATX Desktop Motherboard, model Vikyeoaqchmfg32. This motherboard is designed for desktop computers, supporting Intel LGA 1151 CPUs and DDR4 memory, offering a reliable foundation for your computing needs.
Key Features:
- CPU Compatibility: Supports Intel Core i7, i5, i3, Pentium, and Celeron 14nm CPUs with LGA 1151 socket.
- Memory Support: Two DDR4 memory slots, supporting dual-channel DDR4 2133MHz memory up to a maximum capacity of 32GB.
- Expansion Slots: Features one PCI-E 3.0 X16 slot for graphics cards and two PCI-E 3.0 X1 slots for other expansion cards.
- Video Output: Equipped with a DVI interface for high-definition video output.
- Network Connectivity: Integrated Realtek RTL8111GR Gigabit Ethernet for stable network connection.
- Robust Design: Built with premium materials and a 5-phase power mode for stable and long-lasting performance.

Figure 1.1: Overall view of the Vikye M-ATX Desktop Motherboard, showcasing its layout and various components.
2. Setup and Installation
Follow these steps carefully to install your motherboard and its components. Ensure your system is powered off and unplugged before beginning any installation.
2.1 CPU Installation
- Locate the LGA 1151 CPU socket on the motherboard.
- Gently push down the load lever and pull it sideways to open the CPU socket retention frame.
- Align the triangular mark on your Intel LGA 1151 CPU with the corresponding mark on the socket. Carefully place the CPU into the socket without forcing it.
- Close the retention frame and push the load lever back into its locked position.
- Apply a thin, even layer of thermal paste to the top of the CPU and install the CPU cooler according to its manufacturer's instructions.
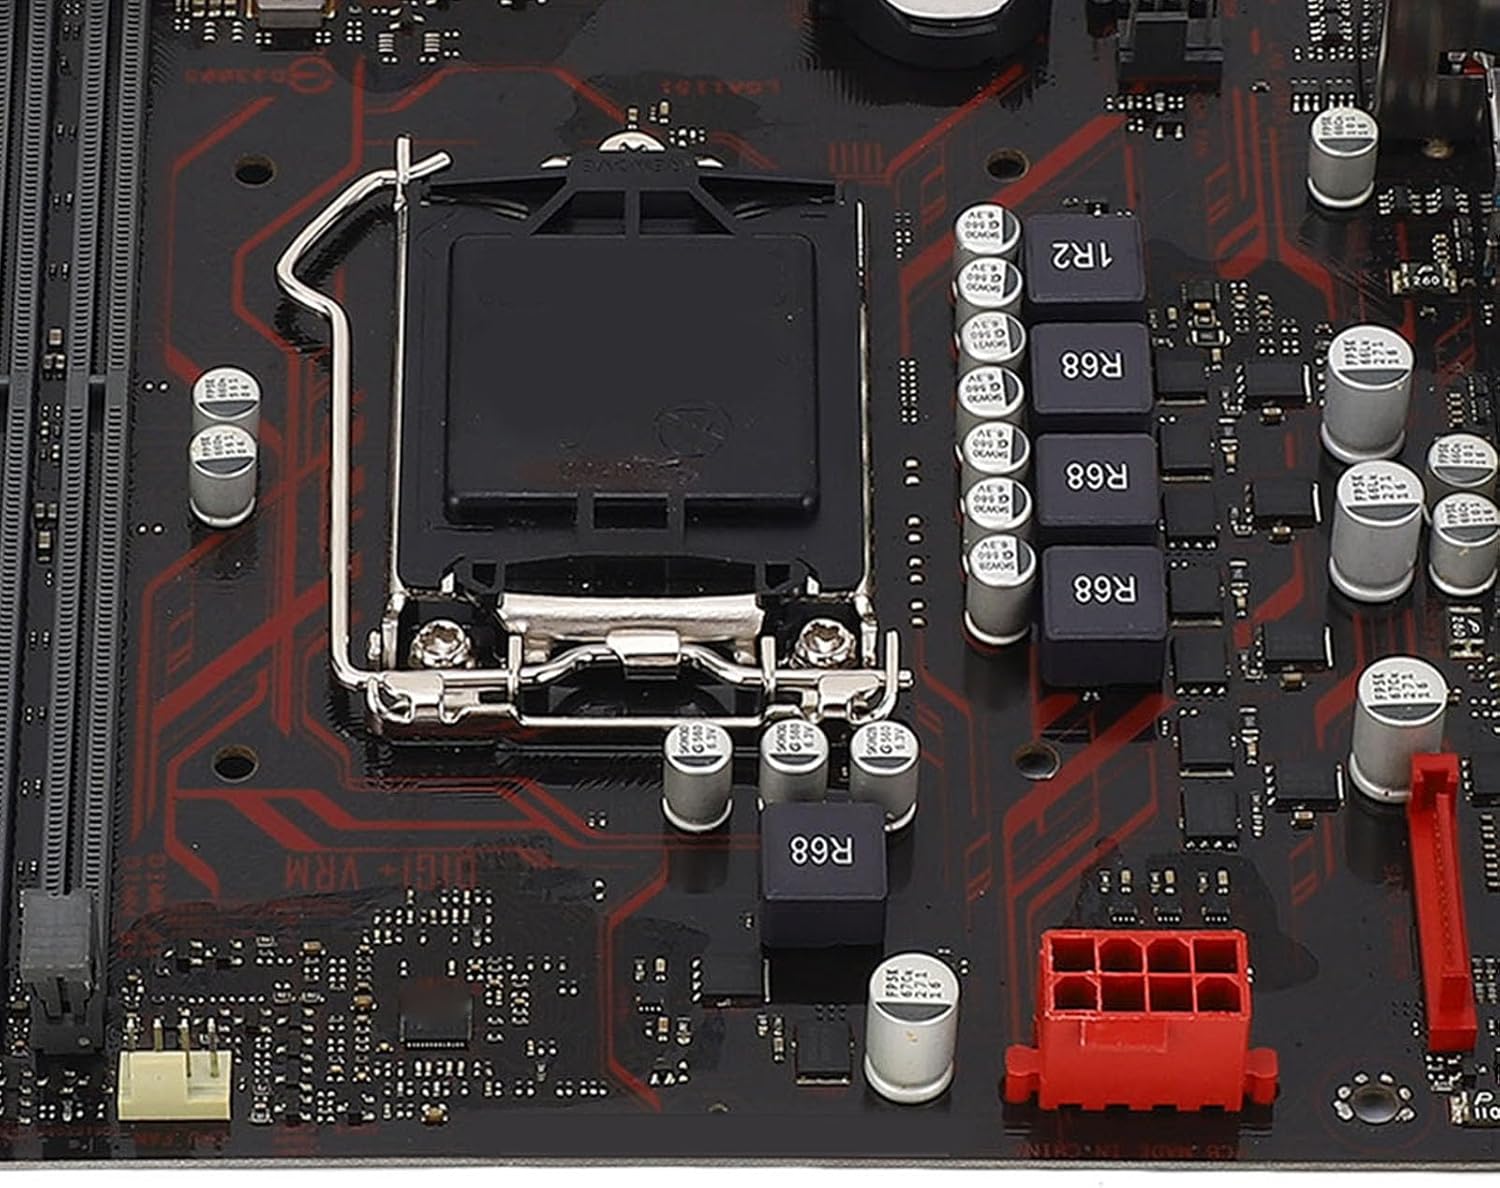
Figure 2.1: Close-up view of the LGA 1151 CPU socket, showing the retention mechanism.
2.2 RAM (Memory) Installation
- Identify the two DDR4 DIMM slots on the motherboard.
- Open the clips at both ends of the DIMM slot.
- Align the notch on the DDR4 memory module with the key in the DIMM slot.
- Insert the memory module firmly into the slot until the clips snap into place. Ensure both clips are fully closed.
- For dual-channel operation, install memory modules in both slots.

Figure 2.2: The motherboard featuring two DDR4 memory slots, designed for dual-channel operation.
2.3 PCI-E Card Installation
- Locate the PCI-E X16 slot (for graphics cards) and PCI-E X1 slots on the motherboard.
- Remove the corresponding expansion slot cover from your PC case.
- Align your PCI-E expansion card with the chosen slot and press it down firmly until it is fully seated.
- Secure the card with a screw to the PC case.
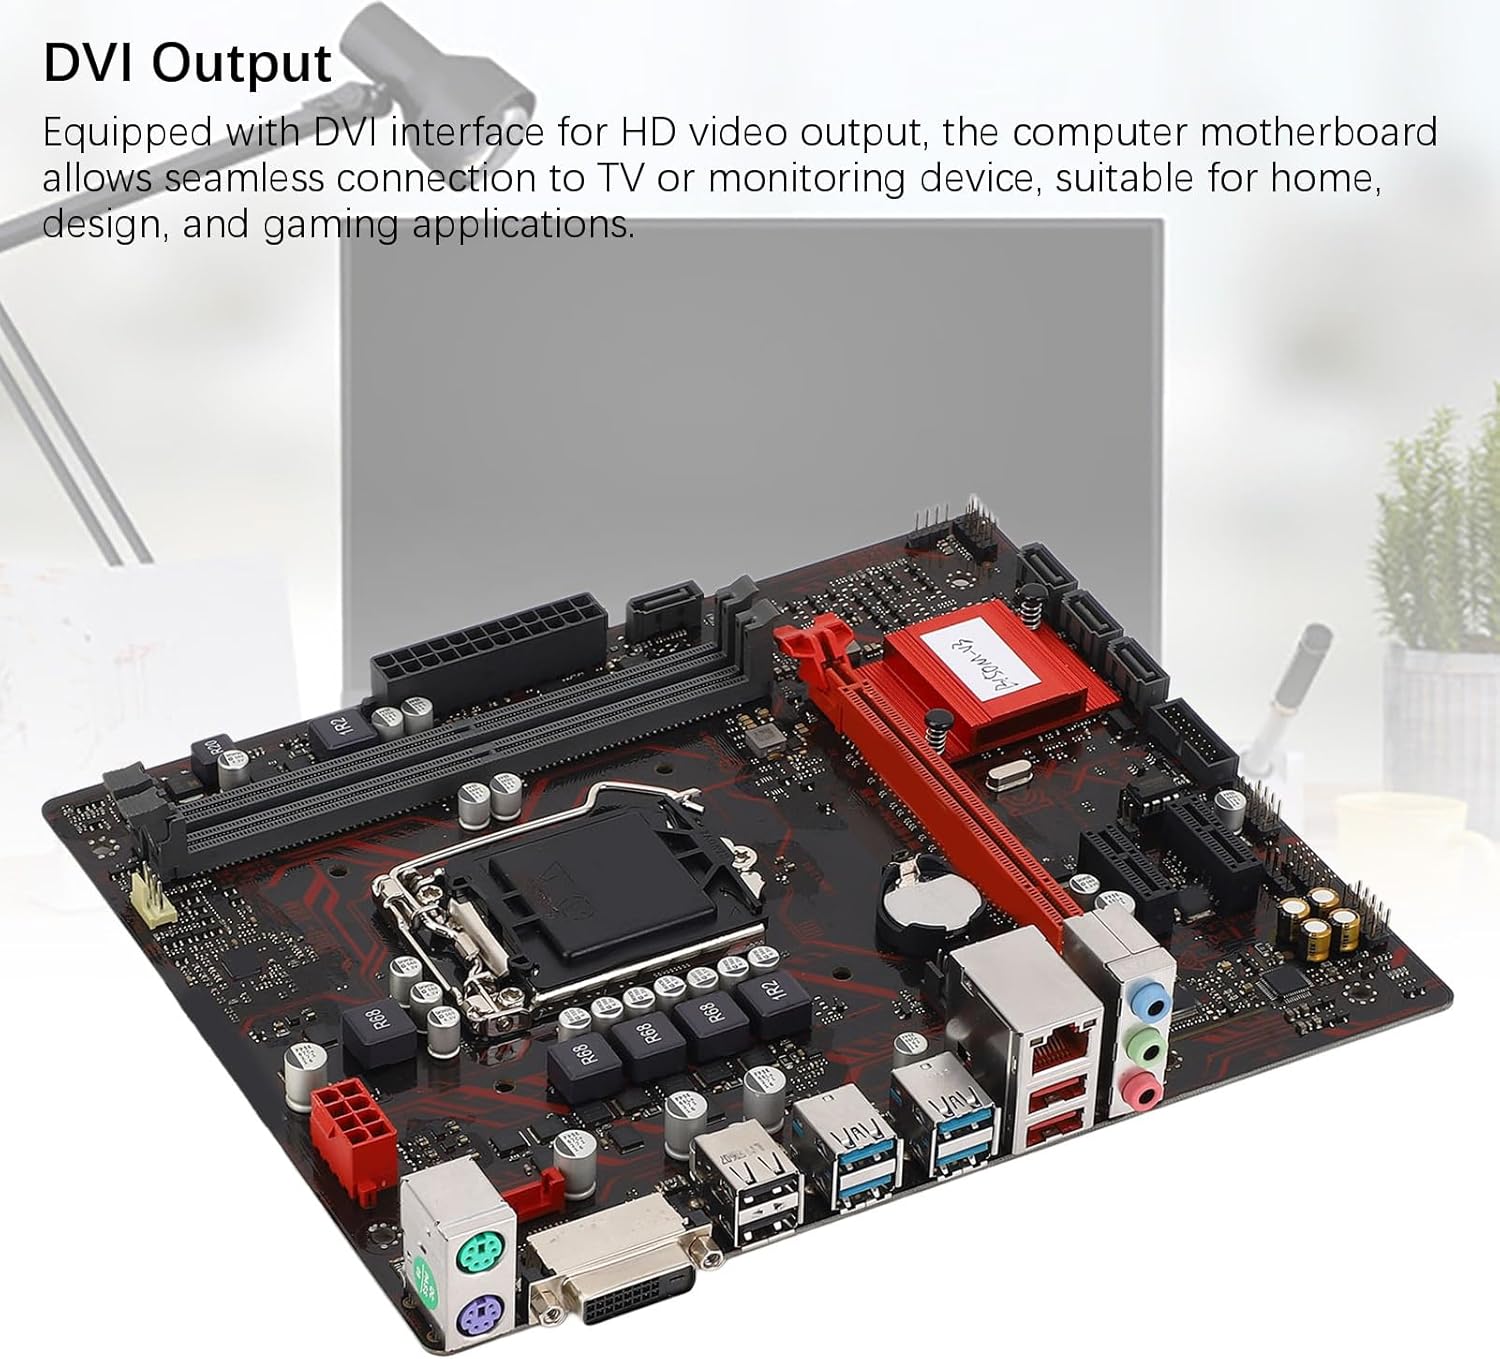
Figure 2.3: The motherboard's PCI-E slots, including one PCI-E X16 and two PCI-E X1 slots for various expansion cards.
2.4 Power Connections
- Connect the 24-pin ATX power connector from your power supply unit (PSU) to the main power socket on the motherboard.
- Connect the 8-pin CPU power connector from your PSU to the CPU power socket near the CPU.
2.5 Storage Connections
- Connect SATA data cables from your storage devices (HDDs, SSDs) to the SATA ports on the motherboard.
- Ensure your storage devices are also connected to the power supply unit.

Figure 2.4: Detailed view of the rear I/O panel and SATA ports, indicating connection points for peripherals and storage.
2.6 Front Panel and Rear I/O Connections
- Connect your PC case's front panel connectors (power button, reset button, USB ports, audio jacks, LED indicators) to the corresponding headers on the motherboard. Refer to your PC case manual for specific pin assignments.
- Connect your monitor to the DVI port on the rear I/O panel.
- Connect USB devices, Ethernet cable, and audio peripherals to the appropriate ports on the rear I/O panel.

Figure 2.5: The motherboard's DVI output interface, enabling connection to HD displays.
3. Operating Instructions
3.1 Initial Boot-up
- After all components are installed and connected, plug in your power supply and turn on the system.
- The system should power on, and you should see a display on your monitor.
3.2 BIOS/UEFI Access
- During the initial boot sequence, repeatedly press the DEL or F2 key to enter the BIOS/UEFI setup utility.
- In the BIOS/UEFI, you can configure system settings, boot order, and monitor hardware status.
3.3 Driver and Operating System Installation
- Install your preferred operating system (e.g., Windows, Linux) from a bootable USB drive or DVD.
- After the operating system is installed, install the necessary drivers for the motherboard components (chipset, audio, LAN, etc.). These drivers are typically available on the manufacturer's website or an included driver disc.
4. Maintenance
- Cleaning: Regularly clean dust from the motherboard and other components using compressed air. Ensure the system is powered off and unplugged before cleaning. Avoid using liquid cleaners directly on components.
- BIOS Updates: Periodically check the Vikye official website for BIOS/UEFI updates. Updating the BIOS can improve system stability, compatibility, and performance. Follow the update instructions provided by Vikye carefully to avoid damaging the motherboard.
- Component Checks: Ensure all cables are securely connected and no components are loose. Inspect for any signs of physical damage or overheating.
5. Troubleshooting
This section provides solutions to common issues you might encounter.
5.1 No Power / No Boot
- Ensure the power supply unit (PSU) is switched on and connected correctly to the motherboard (24-pin and 8-pin connectors).
- Verify that the front panel power button connector is correctly attached to the motherboard header.
- Test the PSU with another system or use a PSU tester if available.
5.2 No Display Output
- Check if the monitor is properly connected to the DVI port on the motherboard or the graphics card (if installed).
- Ensure the monitor is powered on and set to the correct input source.
- Reseat the RAM modules. Incorrectly seated RAM is a common cause of no display.
- If using a dedicated graphics card, ensure it is properly seated in the PCI-E X16 slot and has adequate power connected.
5.3 System Instability / Crashes
- Check for overheating. Ensure CPU cooler and case fans are functioning correctly.
- Run memory diagnostic tools to check for faulty RAM modules.
- Ensure all drivers are up to date.
- Check for BIOS updates that might address stability issues.
6. Specifications
| Feature | Specification |
|---|---|
| Brand | Vikye |
| Model | Vikyeoaqchmfg32 |
| Form Factor | M-ATX |
| CPU Socket | LGA 1151 |
| Supported CPUs | Intel Core i7, i5, i3, Pentium, Celeron (14nm) |
| Chipset | Intel B150 |
| Memory Slots | 2 x DDR4 DIMM slots |
| Memory Type | DDR4 2133MHz (Dual Channel) |
| Max Memory Capacity | 32 GB |
| PCI-E X16 Slots | 1 x PCI-E 3.0 X16 |
| PCI-E X1 Slots | 2 x PCI-E 3.0 X1 |
| Storage Interfaces | SATA ports (number not specified, typically 4-6 on M-ATX) |
| Video Output | 1 x DVI port |
| USB Ports | 6 x USB (total, including rear I/O and internal headers) |
| LAN | Realtek RTL8111GR Gigabit Ethernet |
| Audio | Integrated Audio Codec (details not specified) |
| Power Connectors | 1 x 24-pin ATX, 1 x 8-pin CPU |
| Dimensions (Package) | 29 x 26 x 6 cm |
| Weight (Item) | 566 g |
7. Warranty Information
This Vikye motherboard comes with a standard manufacturer's warranty. For detailed information regarding warranty terms, conditions, and duration, please refer to the official Vikye website or contact your point of purchase. Keep your proof of purchase for warranty claims.
8. Technical Support
For technical assistance, driver downloads, or further product information, please visit the official Vikye support website. You may also contact their customer service for direct support.
Vikye Official Website: Visit Vikye Store on Amazon (Note: This link directs to the brand's store on Amazon. For official support, search for Vikye's dedicated support page.)