1. Introduction
This manual provides detailed instructions for the installation and operation of the Generic Canbus Box Adaptor for Honda Civic Air Conditioner systems. This adaptor facilitates the integration of your vehicle's air conditioning controls with an aftermarket Android car radio or head unit, ensuring seamless functionality.
2. Safety Information
- Always disconnect the vehicle's battery before beginning any electrical installation to prevent short circuits and electrical shock.
- Ensure all connections are secure and properly insulated to avoid electrical hazards.
- If you are unsure about any part of the installation process, consult a qualified professional installer.
- Do not modify the Canbus box or wiring harness. Unauthorized modifications may void the warranty and create safety risks.
- Keep the product away from water and excessive heat.
3. Package Contents
Verify that all items listed below are present in your package:
- 1x Canbus Box Adaptor
- 1x Wiring Harness Power Cable

Figure 1: The complete package includes the Canbus Box Adaptor and its associated multi-pin wiring harness.
4. Specifications
| Product Type | Canbus Box Adaptor |
| Material | Plastic |
| Weight | Approximately 0.2 kg |
| Voltage | 5V |
| Output Power | 5W |
5. Compatibility
This Canbus Box Adaptor is specifically designed for:
- Honda Civic models equipped with an Air Conditioner canbus system.
It is intended for use with aftermarket Android car radio or head unit installations to enable communication with the vehicle's air conditioning controls.
6. Setup and Installation
Important: Professional installation is highly recommended for this product. Incorrect installation can damage your vehicle's electrical system or the product itself.
6.1 Identifying Components
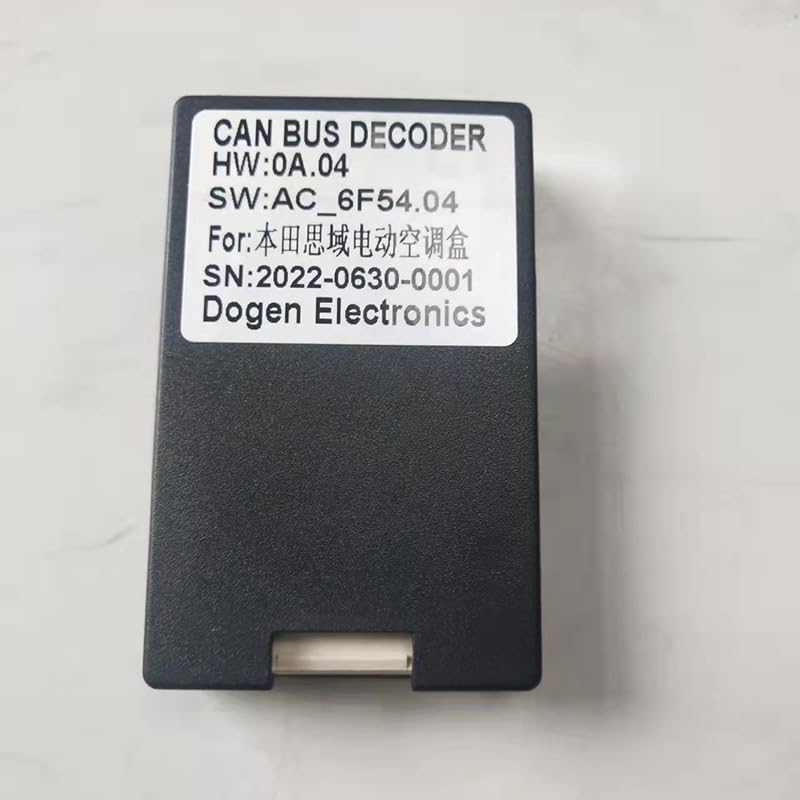
Figure 2: The Canbus Box Adaptor, showing its label with model and serial information.
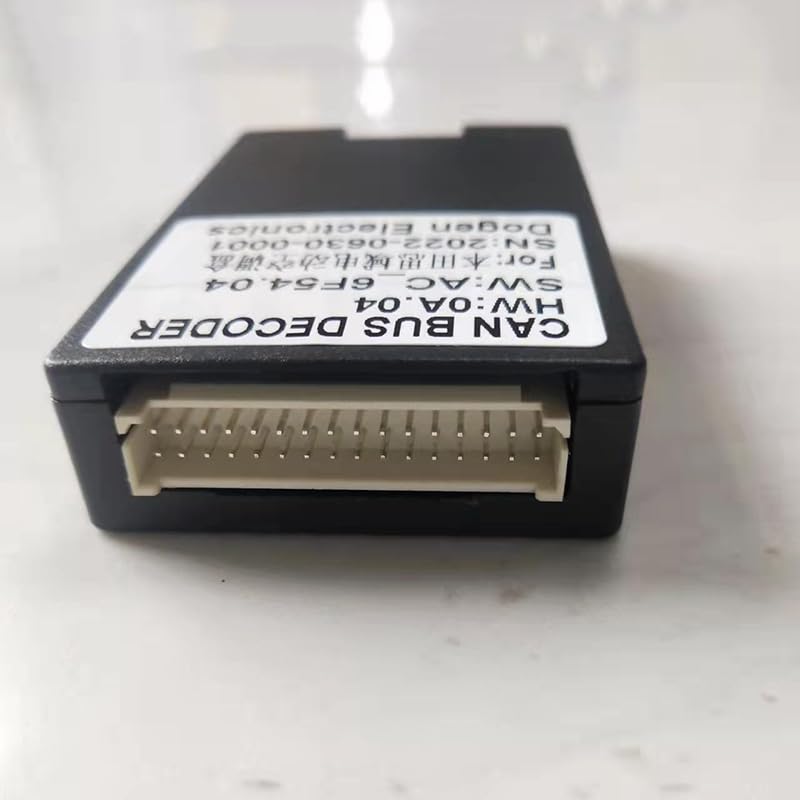
Figure 3: The multi-pin connectors of the wiring harness, designed for specific vehicle and head unit interfaces.
6.2 Installation Steps
- Prepare the Vehicle: Ensure the vehicle is turned off and the negative terminal of the battery is disconnected to prevent electrical hazards.
- Access Head Unit Area: Carefully remove the existing car radio or head unit from the dashboard. Refer to your vehicle's service manual for specific instructions on panel removal.
- Connect Wiring Harness:
- Connect the vehicle-specific end of the provided wiring harness to the corresponding connectors in your Honda Civic's dashboard wiring.
- Connect the other end of the wiring harness to your aftermarket Android car radio or head unit. Ensure all pins align correctly and connections are secure.
- Integrate Canbus Box: Locate the dedicated connector on the wiring harness for the Canbus Box Adaptor. Plug the Canbus Box Adaptor into this connector.

Figure 4: The Canbus Box Adaptor features a multi-pin port for connection to the wiring harness.
- Secure Components: Ensure the Canbus box and all wiring are neatly tucked away and secured to prevent rattling or interference. Avoid placing components where they might be exposed to excessive heat or moisture.
- Reconnect Battery and Test: Reconnect the vehicle's battery. Turn on the ignition and power on your new Android head unit. Test the air conditioning controls through the head unit interface to confirm proper communication and functionality.
- Reassemble Dashboard: Once functionality is confirmed, carefully reassemble the dashboard panels.
7. Operation
The Canbus Box Adaptor operates automatically once correctly installed. Its primary function is to translate the vehicle's CAN-BUS signals related to the air conditioning system into a format that your aftermarket Android head unit can understand and display.
- Air Conditioning Control: After installation, the air conditioning controls (temperature, fan speed, mode, etc.) that were previously managed by physical buttons or the original head unit will now be accessible and controllable via the interface of your Android car radio.
- Display Information: The Android head unit should display real-time information regarding the air conditioning settings, such as current temperature, fan speed, and air distribution mode.
Refer to your Android head unit's user manual for specific instructions on how to access and operate the integrated air conditioning controls through its interface.
8. Troubleshooting
| Problem | Possible Cause | Solution |
|---|---|---|
| Air conditioning controls not appearing on Android head unit. |
|
|
| Incorrect AC information displayed. |
|
|
| No power to Android head unit after installation. |
|
|
9. Maintenance
The Canbus Box Adaptor requires minimal maintenance. Keep the unit and its connections free from dust and moisture. Do not attempt to open the Canbus box, as it contains no user-serviceable parts.
10. Warranty and Support
For warranty information and technical support, please refer to the retailer or manufacturer from whom you purchased this product. Keep your proof of purchase for warranty claims.


