Introduction
Thank you for choosing the Oeukas 4-in-1 Bathroom Exhaust Fan. This unit integrates an exhaust fan, heater, LED light, and decorative nightlight into a single, efficient system. Designed for optimal bathroom comfort and air quality, it provides powerful ventilation, rapid heating, and bright illumination. This manual provides essential information for safe installation, operation, and maintenance of your new unit.
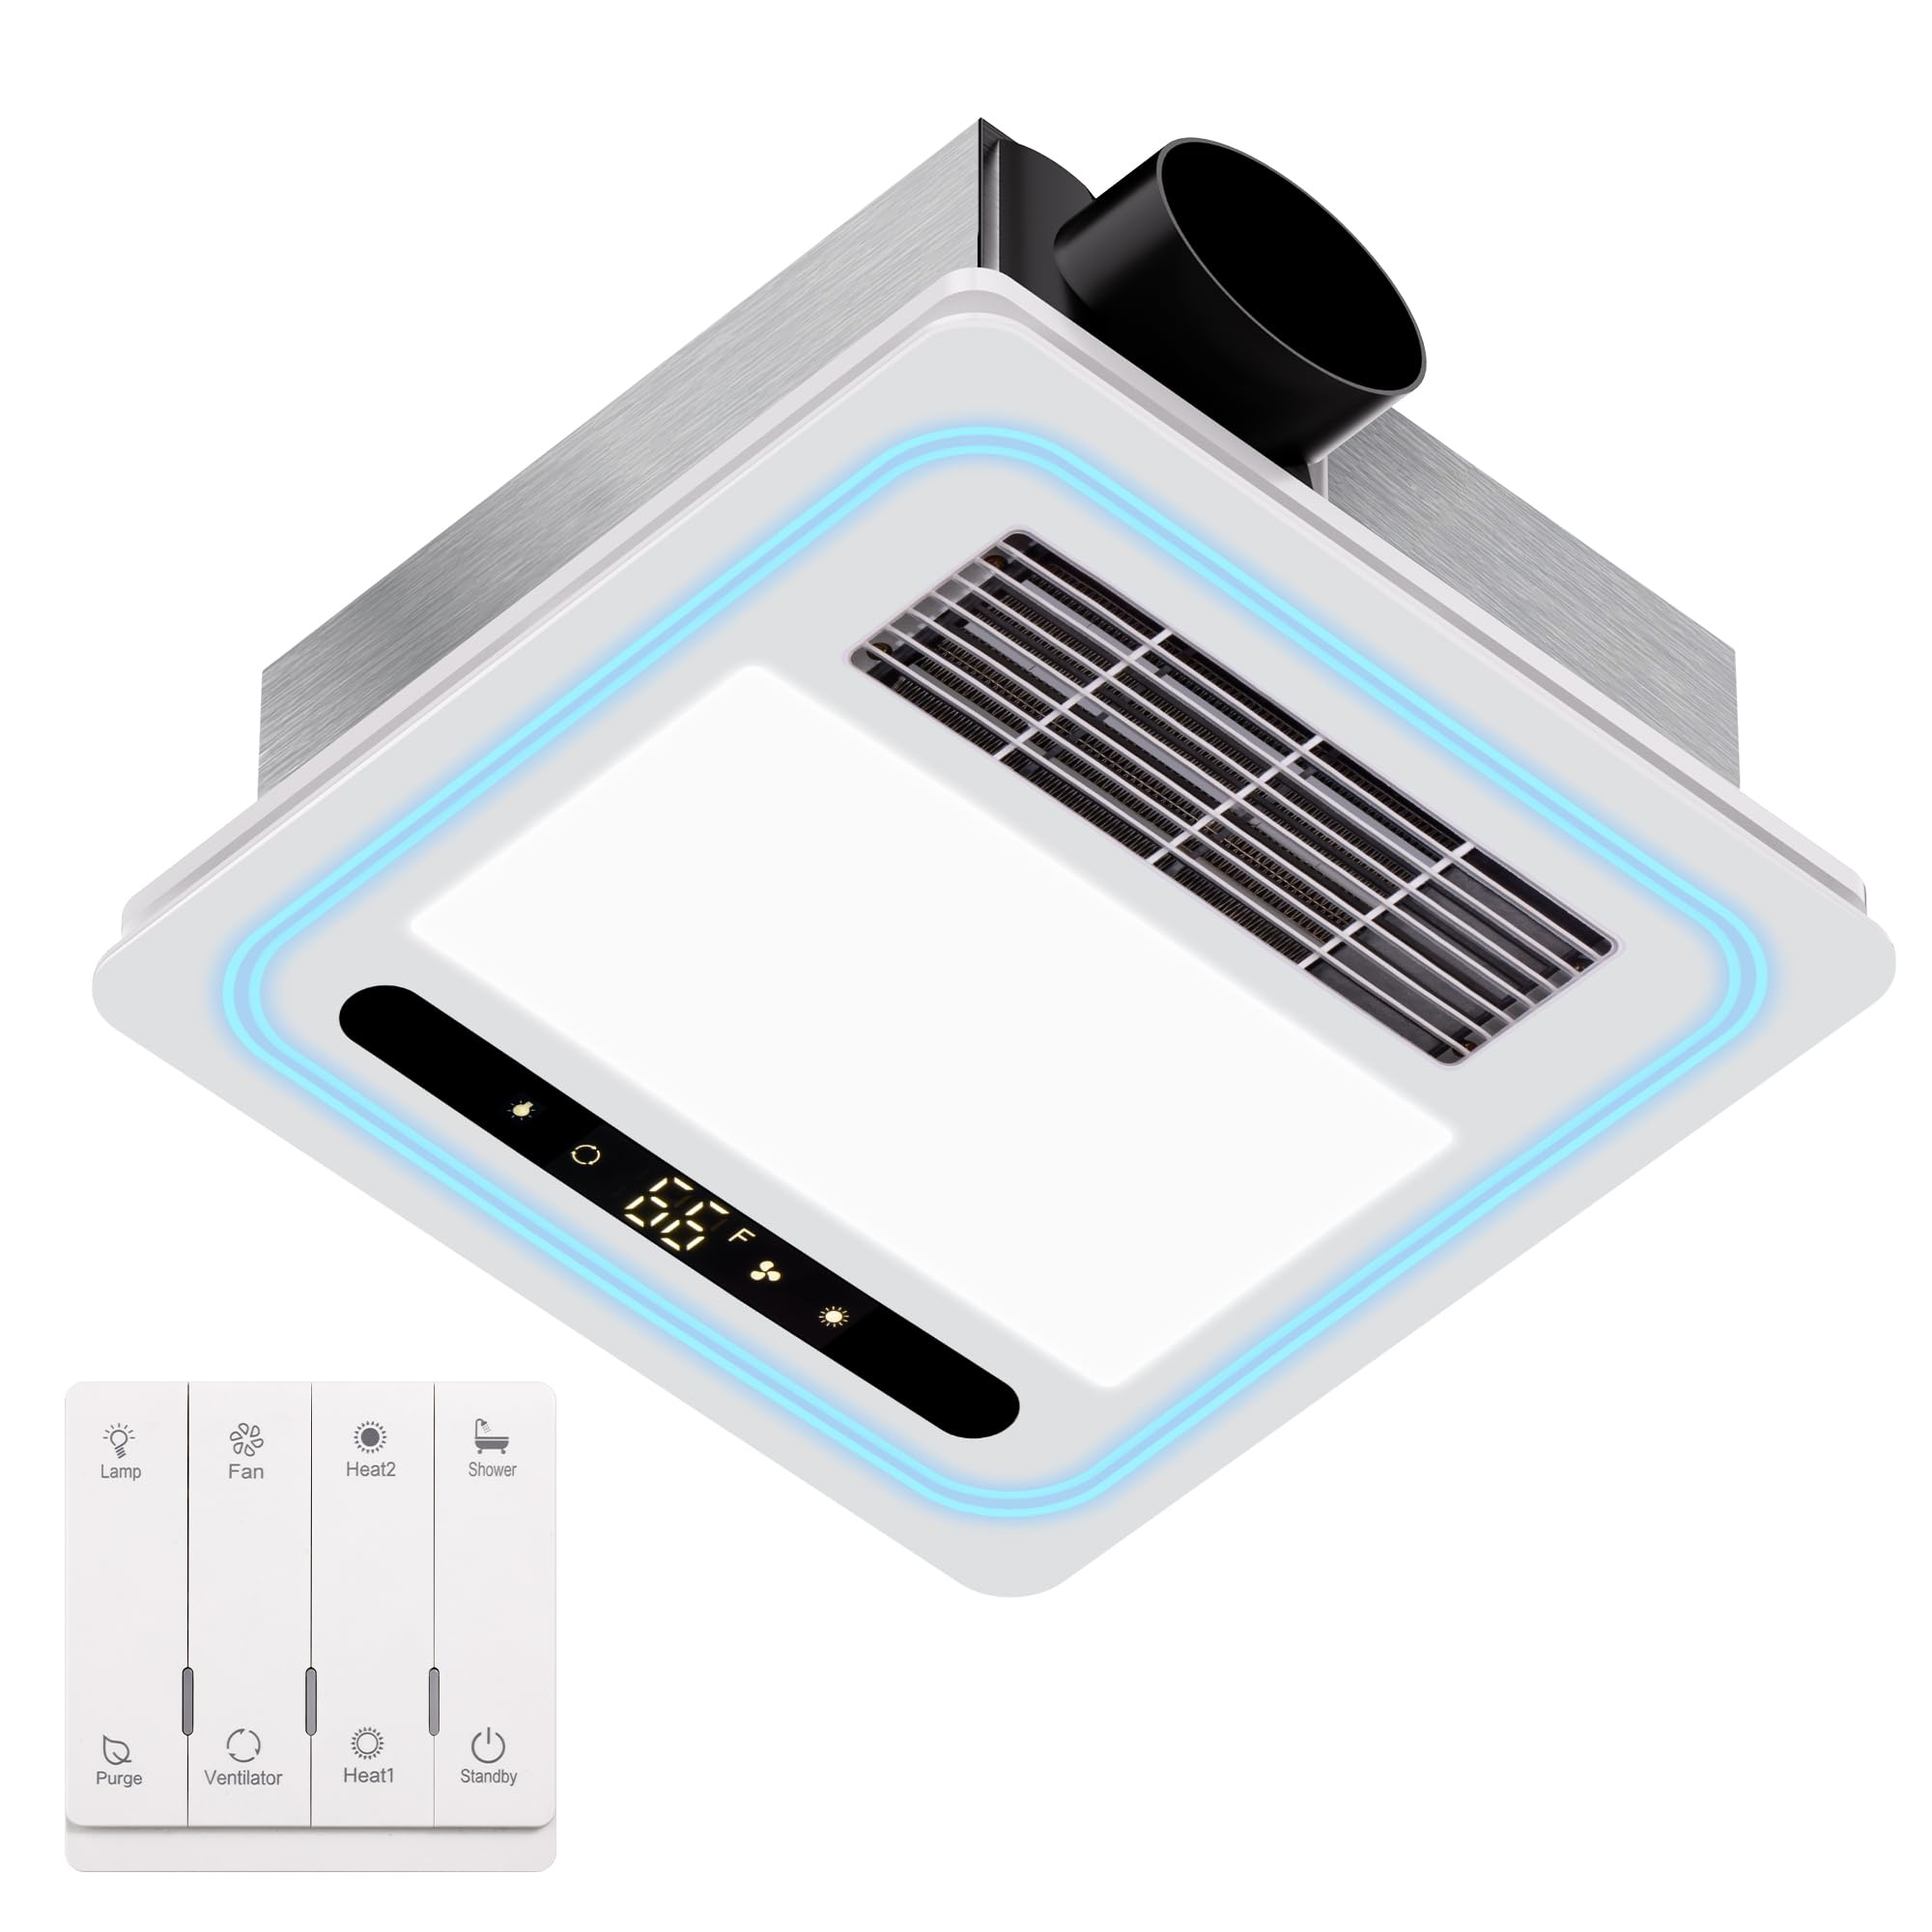
Image: The Oeukas 4-in-1 Bathroom Exhaust Fan unit with its remote control, showcasing its sleek design.
Important Safety Information
Read all instructions carefully before installation and use. Failure to follow these instructions may result in electric shock, fire, or serious injury.
- Professional Installation Recommended: Due to the electrical nature and ceiling integration, professional installation by a qualified electrician is strongly recommended to ensure safety and compliance with local electrical codes.
- UL Listed: This unit is UL Listed, indicating it meets specific safety standards.
- Automatic Overheat Protection: The unit features automatic overheat protection to prevent overheating. However, ensure proper ventilation and clearance during installation.
- Power Disconnection: Always disconnect power at the circuit breaker before installing, servicing, or cleaning the unit.
- Wiring: All wiring must conform to local electrical codes and standards. Ensure proper grounding.
- Ventilation: Do not use this fan in areas where flammable or explosive gases are present. Ensure the exhaust ducting is properly installed and free of obstructions.
- Inspection: Regularly inspect the unit for any signs of damage, loose connections, or unusual odors. If any issues are detected, immediately disconnect power and contact a qualified technician.
- Fire Hazard Warning: There have been isolated reports of units overheating. To mitigate fire risk, ensure the unit is installed correctly, maintained regularly, and never operated if it shows signs of malfunction, unusual noise, or smoke. Do not block air intake or exhaust vents.
Package Contents
Verify that all components are present before beginning installation:
- Oeukas 4-in-1 Bathroom Exhaust Fan Unit (Model BF-190)
- Multi-function Remote Control (AAA batteries not included)
- Remote Control Wall Mount Base
- Installation Hardware (screws, anchors, etc.)
- User Manual (this document)
Specifications
| Feature | Specification |
|---|---|
| Brand | Oeukas |
| Model Name | Bathroom Fan (BF-190) |
| Power Source | AC |
| Voltage | 110 Volts (AC) |
| Air Flow Capacity | 190 Cubic Feet Per Minute (CFM) |
| Heating Power | 1800 Watts |
| Noise Level | 1.0 Sones |
| LED Light Output | 1500 Lumens |
| Control Method | Remote Control |
| Product Dimensions | 4.7"D x 13.8"W x 13.8"H |
| Ceiling Cutout Required | 11.22" x 11.22" |
| Mounting Type | Ceiling Mount |
| Item Weight | 9.53 pounds |
| Safety Certification | UL Listed |
Installation and Setup
Important: Installation should be performed by a qualified electrician in accordance with all local and national electrical codes.
- Prepare the Installation Area: Ensure the power supply to the installation area is turned off at the circuit breaker. Identify the desired location for the fan, ensuring adequate space above the ceiling for the unit and ductwork.
- Measure and Cut Ceiling Opening: The unit requires a ceiling cutout of 11.22 inches x 11.22 inches. Carefully measure and mark the area, then cut the opening in the ceiling.

Image: Visual guide for installation, including measuring the ceiling cutout and mounting the unit.
- Mount the Fan Unit: Position the fan unit at an angle to insert it into the ceiling opening. Secure the unit to the ceiling joists using appropriate fasteners. Ensure the unit is firmly in place.
- Connect Ductwork: Connect the exhaust ducting to the fan's outlet. Ensure all connections are sealed to prevent air leakage.
- Electrical Wiring: Connect the electrical wiring according to the provided wiring diagram and local electrical codes. Ensure all connections are secure and properly insulated.
- Attach the Decorative Panel: Once the main unit is secured and wired, attach the decorative panel to the machine. Ensure the panel exhaust vents align with the machine's air outlet.
- Install Remote Control: The multi-function remote control can be mounted on a wall using the provided wall mount base. Insert AAA batteries (not included) into the remote control.

Image: Instructions for mounting the remote control base on a wall.
Operating Instructions
The Oeukas 4-in-1 Bathroom Exhaust Fan is operated using the included multi-function remote control. Ensure batteries are installed in the remote.

Image: Detailed view of the remote control and its various function buttons.
Remote Control Functions:
- Standby (Power Button): Turns the unit ON or OFF.
- Lamp: Activates the 1500 Lumen LED light. The unit also features 5-color RGB lights for ambient lighting.
- Fan (Blower Function): Activates the exhaust fan for general ventilation. The fan operates at 190 CFM with a quiet 1.0 Sone noise level.
- Heat1 (Half-power Heating): Activates the heater at a lower power setting (e.g., 800W).
- Heat2 (Full Power Heating): Activates the heater at full 1800W power for rapid warming.
- Ventilator (Ventilation Function): Engages the ventilation system to exchange indoor and outdoor air.
- Purge (Cleaning Function): Initiates a cleaning or air purification cycle. Note: Some models may have a continuous purge function that runs for 24 hours, not a short-duration timer.
- Shower Function: A pre-programmed mode that may combine heating and ventilation for optimal post-shower comfort.
Key Features in Operation:

Image: 190 CFM Powerful Ventilation System effectively removes dampness and unpleasant odors from the bathroom.

Image: Fast Heater System with 1800W heating power provides quick warmth to the bathroom.

Image: The 1500 Lumen LED light provides bright, neutral white illumination.

Image: The unit operates at a quiet 1.0 Sone, ensuring a peaceful bathroom environment.
Maintenance
Regular maintenance ensures optimal performance and longevity of your Oeukas Bathroom Exhaust Fan. Always disconnect power at the circuit breaker before performing any maintenance.
- Cleaning the Grille/Cover: Periodically wipe the exterior grille and decorative panel with a soft, damp cloth. Do not use abrasive cleaners or solvents.
- Cleaning the Fan Blades: If accessible, gently clean dust and debris from the fan blades using a soft brush or vacuum cleaner attachment. Accumulation of dust can reduce efficiency and increase noise.
- Ductwork Inspection: Annually inspect the exhaust ducting for any blockages, kinks, or disconnections that could impede airflow.
- Light Panel: The LED light panel is designed for long life and typically does not require replacement. If the light fails, contact customer support.
Troubleshooting
If you encounter issues with your Oeukas Bathroom Exhaust Fan, refer to the following common problems and solutions:
| Problem | Possible Cause | Solution |
|---|---|---|
| Unit does not turn on. | No power, circuit breaker tripped, remote control batteries dead, loose wiring. | Check power supply and circuit breaker. Replace remote batteries. Verify all electrical connections are secure (consult an electrician if unsure). |
| Fan runs, but no heat. | Heater element malfunction, overheat protection activated. | Ensure heater function is selected on remote. Turn off unit, wait 15 minutes for reset, then restart. If problem persists, contact support. |
| Light does not work. | LED panel malfunction, loose connection. | Ensure light function is selected on remote. Check wiring connections to the light panel (consult an electrician). If LED panel is faulty, contact support. |
| Poor ventilation/steam not clearing. | Blocked ductwork, fan motor issue, improper installation. | Inspect ductwork for obstructions. Clean fan blades. Ensure the unit is correctly sized for the bathroom. If issues persist, contact support or an electrician. |
| Unit is excessively noisy. | Loose components, fan blade imbalance, motor issue, ductwork vibration. | Ensure unit is securely mounted. Check for debris in fan blades. Inspect ductwork for proper sealing and support. If noise persists, contact support. |
| Unit smells like burning plastic or smoke. | Serious electrical fault, overheating. | IMMEDIATELY DISCONNECT POWER AT THE CIRCUIT BREAKER. DO NOT OPERATE THE UNIT. CONTACT A QUALIFIED ELECTRICIAN OR CUSTOMER SUPPORT IMMEDIATELY. This indicates a severe safety hazard. |
| Remote control not responding. | Dead batteries, remote out of range, interference. | Replace AAA batteries in the remote. Ensure you are within range of the unit. Remove any potential obstructions between the remote and the unit. |
Warranty and Support
Oeukas provides an 18-month warranty service for this product. This warranty covers defects in materials and workmanship under normal use.
If you have any questions, require technical assistance, or need to claim warranty service, please contact Oeukas customer support through the retailer where you purchased the product or visit the official Oeukas website for contact information.
Please have your model number (BF-190) and proof of purchase ready when contacting support.