1. Introduction
This manual provides essential information for the safe and effective operation of your Big Dipper L1015 Moving Head Stage Light Bar. Please read this manual thoroughly before installation and use, and retain it for future reference. This device is designed to produce dynamic lighting effects for various events and venues.

Image 1.1: Big Dipper L1015 Moving Head Stage Light Bar in operation, showcasing various light beams.
2. Safety Instructions
- Always connect the unit to a grounded circuit to avoid the risk of electrocution.
- Ensure the power voltage matches the rated voltage of the device.
- Do not operate the unit if the power cord is damaged.
- Avoid direct eye exposure to the light source, as it can cause eye damage.
- Keep the device away from rain, moisture, and extreme temperatures.
- Ensure adequate ventilation around the unit to prevent overheating.
- Mount the device securely using appropriate hardware and safety cables.
- Refer all servicing to qualified personnel.
3. Package Contents
Verify that all items listed below are included in your package:
- Big Dipper L1015 Stage Light Body
- Mounting Brackets (2 sets)
- Power Cable
- DMX Cable
- User Manual

Image 3.1: Contents of the Big Dipper L1015 package.
4. Product Features
- RGBW 4-in-1 LED Technology: Equipped with 10 x 15W super bright LEDs, providing vibrant red, green, blue, and white light.
- Flexible Y-Axis Movement: The motor allows for smooth and quiet 180° rotation on the Y-axis, enabling dynamic beam changes and sophisticated 3D lighting effects.
- Multiple Control Modes: Supports Auto mode, Sound-Activated mode, Master-Slave mode, and DMX 512 mode (7/13/43 Channel), including RDM function for professional control.
- Space-Saving Design: Compact dimensions (985x73x153mm) and a grooved clamp design facilitate installation in various spaces.
- Silent Cooling System: Features an efficient cooling system designed for zero noise pollution during operation.

Image 4.1: Demonstration of RGBW 4-in-1 LED capabilities.

Image 4.2: Product dimensions and Y-axis rotation feature.
5. Setup
Follow these steps for proper installation and connection:
- Mounting: Securely attach the light bar using the provided mounting brackets to a truss or stable surface. Ensure the installation point can support the weight of the fixture.
- Power Connection: Connect the power cable to the 'Power In' port on the unit and then to a suitable power outlet. Use the 'Power Out' port to daisy-chain power to other compatible units if needed.
- DMX Connection (Optional): For DMX control, connect a DMX cable from your DMX controller to the 'DMX In' port. If linking multiple units, connect from the 'DMX Out' of the first unit to the 'DMX In' of the next.
- Initial Power-Up: Once all connections are secure, power on the unit. The 4-button LED display will illuminate.

Image 5.1: Connection ports and control panel details.
6. Operating Modes
The Big Dipper L1015 offers several operating modes, selectable via the onboard display or DMX control.
- Auto Mode: The light bar cycles through pre-programmed lighting sequences automatically. This mode is ideal for quick setup without external control.
- Sound-Activated Mode: The lighting effects respond to ambient sound or music. Adjust sensitivity as needed for optimal performance.
- Master-Slave Mode: Link multiple L1015 units together. One unit acts as the master, controlling all other slave units to synchronize effects.
- DMX 512 Mode: For professional control, connect to a DMX controller. The unit supports 7, 13, or 43 DMX channels, allowing precise control over color, movement, dimming, and strobe effects. RDM (Remote Device Management) functionality is also supported.
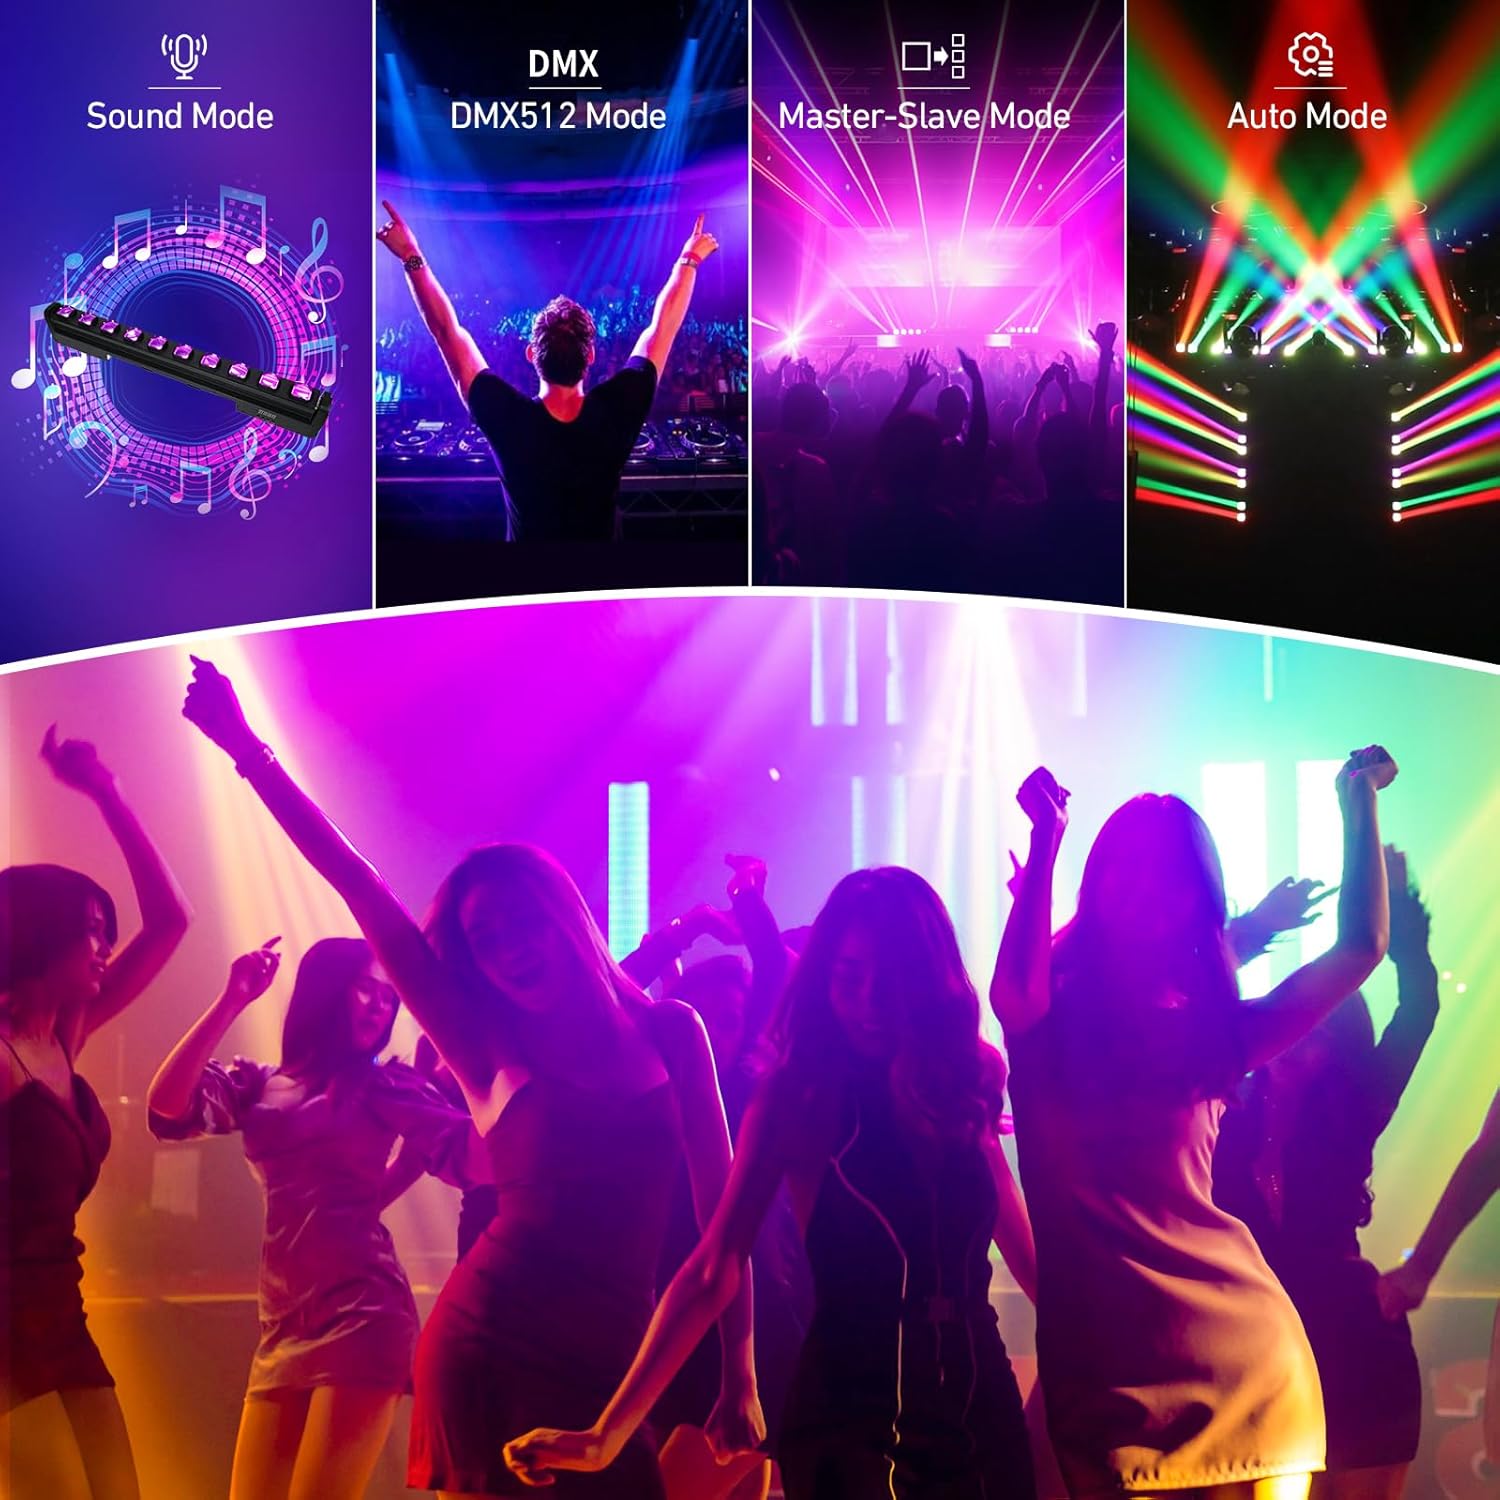
Image 6.1: Overview of available control modes.
Operating Modes Demonstration Video
Video 6.1: This video demonstrates the various operating modes of the Big Dipper L1015, including Auto, Sound-Active, Master-Slave, and DMX512, showcasing the light bar's features and effects.
Lighting Effects Demonstration Video
Video 6.2: This video provides a comprehensive demonstration of the lighting effects produced by the Big Dipper L1015 Stage Light Bar, highlighting its dynamic capabilities and color mixing.
7. Maintenance
Regular maintenance ensures optimal performance and longevity of your light bar:
- Cleaning: Periodically clean the lenses and exterior with a soft, lint-free cloth. Do not use abrasive cleaners or solvents.
- Inspection: Regularly check all cables, connections, and mounting hardware for any signs of wear or damage. Replace any damaged components immediately.
- Ventilation: Ensure that the ventilation openings are clear of dust and debris to maintain proper airflow and prevent overheating.
8. Troubleshooting
| Problem | Possible Cause | Solution |
|---|---|---|
| No power | Power cable not connected, faulty outlet, or internal fuse. | Check power connections, try a different outlet, or consult a technician for fuse replacement. |
| No DMX control | Incorrect DMX cable connection, wrong DMX address, or faulty DMX controller. | Verify DMX cable connections, ensure correct DMX address is set on the unit, and test with a different DMX controller if possible. |
| Lights not moving | Motor settings incorrect in DMX mode or unit in a static mode. | Check DMX channel values for movement control or switch to an Auto or Sound-Activated mode that includes movement. |
| Overheating | Blocked ventilation or prolonged use in high ambient temperatures. | Ensure ventilation openings are clear. Allow the unit to cool down. Operate in environments with adequate airflow. |
9. Specifications
- Model: L1015
- Light Source: 10 x 15W RGBW 4-in-1 LEDs
- Power Source: Corded Electric
- Wattage: 150 Watts (Total)
- Material: Aluminum
- Color: Black
- Product Dimensions: 38.78"L x 2.87"W x 6.02"H (985mm x 73mm x 153mm)
- Item Weight: 15.47 pounds (7.02 kg)
- Control Modes: Auto, Sound-Activated, Master-Slave, DMX512 (7/13/43 Channel), RDM
- Y-Axis Rotation: 180°
10. Warranty and Support
For warranty information and technical support, please refer to the documentation provided at the time of purchase or contact the seller directly. Keep your purchase receipt as proof of purchase.