1. Introduction
This manual provides detailed instructions for the safe and effective use of your JAXWQ 5-in-1 Stud Finder Wall Scanner. This device is designed to accurately detect the edges and center of wood studs, metal studs, joists, pipes, and live AC wires behind various wall materials, floors, and ceilings. Please read this manual thoroughly before operation and retain it for future reference.

Image: The JAXWQ 5-in-1 Stud Finder is a versatile tool suitable for electrical wiring, hanging pictures, decoration, and DIY furniture projects.
2. Safety Information
Always observe the following safety precautions to prevent injury or damage to the device:
- Do not immerse the device in water or expose it to excessive moisture.
- Do not attempt to open or modify the device. There are no user-serviceable parts inside.
- Always remove batteries if the device will not be used for an extended period.
- Exercise caution when drilling or cutting into walls, even after using the stud finder. Always verify findings with other methods if uncertainty exists.
- The AC Scan mode indicates the presence of live AC wires. Always turn off power at the circuit breaker before working near detected live wires.
3. Product Overview
The JAXWQ 5-in-1 Stud Finder features an intelligent micro-sensor chip and a high-definition LCD display for accurate and rapid detection.

Image: The JAXWQ 5-in-1 Stud Finder, shown with a 9V battery for power.
Components:
- LCD Display: Backlit screen showing detection mode, signal strength, battery status, and object location.
- ON/OFF Button: Powers the device on and off.
- Scan Mode Button: Cycles through the different detection modes.
- Sensor Area: The part of the device that makes contact with the wall for scanning.
- Battery Compartment: Located at the back for a 9V battery.
4. Specifications
| Feature | Detail |
|---|---|
| Model Number | TH410 |
| Manufacturer | JAXWQ |
| Power Source | Battery Powered (9V Alkaline) |
| Item Weight | 8.1 ounces |
| Package Dimensions | 7.76 x 3.31 x 1.73 inches |
| Included Components | Stud Finder |
| Color | Lemon |
5. Setup
5.1 Battery Installation
- Open the battery compartment cover located on the back of the device.
- Insert a new 9V alkaline battery, ensuring correct polarity (+/-).
- Close the battery compartment cover securely.
5.2 Initial Calibration
Proper calibration is crucial for accurate detection. Calibrate the device before each use and whenever you move to a new scanning area.
- Press the ON/OFF button to power on the device.
- Place the device flat against the wall surface where you intend to scan. Ensure there are no studs, metal, or AC wires in the immediate area where you calibrate.
- Press and hold the Scan Mode button (often labeled with an arrow or 'Scan') until you hear a short beep sound. The LCD display will show a clear indication that calibration is complete.
- Release the Scan Mode button. The device is now calibrated and ready for use.

Image: Visual guide demonstrating the four-step use method: power on, calibration, scanning, and marking detected objects.
6. Operating Modes
The JAXWQ Stud Finder offers five distinct scanning modes to detect various materials at different depths.
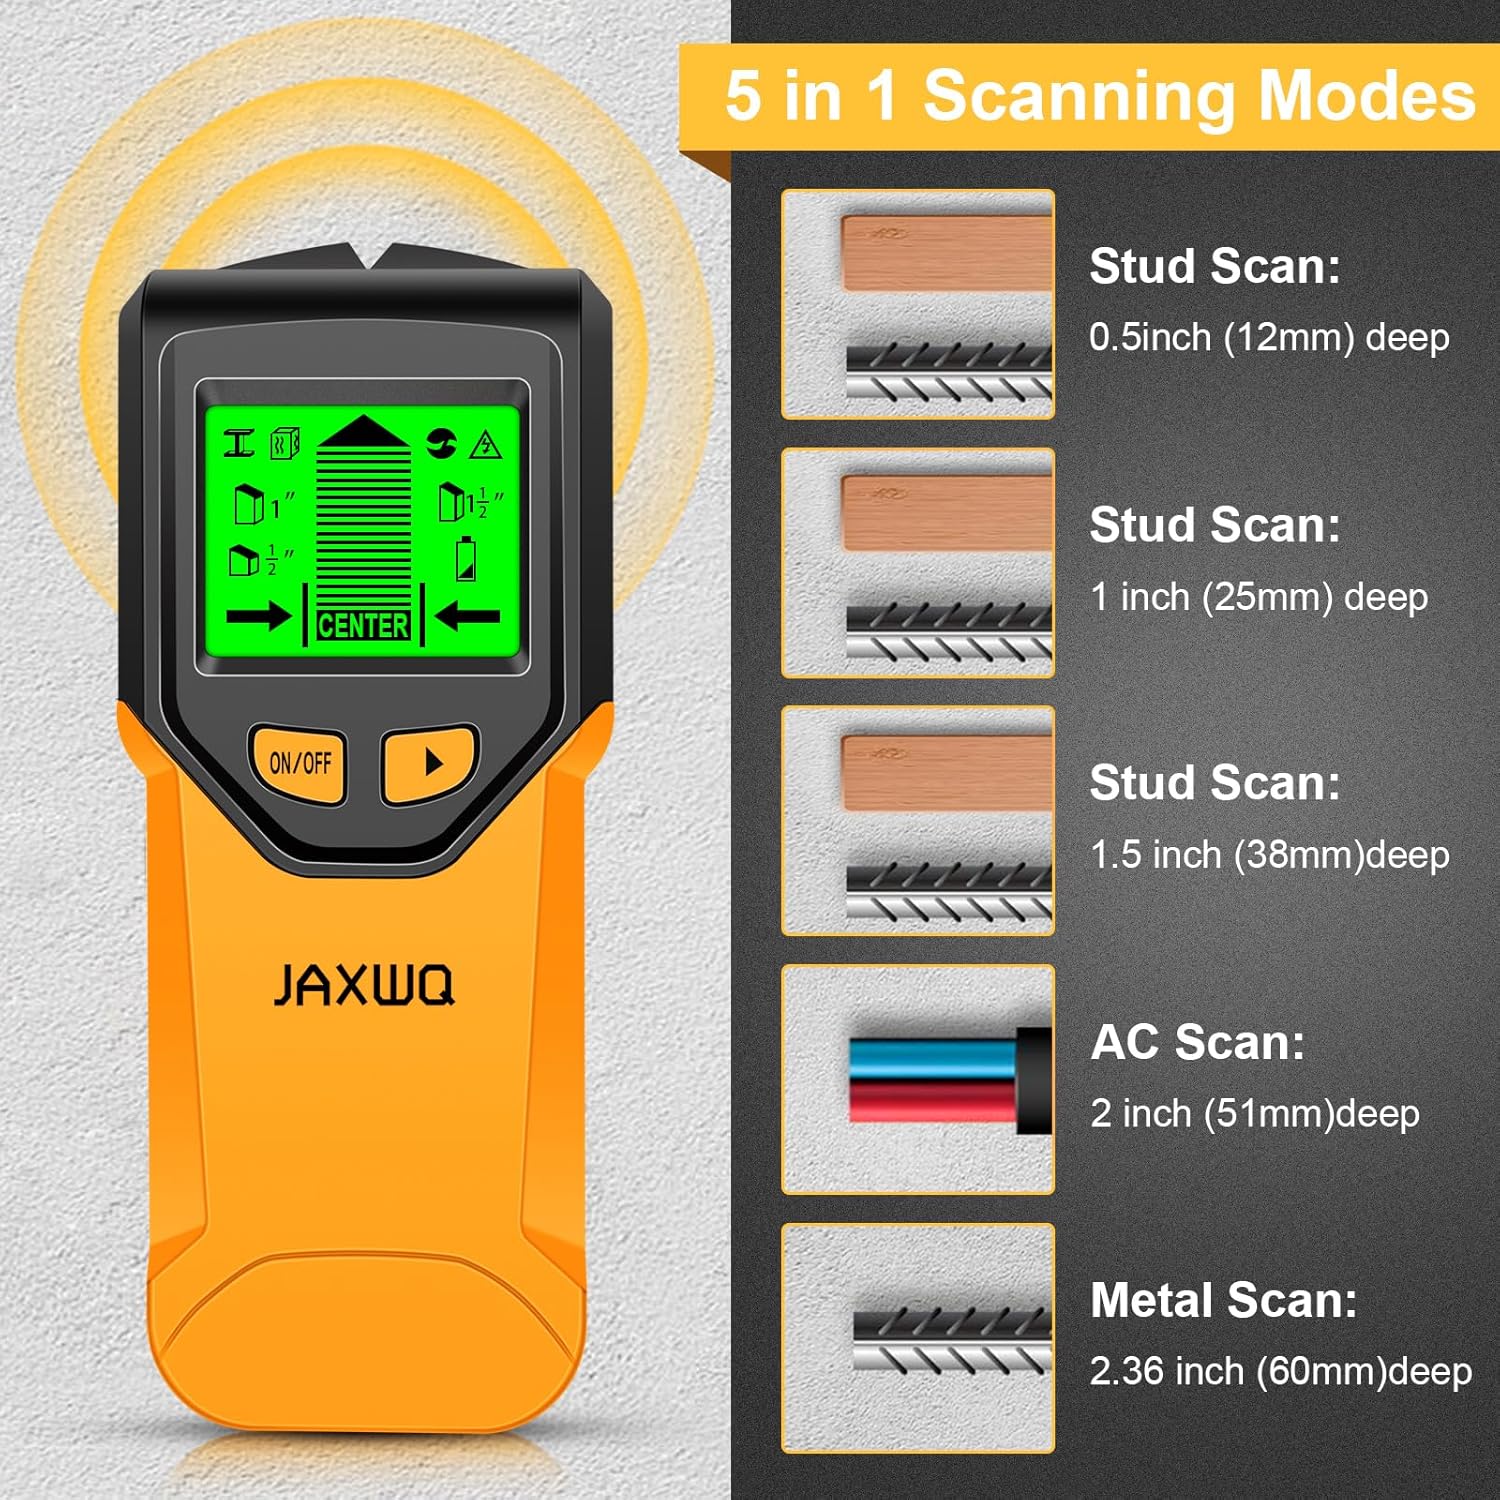
Image: Overview of the 5-in-1 scanning modes and their maximum detection depths.
6.1 Stud Scan Modes
- Stud Scan (0.5 inch / 12mm deep): Detects the center and edges of wood and metal studs up to 0.5 inches (12mm) deep.
- Stud Scan (1 inch / 25mm deep): Detects the center and edges of wood and metal studs up to 1 inch (25mm) deep.
- Stud Scan (1.5 inch / 38mm deep): Detects the center and edges of wood and metal studs up to 1.5 inches (38mm) deep.
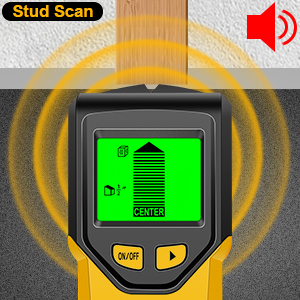
Image: The device indicating the presence of a stud during Stud Scan mode, accompanied by an audio alert.
6.2 Metal Scan Mode
- Metal Scan (2.36 inch / 60mm deep): Detects ferrous and non-ferrous metals, such as rebar, copper pipes, and metal studs, up to 2.36 inches (60mm) deep.

Image: The device indicating the presence of metal during Metal Scan mode, accompanied by an audio alert.
6.3 AC Scan Mode
- AC Scan (2 inch / 51mm deep): Detects live unshielded AC wires up to 2 inches (51mm) deep. This mode is crucial for avoiding electrical hazards.
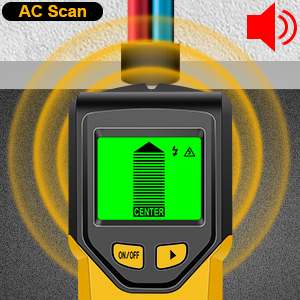
Image: The device indicating the presence of a live AC wire during AC Scan mode, accompanied by an audio alert.
7. Operation Guide
Follow these steps for effective scanning and detection:
- Power On and Select Mode: Press the ON/OFF button. Use the Scan Mode button to cycle through the desired detection mode (e.g., Stud Scan, Metal Scan, AC Scan).
- Calibrate: Place the device flat against the wall in an area free of objects. Press and hold the Scan Mode button until calibration is complete (short beep). Release the button.
- Scan the Wall: Slowly slide the device horizontally across the wall surface, maintaining full contact. Do not lift or tilt the device during scanning.
- Interpret Display and Audio:
- As the device approaches an object, the signal strength indicators on the LCD will increase.
- When the device detects the edge of an object, an arrow will appear on the display, and an audio alert may sound.
- When the device is directly over the center of an object, the 'CENTER' indicator will illuminate, and a continuous beep will sound.
- Mark Findings: Use a pencil to mark the edges and center of detected objects on the wall.
- Verify: For critical applications, scan the area from multiple directions or use other methods to confirm the location of objects.

Image: The easy-to-read digital LCD display and audio alarm pinpoint the exact center and edge of studs.
Important Considerations:
- AC Wire Detection: The device indicates live AC wires in all modes. If an AC warning appears, switch to AC Scan mode to locate the center of the wire before proceeding.
- Wall Materials: Performance may vary depending on wall material, thickness, and moisture content.

Image: The device indicates live AC wires in all modes, helping to prevent accidental drilling into electrical lines.
8. Maintenance
- Cleaning: Wipe the device with a soft, dry cloth. Do not use abrasive cleaners or solvents.
- Storage: Store the stud finder in a cool, dry place, away from direct sunlight and extreme temperatures.
- Battery: Replace the 9V battery when the low battery indicator appears on the LCD. Remove the battery if storing the device for extended periods to prevent leakage.
9. Troubleshooting
| Problem | Possible Cause | Solution |
|---|---|---|
| Device does not power on | Dead or incorrectly installed battery | Replace the 9V battery, ensuring correct polarity. |
| Inconsistent readings | Improper calibration, moisture in wall, or scanning too fast | Recalibrate the device on a clear section of the wall. Ensure the wall is dry. Scan slowly and consistently. |
| Cannot find studs/objects | Incorrect mode selected, deep objects, or unusual wall construction | Try different Stud Scan depths or Metal Scan mode. Ensure the device is calibrated correctly. |
| AC warning always on | Live AC wires are present throughout the wall, or high static electricity | Proceed with extreme caution. Turn off power at the circuit breaker. Recalibrate in a different area. |
10. Warranty and Support
For warranty information and customer support, please refer to the documentation included with your purchase or contact JAXWQ customer service directly. Standard return policies typically allow for returns or replacements within a specified period from the date of purchase.