Introduction
This manual provides essential information for the safe and efficient installation, operation, and maintenance of the QQAMOGNNK Pneumatic Air Solenoid Valve. Please read this manual thoroughly before using the product to ensure proper function and to prevent damage or injury.
Safety Information
Always adhere to the following safety guidelines to prevent personal injury or damage to the equipment:
- Ensure the power supply is disconnected before performing any installation, maintenance, or troubleshooting.
- Verify that the pneumatic system is depressurized before connecting or disconnecting air lines.
- Use appropriate personal protective equipment (PPE) such as safety glasses.
- Do not exceed the specified pressure and voltage ratings for the valve.
- Installation and wiring should be performed by qualified personnel in accordance with local electrical and safety codes.
- Avoid exposing the valve to corrosive environments or extreme temperatures outside its operating range.
Product Overview
The QQAMOGNNK Pneumatic Air Solenoid Valve is a 3-way, 2-position (3/2) normally closed valve designed for controlling the flow of compressed air in various pneumatic systems. It features an electric solenoid for actuation, allowing for precise and rapid control.

Figure 1: Front view of the solenoid valve, showing the main body, electrical coil, and pneumatic ports. The model number 3V210-08NC and pressure range 0.15-0.8MPa are visible on the side.
Key components include:
- Valve Body: Houses the internal mechanisms for air flow control.
- Solenoid Coil: The electrical component that, when energized, actuates the valve.
- Pneumatic Ports: Typically labeled P (pressure inlet), A (outlet), and R (exhaust).
- Manual Override: A small button or lever for manual operation during testing or power failure.
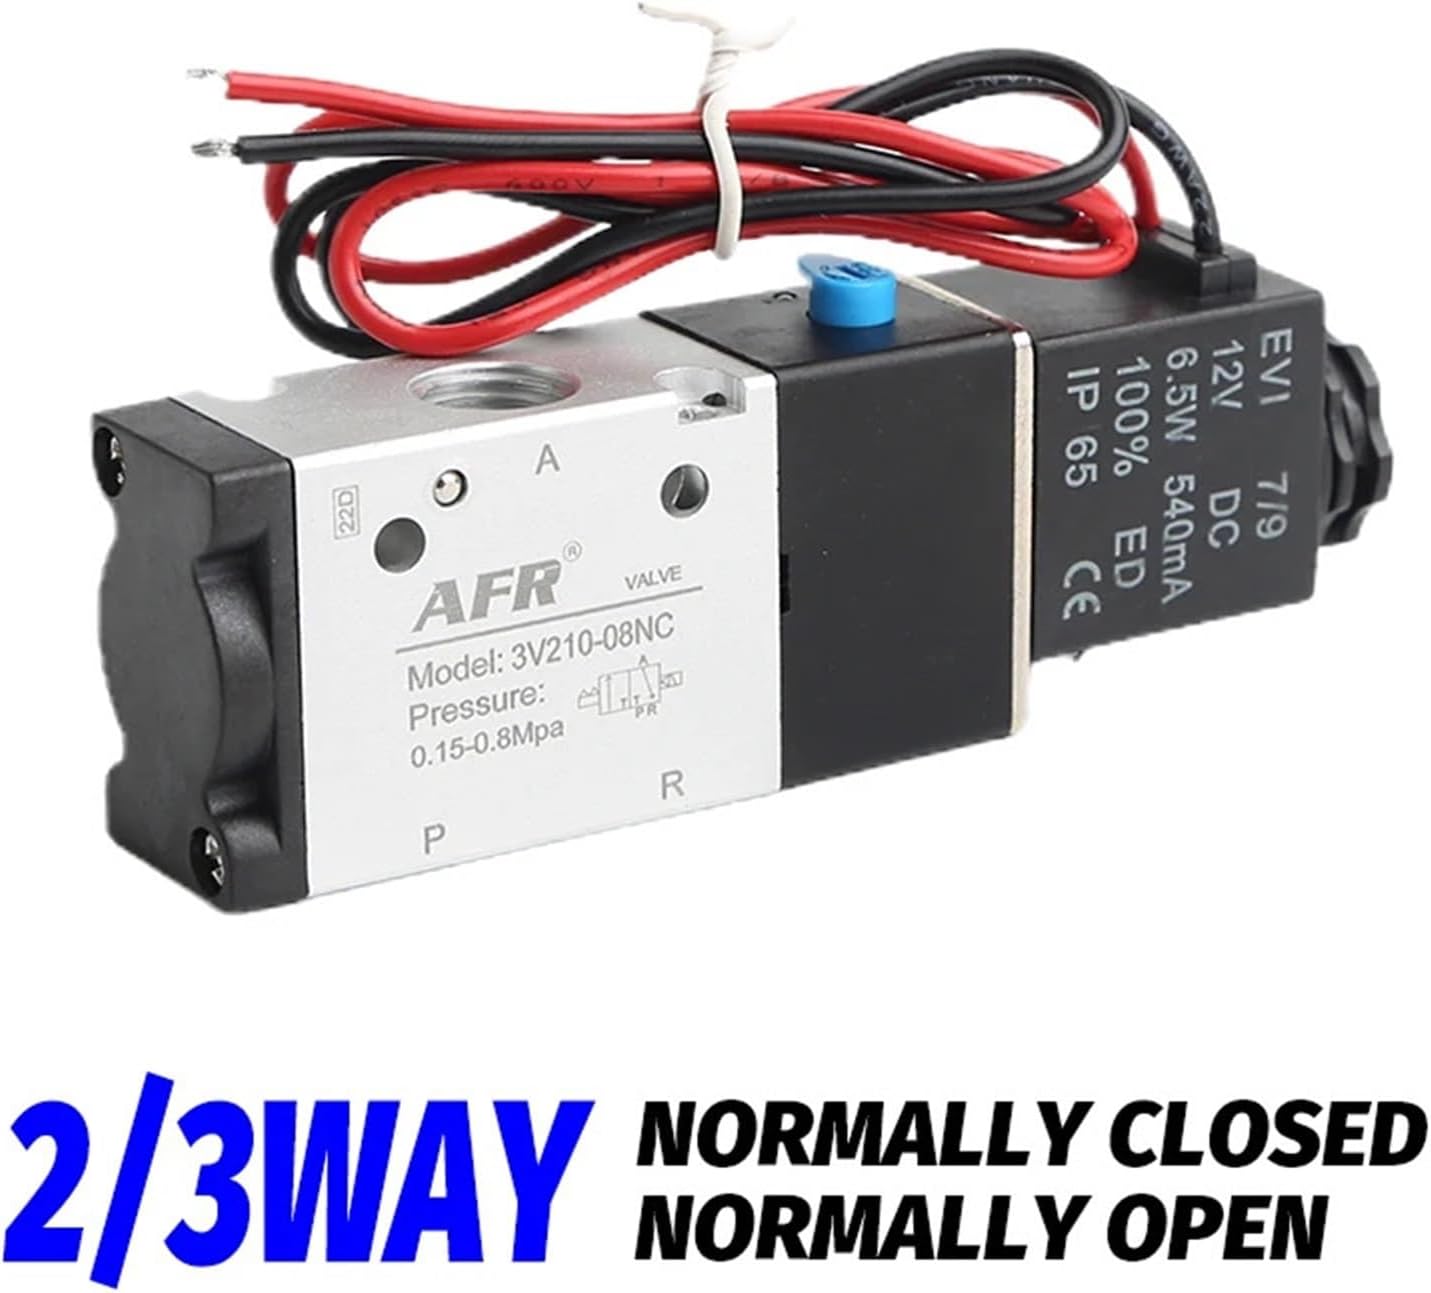
Figure 2: Side view of the solenoid valve, emphasizing its 2/3-way functionality and normally closed configuration. This view clearly shows the P, A, and R ports.
Specifications
The following table details the technical specifications for the AC110V 3v210 Pc6 variant of the solenoid valve:
| Specification | Value |
|---|---|
| Model Number | 3V210-08NC |
| Operating Voltage | AC110V |
| Valve Type | 3-Way, 2-Position (3/2) |
| Default State | Normally Closed |
| Pressure Range | 0.15 - 0.8 MPa |
| Item Weight | 1.43 pounds (approx. 0.65 kg) |
| Package Dimensions | 1.18 x 0.79 x 0.39 inches |
| Ingress Protection (IP) Rating | IP65 |
| Power Consumption | 6.5W |
Setup and Installation
Proper installation is crucial for the valve's performance and longevity. Follow these steps carefully:
- Mounting: Securely mount the valve to a stable surface using appropriate fasteners. Ensure the valve is oriented correctly, typically with the ports facing the desired direction for plumbing.
- Pneumatic Connections:
- Connect the compressed air supply line to the "P" (Pressure) port.
- Connect the output line to the "A" (Actuator/Output) port. This line will lead to the pneumatic device being controlled.
- Connect an exhaust line or muffler to the "R" (Exhaust) port. This port releases air when the valve shifts.
- Ensure all pneumatic connections are tight and leak-free. Use thread sealant if necessary.
- Electrical Wiring:
- Identify the voltage requirements of your specific valve model (AC110V for this variant).
- Connect the electrical wires from the solenoid coil to your control circuit. For AC valves, polarity is generally not a concern, but always refer to specific wiring diagrams if provided with your unit.
- Ensure all electrical connections are secure and insulated to prevent short circuits.
- It is recommended to install an appropriate circuit breaker or fuse upstream of the valve for protection.
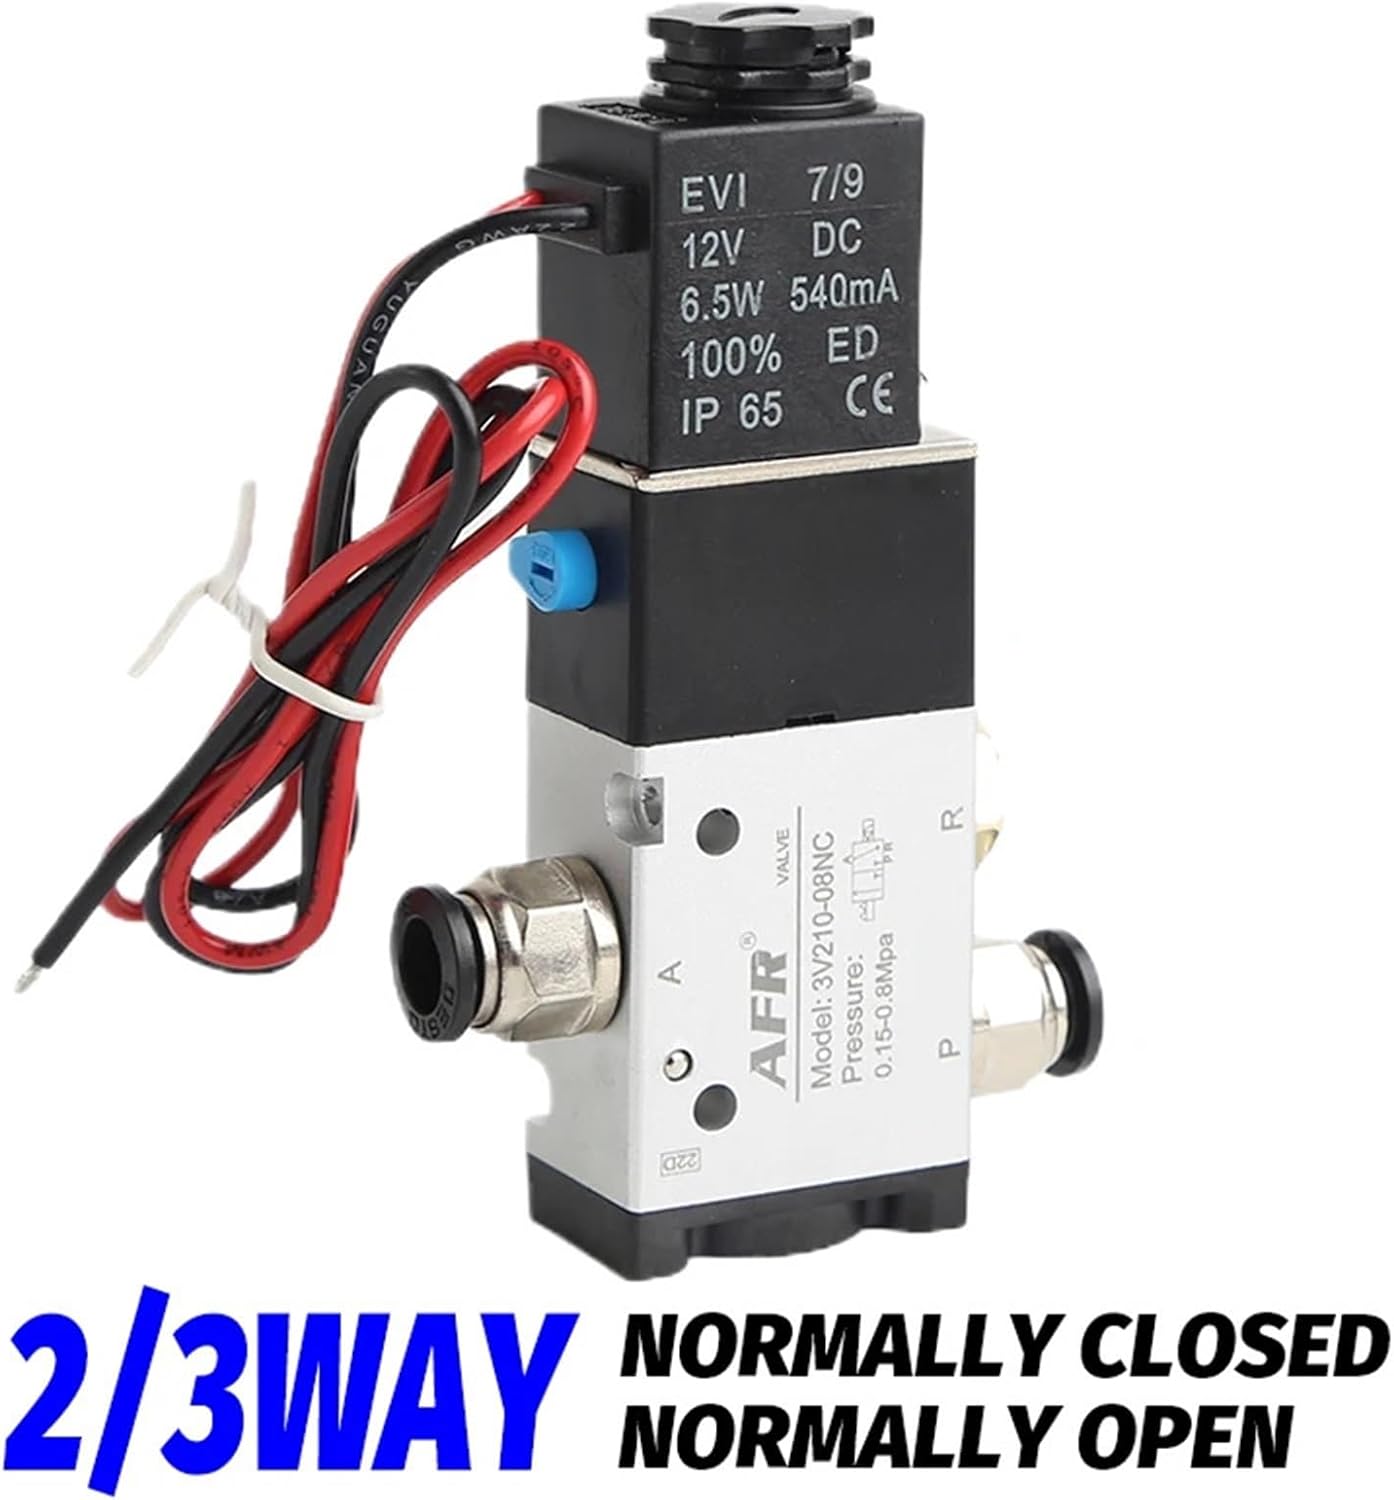
Figure 3: Close-up view illustrating the electrical coil connection and the clearly marked pneumatic ports (P, A, R) for proper air line attachment.
Operating Instructions
The 3/2 Normally Closed solenoid valve operates as follows:
- De-energized State (Normally Closed): When no electrical power is supplied to the solenoid coil, the valve is in its default, normally closed position. In this state, the "P" (Pressure) port is blocked, and the "A" (Actuator/Output) port is connected to the "R" (Exhaust) port. This means any air in the actuator connected to port A will be vented to atmosphere.
- Energized State (Open): When electrical power (AC110V for this model) is supplied to the solenoid coil, the coil energizes and shifts the valve's internal mechanism. In this position, the "P" (Pressure) port is connected to the "A" (Actuator/Output) port, allowing compressed air to flow to the connected pneumatic device. The "R" (Exhaust) port is blocked.
To operate the valve:
- Ensure all pneumatic and electrical connections are correctly made and secure.
- Apply compressed air to the "P" port.
- Apply the rated electrical voltage (AC110V) to the solenoid coil to open the valve and allow air flow from P to A.
- Remove the electrical voltage to close the valve, blocking P and exhausting A to R.
- Manual Override: If present, the manual override button can be pressed to temporarily shift the valve without electrical power. This is useful for testing or emergency operation. Release the button to return to normal operation.
Maintenance
The solenoid valve is designed for reliable operation with minimal maintenance. However, periodic checks can extend its lifespan:
- Cleanliness: Keep the valve and its surroundings clean and free from dust, dirt, and moisture.
- Air Quality: Ensure the compressed air supply is clean, dry, and filtered. Contaminants can cause premature wear or blockages.
- Leak Checks: Periodically check all pneumatic connections for air leaks using a soapy water solution. Tighten connections as needed.
- Electrical Connections: Inspect electrical wiring for signs of wear, fraying, or loose connections.
- Operating Environment: Ensure the valve is operating within its specified temperature and pressure ranges.
Note: Internal components are generally not user-serviceable. Do not attempt to disassemble the valve unless specifically instructed by the manufacturer.
Troubleshooting
Refer to the table below for common issues and their potential solutions:
| Problem | Possible Cause | Solution |
|---|---|---|
| Valve does not actuate when energized. | No power to coil, incorrect voltage, faulty coil, or internal blockage. | Check power supply and connections. Verify voltage matches valve rating. Test coil continuity (if equipped). Check for air contaminants. |
| Air leaks from ports or connections. | Loose fittings, damaged seals, or internal valve wear. | Tighten all pneumatic fittings. Inspect and replace O-rings or seals if accessible and damaged. If internal, valve replacement may be necessary. |
| Valve remains open/closed after de-energizing/energizing. | Stuck spool/piston due to dirt, debris, or mechanical failure. | Ensure air supply is clean. Attempt manual override to free the mechanism. If persistent, valve may need replacement. |
| Weak or inconsistent air flow. | Insufficient air pressure, partial blockage, or undersized valve. | Check air compressor and regulator settings. Inspect air lines for kinks or blockages. Ensure valve is correctly sized for the application. |
Warranty and Support
For information regarding warranty coverage, technical support, or replacement parts, please contact the manufacturer, QQAMOGNNK, or your authorized distributor. Keep your purchase receipt and product model number (3V210-08NC) readily available when seeking support.
For general inquiries, you may visit the brand's Amazon store page: QQAMOGNNK Store.