1. Introduction
This manual provides comprehensive instructions for the safe and effective use of the Didiseaon Professional Ear Wax Removal Kit. This kit is designed to assist adults in maintaining ear hygiene by carefully removing accumulated earwax. Please read all instructions thoroughly before first use.
2. Important Safety Information
Your safety is paramount. Improper use of ear cleaning tools can cause injury. Adhere to the following guidelines:
- Consult a Medical Professional: If you experience ear pain, discharge, bleeding, or have a perforated eardrum, do not use these tools. Seek advice from a doctor.
- Adult Use Only: These tools are intended for adult use. Keep out of reach of children.
- Do Not Over-Insert: Never insert the tools too deeply into the ear canal. The ear canal is delicate, and deep insertion can cause damage to the eardrum or inner ear structures.
- Gentle Application: Always use the tools with extreme gentleness. Avoid any forceful or sudden movements.
- Good Lighting: Ensure you have adequate lighting to clearly see inside the ear canal during use.
- Clean Before and After Use: Thoroughly clean and disinfect all tools before and after each use to prevent infection.
- Discontinue Use if Discomfort: If you experience any discomfort, pain, or dizziness during use, stop immediately.
3. Package Contents
The Didiseaon Professional Ear Wax Removal Kit (3-set) typically includes:
- Multiple stainless steel ear cleaning tools (various designs including scoops, spirals, and curettes)
- Cleaning brush

This image displays the complete set of ear wax removal tools, showcasing different shapes and sizes designed for various ear cleaning needs.
An image highlighting the variety of five distinct ear cleaning tools included in the kit, each designed for specific earwax removal tasks.
4. Tool Identification and Purpose
The kit contains various tools, each designed for specific earwax removal tasks. Familiarize yourself with each type:
- Scoop/Curette Tools: These tools feature a small, spoon-shaped or looped end. They are effective for gently scooping out larger pieces of earwax from the outer ear canal.
- Spiral/Spring Tools: Designed with a flexible, spiral or spring-like tip. These are useful for dislodging and extracting softer or flaky earwax by twisting gently.
- Flat-ended Tools: Some tools may have a flat, rounded end, suitable for general cleaning or massaging the outer ear canal.

A detailed view of the working ends of the ear cleaning tools, highlighting the distinct designs such as the spiral, small scoop, and larger curette, each serving a specific function in earwax removal.
5. Setup and Preparation
Before using the ear wax removal tools, follow these preparation steps:
- Wash Hands: Thoroughly wash your hands with soap and water.
- Clean Tools: Clean and disinfect the ear wax removal tools as described in the "Maintenance and Cleaning" section.
- Soften Earwax (Optional): If your earwax is hard or impacted, consider using earwax softening drops (available separately) a few days prior to using the tools. Follow the instructions provided with the drops.
- Ensure Good Lighting: Position yourself in a well-lit area to clearly see the ear canal.
6. Operating Instructions
Proceed with caution and gentleness when using the tools.
General Usage Guidelines:
- Always hold the tool firmly but gently.
- Never insert the tool beyond the visible part of the ear canal. Avoid pushing the tool deep into the ear.
- Use a mirror or have a trusted adult assist you if you cannot clearly see the ear canal.
- Avoid using the tools if you feel any resistance or pain.
Using Scoop/Curette Tools:
- Gently insert the scoop or curette end just inside the ear canal, targeting visible earwax.
- Carefully scrape or scoop the earwax outwards. Do not push the wax further in.
- Remove the tool and clean off any collected wax. Repeat as necessary, always being gentle.
Using Spiral/Spring Tools:
- Gently insert the spiral or spring end into the outer ear canal.
- Slowly and gently twist the tool to engage the earwax.
- Carefully pull the tool outwards to extract the dislodged wax.
- Clean the tool frequently during use.

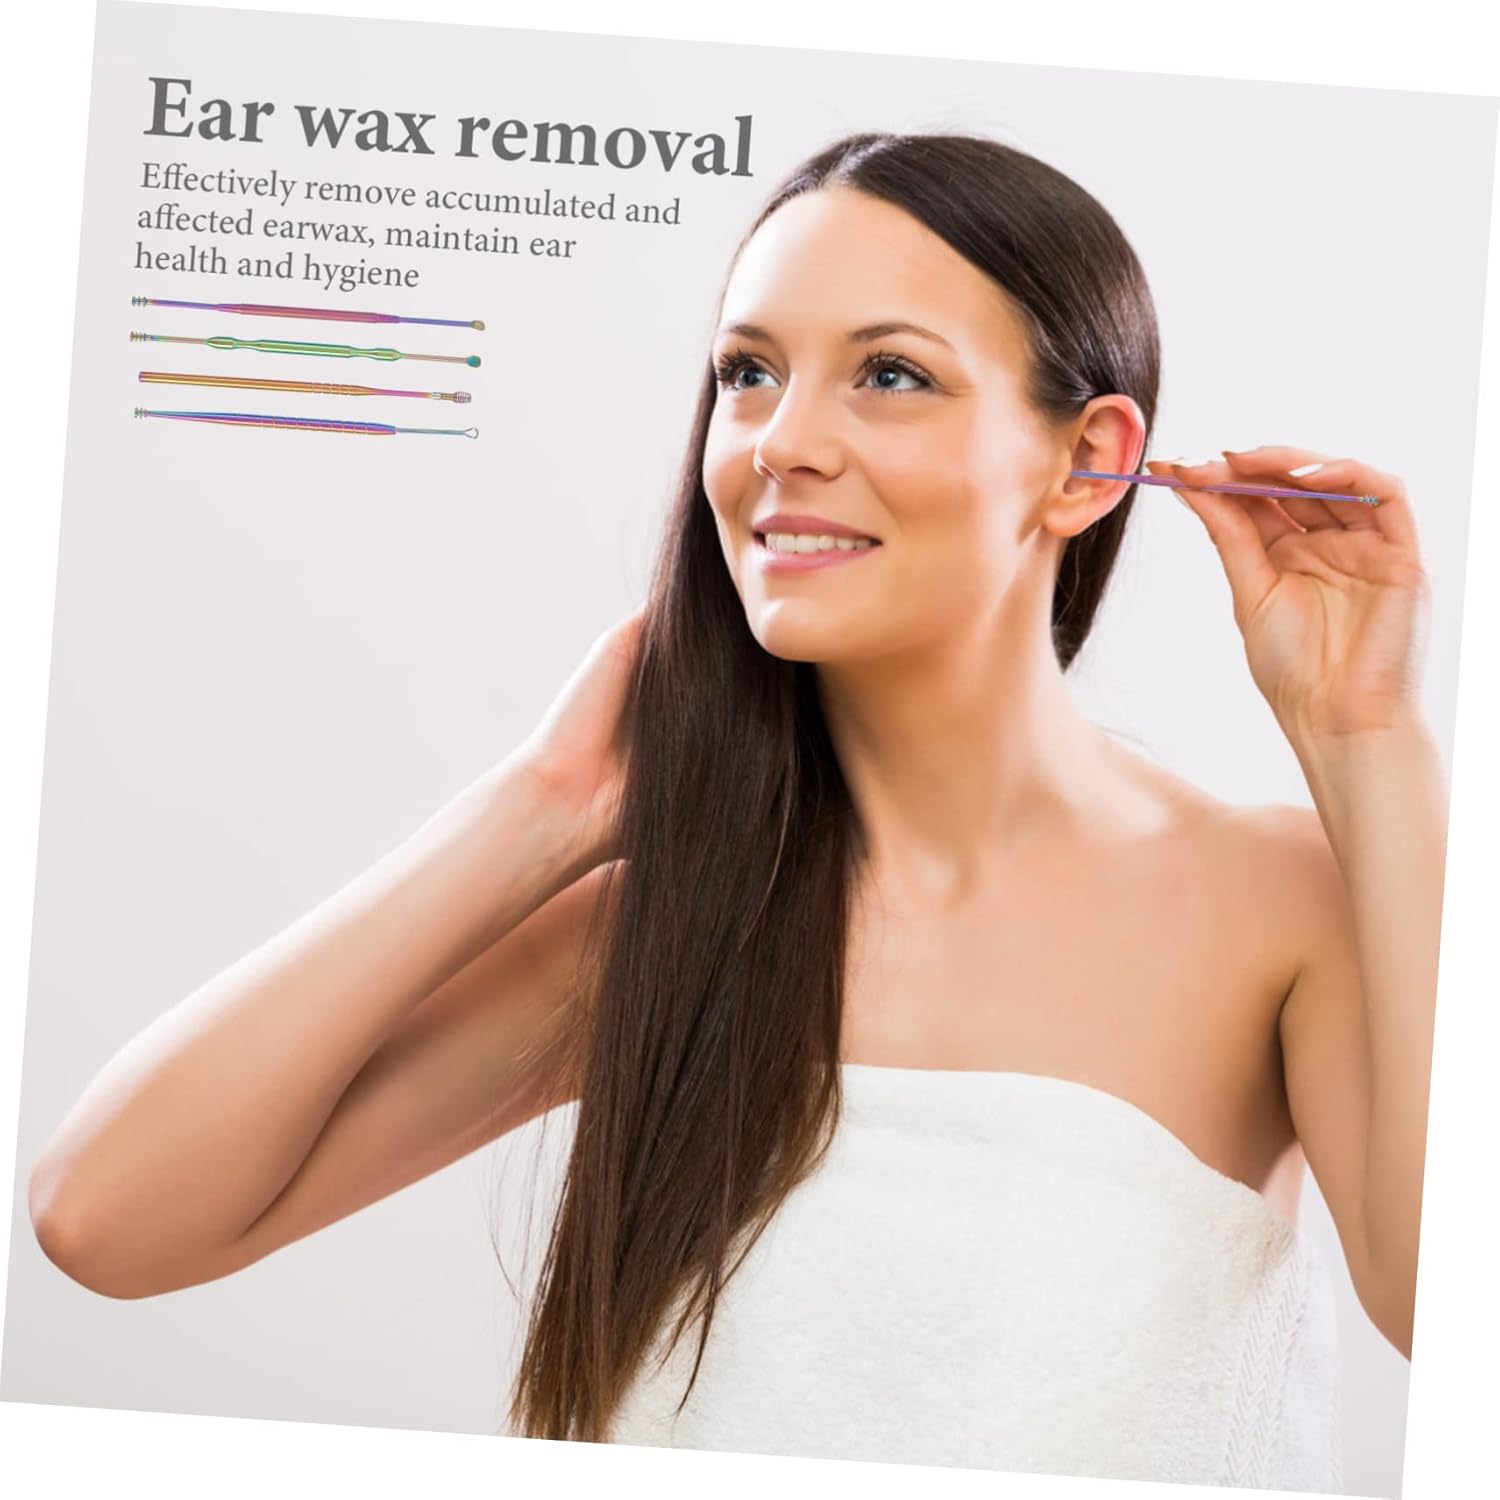
This image demonstrates the proper technique for using an ear wax removal tool, showing a user gently inserting the tool into the outer ear canal.

A magnified view illustrating the precise placement of an ear wax removal tool within the ear canal, emphasizing careful and shallow insertion.
7. Maintenance and Cleaning
Proper cleaning and maintenance ensure hygiene and prolong the life of your tools.
- Rinse: Immediately after each use, rinse the tools under warm running water to remove visible earwax.
- Clean with Soap: Wash the tools with mild soap and water. Use the provided cleaning brush to remove any stubborn debris from the grooves and tips.
- Disinfect: For thorough disinfection, wipe the tools with an alcohol swab or immerse them in a suitable disinfectant solution according to the product's instructions.
- Dry: Ensure the tools are completely dry before storage to prevent rust or bacterial growth. Use a clean, dry cloth.
- Store: Store the clean, dry tools in a clean, dry place, preferably in their original packaging or a dedicated case.

The cleaning brush provided with the kit, essential for removing debris from the ear wax removal tools after each use.
8. Troubleshooting
If you encounter issues, consider the following:
- Earwax Not Coming Out: If earwax is too hard or deep, do not force it. Consider using earwax softening drops for a few days before attempting removal again, or consult a medical professional.
- Discomfort During Use: If you feel any pain or significant discomfort, stop immediately. Ensure you are using the tools gently and not inserting them too deeply.
- Tools Feel Rough: Ensure tools are clean and free of debris. If a tool feels rough or damaged, discontinue use to prevent injury.
9. Specifications
| Material | Stainless steel, Plastic |
| Product Dimensions (approx.) | 5.71 x 1.18 x 1.18 inches (for the 3-set package) |
| Weight (approx.) | 5.28 ounces (for the 3-set package) |
| Manufacturer | Didiseaon |

This graphic illustrates that the tools are made of safe stainless steel and highlights their function as a useful and safe ear cleaning kit for family use.
10. Customer Support
If you have any questions, concerns, or require further assistance not covered in this manual, please contact the manufacturer or your retailer for support.