FUXGZ VD2
Mini Body Camera HD 1080P Wearable Video Recorder User Manual
Brand: FUXGZ | Model: VD2
1. Introduction and Overview
The FUXGZ Mini Body Camera is a versatile and portable video recorder designed for various applications, including law enforcement, sports, and personal security. It features HD 1080P video recording, night vision capabilities, a 180° rotatable lens, and a built-in 1.3-inch display for convenient playback. This manual provides detailed instructions to help you set up, operate, and maintain your device.
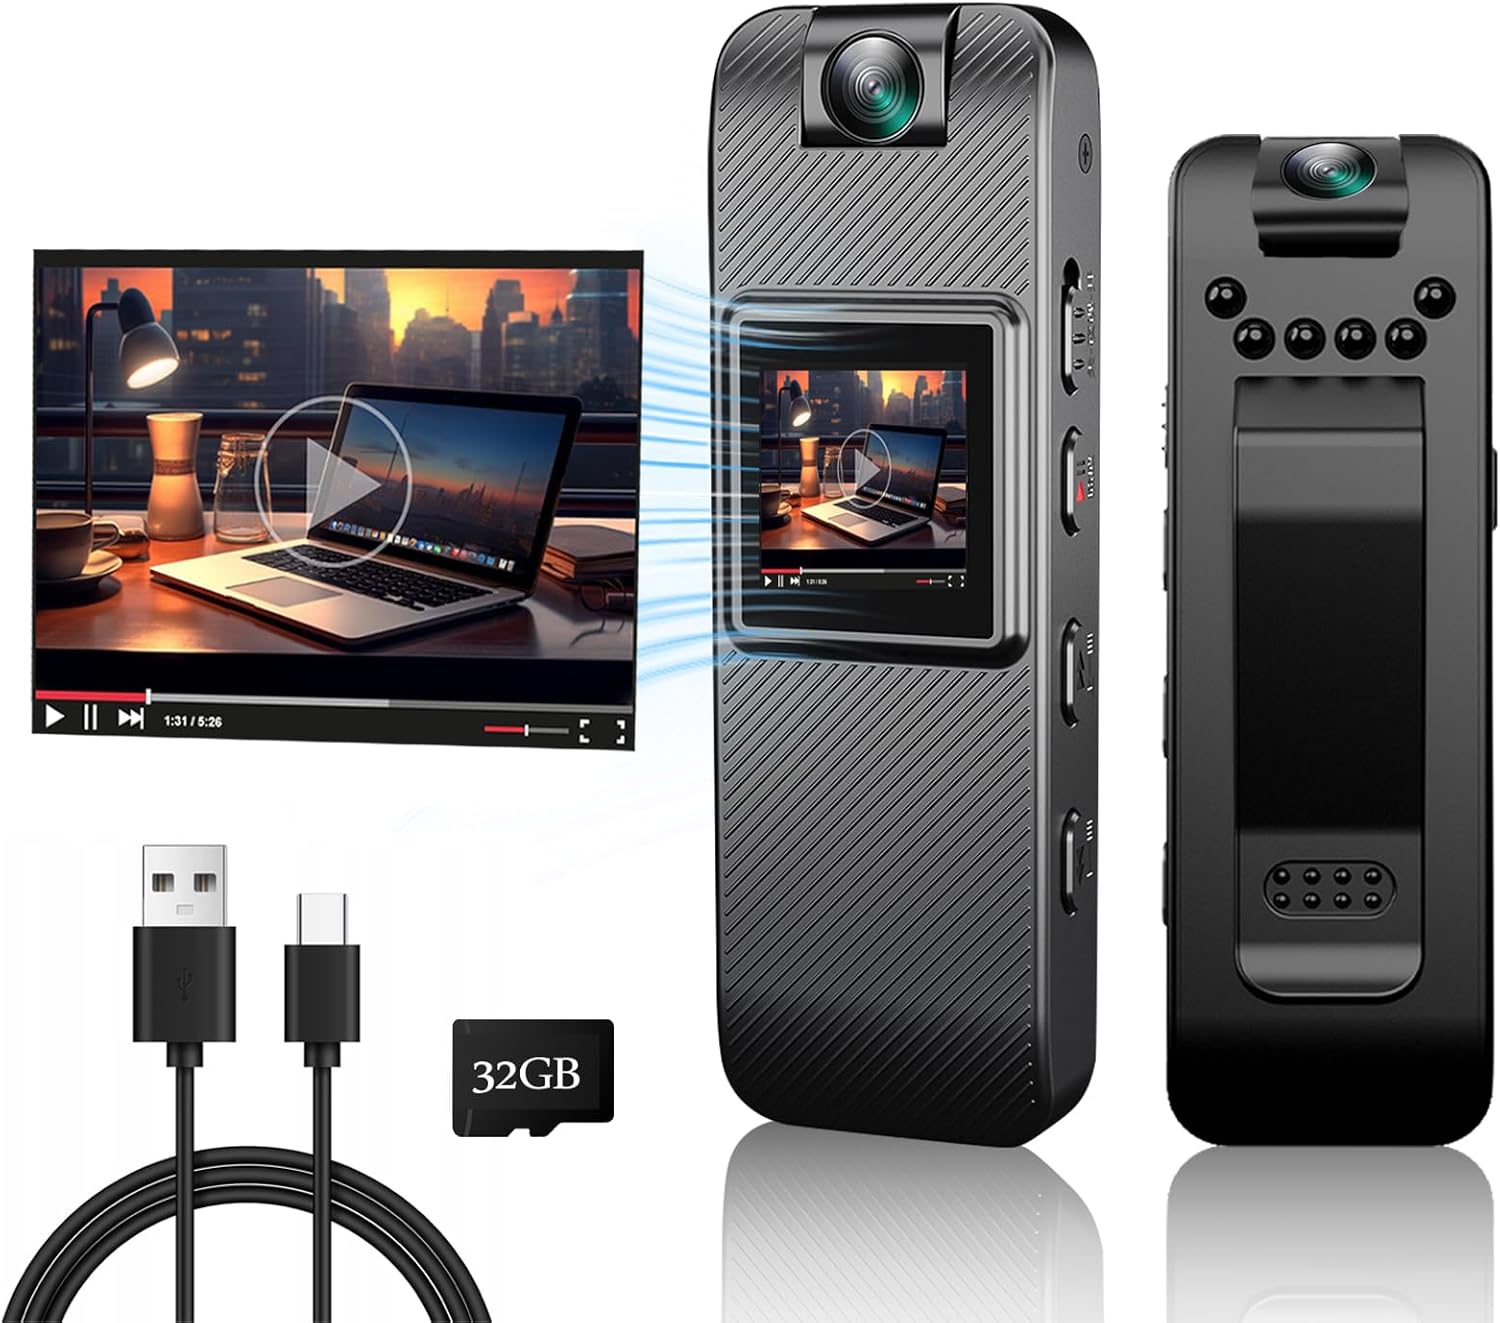
Figure 1.1: FUXGZ Mini Body Camera and Accessories
2. What's in the Box
Upon unboxing your FUXGZ Mini Body Camera, please verify that all the following components are included:
- Mini Body Camera (Model VD2)
- USB Charging Cable (Type-C)
- User Manual
- 32GB Micro SD Card (pre-installed or included separately)
3. Product Features
3.1. HD Display & Rotatable Lens
The camera features a 1.3-inch display for live viewing and playback, along with a 180° rotatable lens. This allows for flexible recording angles without repositioning the entire device.

Figure 3.1: Rotatable Lens and Display
3.2. HD 1080P Video & Loop Recording
Record high-definition video in 1080P or 720P resolution. The loop recording function automatically overwrites the oldest files when the memory card is full, ensuring continuous recording.
3.3. Night Vision & Motion Detection
Equipped with 6 infrared bulbs, the camera can record clearly in low-light conditions. Motion detection allows the camera to automatically begin recording when movement is detected.

Figure 3.2: HD and Night Vision Capabilities
3.4. Portable Design with Magnetic Clip
The compact and lightweight design, combined with a magnetic back clip, allows for easy attachment to clothing or other objects, making it highly portable for various scenarios.

Figure 3.3: Portable Body Camera Components and Dimensions
3.5. Rechargeable Battery
The built-in 400mAh rechargeable battery provides approximately 3 hours of continuous recording. Charging is done via the included Type-C cable.
4. Setup
4.1. Charging the Device
- Connect the included Type-C USB cable to the camera's charging port.
- Connect the other end of the USB cable to a USB power adapter (not included) or a computer's USB port.
- The charging indicator light will illuminate. Once fully charged, the light may change color or turn off.
4.2. Inserting the Micro SD Card
A 32GB Micro SD card is included. The camera supports Micro SD cards up to 128GB.
- Locate the TF card slot on the side of the camera (refer to Figure 3.3).
- Gently insert the Micro SD card into the slot with the gold contacts facing down until it clicks into place.
- To remove, push the card in slightly until it springs out.
5. Operating Instructions
5.1. Power On/Off
- Power On: Press and hold the Power/Mode button until the screen illuminates.
- Power Off: Press and hold the Power/Mode button until the screen turns off.
5.2. Video Recording
- Ensure the camera is powered on and in video recording mode (indicated on the display). If not, press the Mode button to cycle through modes.
- Press the Play/Record button to start recording. A recording indicator (e.g., red dot or flashing icon) will appear on the screen.
- Press the Play/Record button again to stop recording. The file will be saved to the Micro SD card.
5.3. Photo Shooting
- Power on the camera and switch to photo mode using the Mode button.
- Press the Play/Record button to take a photo. The photo will be saved to the Micro SD card.
5.4. Night Vision Activation
Locate the night vision light switch on the side of the camera (refer to Figure 3.3). Toggle this switch to activate or deactivate the infrared night vision lights.
5.5. Accessing Files
There are three primary ways to view your recorded videos and photos:
- View via Camera Screen: In playback mode, use the navigation buttons (Previous/Next Track) to browse files and the Play button to view them directly on the camera's 1.3-inch display.
- Connect to Computer: Use the included Type-C USB cable to connect the camera to your computer. The camera will appear as a removable disk, allowing you to access and transfer files.
- Use a Card Reader: Remove the Micro SD card from the camera and insert it into a compatible card reader. Connect the card reader to your computer to access the files.

Figure 5.1: Methods for Accessing Files
5.6. Adjusting Settings (Loop Recording, Motion Detection)
Advanced settings such as video resolution (1080P/720P), loop recording duration, and motion detection sensitivity can be configured by modifying parameters in a configuration file automatically generated by the camera on the Micro SD card. Connect the camera to a computer or use a card reader to access this file and make necessary adjustments.
6. Maintenance
- Cleaning: Use a soft, dry cloth to clean the camera body and lens. Avoid using liquid cleaners or abrasive materials.
- Storage: Store the camera in a cool, dry place away from direct sunlight and extreme temperatures.
- Battery Care: To prolong battery life, avoid fully discharging the battery frequently. Charge the camera regularly, even if not in use for extended periods.
- SD Card Management: Periodically back up important files from the Micro SD card to a computer. Format the SD card regularly (e.g., monthly) to maintain optimal performance and prevent data corruption.
7. Troubleshooting
- Camera does not power on: Ensure the battery is fully charged. If the blue light is on but the device doesn't respond, try pressing the Reset button (refer to Figure 3.3 for location).
- Cannot record video/take photos: Check if the Micro SD card is properly inserted and has sufficient free space. If the card is full, back up and format it.
- Poor video/photo quality: Ensure the lens is clean and free from smudges. Check that you are recording in 1080P resolution if desired.
- Files not accessible on computer: Ensure the USB cable is securely connected. Try connecting to a different USB port or using a Micro SD card reader. Ensure the camera is in the correct USB mode if applicable (some cameras require selecting 'Mass Storage' mode).
- Buttons do not respond as expected: Some buttons may have dual functions or require a long press. Refer to the specific operating instructions for each function. If issues persist, perform a factory reset if available (check the configuration file for this option) or contact customer support.
8. Specifications
| Feature | Specification |
|---|---|
| Model Name | Body Camera (VD2) |
| Brand | FUXGZ |
| Video Capture Resolution | 1080p |
| Maximum Webcam Image Resolution | 2 MP |
| Photo Sensor Technology | CMOS |
| Flash Memory Type | Micro SD (up to 128GB) |
| Included Components | Camera, Cable, User Manual |
| Power Source | Battery Powered (1 Lithium Ion battery included) |
| Battery Capacity | 400mAh |
| Recording Time | Approx. 3 hours |
| Charging Port | Type-C USB |
| Connectivity Technology | USB |
| Controller Type | Push Button |
| Item Dimensions (L x W x H) | 0.9 x 0.7 x 3 inches |
| Item Weight | 2.08 ounces |
| Color | Black |
| Indoor/Outdoor Usage | Outdoor |
| Recommended Uses | Cycling, Vlogging, Law Enforcement, Sports, Delivery |
Ask a question about this manual
Ask about setup, troubleshooting, compatibility, parts, safety, or missing instructions. Manuals+ will review the question and use this page’s manual context to help answer it.