1. Introduction
This manual provides detailed instructions for the installation, operation, and maintenance of your Blütezeit 1400lb Sliding Gate Opener. This system features a 35V 25W solar panel for enhanced charging, WiFi control, a built-in backup battery, an infrared safety sensor, and two remote controls. Please read this manual thoroughly before installation and use to ensure proper function and safety.
2. Safety Information
WARNING: Failure to follow these safety instructions may result in serious injury or property damage.
- Ensure all installation and wiring are performed by qualified personnel.
- Keep children and pets away from the gate area during operation.
- Do not operate the gate opener if any part is damaged or malfunctioning.
- Regularly inspect the gate and opener for signs of wear or damage.
- The infrared safety sensor must be installed and tested to prevent entrapment.
- Disconnect power before performing any maintenance or repairs.
- Use the manual release function only in emergencies or during power outages.
3. Package Contents
Verify that all components listed below are present in your package:
- Sliding Gate Opener Motor Unit
- 35V 25W Solar Panel (shipped separately)
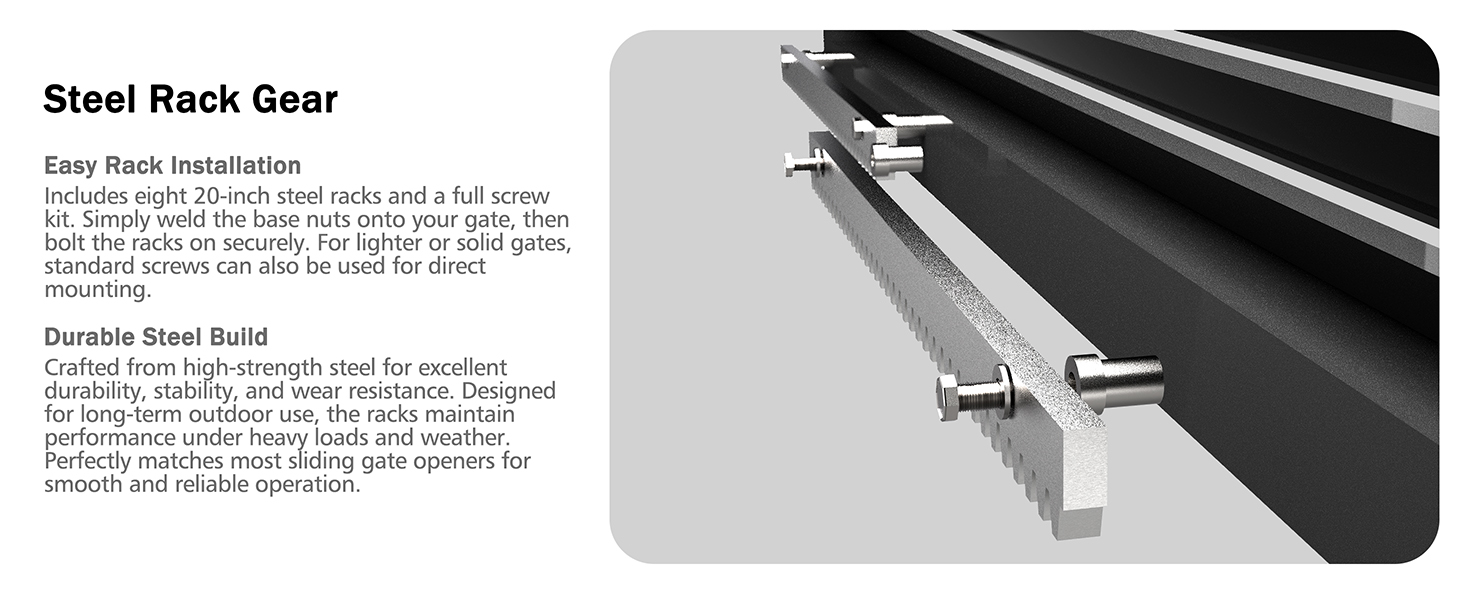
- Rack Gear (13.12ft total, typically 8 pieces of 20-inch racks)
- 2 Remote Controls (requires 12V 27A batteries, not included)
- Infrared Safety Sensor
- Mounting Hardware (bolts, brackets, etc.)
- Manual Release Keys
- Magnetic Limit Switches
- Instruction Manual


4. Setup and Installation
4.1 Site Preparation
Ensure the gate moves freely and smoothly. Clear any debris from the gate path. The mounting surface for the opener should be level and stable.
4.2 Mounting the Opener
Position the motor unit on a solid, level base next to the gate. Use the provided mounting plate and bolts to secure the opener firmly. Ensure adequate clearance for the gate's movement.
4.3 Installing the Rack Gear
Attach the rack gears along the bottom edge of the gate, ensuring they mesh correctly with the opener's drive gear. Maintain a small gap (approximately 1-2mm) between the rack and the drive gear to allow for smooth operation and thermal expansion. For longer gates, additional rack gears can be purchased and installed.
4.4 Installing Magnetic Limit Switches
Mount the magnetic limit switches at the desired open and closed positions of the gate. These switches signal the opener to stop the gate's movement accurately.

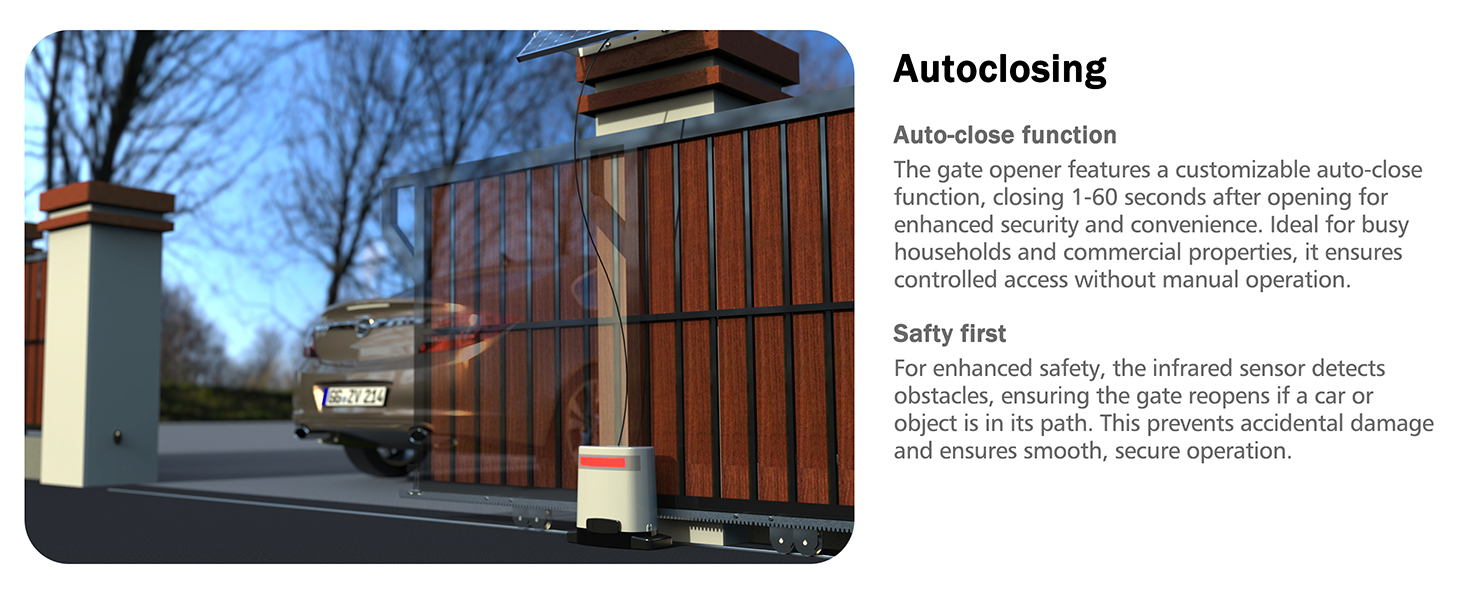
4.5 Connecting the Infrared Safety Sensor
Install the infrared safety sensor across the gate's path. This sensor detects obstacles and automatically stops or reverses the gate to prevent accidents. Connect it to the designated terminals on the control board.

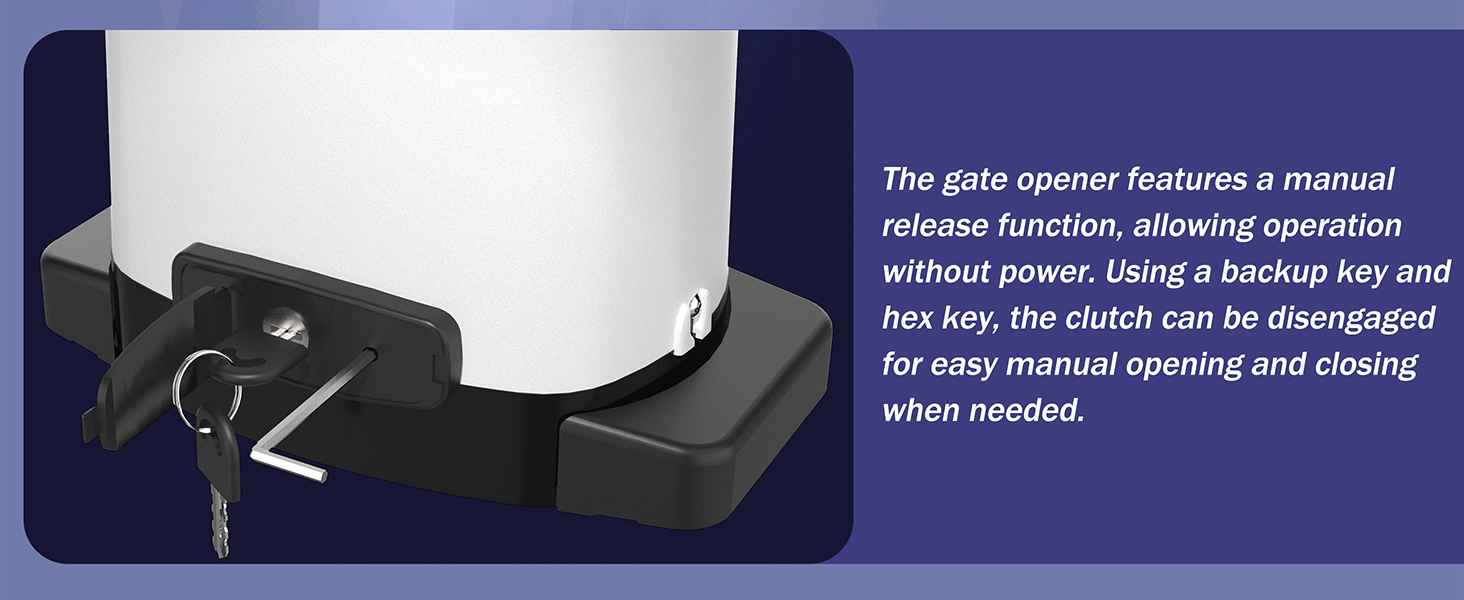
4.6 Manual Release Function
In case of power failure or emergency, the gate opener can be manually operated. Insert the provided manual release key into the lock and turn it to disengage the motor, allowing the gate to be moved by hand.
5. Operating Instructions
5.1 Remote Control Operation
The system includes two remote controls. Insert a 12V 27A battery into each remote. Press the designated button on the remote to open, close, or stop the gate. The remote has a range of up to 165 feet.

5.2 Auto-Close Feature
The gate opener can be configured to close automatically after a set period (1-60 seconds). Refer to the control board's programming instructions for setting the auto-close timer. This feature enhances security by ensuring the gate is not left open inadvertently.
5.3 LED Status Indicator
The built-in LED indicator on the motor unit provides visual feedback on the gate's status. A green light typically indicates the gate is open, while a red light indicates it is closed. Consult the control board manual for specific LED codes.

6. WiFi Control & App Setup
The gate opener features a pre-installed WiFi module for smart control via the "eWeLink" App.
6.1 eWeLink App Installation and Setup
- Download the "eWeLink" App from your smartphone's app store (iOS or Android).
- Register for an eWeLink account or log in if you already have one.
- Follow the in-app instructions to add your Blütezeit gate opener as a new device. This typically involves putting the opener into pairing mode (refer to the control board manual for specific steps) and connecting it to your home WiFi network.
- Once connected, you can control the gate (open, close, stop) and monitor its status remotely from anywhere with an internet connection.
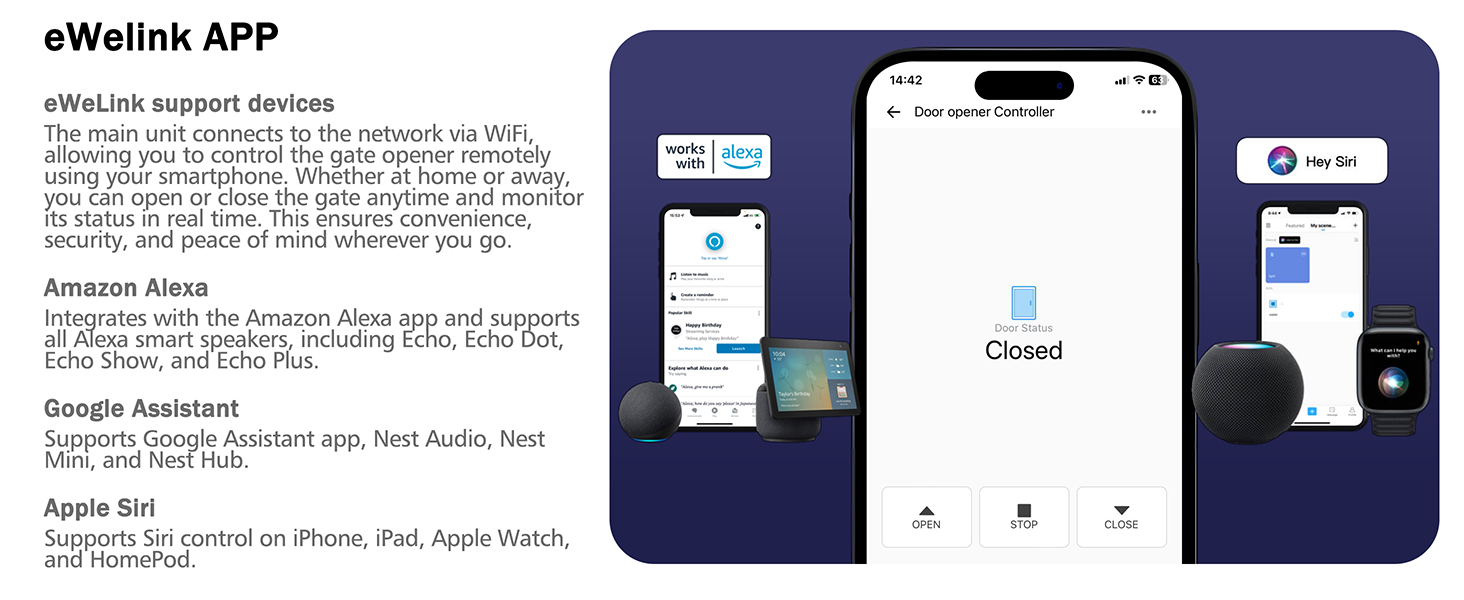
6.2 Smart Assistant Integration
The eWeLink App supports integration with popular smart home assistants:
- Amazon Alexa: Link your eWeLink account in the Alexa app to control your gate using voice commands.
- Google Assistant: Connect eWeLink to Google Assistant for voice control via Google Home devices.
- Apple Siri: Use Siri shortcuts on iOS devices for quick voice commands.
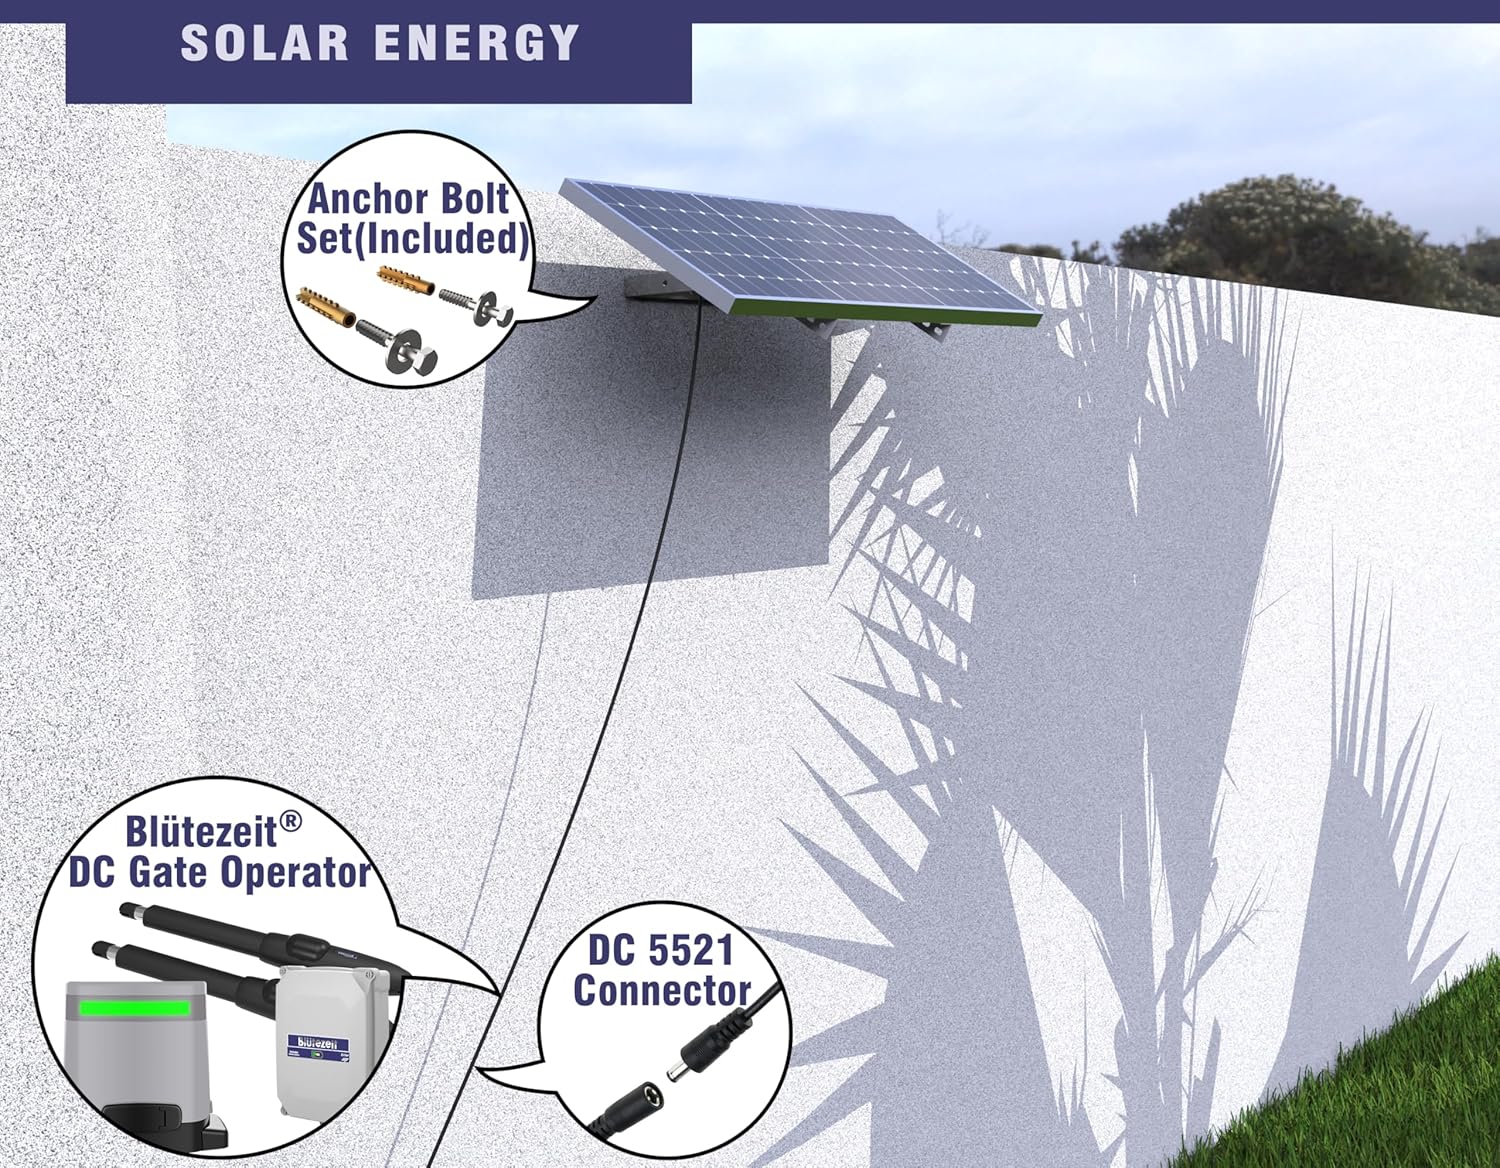
7. Solar Power System
The Blütezeit sliding gate opener is designed for efficient solar power operation, featuring an upgraded 35V 25W solar panel and a built-in DC24V 6.0Ah lithium-ion battery.
7.1 Solar Panel Installation and Connection
Mount the solar panel in a location that receives maximum direct sunlight throughout the day. Use the provided mounting brackets to secure it. Connect the solar panel directly to the motor unit using the plug-and-play solar connectivity. No additional wiring is required for basic solar charging.
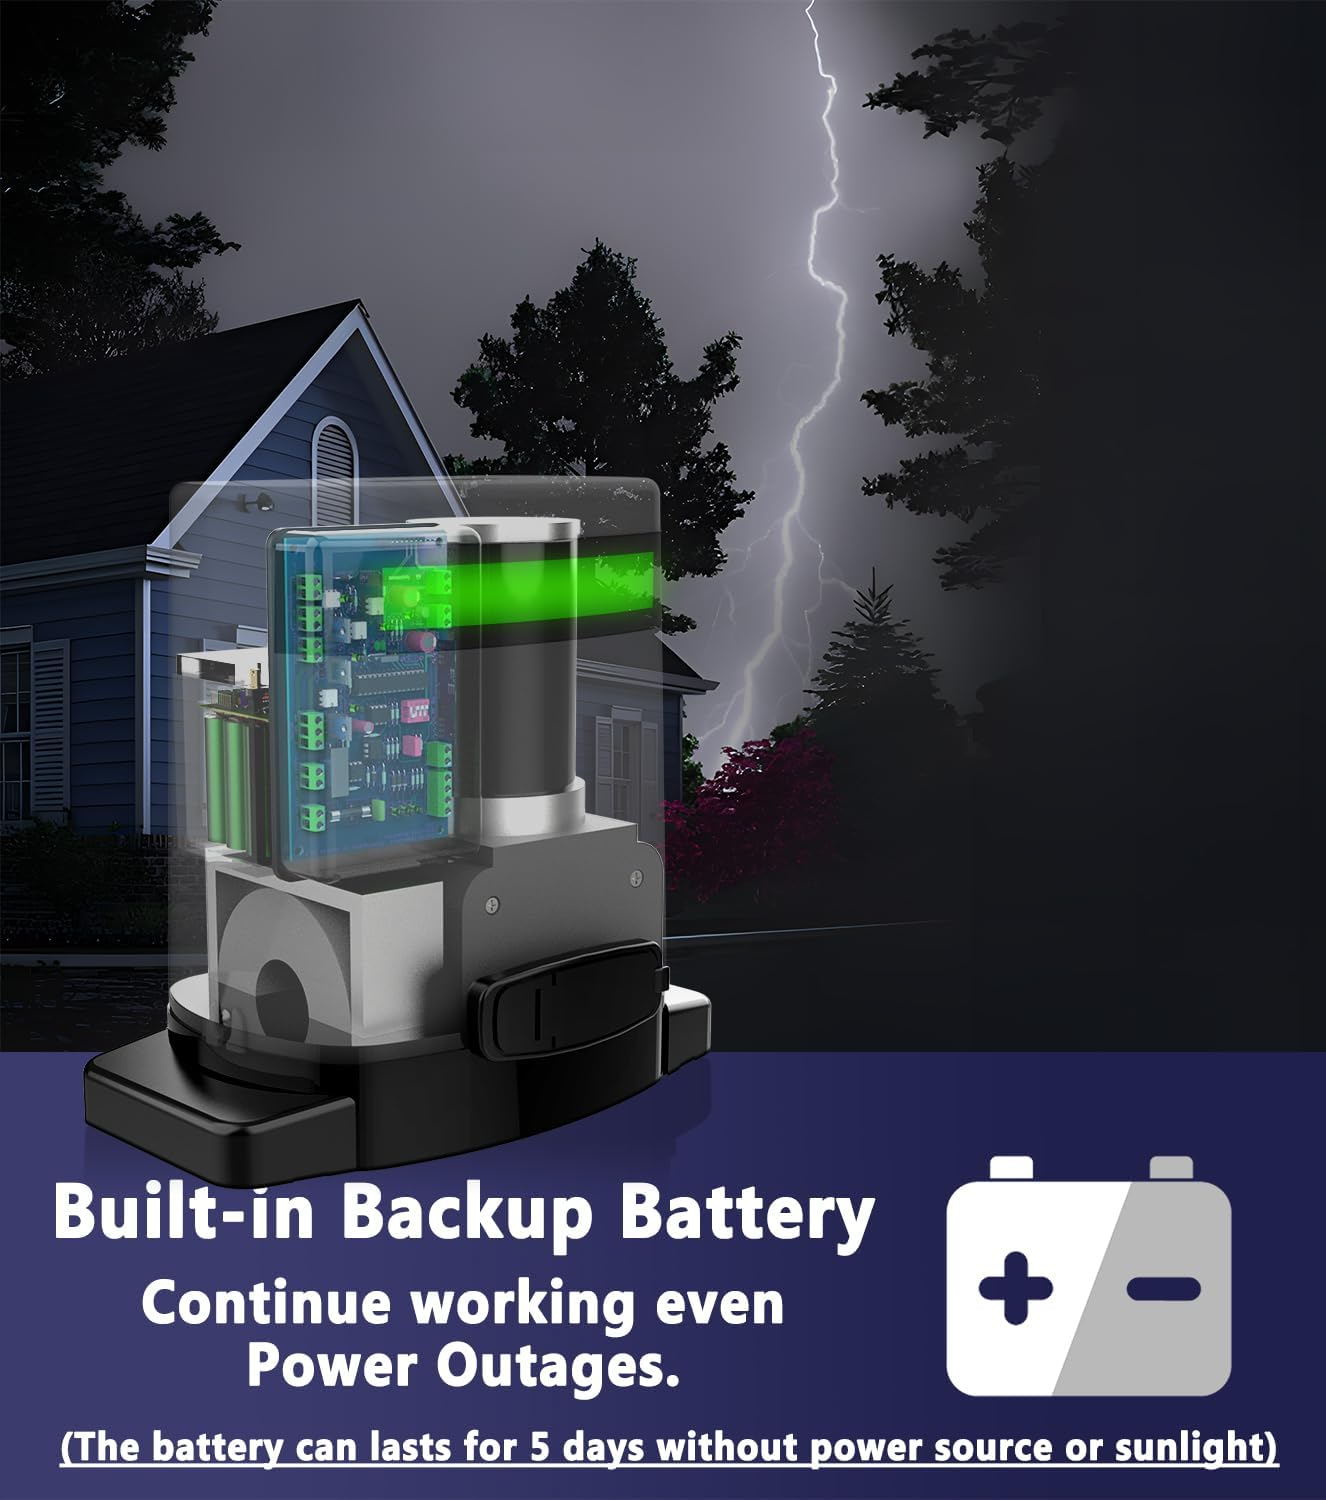
7.2 Battery Backup
The integrated DC24V 6.0Ah lithium-ion battery provides reliable backup power. When fully charged, it can sustain 3-5 days of standby operation (approximately 40-60 gate cycles) without external power or sunlight, assuming no additional accessories like WiFi or IR sensors are continuously drawing power. This ensures uninterrupted operation during power outages.
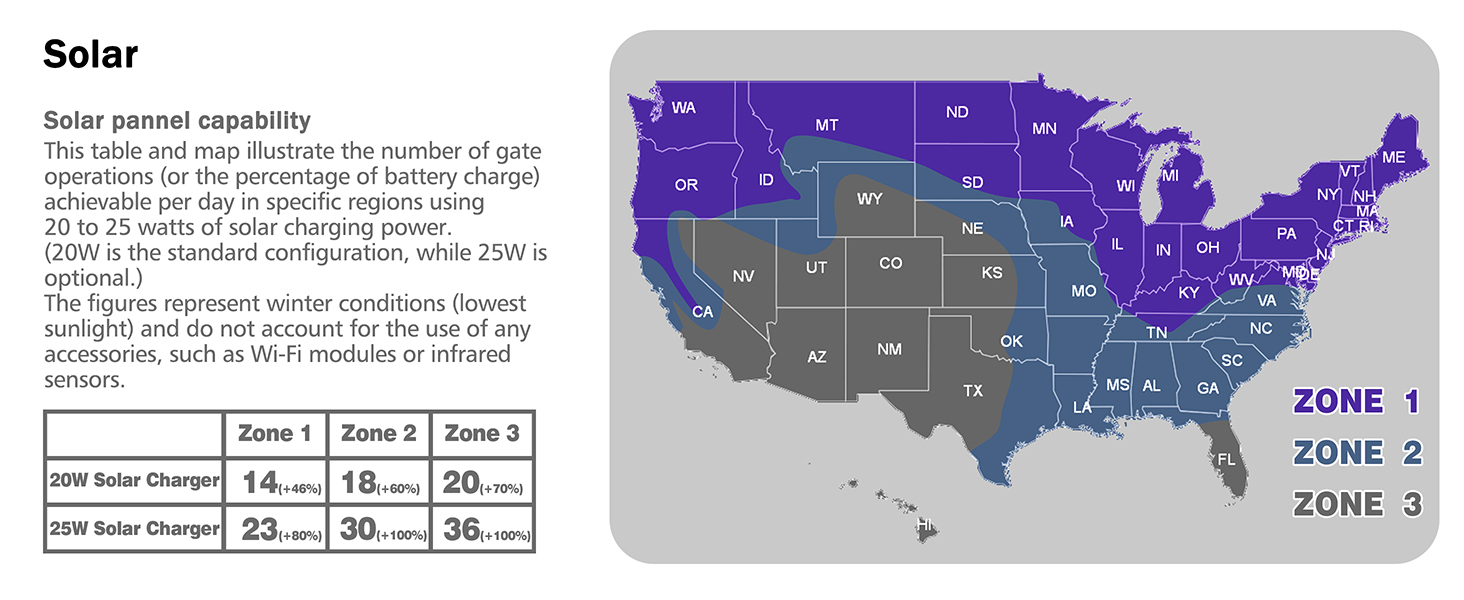
7.3 Solar Charging Performance
The 35V 25W solar panel offers faster charging and improved battery recovery. The actual number of gate operations per day depends on sunlight availability and geographical location. Refer to the solar capability map for estimated performance in different regions under winter conditions (lowest sunlight).
8. Maintenance
Regular maintenance ensures the longevity and reliable operation of your gate opener.
- Monthly: Inspect the gate's movement for any obstructions or friction. Clean the rack gears and lubricate if necessary. Check all mounting bolts for tightness.
- Quarterly: Test the infrared safety sensor by placing an object in its path while the gate is closing. The gate should stop or reverse.
- Annually: Inspect all wiring for damage or corrosion. Check the battery health and ensure the solar panel is clean and free of debris for optimal charging.
- Keep the motor unit clean and free from dust, dirt, and insects.
9. Troubleshooting
| Problem | Possible Cause | Solution |
|---|---|---|
| Gate does not move. | No power, remote battery dead, safety sensor obstructed, manual release engaged. | Check power supply/solar charge, replace remote battery, clear sensor path, disengage manual release. |
| Gate stops unexpectedly. | Obstruction detected by safety sensor, gate friction, motor overheating. | Clear obstruction, check gate for smooth movement, allow motor to cool. |
| Remote control not working. | Dead battery, out of range, remote not programmed. | Replace battery, move closer to gate, reprogram remote (refer to control board manual). |
| WiFi control not connecting. | WiFi signal weak, incorrect password, app not configured. | Check WiFi signal strength, re-enter password, reconfigure device in eWeLink app. |
| Solar panel not charging. | Panel dirty, obstructed, faulty connection, insufficient sunlight. | Clean panel, clear obstructions, check connections, ensure adequate sunlight exposure. |
10. Specifications
| Feature | Specification |
|---|---|
| Max Gate Weight | 1400 lbs |
| Motor Power | 280W |
| Solar Panel | 35V 25W |
| Battery Type | DC24V 6.0Ah Lithium-ion |
| Noise Level | 45dB |
| Operating Temperature | -13°F to 131°F (-25°C to 55°C) |
| Remote Control Range | 165 ft (50m) |
| Rack Length Included | 13.12 ft (4m) |
| WiFi Control | eWeLink App compatible |
11. Warranty and Support
Blütezeit products are designed for durability and performance. For technical assistance, troubleshooting, or warranty inquiries, please contact Blütezeit customer support. Our professionals are available to provide guidance and solutions.
Please refer to your purchase documentation for specific warranty terms and contact information.