1. Product Overview
Thank you for choosing the Bestier Queen Size Bed Frame. This bed frame features a comfortable corduroy upholstered headboard with integrated LED lighting, solid wooden slat support, and a design that eliminates the need for a box spring. This manual provides detailed instructions for assembly, operation, maintenance, and troubleshooting to ensure a safe and enjoyable experience with your new bed frame.

Image: Bestier Queen Size Bed Frame, Light Grey
2. Important Safety Information
- Do not exceed the maximum weight capacity of 1100 lbs (500 kg).
- Be cautious when adjusting the headboard to prevent injury.
- Ensure all screws and bolts are securely tightened before use. Periodically check and re-tighten as necessary.
- Keep small parts away from children during assembly to prevent choking hazards.
- Use only the provided tools and hardware for assembly.
3. Package Contents
Please verify that all components are present before beginning assembly. Refer to the assembly video for a visual guide to all parts.
- Headboard (1)
- LED Strip (1)
- Side Rails (2)
- Footboard (1)
- Wooden Slats (multiple)
- Support Legs (multiple)
- Hardware Pack (screws, washers, Allen wrench, screwdriver)
Video: Bestier Upholstered Bed Frame - Assembly Instruction. This video provides a visual guide to all included parts and the complete assembly process.
4. Assembly Instructions
Follow these steps carefully for proper assembly. It is recommended to have two people for assembly.
Step 1: Attach Legs to Side Rails and Footboard
Attach the wooden legs to the side rails and footboard. Ensure they are securely tightened. The assembly video demonstrates this process from 0:04 to 0:09.
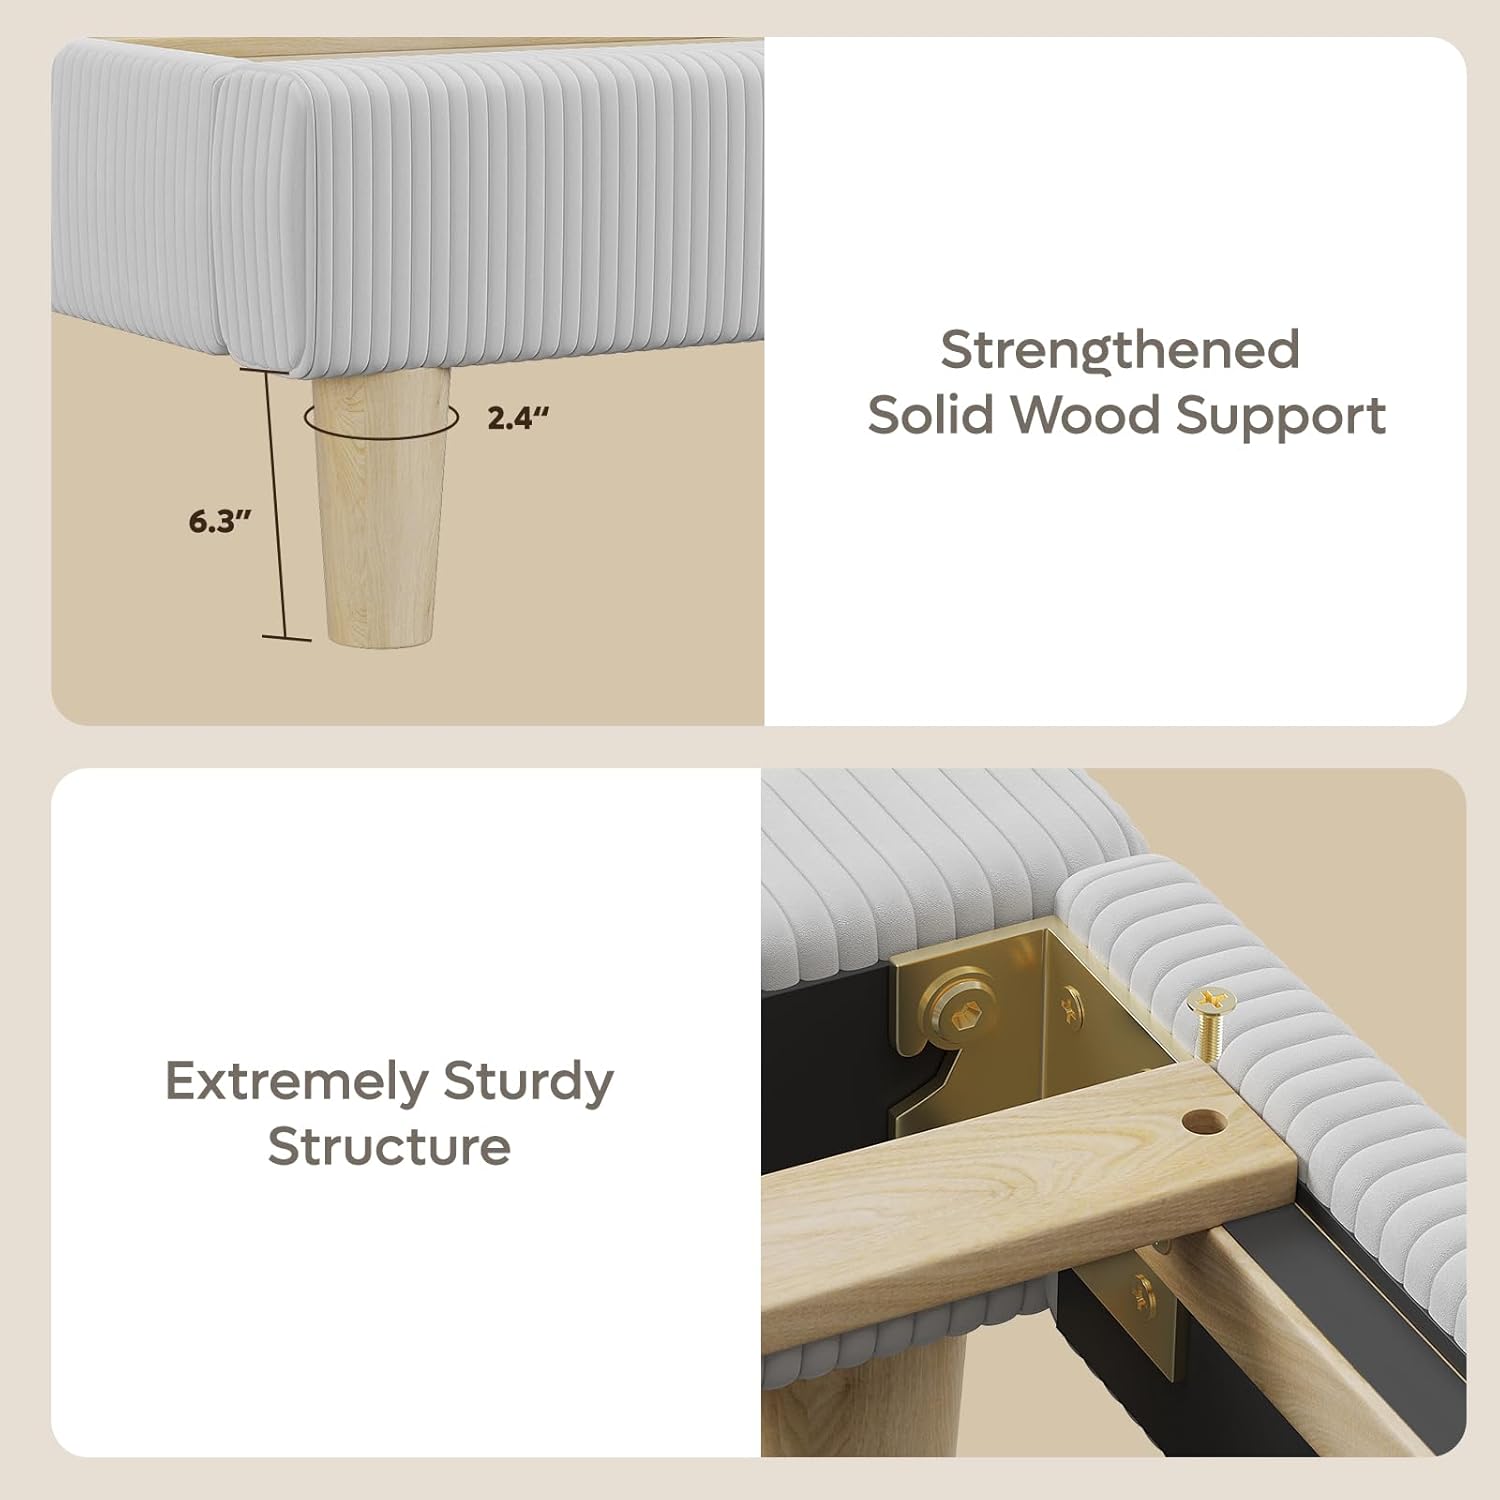
Image: Close-up of the strengthened solid wood support legs, showing a 6.3 inch clearance.
Step 2: Assemble Headboard Components
Assemble the headboard components as shown in the video from 0:10 to 0:22. This typically involves securing the vertical channel tufted panels.
Step 3: Attach Headboard to Side Rails
Connect the assembled headboard to the side rails using the provided hardware. The headboard is adjustable to accommodate mattress thicknesses between 10 and 12.5 inches. The video illustrates this from 0:23 to 0:30, and again from 0:31 to 0:40 for the adjustable feature.
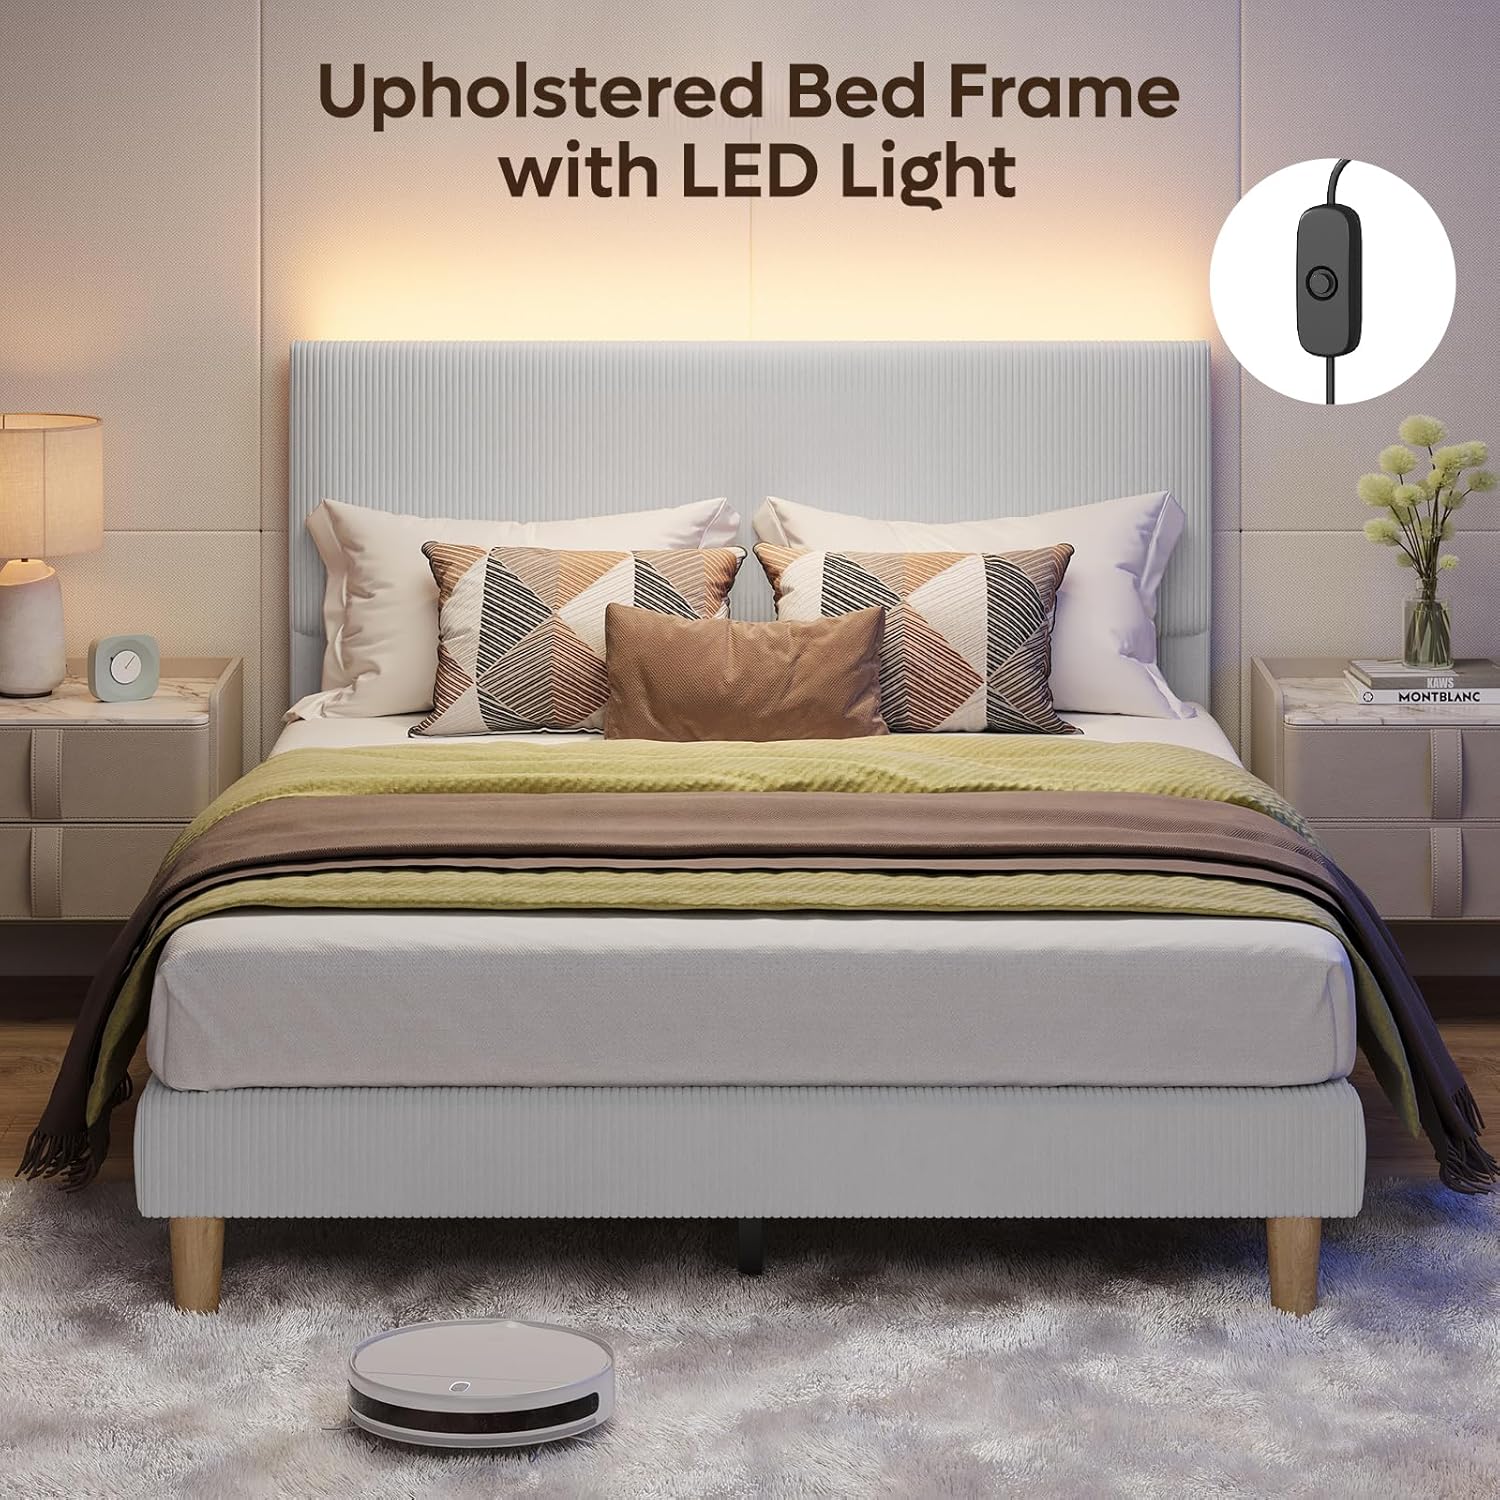
Image: Diagram showing the adjustable upholstered headboard, recommending mattress heights of 10-12.5 inches.
Step 4: Attach Center Support Beam
Install the center support beam to the bed frame. This provides additional stability. Refer to the video from 0:41 to 0:46.
Step 5: Install Wooden Slats
Place the wooden slats across the bed frame. The slats are often connected by a Velcro strap for easy positioning. The video shows this from 0:47 to 0:52.
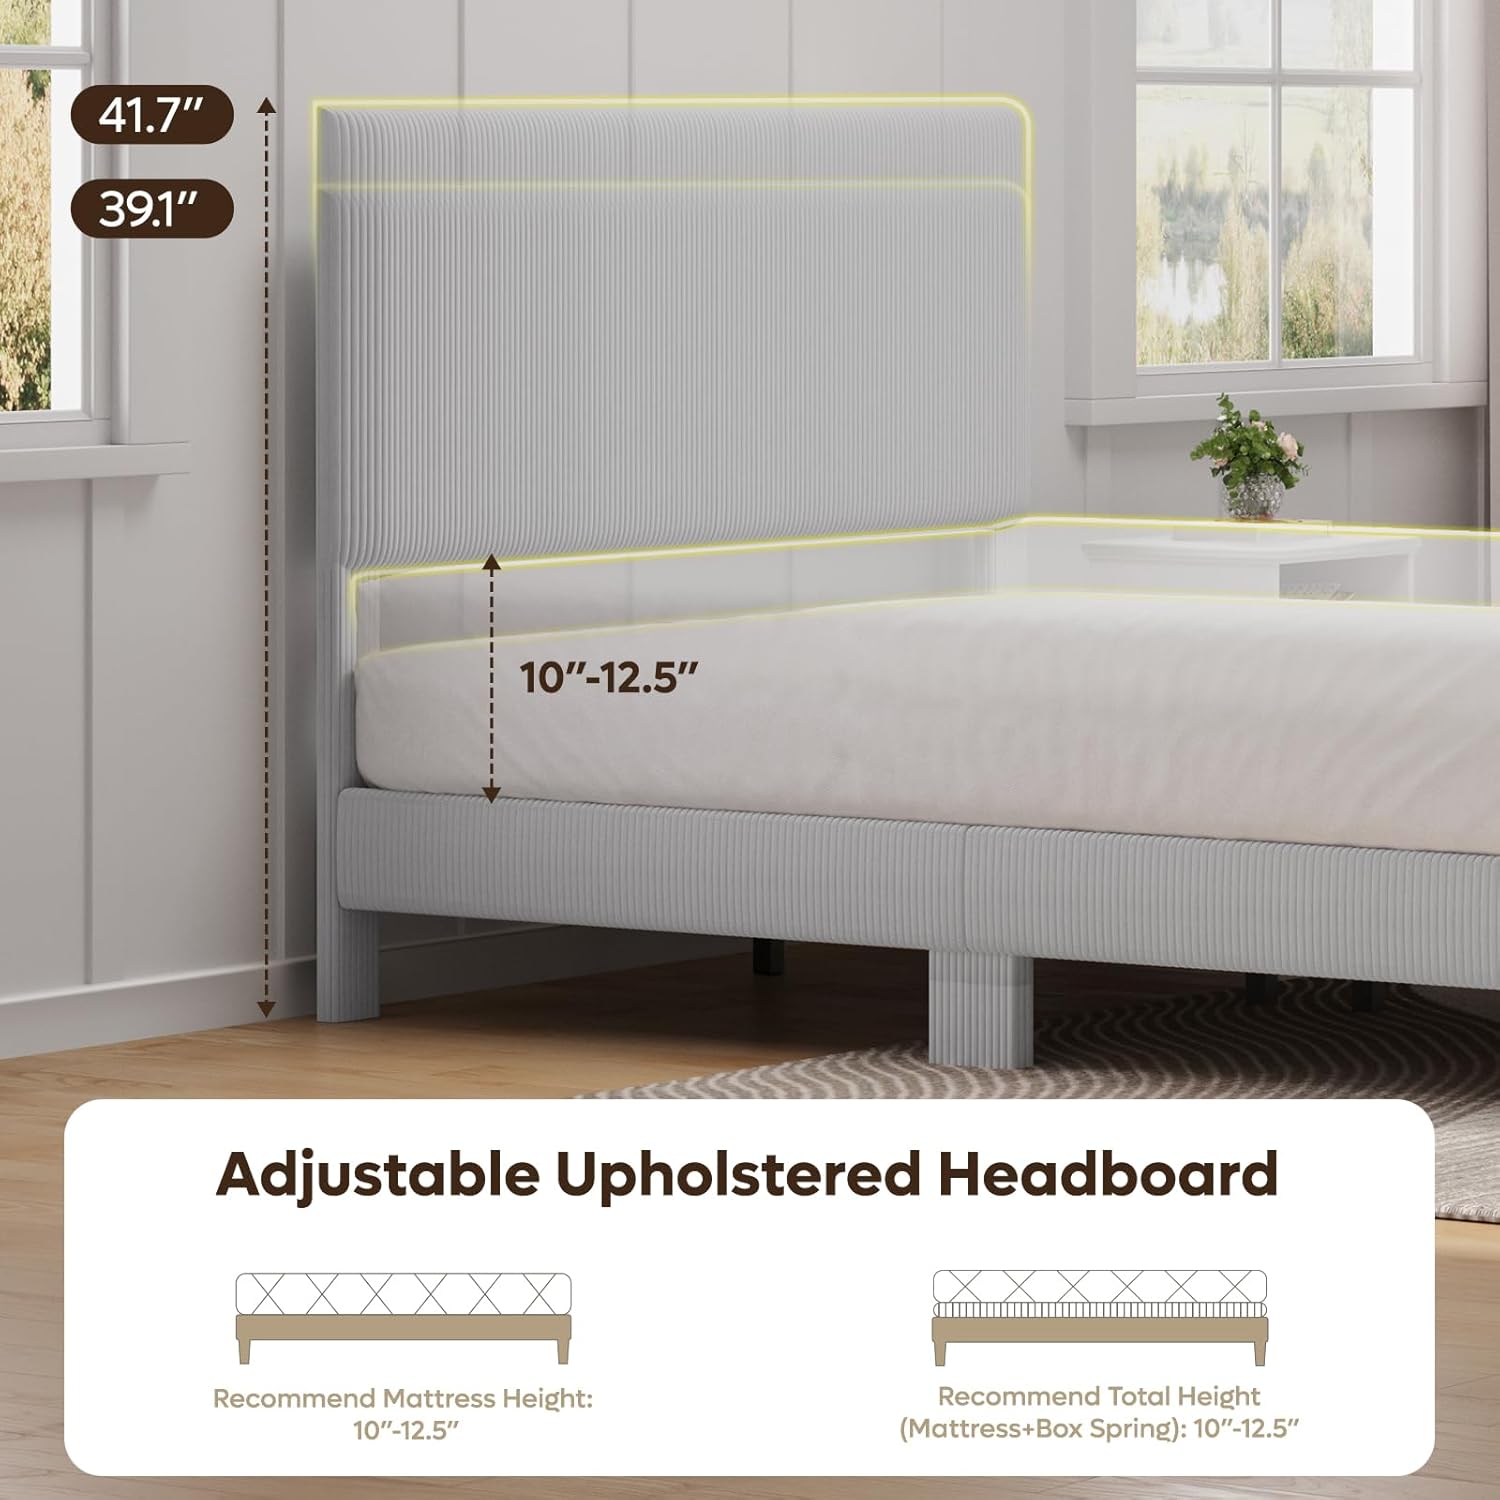
Image: Diagram showing the overall product dimensions for Queen size (60.5"L x 81"W x 39.1"-41.7"H) and Full size, with a recommended load of 1100 lbs.
Step 6: Secure Slats
Secure the wooden slats to the frame using the provided screws and screwdriver. This step is demonstrated in the video from 1:03 to 1:08.
Step 7: Install LED Strip
Carefully attach the LED light strip to the back of the headboard using the adhesive backing or clips provided. Ensure the strip is evenly placed. The video guides you through this from 1:09 to 1:25.

Image: A bedroom scene showing the upholstered bed frame with the LED light strip illuminating the wall behind the headboard.
Step 8: Connect LED Power
Connect the LED strip to the power source and test the lighting. The video shows the connection and operation from 1:29 to 1:34.
5. Operating the LED Lighting
The integrated LED light strip provides soft, warm ambient lighting. To operate:
- Locate the inline switch on the power cord of the LED strip.
- Press the switch to turn the LED lights ON or OFF.
- The warm glow creates a relaxing atmosphere, ideal for reading or winding down.
6. Care and Maintenance
- Cleaning: For general cleaning of the corduroy upholstery, wipe with a damp cloth. Avoid harsh chemicals or abrasive cleaners.
- Inspection: Periodically check all connections and hardware to ensure they remain tight. Re-tighten if necessary to maintain stability and prevent squeaking.
- LED Care: The LED strip is designed for long-term use. If issues arise, check the power connection and switch. Do not attempt to repair the LED strip yourself; contact customer support.
7. Product Specifications
| Feature | Detail |
|---|---|
| Size | Queen |
| Material | Corduroy, Wood |
| Product Dimensions (L x W x H) | 80.98" x 60.51" x 39.13" |
| Style | Minimalist |
| Special Features | Adjustable, Corduroy Vertical Channel Tufted, LED Lighting |
| Included Components | Headboard, LED Strip |
| Model Number | B701253D |
| Color | Light Grey |
| Maximum Weight Recommendation | 1100 Pounds |
| Ground To Item Distance | 6.3 Inches |
| Required Assembly | Yes |
8. Troubleshooting
- Bed Frame Squeaks: Ensure all bolts and screws are tightened. Squeaking can often be resolved by re-tightening connections.
- LED Lights Not Working: Check if the power adapter is securely plugged into a working outlet. Verify the inline switch is in the 'ON' position. Inspect the LED strip for any visible damage.
- Headboard Stability: If the headboard feels wobbly, ensure the connection points to the side rails are fully secured and the adjustable height bolts are tightened.
9. Customer Support
For any questions, concerns, or assistance with your Bestier bed frame, please contact our customer support team:
| Region | Contact Information |
|---|---|
| North American | Phone: 888-666-1086 Email: Service.US@bestier.net |
| Europe | Email: Service.UK@bestier.net, Service.FR@bestier.net, Service.DE@bestier.net, Service.IT@bestier.net, Service.ES@bestier.net |
| Asia | Phone: 04-8888-0283 Email: Service.JP@bestier.net |
| Global | Email: Service@bestier.net |
Please have your model number (B701253D) and purchase information ready when contacting support.


