1. Product Overview
The JONSBO NV10 is a compact Mini ITX PC case designed for small form factor builds. It features a durable aluminum alloy shell with a sandblasted finish and North American walnut trim, offering both aesthetic appeal and robust construction. The case has a portable capacity of approximately 4.5 liters and supports flexible placement in both standing and lying positions. It comes standard with a PCI-E 4.0 extended cable and is compatible with low-profile graphics cards up to 190mm in length.
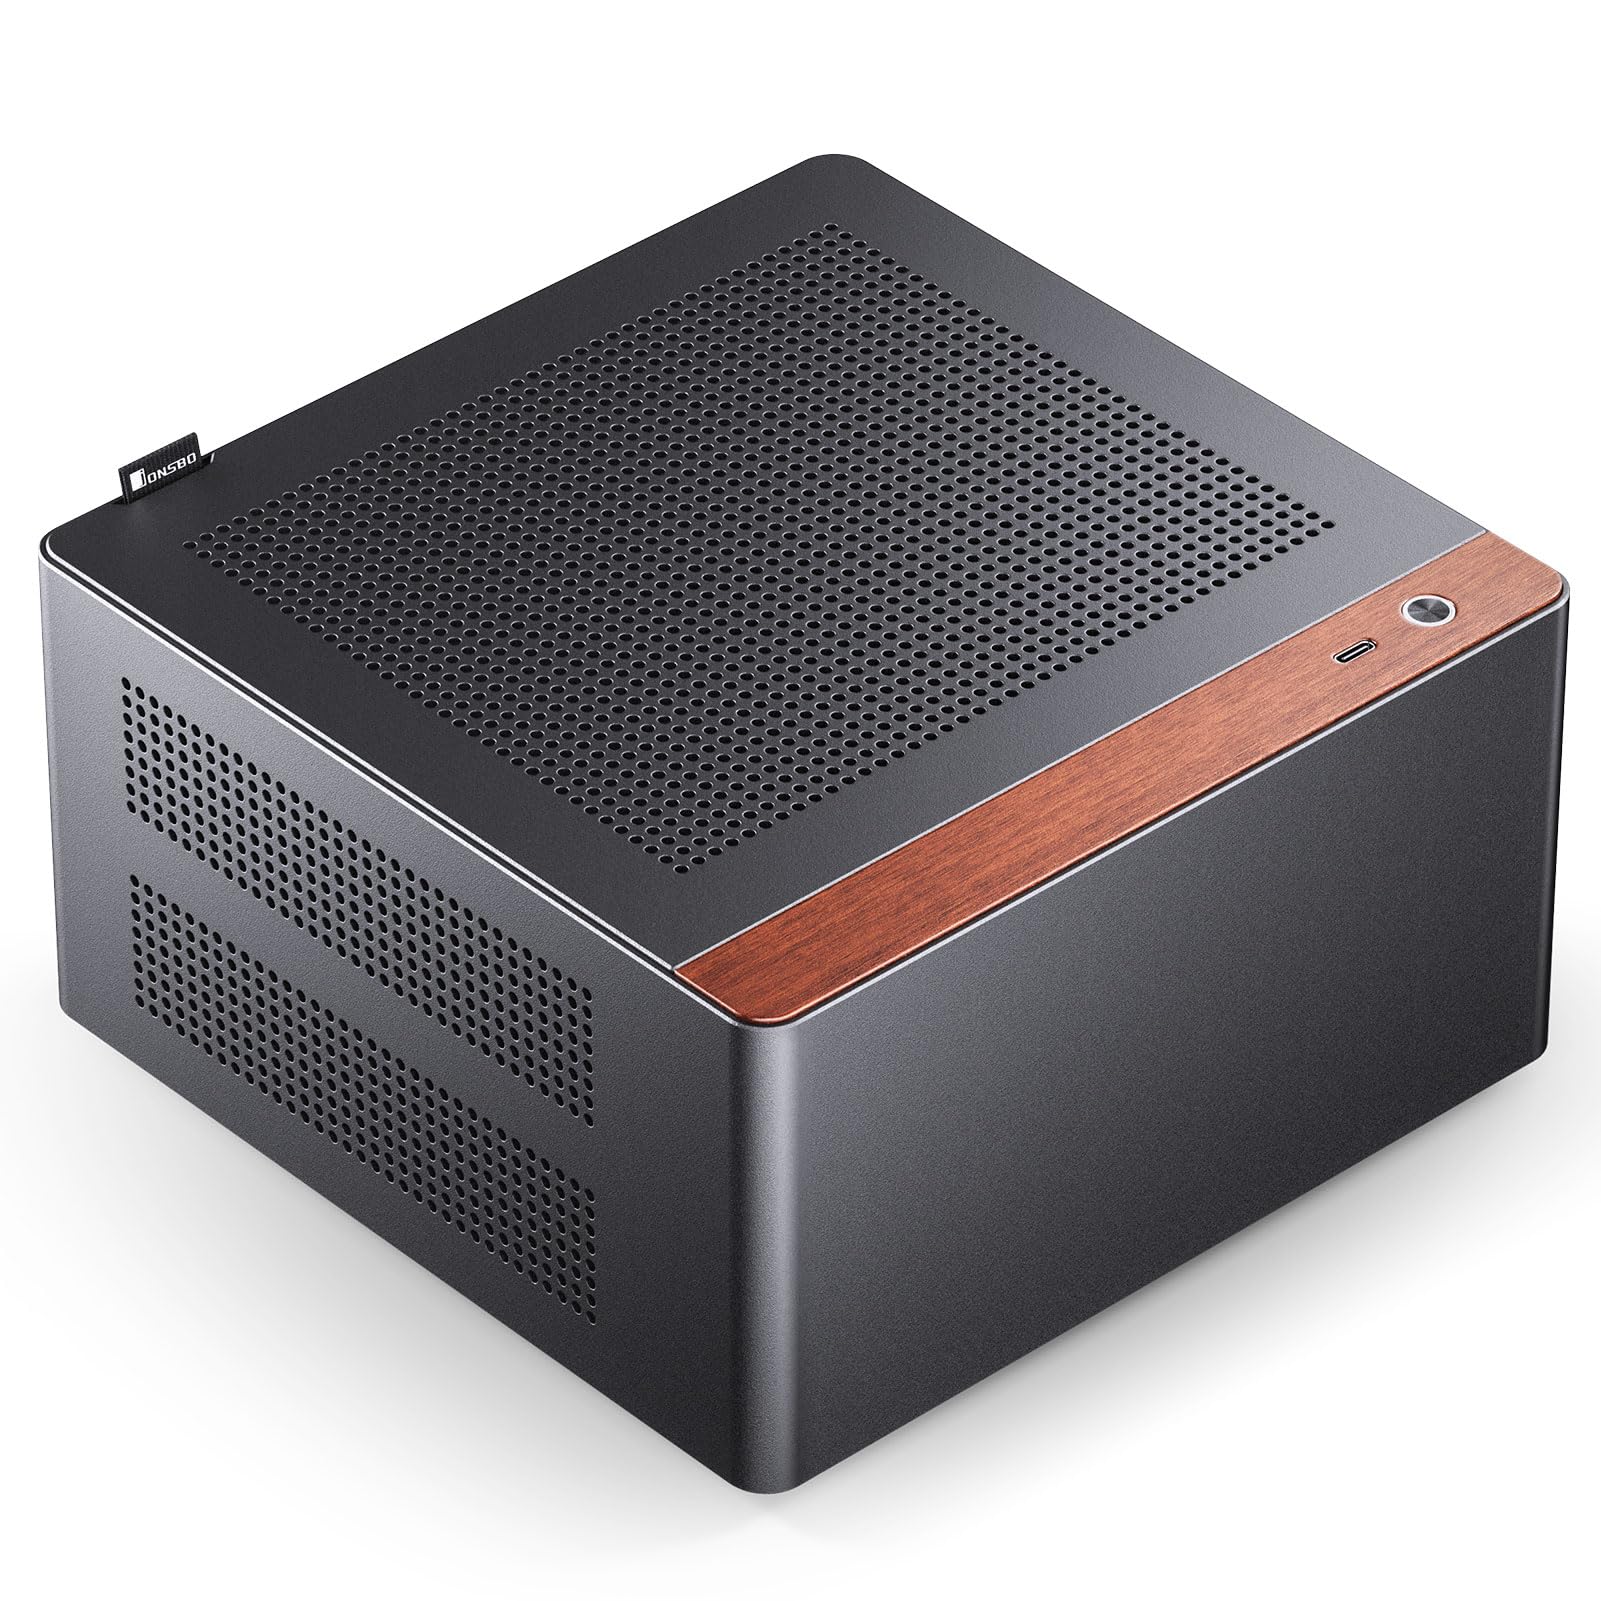
Figure 1: JONSBO NV10 Mini ITX PC Case in a desktop setup.

Figure 2: Dimensions of the JONSBO NV10 case: 205mm (W) x 205mm (D) x 108mm (H).
2. Specifications
| Model Name | NV10 |
| Dimensions (W x D x H) | 205mm x 205mm x 108mm |
| Material | Aluminum Alloy, Steel |
| Motherboard Compatibility | Mini ITX |
| PSU Support | 1U FLEX Power Supply (Max Length 150mm) |
| Max Display Card Length | ≤190mm (Low Profile) |
| Hard Disk Support | 4 x 2.5-inch SSDs |
| Air Cooling Support | CPU Cooler Height ≤38mm |
| I/O Port | Type-C (USB 3.2 Gen 2) |
| PCI-E Extension Cable | Standard with PCI-E 4.0 Extended Cable |
3. Setup Guide
3.1 Disassembly and Access
The JONSBO NV10 features a quick-release design for the top plate, allowing for easy access to internal components for installation and maintenance. To open the case, gently pull the top cover using the integrated handle.

Figure 3: Top panel removed for internal access.
3.2 Motherboard Installation
Install your Mini ITX motherboard into the designated area within the case. Ensure all standoffs align correctly and secure the motherboard with screws. The case is designed to accommodate Mini ITX motherboards.
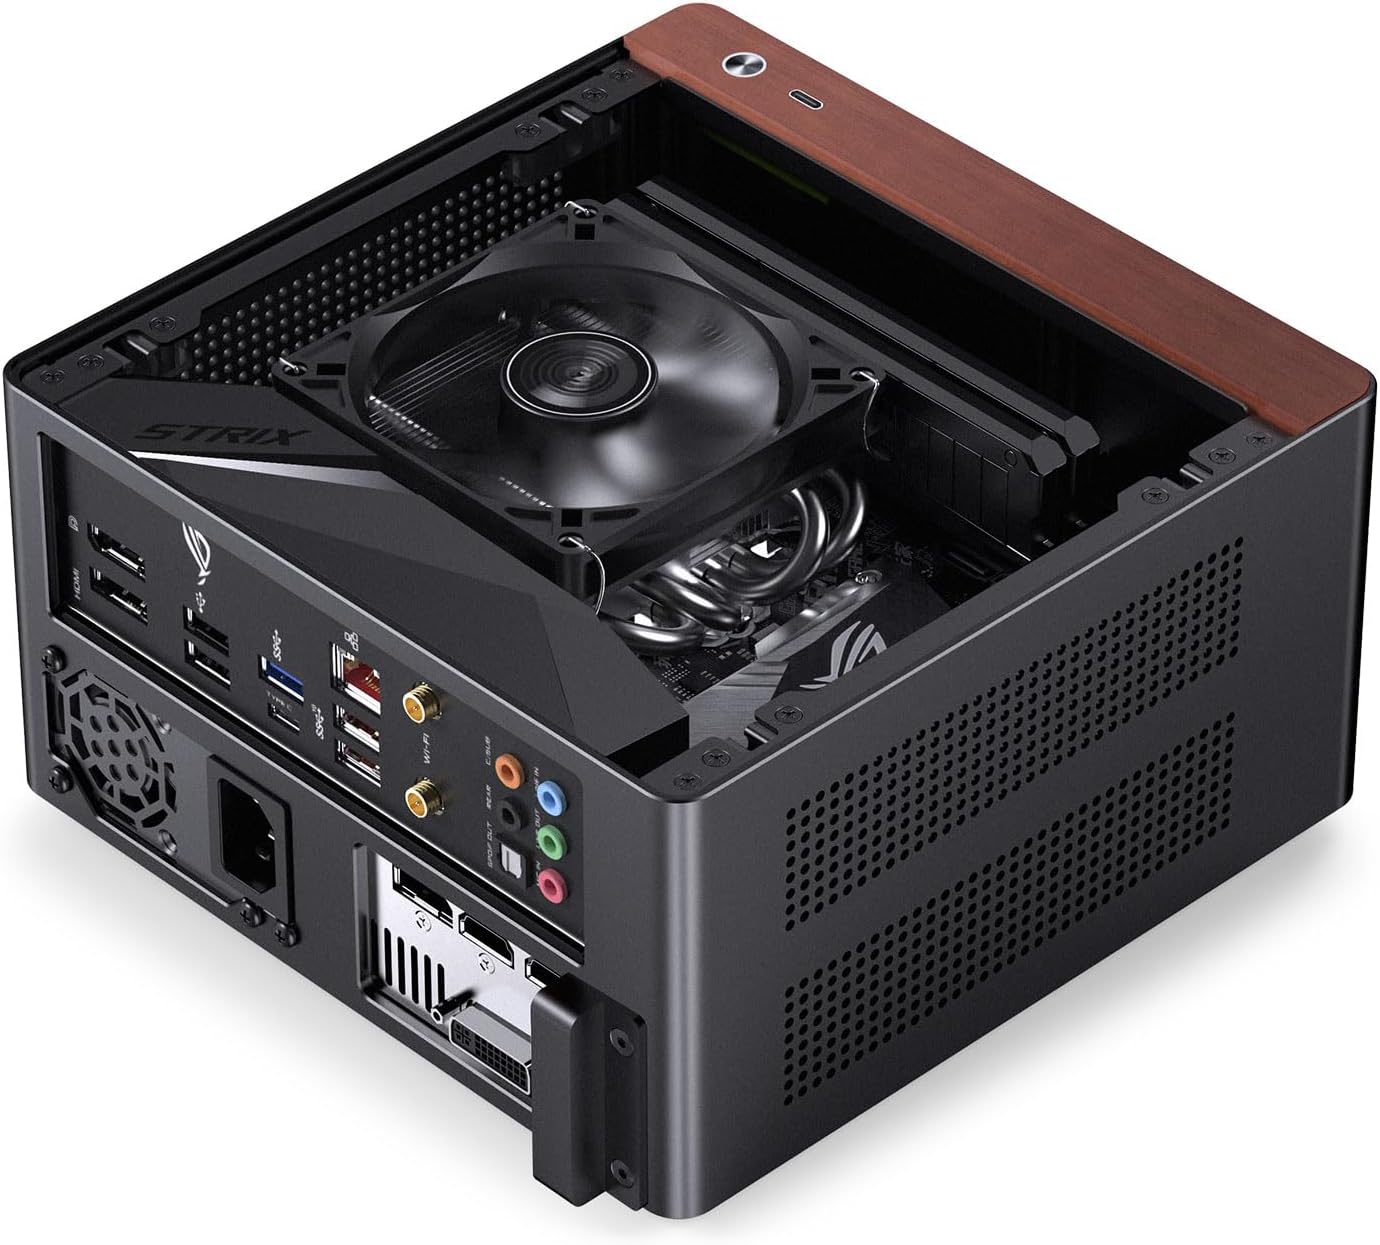
Figure 4: Mini ITX motherboard installed in the case.
3.3 Power Supply Unit (PSU) Installation
The NV10 supports 1U FLEX power supplies with a maximum length of 150mm. Install the PSU into its dedicated compartment, typically located at the bottom of the case. Secure it with the appropriate screws.
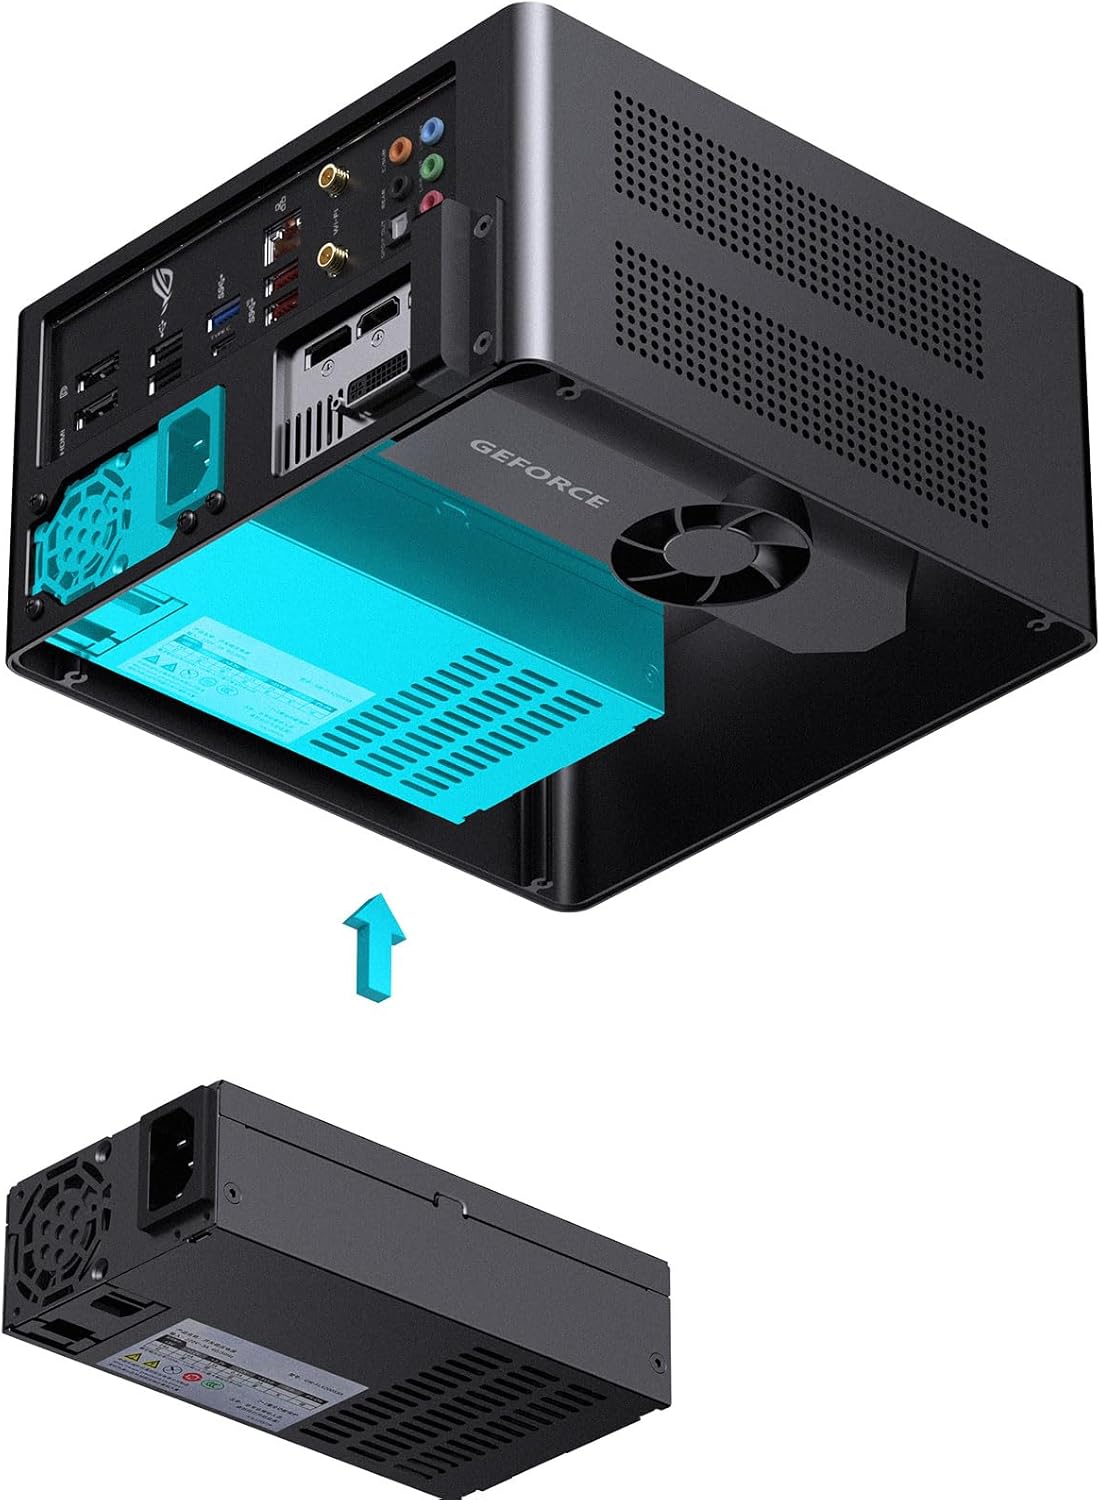
Figure 5: Installation of a 1U FLEX power supply.
3.4 Graphics Card (GPU) Installation
The case includes a standard PCI-E 4.0 extended cable for installing a low-profile graphics card. Ensure your GPU is no longer than 190mm. Connect the PCI-E riser cable to the motherboard and then install your low-profile GPU into the riser. Secure the GPU and cable as needed.

Figure 6: PCI-E 4.0 extended cable connection.

Figure 7: Installing a low-profile graphics card.
3.5 Storage Installation
The NV10 supports up to four 2.5-inch SSDs. Locate the designated mounting points for these drives and secure them using the provided hardware.
3.6 Air Cooler Installation
Ensure your CPU air cooler has a maximum height of 38mm to fit within the case. Install the cooler according to its manufacturer's instructions, ensuring proper contact with the CPU and secure mounting.
3.7 Cable Management
Route all power and data cables neatly to ensure optimal airflow and a clean internal appearance. Utilize any available cable tie-down points or channels within the case.
4. Operating Instructions
After assembling all components, connect your peripherals (monitor, keyboard, mouse, etc.) to the appropriate ports on the motherboard and graphics card. Connect the power cable to the PSU and a wall outlet. Press the power button on the front I/O panel to start your system.
The case features multi-component perforated design to enhance heat dissipation and improve airflow circulation. Ensure these ventilation areas are not obstructed for optimal performance.

Figure 8: Perforated design for enhanced heat dissipation.
5. Maintenance
- Cleaning: Regularly clean the exterior of the case with a soft, dry cloth. For dust accumulation inside, use compressed air to gently clear out vents and components. Ensure the system is powered off and unplugged before cleaning.
- Airflow: Periodically check that all ventilation holes are free from obstructions to maintain optimal airflow and cooling performance.
- Component Checks: Occasionally inspect internal components for loose connections or excessive dust buildup.
6. Troubleshooting
6.1 System Not Powering On
- Check if the power cable is securely connected to both the PSU and the wall outlet.
- Verify that the power switch on the PSU is in the "ON" position.
- Ensure the front panel power button cable is correctly connected to the motherboard.
- Confirm all internal power connections (24-pin ATX, CPU power, GPU power) are firmly seated.
6.2 No Display Output
- Ensure your monitor is connected to the graphics card output, not the motherboard's integrated graphics ports (unless you are using integrated graphics).
- Verify the graphics card is properly seated in its PCI-E slot and the PCI-E riser cable is correctly connected.
- Check if the monitor is powered on and set to the correct input source.
6.3 Overheating Issues
- Ensure the CPU cooler is properly installed and making good contact with the CPU, with thermal paste applied.
- Check that all case ventilation holes are unobstructed.
- Verify that the CPU cooler fan is spinning correctly.
7. Official Product Video
Video 1: Official JONSBO N10/NV10 ITX PC Case overview, demonstrating features and design. Duration: 1 minute 15 seconds.
8. Warranty and Support
The JONSBO NV10 PC Case comes with a 2-Year Manufacturer Warranty. For warranty claims or technical support, please contact JONSBO customer service through their official website or the retailer where the product was purchased.
Standard return policy allows for returns within 30 days for refund or replacement, subject to retailer terms.
For additional information and resources, visit the JONSBO Store on Amazon.


