
Introduction
This manual provides detailed instructions for the installation, operation, and maintenance of your Zomolither HE-1006 Single Din Bluetooth 5.0 Car Stereo. Please read this manual thoroughly before using the product to ensure proper function and to prevent damage.
Safety Information
- Always ensure the vehicle is parked safely before operating the stereo controls.
- Do not attempt to disassemble or modify the unit. This may cause damage and void the warranty.
- Ensure all wiring connections are secure and correctly insulated to prevent short circuits and electrical hazards.
- Keep the unit away from water and excessive moisture.
- Avoid exposing the unit to direct sunlight or extreme temperatures for extended periods.
Package Contents
Verify that all items are present in the package:
- 1 x Zomolither HE-1006 Car Stereo Unit
- 1 x Power Cable
- 1 x Horn Cable
- 1 x User Manual
- Accessories (e.g., mounting brackets, screws, remote control, disassembly keys)

Product Overview
Front Panel Controls
The front panel features an LCD digital display and various buttons for controlling the stereo's functions.
- Power/Mute (POW MUT) Button: Press to turn on/off, short press to mute/unmute.
- Mode Button: Cycles through available audio sources (FM, Bluetooth, USB, AUX, TF Card).
- Band Button: In FM mode, cycles through FM bands (FM1, FM2, FM3).
- Volume Knob: Rotate to adjust volume. Press to access audio settings (Bass, Treble, Balance, Fader, EQ).
- Track Controls (Previous/Next): Skips tracks in media playback or tunes radio stations.
- Numeric Presets (1-6): Stores and recalls FM radio stations. Also functions as RPT (Repeat), RDM (Random), INT (Intro) in media playback.
- USB Ports: One for media playback, one for fast charging.
- AUX Input: 3.5mm jack for external audio devices.
- RST (Reset) Button: Resets the unit to factory defaults (requires a thin object to press).
Rear Panel Connections
The rear panel provides connections for power, speakers, antenna, and RCA outputs.
- Power Connector: For connecting the main power harness.
- Horn Cable Connector: For speaker connections.
- ANT (Antenna) Input: For connecting the vehicle's FM antenna.
- RCA Outputs (F-L, F-R, R-L, R-R): For connecting to external amplifiers.
Setup
Installation Dimensions
The Zomolither HE-1006 is a standard single DIN unit. Ensure your vehicle's dashboard opening matches these dimensions for proper fitment.

- Front Panel: 188mm (7.4 inches) x 58mm (2.28 inches)
- Chassis: 178mm (7.01 inches) x 101mm (4.0 inches) x 50mm (1.96 inches)
Wiring Instructions
Proper wiring is crucial for the stereo's functionality and to prevent damage. Refer to the wiring diagram provided with your vehicle and the stereo's horn and power cables.

- Power Cable: Connect the yellow wire to the constant 12V supply, the red wire to the accessory 12V supply (switched by ignition), and the black wire to ground.
- Horn Cable (Speaker Wires): Connect each speaker wire pair (e.g., white/white-black, grey/grey-black) to the corresponding positive and negative terminals of your vehicle's speakers. Ensure correct polarity.
- Antenna: Connect the vehicle's FM antenna to the ANT input.
- Protection: The unit features automatic power-off protection if the power cord is incorrectly wired, preventing damage. Always double-check connections before powering on.
Operating Instructions
Power On/Off and Volume Control
- Power On: Press the POW MUT button.
- Power Off: Press and hold the POW MUT button.
- Mute/Unmute: Short press the POW MUT button.
- Volume Adjustment: Rotate the volume knob clockwise to increase, counter-clockwise to decrease.
Source Selection
Press the MODE button repeatedly to cycle through available audio sources: FM Radio, Bluetooth Audio, USB, TF Card, and AUX Input.
Bluetooth Operation
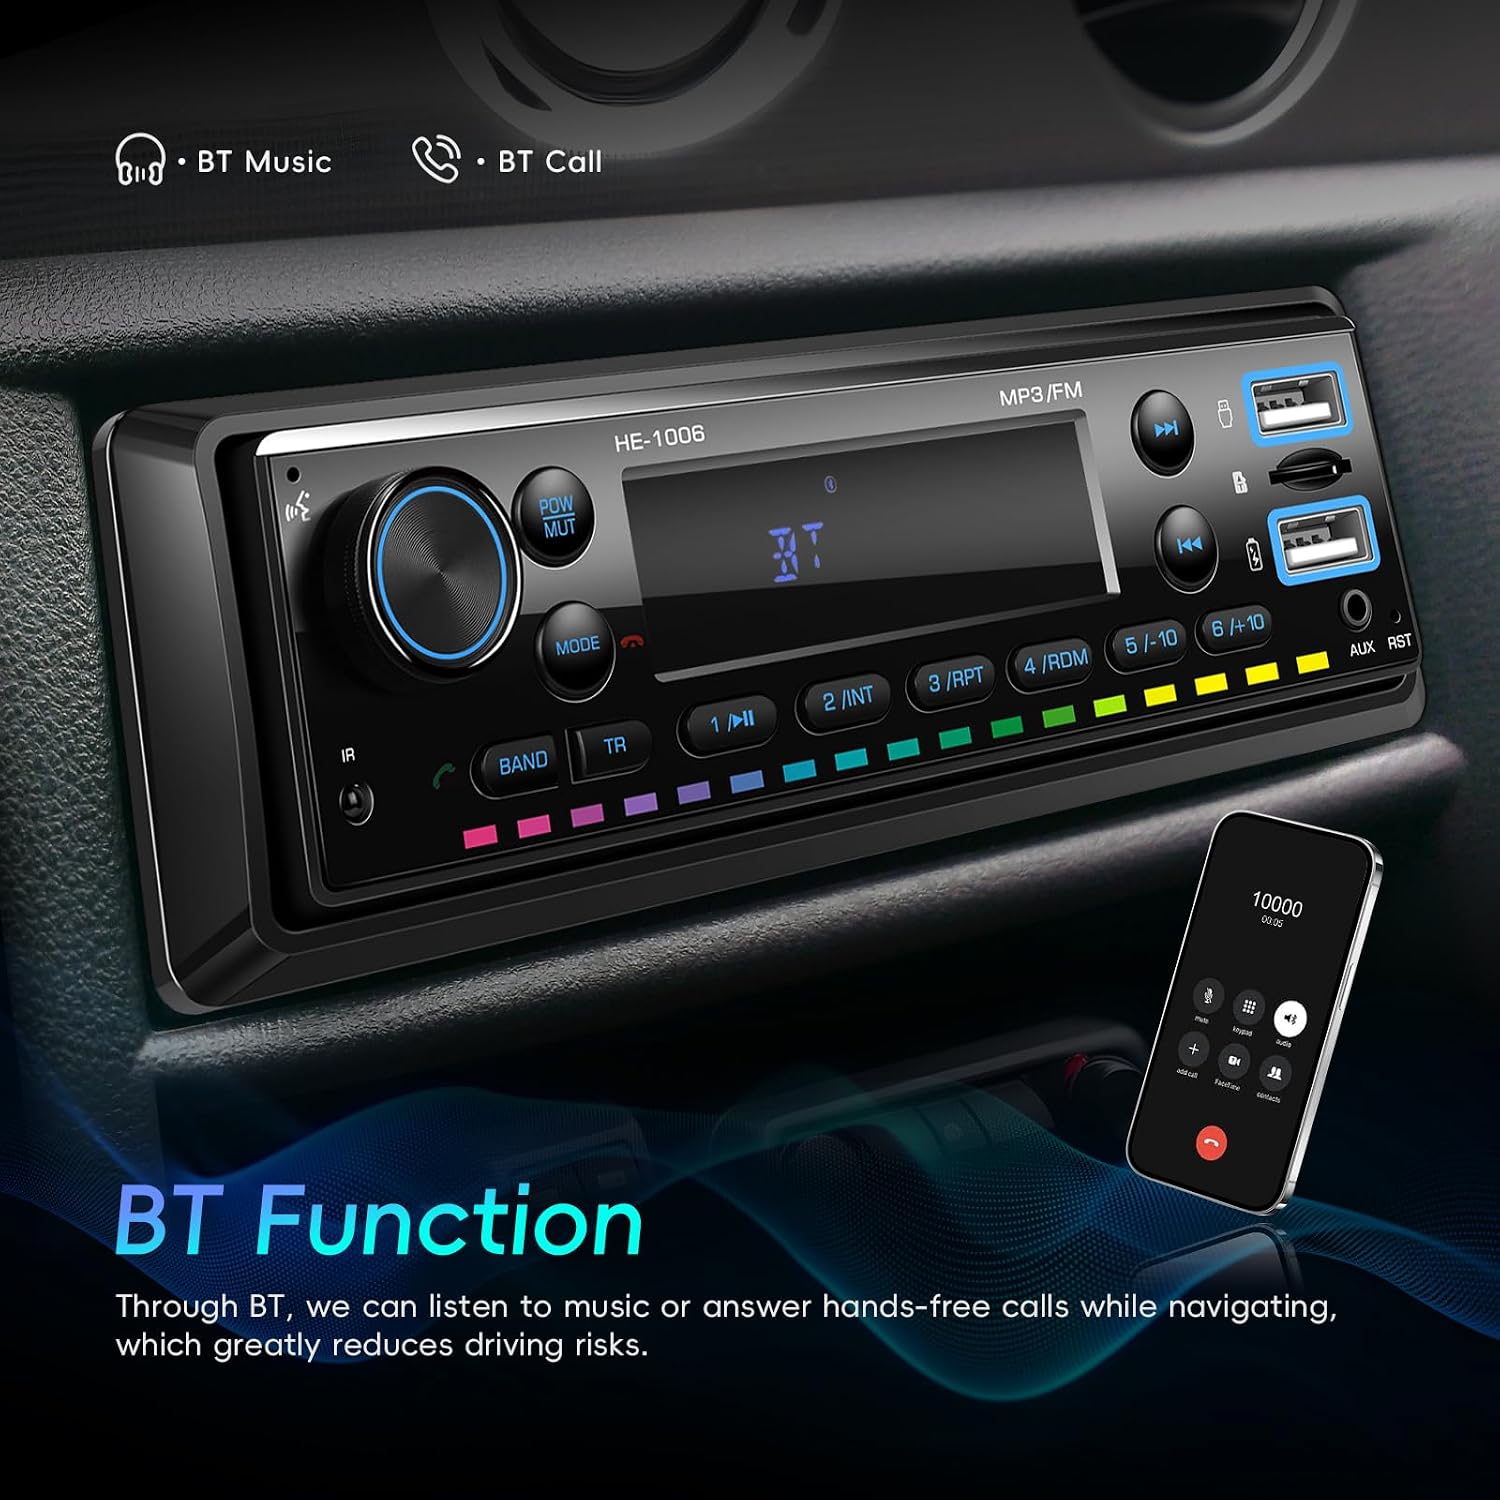
- Pairing:
- Ensure the stereo is in Bluetooth mode (display shows "BT").
- On your mobile device, enable Bluetooth and search for available devices.
- Select "CAR BT" or a similar name from the list. No password is typically required.
- Once paired, the display will indicate a successful connection.
- Hands-Free Calling:
- When a call comes in, the stereo will display the caller ID (if supported).
- Press the Answer button (often the volume knob press or a dedicated button) to accept the call.
- Press the End Call button to hang up.
- Bluetooth Audio Streaming:
- After pairing, play music from your mobile device. Audio will stream through the car stereo.
- Use the Previous/Next Track buttons on the stereo to control playback.
FM Radio Operation

- Select FM Mode: Press the MODE button until "FM" is displayed.
- Change Band: Press the BAND button to cycle through FM1, FM2, FM3. Each band can store 6 preset stations.
- Automatic Search: Press and hold the Previous/Next Track buttons to automatically search for the next strong station.
- Manual Search: Short press the Previous/Next Track buttons to fine-tune the frequency.
- Store Presets: Tune to a desired station, then press and hold one of the numeric preset buttons (1-6) until you hear a beep. The station is now saved.
- Recall Presets: Short press a numeric preset button (1-6) to recall a saved station.
USB/TF Card/AUX Input Playback

- USB Playback: Insert a USB flash drive into the designated USB port. The unit will automatically switch to USB mode and begin playing supported audio files (MP3/WMA/WAV/FLAC).
- TF Card Playback: Insert a TF (Micro SD) card into the TF card slot. The unit will automatically switch to TF mode and play supported audio files. Supports up to 32GB cards.
- AUX Input: Connect an external audio device (e.g., smartphone, MP3 player) to the 3.5mm AUX-IN jack using an audio cable. Press the MODE button to select AUX mode.
- Playback Controls: Use the Previous/Next Track buttons to skip tracks. Use the numeric preset buttons for functions like RPT (Repeat), RDM (Random), and INT (Intro Scan).
USB Fast Charging

The stereo features a dedicated USB port for fast charging. Connect your compatible device to this port to utilize the 3A current, 9V voltage, and 25W fast charging capabilities. The unit automatically detects and recognizes 5V and 9V devices.
Audio Settings (Equalizer)
Press the volume knob to cycle through audio settings such as Bass, Treble, Balance, Fader, and Equalizer (EQ) presets. Rotate the knob to adjust the selected setting.
Color Key Light Adjustment

The unit supports 7 colorful backlight displays for the buttons. The colors cycle automatically. Specific controls for manual color selection may be available through the menu settings (refer to the full user manual for advanced settings).
Maintenance
- Cleaning: Use a soft, dry cloth to clean the unit's surface. Do not use abrasive cleaners or solvents.
- Dust: Regularly remove dust from the front panel and around buttons to ensure smooth operation.
- Connections: Periodically check all wiring connections to ensure they are secure.
Troubleshooting
| Problem | Possible Cause | Solution |
|---|---|---|
| No power | Incorrect wiring; Blown fuse; Vehicle battery low. | Check power and ground connections. Inspect the fuse. Check vehicle battery. |
| No sound | Speaker wires disconnected; Volume too low; Mute function active; Incorrect audio source. | Check speaker connections. Increase volume. Deactivate mute. Select correct audio source. |
| Bluetooth not connecting | Bluetooth not enabled on device; Stereo not in Bluetooth mode; Device too far. | Ensure Bluetooth is on and discoverable. Switch stereo to BT mode. Bring device closer. |
| FM radio poor reception | Antenna not connected; Weak signal area; Damaged antenna. | Check antenna connection. Try a different location. Inspect antenna for damage. |
| USB/TF card not playing | Unsupported file format; Corrupted files; Card/drive not inserted correctly; Max capacity exceeded. | Ensure files are MP3/WMA/WAV/FLAC. Reinsert card/drive. Check card capacity (max 32GB). |
| Volume resets after power cycle | Unit design characteristic; Power connection issue (e.g., constant 12V not connected). | Ensure the yellow wire is connected to a constant 12V supply to retain settings. If issue persists, it may be a design feature. |
Specifications
| Feature | Detail |
|---|---|
| Model | HE-1006 |
| Screen Material | VALCD |
| Output Power | 4*45W (Amplifier: 7388) / 180 Watts Max |
| Operating Voltage | 10V-14.4V |
| Radio Frequency | 87.5-108MHZ (FM Band) |
| Operating Temperature | -10°C to 60°C |
| Audio Formats Supported | MP3/WMA/WAV/FLAC |
| Bluetooth Version | 5.0 |
| Microphone | Built-in, supports hands-free calling |
| Video Format | Not supported |
| Picture Format | Not supported |
| TF Card Support | Yes, up to 32GB |
| AUX-IN | Yes |
| USB Output Charge | Yes, 3A current, 9V voltage, 25W fast charging |
| Colorful Lights | 7-color key backlights |
| Product Dimensions (L x W x H) | 10 x 18.8 x 5.8 cm (3.94 x 7.40 x 2.28 inches) |
| Weight | 450 g |
Warranty and Support
Zomolither provides the following support for your product:
- Money-Back Guarantee: 30-day period from purchase.
- Replacement Warranty: 12-month period for product defects.
- Technical Support: 365 days, 24-hour lifetime technical support.
For technical assistance or warranty claims, please contact Zomolither customer service at: Zomolither@126.com