Introduction
This manual provides detailed instructions for the safe and effective operation, maintenance, and troubleshooting of your Oiiwak Endoscope Camera. Please read this manual thoroughly before using the device to ensure optimal performance and longevity.
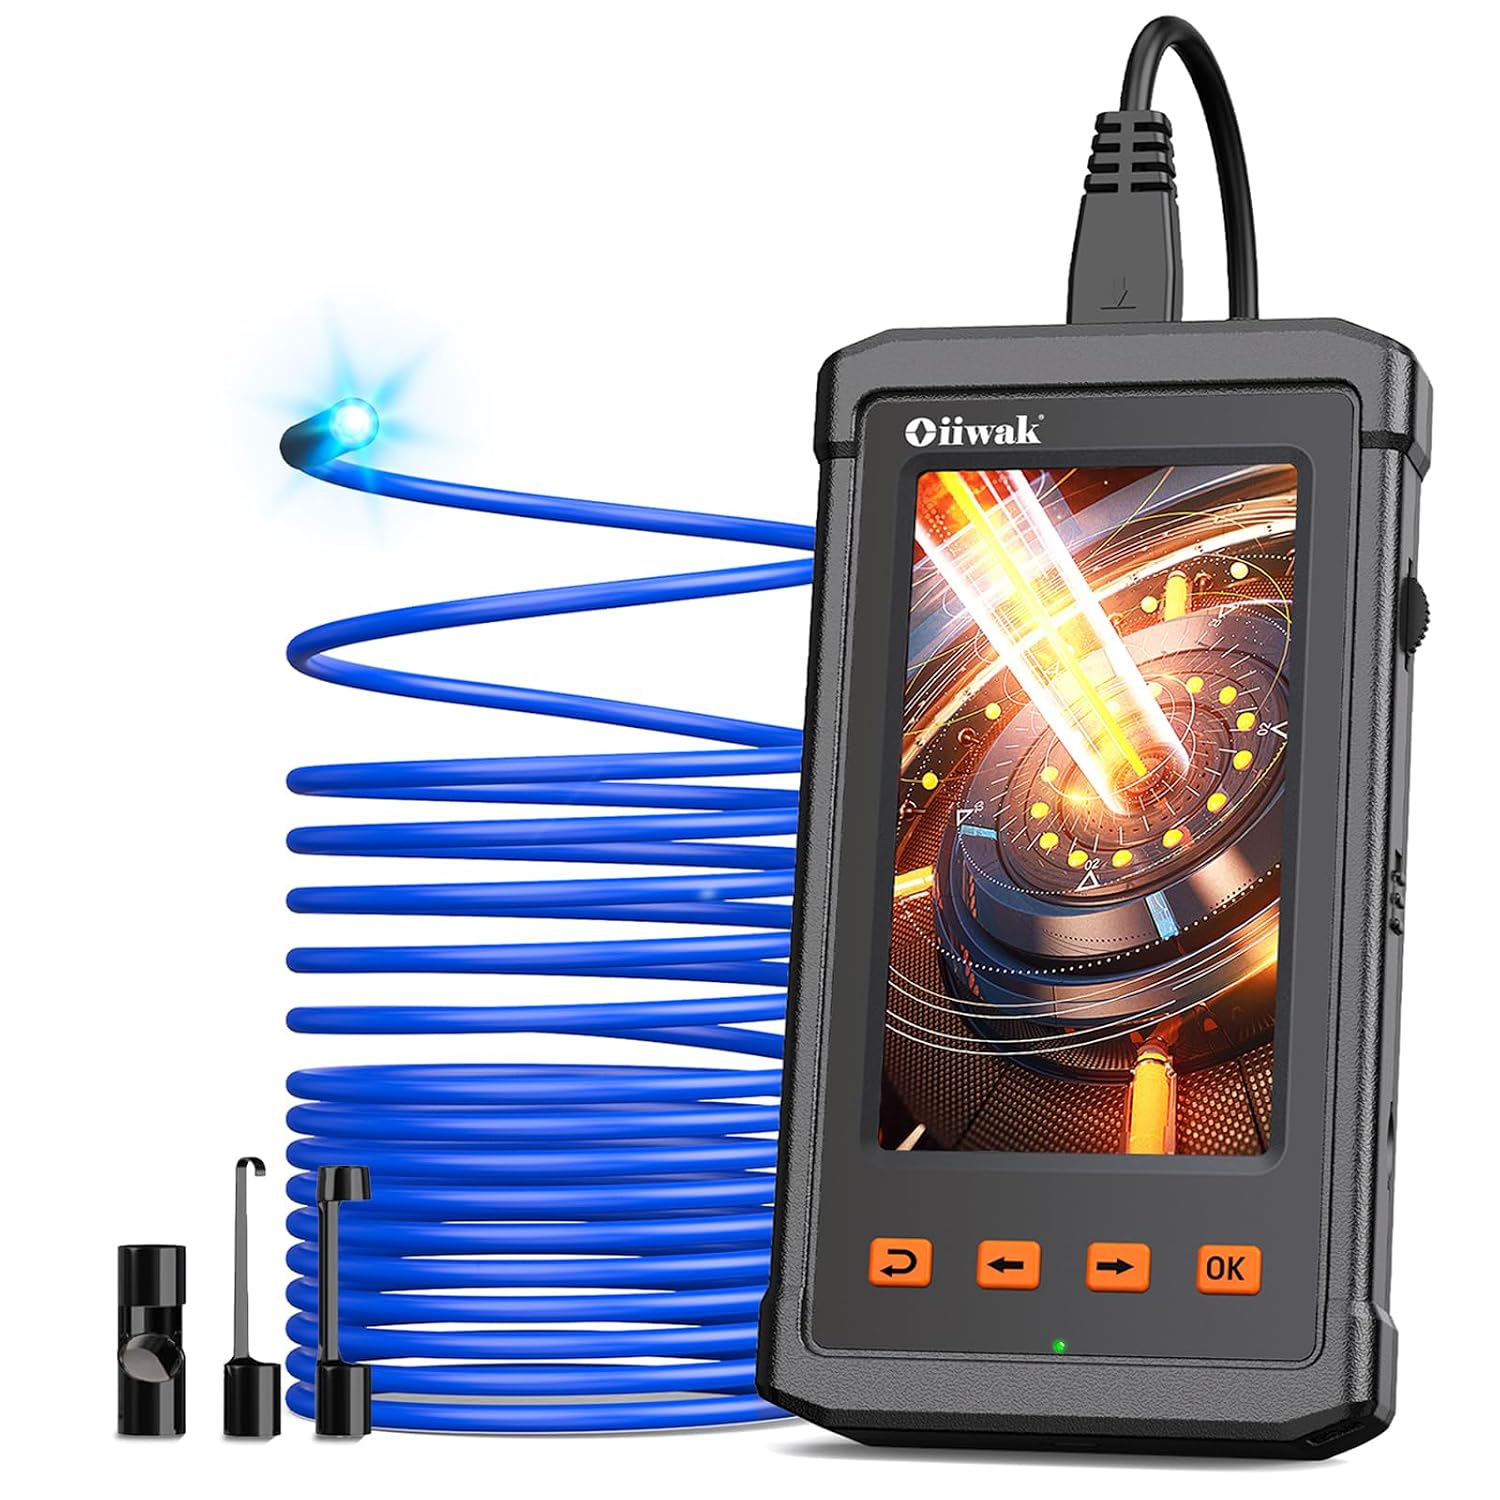
Figure 1: Oiiwak Endoscope Camera main unit with 11.5 ft semi-rigid cable and camera probe.
What's in the Box
Verify that all items are present in the package:
- 1 x Oiiwak Industrial Endoscope Main Unit
- 1 x Hard Case
- 1 x USB Cable (for charging and data transfer)
- 1 x Side View Mirror (accessory)
- 1 x Hook (accessory)
- 1 x Magnet (accessory)
- 1 x User Manual

Figure 2: Included accessories: hook, magnet, and side view mirror.
Setup
1. Charging the Device
Before first use, fully charge the endoscope camera. Connect the provided USB cable to the charging port on the device and to a standard USB power adapter (not included) or a computer USB port. The battery indicator on the screen will show charging status. A full charge provides up to 3.5 hours of continuous use.
2. Inserting the Micro SD Card
The device comes with an 8GB Micro SD card pre-installed for storing photos and videos. If you need to replace it, gently push the existing card to eject it, then insert a new Micro SD card (up to 32GB, Class 10 recommended) into the slot until it clicks into place.
3. Attaching Accessories
To attach the hook, magnet, or side view mirror, carefully screw the desired accessory onto the tip of the camera probe. Ensure it is securely fastened before use.
Operating Instructions
1. Power On/Off
To power on the device, slide the ON/OFF switch to the 'ON' position. The 4.3-inch IPS screen will light up, displaying the live camera feed. To power off, slide the switch to the 'OFF' position.
2. Basic Navigation and Controls
The device features intuitive buttons for easy operation:
- OK Button: Confirms selections, takes photos, starts/stops video recording.
- Arrow Buttons (Up/Down/Left/Right): Navigates menus, adjusts settings, and rotates the image.
- Return Button: Goes back to the previous screen or menu.

Figure 3: The endoscope is designed for easy, standalone operation without external apps or Wi-Fi.
3. Adjusting LED Brightness
The camera probe is equipped with 6 adjustable LED lights. Use the brightness adjustment wheel on the side of the main unit to increase or decrease the illumination as needed for clear visibility in dark environments.

Figure 4: The camera probe is IP67 waterproof and features 6 adjustable LED lights for optimal viewing.
4. Taking Photos and Recording Videos
From the live view screen, press the 'OK' button to take a photo. To record a video, navigate to the video recording icon using the arrow buttons and press 'OK' to start. Press 'OK' again to stop recording. All media is saved directly to the Micro SD card.
5. Viewing Stored Media
To view your photos and videos, navigate to the gallery icon using the arrow buttons and press 'OK'. Use the arrow buttons to browse through your media. Press 'OK' to play videos.
6. Adjusting Settings (Resolution, Zoom, Rotate, Language)
Access the settings menu by navigating to the gear icon and pressing 'OK'. Here you can adjust various parameters:
- Resolution: Select video resolution (e.g., 1920x1080 for HD clarity).
- Zoom Mode: Adjust the digital zoom level for closer inspection.
- Rotate Mode: Rotate the image 90, 180, or 270 degrees to adjust the viewing orientation.
- Language: Change the device's display language.
After making changes, press the 'Return' button to exit the settings menu.

Figure 5: The 4.3-inch IPS screen offers a wide 178° viewing angle for clear visuals.

Figure 6: The 11.5 ft semi-rigid cable provides flexibility while maintaining shape for navigation.
Demonstration Video
Video 1: Official Oiiwak demonstration of the endoscope's features and usage, including screen functions and probe capabilities.
Maintenance
- Cleaning: After each use, especially in dirty or wet environments, wipe the camera probe and cable with a damp cloth. For stubborn grime, use a mild detergent. Ensure the probe is dry before storage.
- Storage: Store the endoscope camera in its hard case in a cool, dry place away from direct sunlight and extreme temperatures.
- Battery Care: To prolong battery life, avoid fully discharging the battery frequently. Charge the device regularly, even if not in use for extended periods.
Troubleshooting
| Problem | Possible Cause | Solution |
|---|---|---|
| No image on screen | Device not powered on; Camera cable not connected; Low battery. | Slide ON/OFF switch to 'ON'; Ensure camera cable is securely plugged in; Charge the device. |
| Image is blurry/dark | Insufficient lighting; Dirty camera lens. | Adjust LED brightness; Clean the camera lens. |
| Cannot record/save media | Micro SD card full or not inserted correctly; Card error. | Check SD card insertion; Delete old files or replace card; Format the SD card (from settings menu). |
| Device freezes/unresponsive | Software glitch. | Power off and restart the device. |
Specifications
- Model: 006USBK
- Screen: 4.3-inch IPS Color Display
- Resolution: Up to 1920x1080 (Video), 2-megapixel (Camera)
- Camera Diameter: 5.5 mm
- Cable Length: 3.5 m / 11.5 ft
- Cable Type: Semi-rigid
- Waterproof Rating: IP67 (Camera Probe)
- Battery Capacity: 2800 mAh
- Working Time: Up to 3.5 hours
- Storage: Micro SD Card (8GB included, supports up to 32GB)
- Light Source: 6 Adjustable LED Lights
Warranty and Support
For warranty information or technical support, please refer to the contact details provided on the product packaging or visit the official Oiiwak website. Keep your purchase receipt as proof of purchase for warranty claims.
For additional resources and product information, you may visit the Oiiwak Store on Amazon.

