1. Safety Information
Please read and understand all instructions before assembly and use. Failure to follow these instructions may result in product damage or personal injury.
- Weather Conditions: Do not leave the gazebo up in heavy weather conditions, including strong winds, heavy rain, or snow. Disassemble and store the unit to prevent damage.
- Assembly: Adult assembly is required. It is recommended that two or more people assist with the setup for ease and safety.
- Fire Safety: Keep all flame and heat sources away from the gazebo fabric. The fabric is not fireproof.
- Securing: Always use the provided guy ropes and ground stakes to secure the gazebo firmly to the ground. Ensure all poles are properly connected and locked into place.
- Site Selection: Choose a level surface free from sharp objects or debris that could damage the fabric or frame.
2. Package Contents
Verify that all components are present before beginning assembly. If any parts are missing or damaged, contact customer support.
- Pop-Up Gazebo Frame with Mesh Sidewalls
- Removable Roof Cover (UPF30+, 1500mm water resistance)
- 4 Roll-up Wind Panels
- Fiberglass Poles (11mm)
- Guy Ropes
- Ground Stakes
- Portable Carry Bag
3. Setup Instructions
Follow these steps for quick and easy assembly of your pop-up gazebo.
- Unpack: Remove the gazebo from its portable carry bag.
- Expand Frame: Lay the folded frame on a flat surface. With assistance, gently pull the frame outwards from opposing sides until it begins to expand.

Figure 3.1: Initial setup steps, showing removal from carry bag and pulling side straps.
- Secure Frame: Continue to pull the straps on all sides to fully extend the pop-up mechanism until the frame is completely open and stable. Ensure all locking mechanisms (if present) are engaged.
- Attach Roof Cover: If desired, place the removable roof cover over the top of the frame. Secure it using the attached fasteners (e.g., hook-and-loop straps, clips) to ensure a snug fit.
- Ground Anchoring: Use the provided ground stakes to anchor each leg of the gazebo to the ground. For added stability, attach guy ropes to the designated points on the frame and stake them into the ground at an angle.

Figure 3.2: Securing the gazebo using fiberglass poles, ground stakes, and guy ropes.
4. Operating Instructions
Your gazebo offers versatile options for comfort and protection.
4.1 Removable Roof Cover
The roof cover provides UPF30+ sun protection and 1500mm water resistance.
- To Add: Place the roof cover over the frame and secure all attachment points. This provides shade and protection from light rain.
- To Remove: Unfasten all attachment points and carefully lift the roof cover off the frame. Removing the roof cover increases ventilation and allows for an open-air experience.

Figure 4.1: Demonstrating the removable roof cover for sun protection or ventilation.
4.2 Adjustable Mesh Sidewalls and Wind Panels
The gazebo features four mesh sidewalls with integrated roll-up wind panels for customizable enclosure.
- Mesh Sidewalls: The mesh provides insect protection and allows airflow.
- Roll-up Wind Panels: For increased airflow, roll up the wind panels and secure them at the top using the provided fasteners.
- Roll-down Wind Panels: For privacy or protection from light wind, roll down the wind panels. Secure them at the bottom to prevent flapping.
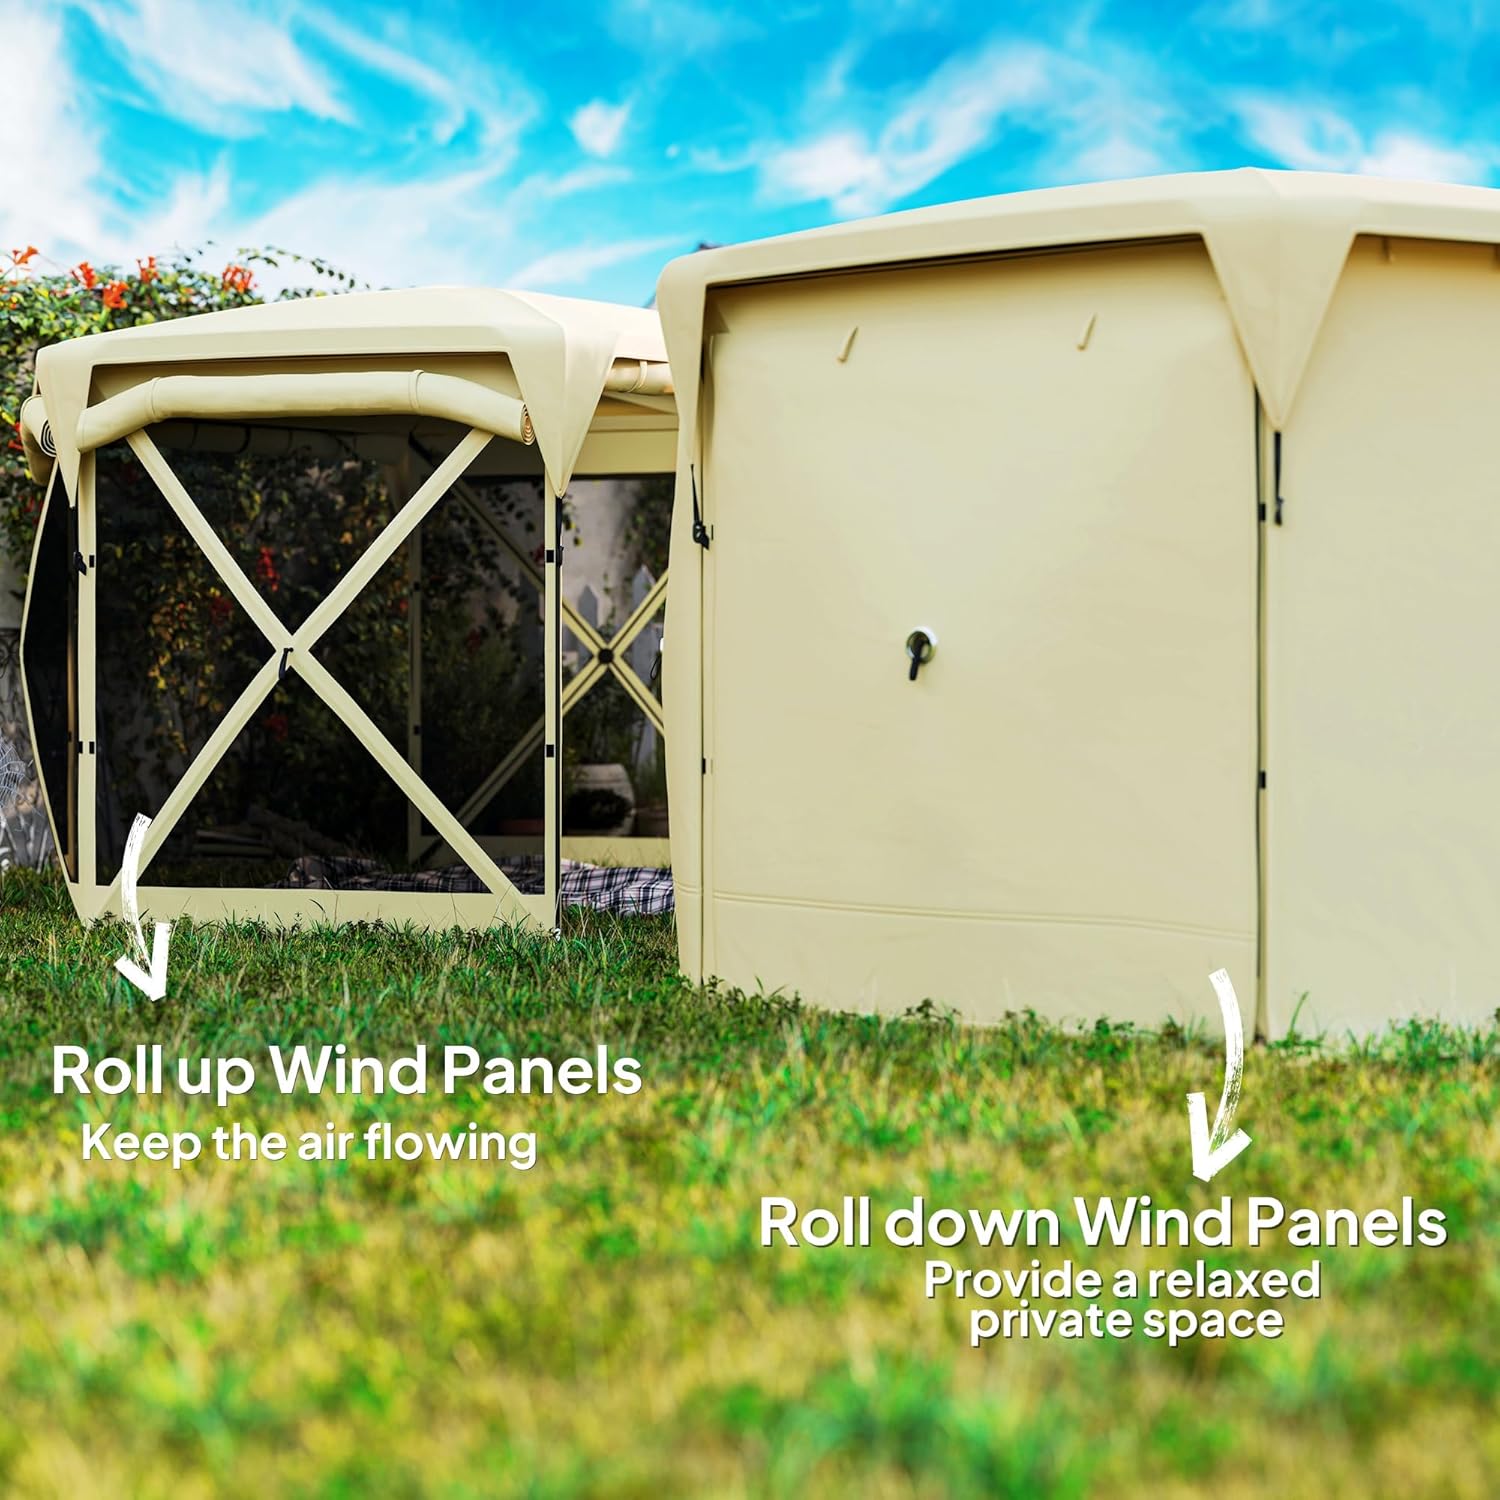
Figure 4.2: Using roll-up and roll-down wind panels for airflow or privacy.
Note: Two doors are included for easy access. These doors do not include mesh sidewalls.
5. Maintenance
Proper care will extend the life of your gazebo.
- Cleaning: Clean the fabric with a mild soap and water solution. Do not use harsh chemicals or abrasive cleaners. Rinse thoroughly and allow to air dry completely before storage.
- Frame Care: Wipe down the frame with a damp cloth as needed. Inspect poles for any damage or bending before each use.
- Storage: Ensure the gazebo is completely dry before folding and storing it in the carry bag. Store in a cool, dry place away from direct sunlight and extreme temperatures.
- Inspection: Periodically check all fasteners, ropes, and stakes for wear and tear. Replace any damaged components to maintain safety and stability.
6. Troubleshooting
Here are solutions to common issues you might encounter.
- Difficulty Setting Up: Ensure the frame is fully extended and all straps are pulled taut. Sometimes, a second person can help align and extend the frame more easily. Practice can improve setup speed.
- Gazebo Not Stable: Verify that all ground stakes are firmly inserted into the ground and guy ropes are properly tensioned. Ensure the setup surface is level. In windy conditions, additional weights (not included) may be necessary.
- Water Accumulation on Roof: Ensure the roof cover is taut and properly secured to prevent water from pooling. Remove any accumulated water promptly to avoid damage.
7. Specifications
Detailed product information for your Outsunny Pop Up Gazebo Screen Tent House.

Figure 7.1: Gazebo dimensions overview.
| Feature | Detail |
|---|---|
| Brand | Outsunny |
| Model Number | 84C-647V00BG |
| Item Dimensions (L x W x H) | 135.8"L x 135.8"W x 82.7"H (Corner to Corner: 135.8", Side to Side: 118.1") |
| Folded Dimensions (L x W x H) | 75.2" L x 9.8" W x 9.8" H |
| Size | 11 x 11 ft |
| Occupancy | 10-12 Person |
| Floor Area | 128 Square Feet |
| Item Weight | 32 Pounds |
| Material | Oxford fabric, Fiberglass |
| Frame Material | Fiberglass (11mm poles) |
| Color | Beige |
| UV Protection | UPF30+ (with roof cover) |
| Water Resistance Level | 1500mm (with roof cover) |
| Coverage | Mesh sidewalls with roll-up wind panels and removable UPF30+ water-resistant roof cover |
| Required Assembly | Yes |
8. Warranty and Support
For warranty information, missing parts, or technical support, please refer to the purchase documentation or contact Outsunny customer service directly. Keep your proof of purchase for any warranty claims.
Contact information can typically be found on the manufacturer's website or on the packaging.