1. Important Safety Instructions
Please read all instructions carefully before using this treadmill. Retain this manual for future reference.
- Always consult with a physician before starting any exercise program.
- Keep children and pets away from the treadmill during operation.
- Ensure the treadmill is placed on a flat, stable surface with adequate clearance around it.
- Always attach the safety key clip to your clothing before starting the treadmill. In case of emergency, the safety key will stop the machine.
- Wear appropriate athletic footwear and clothing. Do not operate the treadmill barefoot.
- Do not use the treadmill if it is damaged or malfunctioning.
- Keep hands and feet clear of the running belt and moving parts.
- Unplug the treadmill from the power outlet when not in use or before cleaning/maintenance.
2. Package Contents
Verify that all components are present in the package before assembly.

This image displays the complete set of items included with your LIVIVOX Walking Pad Treadmill, ensuring you have all necessary parts for setup and maintenance.
- LIVIVOX Walking Pad Treadmill Unit
- T-shape knob (x2)
- Knob (x2)
- Ball head pipe plug (x2)
- Safety Key (x1)
- L-shape wrench (x1)
- Silicone Oil (x1)
- User Manual (this document)
3. Product Overview & Components
Familiarize yourself with the main parts of your LIVIVOX Walking Pad Treadmill.
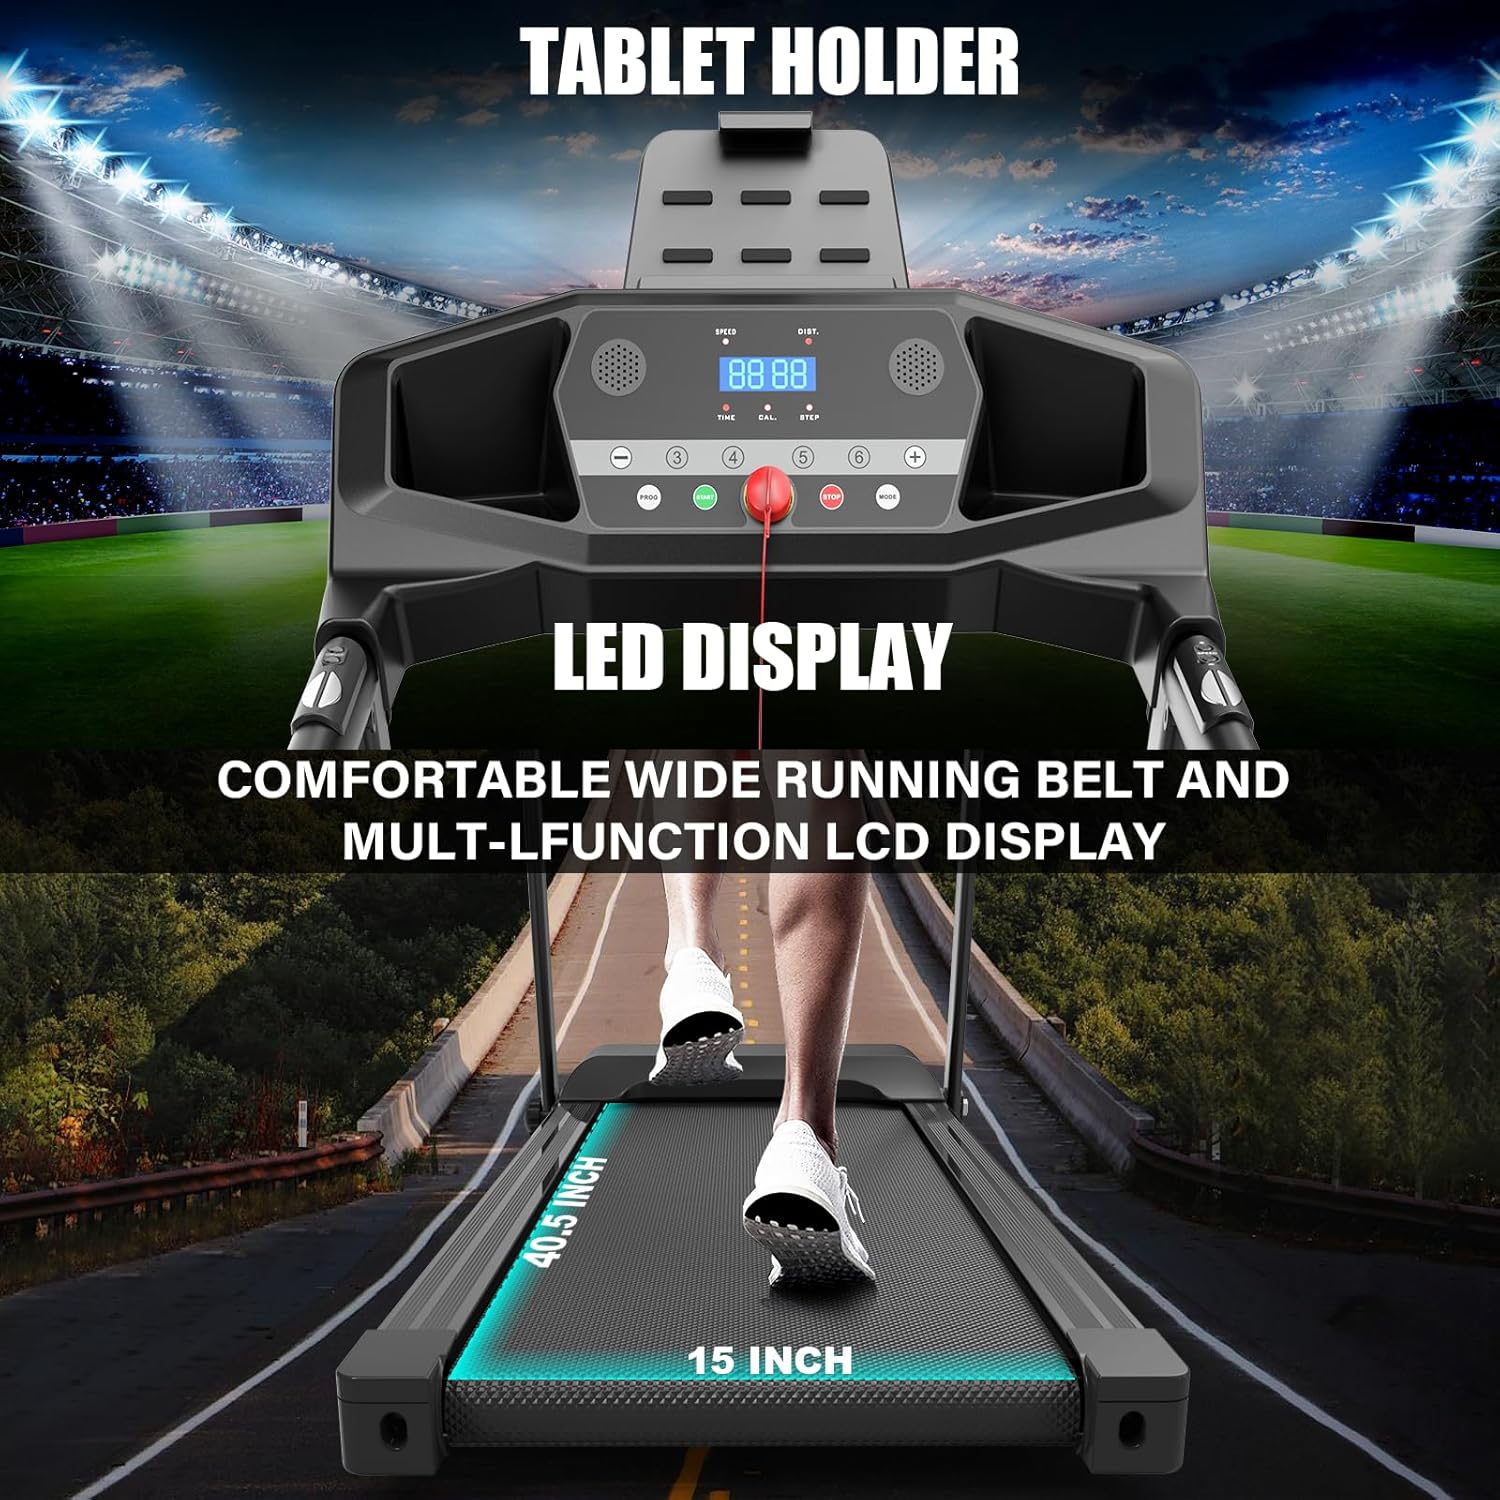
This image highlights the treadmill's control panel with its LED display, tablet holder, and the comfortable wide running belt, essential for tracking your workout and entertainment.

This image provides a detailed look at key features such as the powerful 2.5HP motor, the manual incline adjustment, the safety key for emergency stops, integrated heart rate handles, a convenient cup holder, and wheels for easy transport.
- Control Panel: Features an LCD display for tracking metrics, speed/program controls, and a tablet holder.
- Running Belt: A comfortable, wide, and multi-layered belt designed for shock absorption and joint protection.
- Motor: Equipped with a 2.5HP motor for smooth and quiet operation.
- Safety Key: Magnetic key for immediate stop in emergencies.
- Heart Rate Handles: Integrated sensors for heart rate monitoring.
- Manual Incline: Adjustable incline settings for varied workout intensity.
- Transport Wheels: For easy movement and storage of the folded treadmill.
4. Setup & Assembly
The LIVIVOX Walking Pad Treadmill comes largely pre-assembled. Follow these steps for quick setup.

This diagram illustrates the treadmill's dimensions in both its operational (unfolded) and storage (folded) configurations, demonstrating its compact design and ease of storage.

These images show the simple one-step folding process, highlighting how effortlessly the treadmill can be folded for compact storage and moved using its integrated wheels.
- Unpacking: Carefully remove the treadmill from its packaging.
- Unfolding: Gently lift the running deck until it locks into the upright position. Ensure all locking mechanisms are securely engaged.
- Positioning: Place the treadmill on a firm, level surface. Ensure there is at least 2 feet of clearance on the sides and 6 feet at the rear for safety.
- Power Connection: Plug the power cord into a grounded electrical outlet.
- Manual Incline Adjustment: If desired, adjust the manual incline to one of the available levels before starting your workout.
5. Operating Instructions
Learn how to effectively use your LIVIVOX Walking Pad Treadmill for your fitness routine.

This image illustrates the treadmill's ability to track and display key workout metrics such as calories burned, heart rate, steps taken, and distance covered, providing comprehensive feedback during your exercise.
5.1 Control Panel Overview
The LCD display provides real-time feedback on your workout, including speed, distance, heart rate, and calories burned.
5.2 Starting and Stopping the Treadmill
- To Start: Attach the safety key to your clothing. Press the 'START' button on the control panel. The belt will begin to move at a low speed.
- To Stop: Press the 'STOP' button. For immediate stop, pull the safety key from the console.
5.3 Adjusting Speed and Incline
- Speed: Use the '+' and '-' buttons to increase or decrease the speed. The speed range is 0.5 to 7.5 MPH.
- Incline: The treadmill features a manual incline. Adjust the incline level by physically repositioning the support bars at the rear of the treadmill before starting your workout.
5.4 Preset Programs
The treadmill includes 12 preset programs designed for various fitness goals. Select a program using the 'PROGRAM' button and follow the on-screen instructions.
5.5 Using the Safety Key
The safety key is a critical safety feature. Always clip it to your clothing. If the key is dislodged, the treadmill will immediately stop, preventing potential injury.
6. Maintenance & Care
Regular maintenance ensures the longevity and optimal performance of your treadmill.

This image provides a close-up view of the non-slip, wear-resistant surface of the treadmill belt, highlighting its durable and safe design.
- Cleaning: Wipe down the treadmill surfaces with a damp cloth after each use. Avoid using abrasive cleaners.
- Lubrication: The running belt requires periodic lubrication with the provided silicone oil. Refer to the specific instructions in the full manual for frequency and application.
- Belt Tension & Alignment: Check the running belt tension and alignment regularly. Adjust if necessary using the included L-shape wrench. Refer to the full manual for detailed instructions.
- Storage: When not in use, fold the treadmill for compact storage. Ensure it is stored in a dry, cool place.
7. Troubleshooting Guide
This section addresses common issues you might encounter with your treadmill.
| Problem | Possible Cause | Solution |
|---|---|---|
| Treadmill does not start | Power cord not plugged in; Safety key not in place; Power switch off. | Ensure power cord is securely plugged in; Insert safety key fully; Turn on power switch. |
| Running belt slips or hesitates | Belt too loose; Belt needs lubrication. | Adjust belt tension (refer to manual); Apply silicone oil to the belt. |
| Unusual noise during operation | Loose parts; Belt rubbing; Motor issue. | Check for and tighten any loose bolts; Adjust belt alignment; If noise persists, contact customer support. |
| Display not working | Loose connection; Power issue. | Check all cable connections; Ensure stable power supply. |
If you encounter issues not listed here or if solutions do not resolve the problem, please contact LIVIVOX customer support.
8. Product Specifications
Detailed technical specifications for the LIVIVOX Walking Pad Treadmill.

This image provides a visual summary of the treadmill's physical dimensions and core performance specifications, including product size, running surface, weight capacity, and motor power.
| Specification | Value |
|---|---|
| Brand | LIVIVOX |
| Model | B0DWY1LF56 |
| Product Dimensions (Unfolded) | 50"D x 24.8"W x 42.5"H |
| Folded Size | 50 x 24.8 x 42.5 inches |
| Item Weight | 66 Pounds |
| Maximum Weight Recommendation | 265 Pounds |
| Maximum Horsepower | 2.5 Horsepower |
| Speed Range | 0.5 - 7.5 Miles per Hour |
| Maximum Incline Percentage | 10% (Manual) |
| Running Surface (Deck) | 40.5"L x 15"W |
| Display Type | LCD |
| Metrics Measured | Calories Burned, Distance, Heart Rate, Speed, Time |
| Material | Alloy Steel, Metal, Plastic |
| Assembly Required | No (Minimal setup) |
9. Warranty and Customer Support
LIVIVOX is committed to providing excellent customer service and product reliability.
- Warranty: This product includes a 1-year warranty from the date of purchase. This warranty covers manufacturing defects and workmanship. Please retain your proof of purchase.
- Customer Support: For any questions, troubleshooting assistance, or warranty claims, please contact LIVIVOX customer service. We offer round-the-clock support to address your concerns promptly.
- Contact Information: Please refer to the contact details provided on the product packaging or the official LIVIVOX website for the most up-to-date support channels.