1. Introduction
Thank you for choosing the CREWORKS 25cm 350W Electric Pottery Wheel. This manual provides essential information for the safe and efficient operation of your new pottery wheel. Please read all instructions carefully before use and retain this manual for future reference.
This electric pottery wheel features a 25 cm reversible turntable and a powerful 350W motor, suitable for various pottery projects and skill levels. Its design emphasizes durability, safety, and ease of use, making it an ideal tool for both beginners and experienced potters.
2. Important Safety Instructions
To reduce the risk of fire, electric shock, or injury, always follow these basic safety precautions:
- Read all instructions: Familiarize yourself with the controls and proper use of the pottery wheel.
- Electrical Safety: Ensure the power supply matches the voltage requirements of the machine. Do not operate with wet hands or in wet conditions. Always plug into a grounded outlet.
- Integrated Circuit Breaker (RCD): The machine is equipped with an RCD for enhanced safety. Test the RCD before each use by pressing the "TEST" button. The RCD should trip. Reset it by pressing "RESET" or flipping the switch to "OPEN". If it does not trip, do not use the machine and contact support.
- Supervision: Close supervision is necessary when the pottery wheel is used by or near children or individuals with reduced physical, sensory, or mental capabilities.
- Clear Workspace: Keep your workspace clean, well-lit, and free from clutter.
- Personal Safety: Wear appropriate clothing; avoid loose clothing, jewelry, or long hair that could get caught in moving parts.
- Maintenance: Disconnect the power cord before cleaning or performing any maintenance.
- Intended Use: Use the pottery wheel only for its intended purpose of shaping clay.
3. Package Contents
Upon unpacking, please ensure all items are present and undamaged:
- CREWORKS Electric Pottery Wheel (Main Unit)
- Removable ABS Splash Basin
- Foot Pedal
- 8-Piece Clay Sculpting Tool Set
- User Manual

Figure 3.1: Pottery wheel and included accessories.
4. Product Overview
Familiarize yourself with the main components of your pottery wheel:
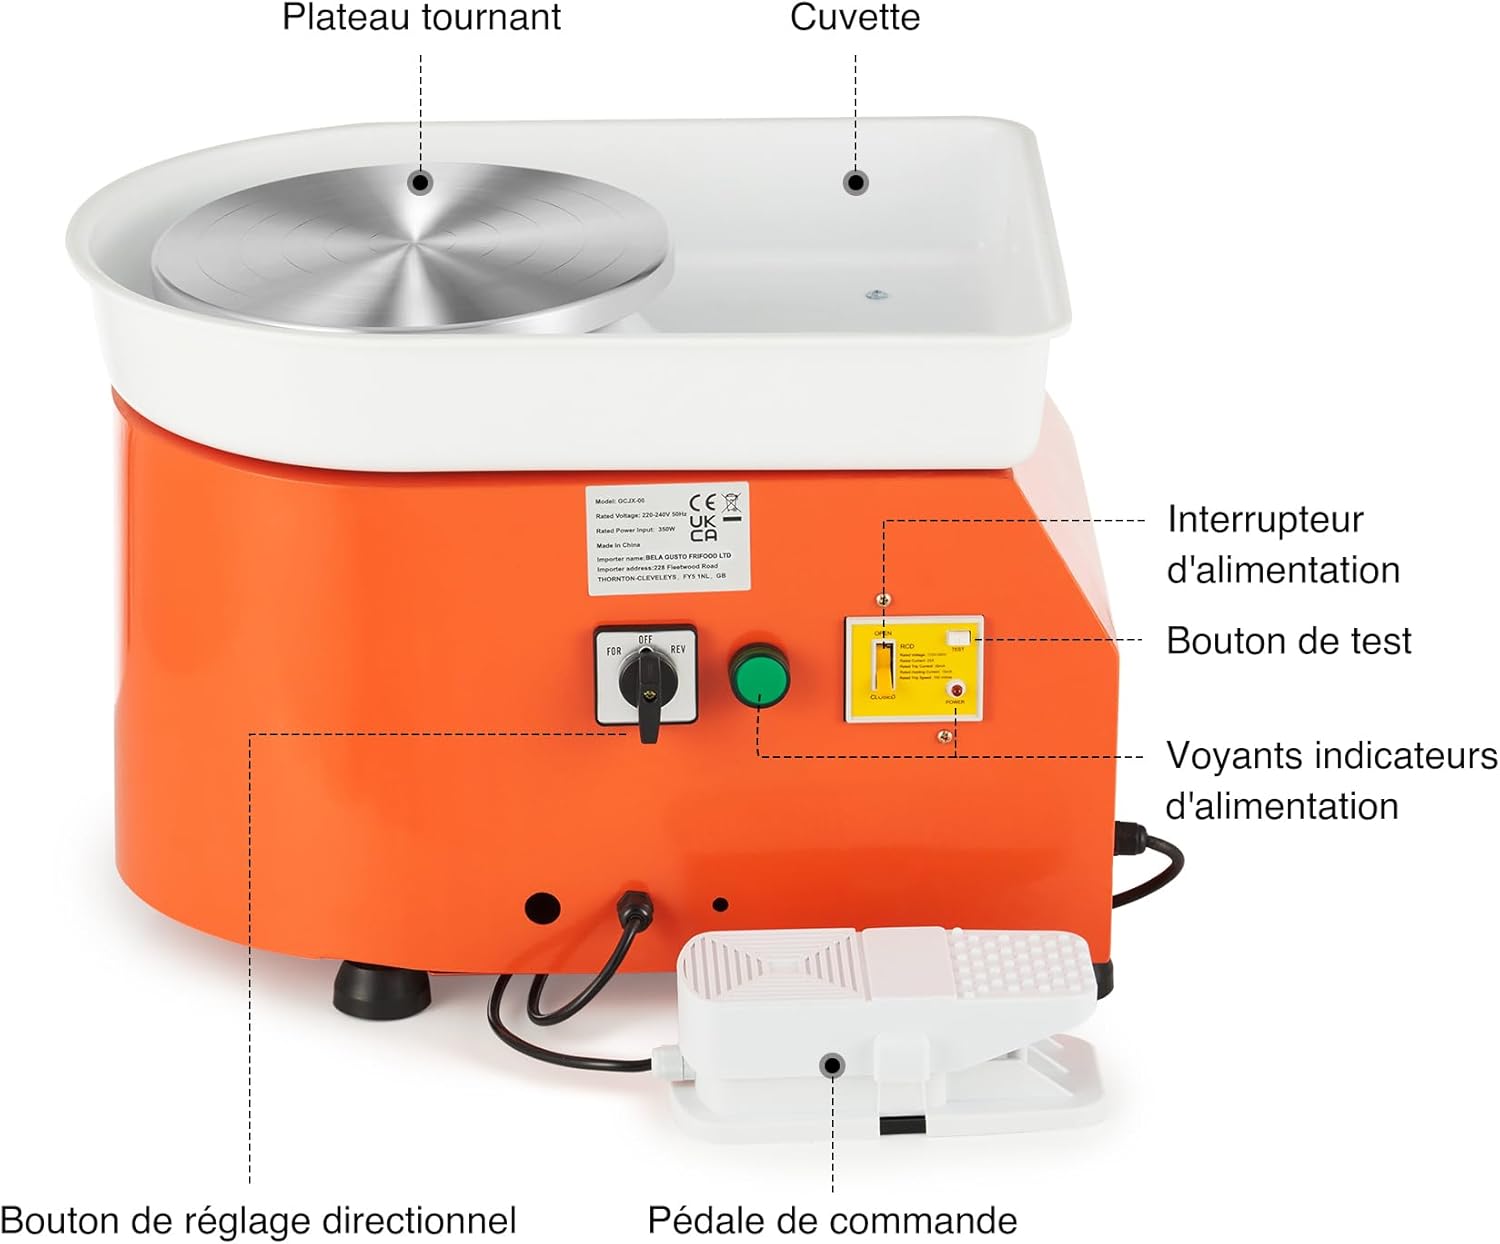
Figure 4.1: Main components of the pottery wheel.
- Turntable (Wheel Head): 25 cm aluminum alloy wheel for shaping clay.
- Splash Basin: Removable ABS basin to contain water and clay splatter.
- Power Switch: Turns the machine ON/OFF.
- Directional Adjustment Knob (FOR/REV): Selects clockwise (FOR) or counter-clockwise (REV) rotation.
- Foot Pedal: Controls the speed of the turntable.
- RCD (Residual Current Device): Integrated safety device with TEST and RESET buttons.
- Power Indicator Lights: Indicate power status.

Figure 4.2: Directional Switch.

Figure 4.3: RCD (Circuit Breaker).

Figure 4.4: Foot Pedal for Speed Control.

Figure 4.5: Aluminum Alloy Turntable.
5. Setup
- Unpacking: Carefully remove all components from the packaging. Inspect for any damage during transit.
- Placement: Place the pottery wheel on a stable, level surface. Ensure there is adequate space around the machine for comfortable operation and to prevent clay splatter from affecting other items.
- Attach Splash Basin: Position the removable ABS splash basin around the turntable. Ensure it is securely seated to prevent leaks.
- Connect Foot Pedal: Plug the foot pedal cable into the designated port on the side of the pottery wheel.
- Power Connection: Plug the power cord into a grounded electrical outlet.
- RCD Test: Before first use and each subsequent use, perform the RCD test as described in the Safety Instructions (Section 2).

Figure 5.1: Pottery wheel dimensions and typical usage environments.
6. Operating Instructions
- Power On: Flip the main power switch to the "ON" position. The power indicator light should illuminate.
- Select Rotation Direction: Use the directional adjustment knob (FOR/REV) to select your desired rotation. "FOR" is clockwise, and "REV" is counter-clockwise. This allows for comfortable use by both right-handed and left-handed individuals.
- Place Clay: Center a lump of prepared clay firmly on the turntable.
- Control Speed: Gently press the foot pedal to start the turntable rotation. Increase pressure on the pedal to increase the speed (up to 300 RPM). Release pressure to slow down or stop the wheel. This hands-free control allows you to use both hands for shaping the clay.
- Shaping: Begin shaping your clay using appropriate techniques and tools. Maintain a consistent speed for best results.
- Power Off: Once finished, release the foot pedal, turn the main power switch to "OFF", and unplug the machine from the power outlet.
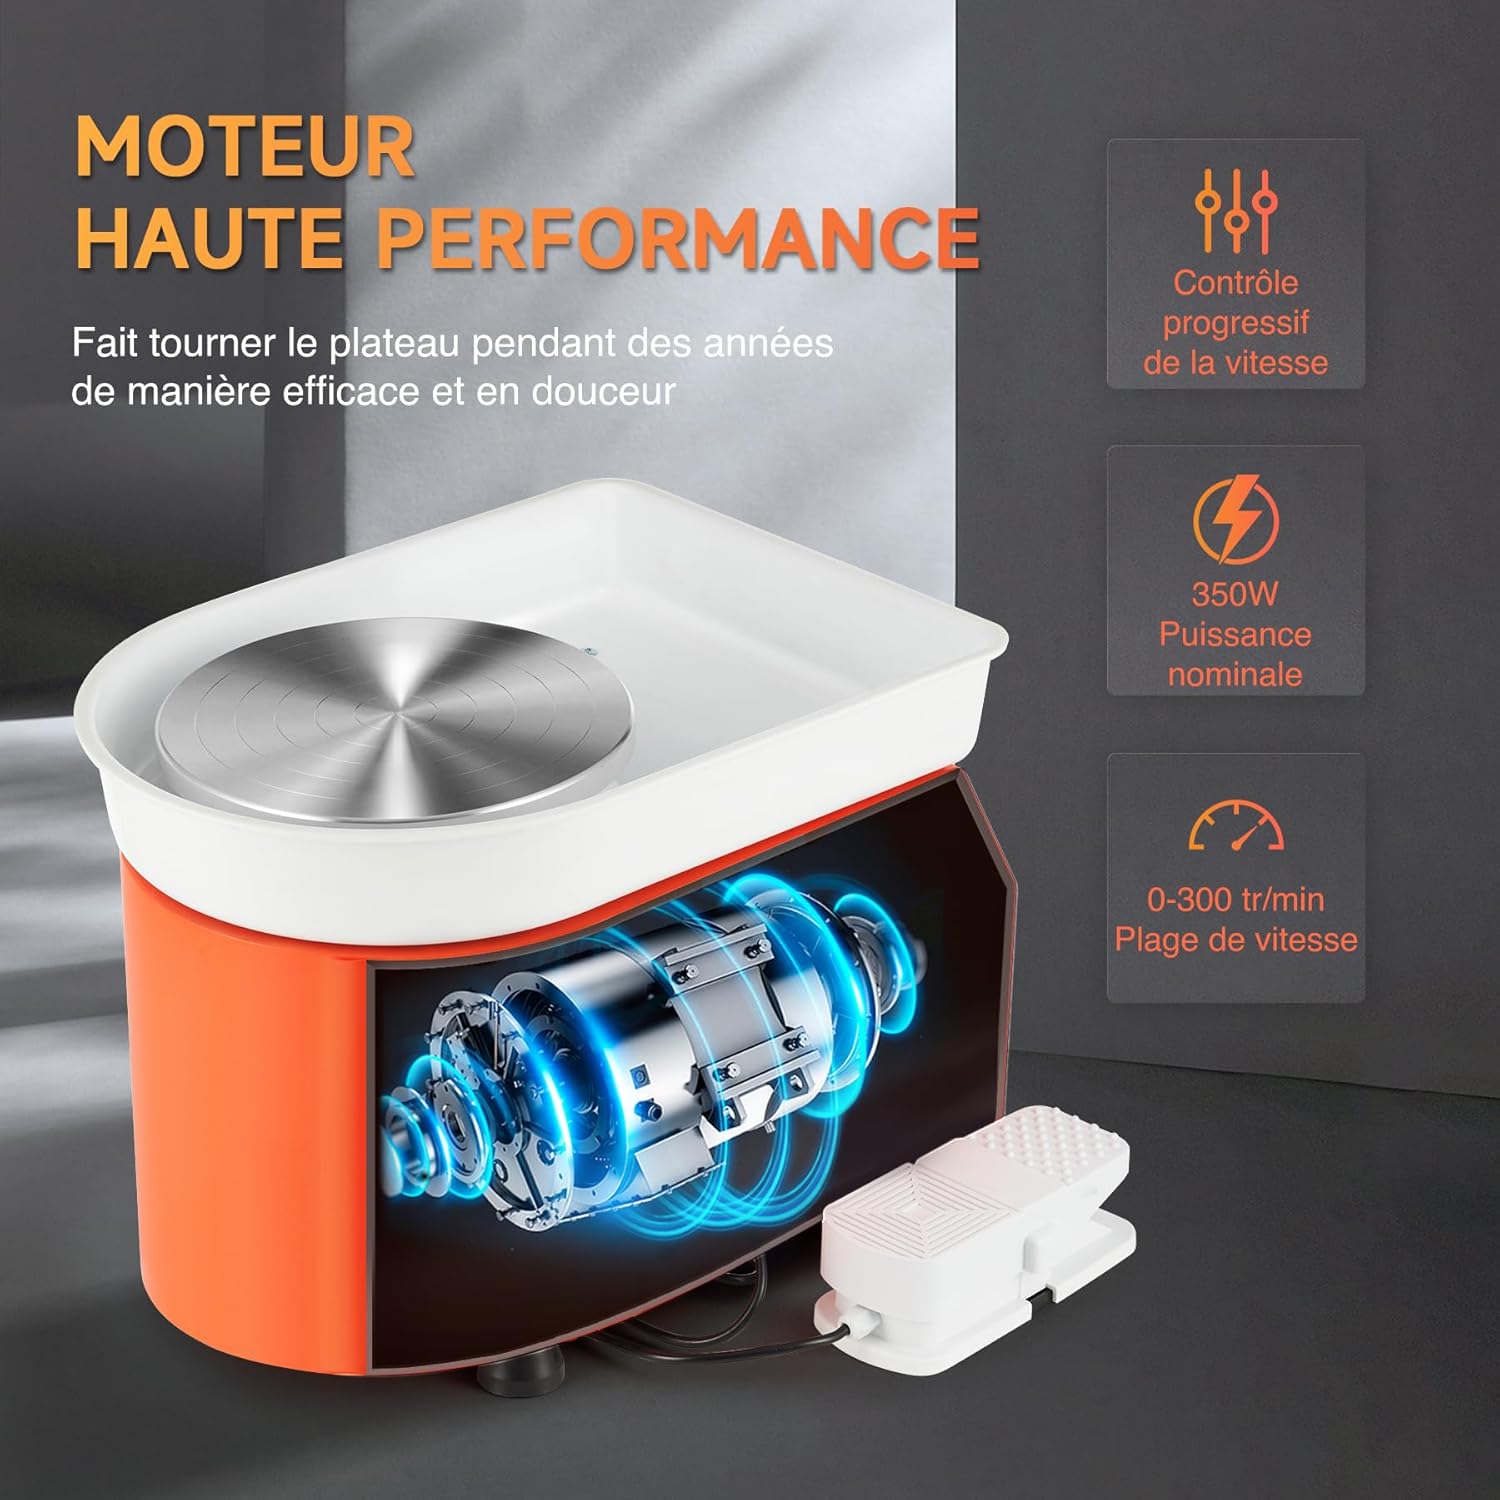
Figure 6.1: Hands-free speed control using the foot pedal.

Figure 6.2: Shaping clay on the pottery wheel.
7. Maintenance
Regular cleaning and maintenance will ensure the longevity and optimal performance of your pottery wheel.
- Disconnect Power: Always unplug the pottery wheel from the power outlet before cleaning or performing any maintenance.
- Clean Splash Basin: Remove the ABS splash basin and thoroughly clean it after each use to prevent clay buildup. Rinse with water and wipe dry.
- Clean Turntable: Wipe down the aluminum turntable with a damp cloth to remove any clay residue. Avoid using abrasive cleaners that could scratch the surface.
- Clean Machine Body: Wipe the main body of the machine with a damp cloth. Ensure no water enters the electrical components.
- Storage: Store the pottery wheel in a dry, dust-free environment when not in use.
- Avoid Water Immersion: Never immerse the main unit of the pottery wheel in water.
8. Troubleshooting
If you encounter any issues, refer to the following troubleshooting guide:
| Problem | Possible Cause | Solution |
|---|---|---|
| Pottery wheel does not start. |
|
|
| Turntable rotates unevenly or with difficulty. |
|
|
| Machine makes unusual noise. |
|
|
For problems not listed above, or if solutions do not resolve the issue, please contact CREWORKS customer support.
9. Specifications
| Brand | CREWORKS |
| Model Number | LPJ-NLJ1-EU |
| Power | 350W |
| Turntable Diameter | 25 cm (9.8 inches) |
| Speed Range | 0-300 RPM (Adjustable) |
| Rotation Direction | Clockwise / Counter-clockwise (Reversible) |
| Material | Aluminum (Turntable), Steel (Body), ABS (Splash Basin) |
| Product Dimensions (L x W x H) | 50 x 36 x 36 cm (19.7 x 14.2 x 14.2 inches) |
| Item Weight | 11.4 kg (25.1 lbs) |
| Color | Orange |
10. Warranty and Support
CREWORKS products are designed for durability and performance. For warranty information, technical support, or service inquiries, please refer to the warranty card included with your product or contact CREWORKS customer service directly. Please have your model number (LPJ-NLJ1-EU) and purchase date available when contacting support.