Introduction
This manual provides detailed instructions for the installation, operation, maintenance, and troubleshooting of your AUTO-VOX 2 Solar Wireless Backup Camera System. Please read this manual thoroughly before using the product to ensure proper function and safety.
Safety Information
- Always operate your vehicle safely. This system is an aid and should not replace careful driving and observation.
- Ensure all components are securely installed to prevent obstruction of driver's view or interference with vehicle controls.
- Do not attempt to disassemble or modify the system. Refer all servicing to qualified personnel.
- Keep the cameras and monitor clean for optimal performance.
- The system is designed for specific voltage (12 Volts). Do not connect to incompatible power sources.
Package Contents
Verify that all items are present in your package:
- 7.2" Monitor
- Monitor Mount
- Video Cable
- Rear Camera x 2 (one license plate, one portable)
- Car Charger
- User Manual
- Installation Tool
- Solar panel built into the backup camera (integrated)

Image: Overview of the system components, including the 7.2-inch monitor, two rear cameras, car charger, and various accessories.
Setup and Installation
The AUTO-VOX 2 Solar Wireless Backup Camera System is designed for quick and easy installation, typically within 3 minutes, requiring no drilling or complex wiring.
1. Camera Installation (License Plate Camera)
- Mounting: Position the license plate camera behind your vehicle's license plate. Ensure it does not obstruct the plate or any vehicle lights.
- Secure: Use the provided screws to firmly attach the camera and license plate to your vehicle. The camera is designed with a barrier-free profile to avoid blocking door handles.

Image: Visual steps for installing the license plate camera, demonstrating its placement and securing with screws.
Image: Comprehensive view of the installation process, from mounting the camera to setting up the monitor inside the vehicle.
2. Portable Camera Use
The second camera offers flexibility and can be used temporarily with its magnetic base or permanently mounted with screws. This is ideal for trailers, campers, or horse haulers.
3. Monitor Setup
- Placement: Attach the 7.2" monitor to your vehicle's dashboard using the provided mount. Choose a location that does not obstruct your view of the road.
- Power Connection: Plug the monitor's power cable into your vehicle's 12V lighter socket. The system will power on automatically.
Operating Instructions
Powering On/Off
The monitor powers on automatically when connected to the vehicle's 12V lighter socket and the vehicle is started. It will power off when the vehicle is turned off or the power is disconnected.
Dual Camera Display and Split-Screen Functionality
The system supports two cameras, allowing for enhanced rear and blind spot visibility. The 7.2" HD monitor features a 16:9 wide display and supports a dual split-screen view.
- Split-Screen: View feeds from both cameras simultaneously on the monitor. This is useful for monitoring a trailer while also having a view of the rear of your primary vehicle.
- Switching Views: Refer to the monitor's controls to switch between single camera views or activate the split-screen mode.
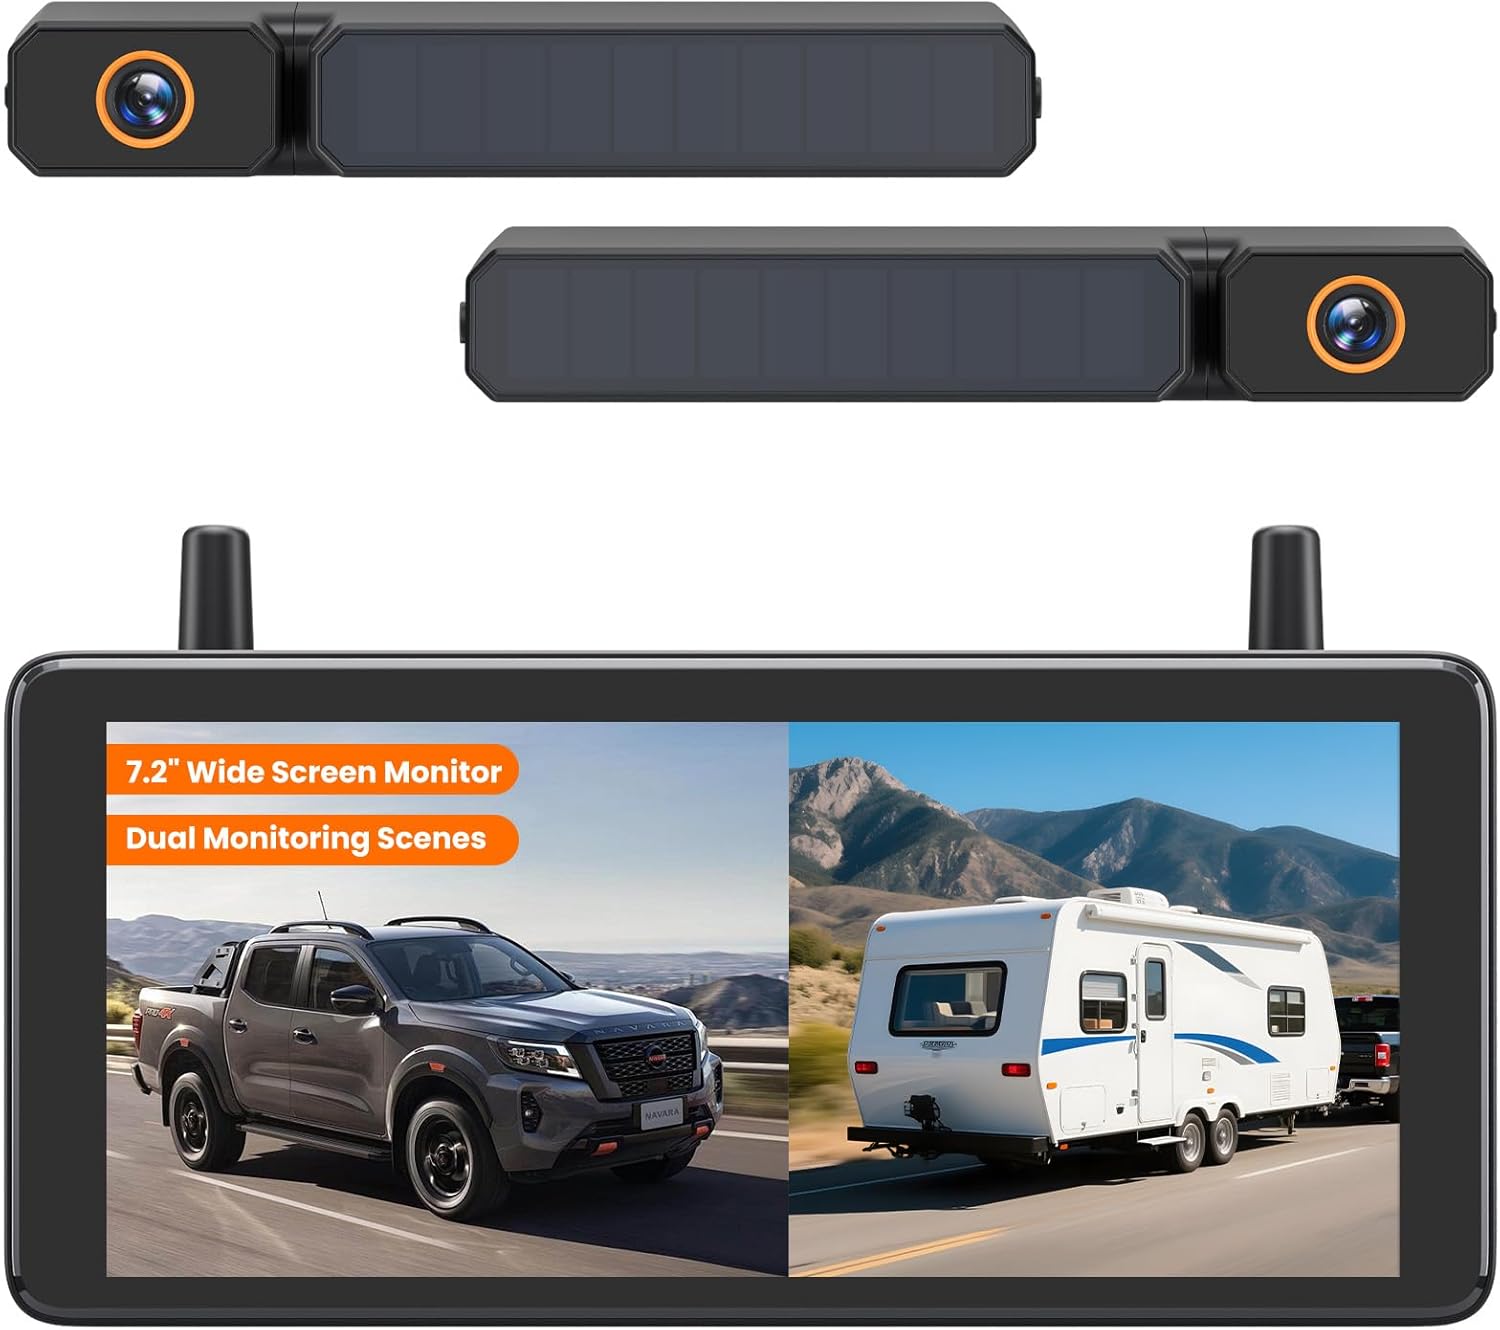
Image: The monitor showing a split-screen view, ideal for simultaneously monitoring the vehicle's rear and a towed trailer.

Image: Illustration of the split-screen capability, highlighting its utility for eliminating blind spots and providing a full view.
1080P HD Imaging and Night Vision
The cameras provide 1080P HD resolution for clear visuals. Integrated infrared night vision ensures visibility in low-light conditions, enhancing safety during nighttime reversing or monitoring.

Image: Demonstrates the camera's clear 1080P HD imaging during daylight and its effective night vision capability in dark environments.

Image: Illustrates the advanced night vision feature, providing clear and detailed views even in challenging low-light conditions.
Adjustable Guidelines and Image Flip
The monitor allows for customization of parking guidelines to match your driving style and vehicle dimensions. The camera image can also be flipped to accommodate various mounting orientations.

Image: Demonstrates the adjustable parking guidelines, allowing users to customize their position and width for precise maneuvering.

Image: Shows the image flip functionality, enabling flexible camera mounting without affecting the correct display orientation.
DVR Loop Recording
The system includes DVR functionality, recording footage onto the included 32GB SD card. This provides a record of your journeys and can automatically lock footage during collisions or sudden impacts.
- Continuous Recording: The system records continuously, overwriting older footage when the SD card is full.
- Event Lock: In case of a collision or sudden bump, the system automatically locks the current recording to prevent it from being overwritten.

Image: Depicts the DVR loop recording feature, showing the monitor with a recording indicator and a visual representation of continuous video capture.

Image: Highlights the DVR's ability to record and protect important footage, particularly in the event of an impact, ensuring critical moments are saved.
Maintenance
Charging the Cameras
The cameras are equipped with built-in solar panels for continuous recharging during daylight. For situations with insufficient sunlight or extended indoor storage, USB charging is also available.
- Solar Charging: Position the cameras to receive adequate sunlight for optimal charging.
- USB Charging: Connect the cameras to a USB power source using a compatible cable for manual charging.

Image: Illustrates the camera's 5000mAh battery and integrated solar panel, emphasizing its long operational lifespan.

Image: Demonstrates the dual charging capabilities of the cameras: solar power for continuous charging and USB for direct charging.
Cleaning
Regularly clean the camera lenses and monitor screen with a soft, damp cloth. Avoid abrasive cleaners that could scratch surfaces. The cameras are IP69K waterproof, ensuring durability against harsh weather conditions.

Image: Highlights the IP69K waterproof rating, indicating the system's resilience to various environmental conditions.
SD Card Management
Periodically check the included 32GB SD card for proper function. Format the card through the monitor's settings if you experience recording issues or wish to clear all footage. Back up important recordings before formatting.
Troubleshooting
| Problem | Possible Cause | Solution |
|---|---|---|
| No image on monitor | Monitor not powered; Camera not powered; Signal interference; Camera not paired. | Ensure monitor is plugged into a working 12V socket. Check camera battery level. Move vehicle to reduce interference. Re-pair camera and monitor if necessary (refer to pairing instructions in full manual). |
| Image flickering or unstable signal | Weak signal due to distance or obstructions; Electromagnetic interference. | Ensure cameras are within the 500ft wireless range. Minimize large metal obstructions between camera and monitor. Avoid placing near strong electromagnetic sources. |
| Poor night vision quality | Dirty camera lens; Insufficient ambient light for IR. | Clean camera lens. Ensure no obstructions are blocking the camera's view. |
| DVR not recording | SD card full or corrupted; SD card not inserted correctly. | Insert SD card correctly. Format the SD card via monitor settings. Replace SD card if corrupted. |

Image: Demonstrates the robust 500ft wireless signal range, ensuring stable transmission even with large vehicles or trailers.
Specifications
| Feature | Detail |
|---|---|
| Model Number | Solar3A Plus 7.2" |
| Product Dimensions | 11.2 x 10.4 x 3.18 inches |
| Item Weight | 3.3 pounds |
| Batteries | 1 Lithium Ion battery required (included) |
| Display Technology | LCD |
| Screen Size | 7.2 Inches |
| Installation Type | Surface Mount |
| Video Capture Resolution | 1080p |
| Voltage | 12 Volts |
| Optical Sensor Technology | CMOS |
| Lens Type | Wide Angle |
| Waterproof Rating | IP69K |
| Wireless Range | Up to 500ft (line of sight) |
Warranty and Support
For warranty information and technical support, please refer to the official AUTO-VOX website or contact their customer service directly. Keep your purchase receipt as proof of purchase.
No relevant product videos from the seller were found in the provided data.


