
1. Introduction
Thank you for choosing the Leakbee Y302 Pro Combustible Gas Leak Detector. This device is designed to monitor for various combustible gases, including LNG, LPG, methane, and coal gas, while also displaying temperature and humidity. It provides visual and audible alarms to alert you to potential gas leaks, enhancing safety in your home or other applicable environments. Please read this manual thoroughly before installation and use to ensure proper operation and safety.
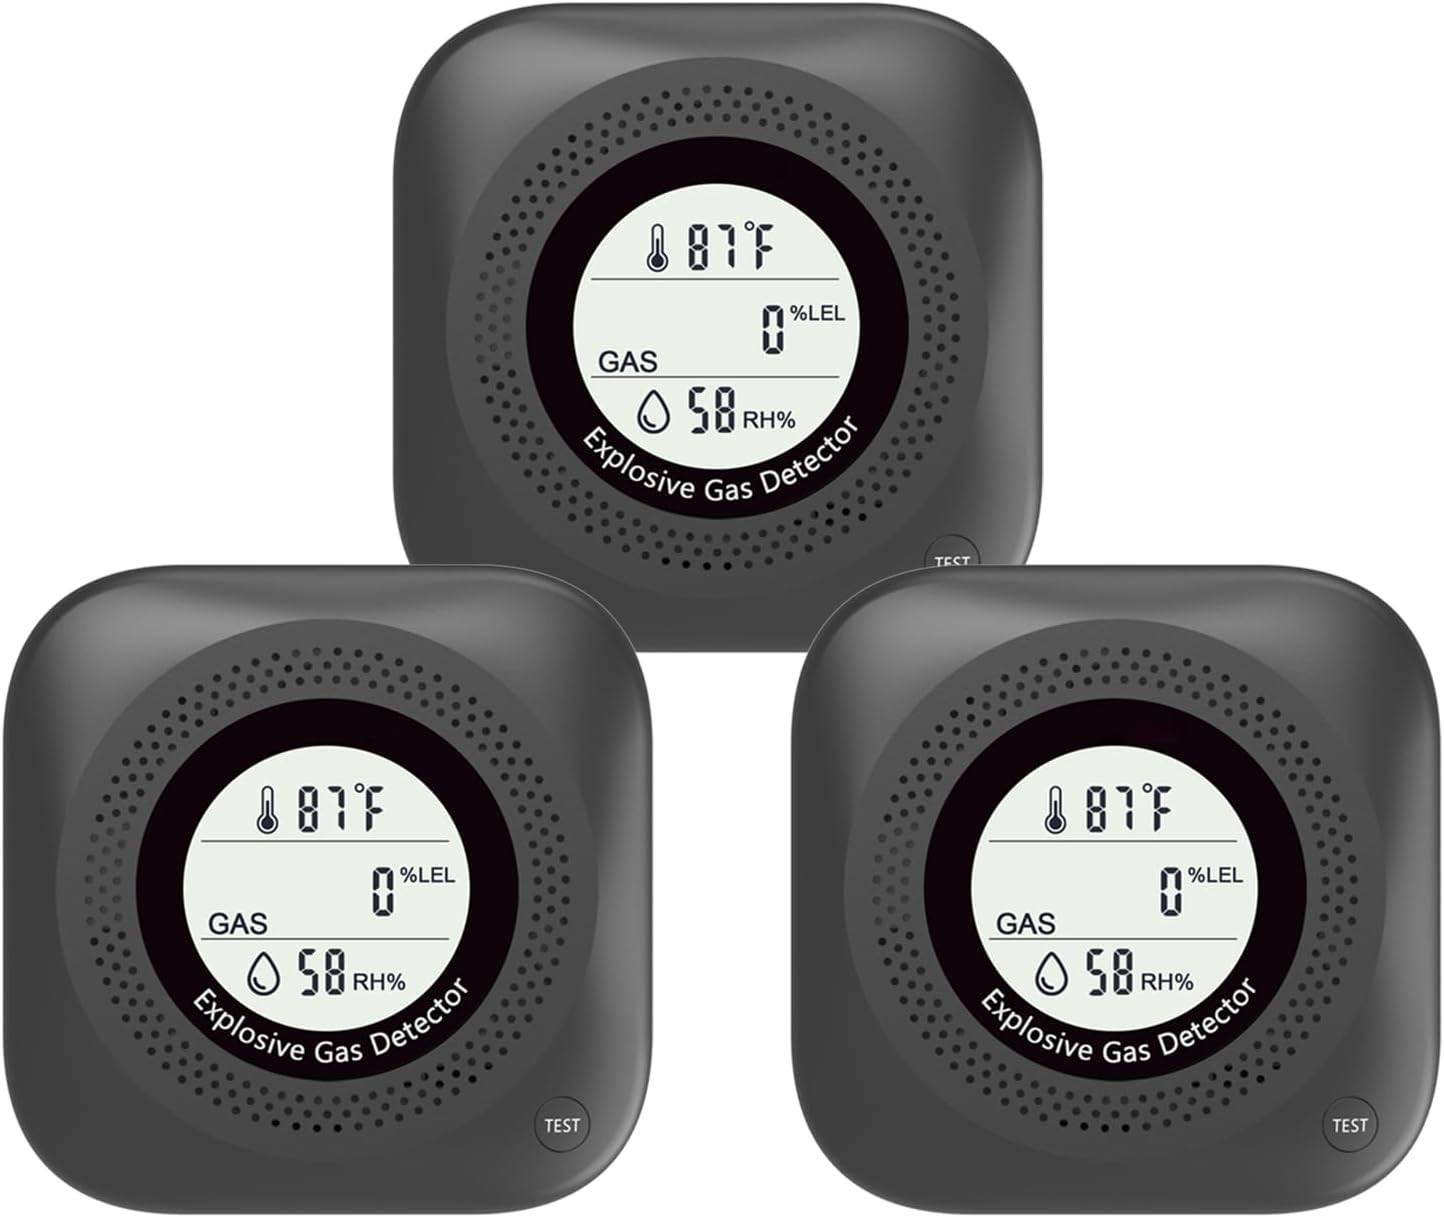
Image 1: Three Leakbee Y302 Pro gas detectors, black, showing the digital display with temperature, gas concentration, and humidity.
2. Safety Information
- This device is intended for indoor use only.
- Do not install in areas with high humidity, dust, or grease, as this may affect performance.
- Do not paint the detector. Paint can clog the sensor openings and prevent the unit from functioning properly.
- Do not block the air vents on the device.
- Regularly test the detector as instructed in this manual.
- In case of an alarm, immediately ventilate the area and investigate the source of the leak. Do not ignore alarms.
- This device is not a substitute for proper ventilation and maintenance of gas appliances.
3. Product Overview
3.1 Components
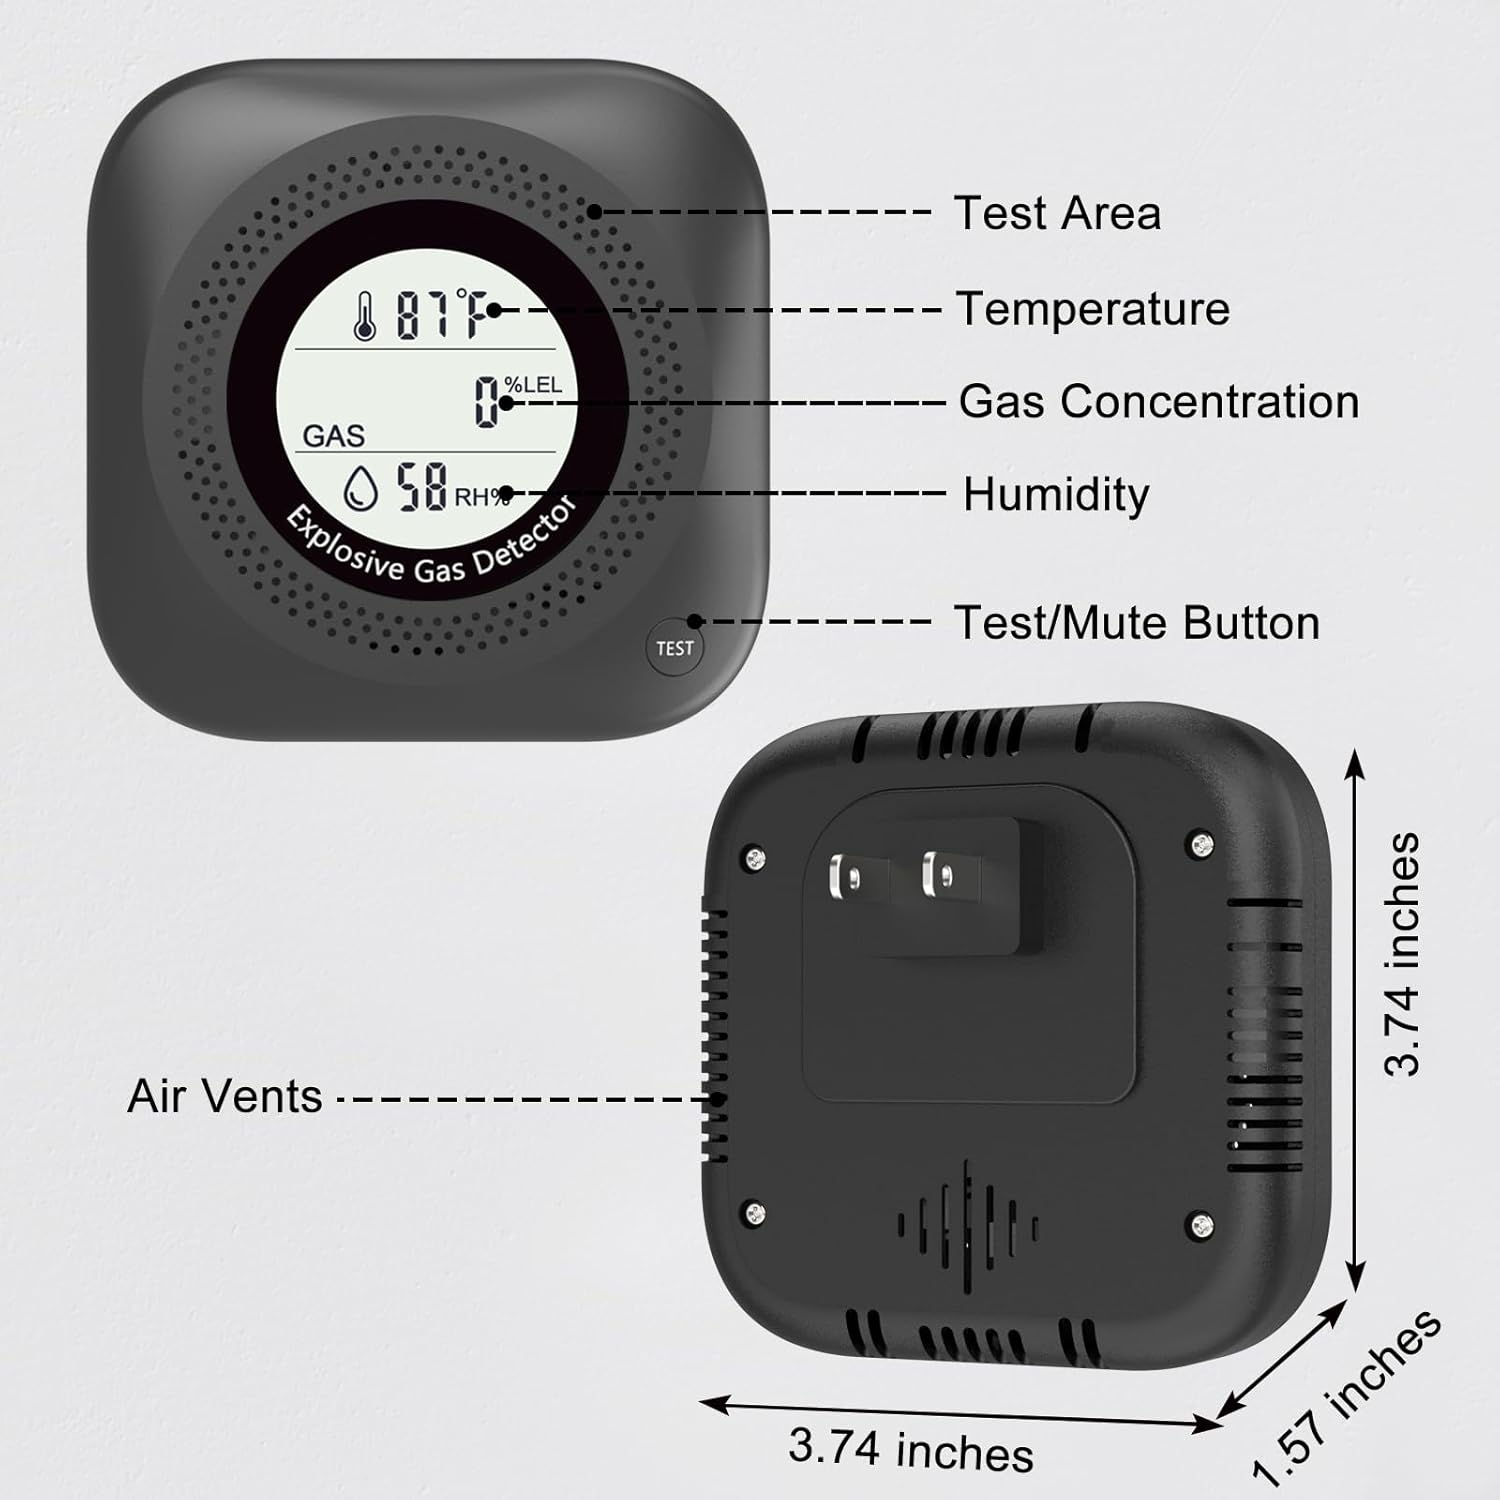
Image 2: A detailed diagram of the Leakbee Y302 Pro gas detector, highlighting its components: Test Area, Temperature display, Gas Concentration display, Humidity display, Test/Mute Button, Air Vents, and overall dimensions (3.74 inches width, 3.74 inches height, 1.57 inches depth).
- Digital Display: Shows real-time temperature, humidity, and gas concentration (%LEL).
- Test/Mute Button: Used to test the alarm function or silence a false alarm.
- Air Vents: Allows gas to enter the sensor for detection.
- Power Plug: For connecting to a standard AC outlet.
3.2 Features

Image 3: Image showing the front and back of the Leakbee Y302 Pro gas detector, with icons representing its key features: Digital display, >85dB Voice Alarm, Accuracy 0~10% LEL, Audible and Visual Alarm, Temperature and Humidity display, and Test/Mute Button.
- 3-in-1 Functionality: Detects combustible gas leaks, displays ambient temperature, and humidity.
- Wide Gas Detection: Suitable for LNG, LPG (propane), methane, and coal gas.
- Visual & Audible Alarm: Features a digital LED display for gas levels and an 85-decibel warning sound.
- Easy Installation: Plug-in design for quick setup in standard AC 110V~230V outlets.
- User-Friendly: Test/Hush button for easy testing and silencing of alarms.
- 24/7 Monitoring: Provides continuous gas leak detection.
4. Setup and Installation
4.1 Recommended Installation Locations
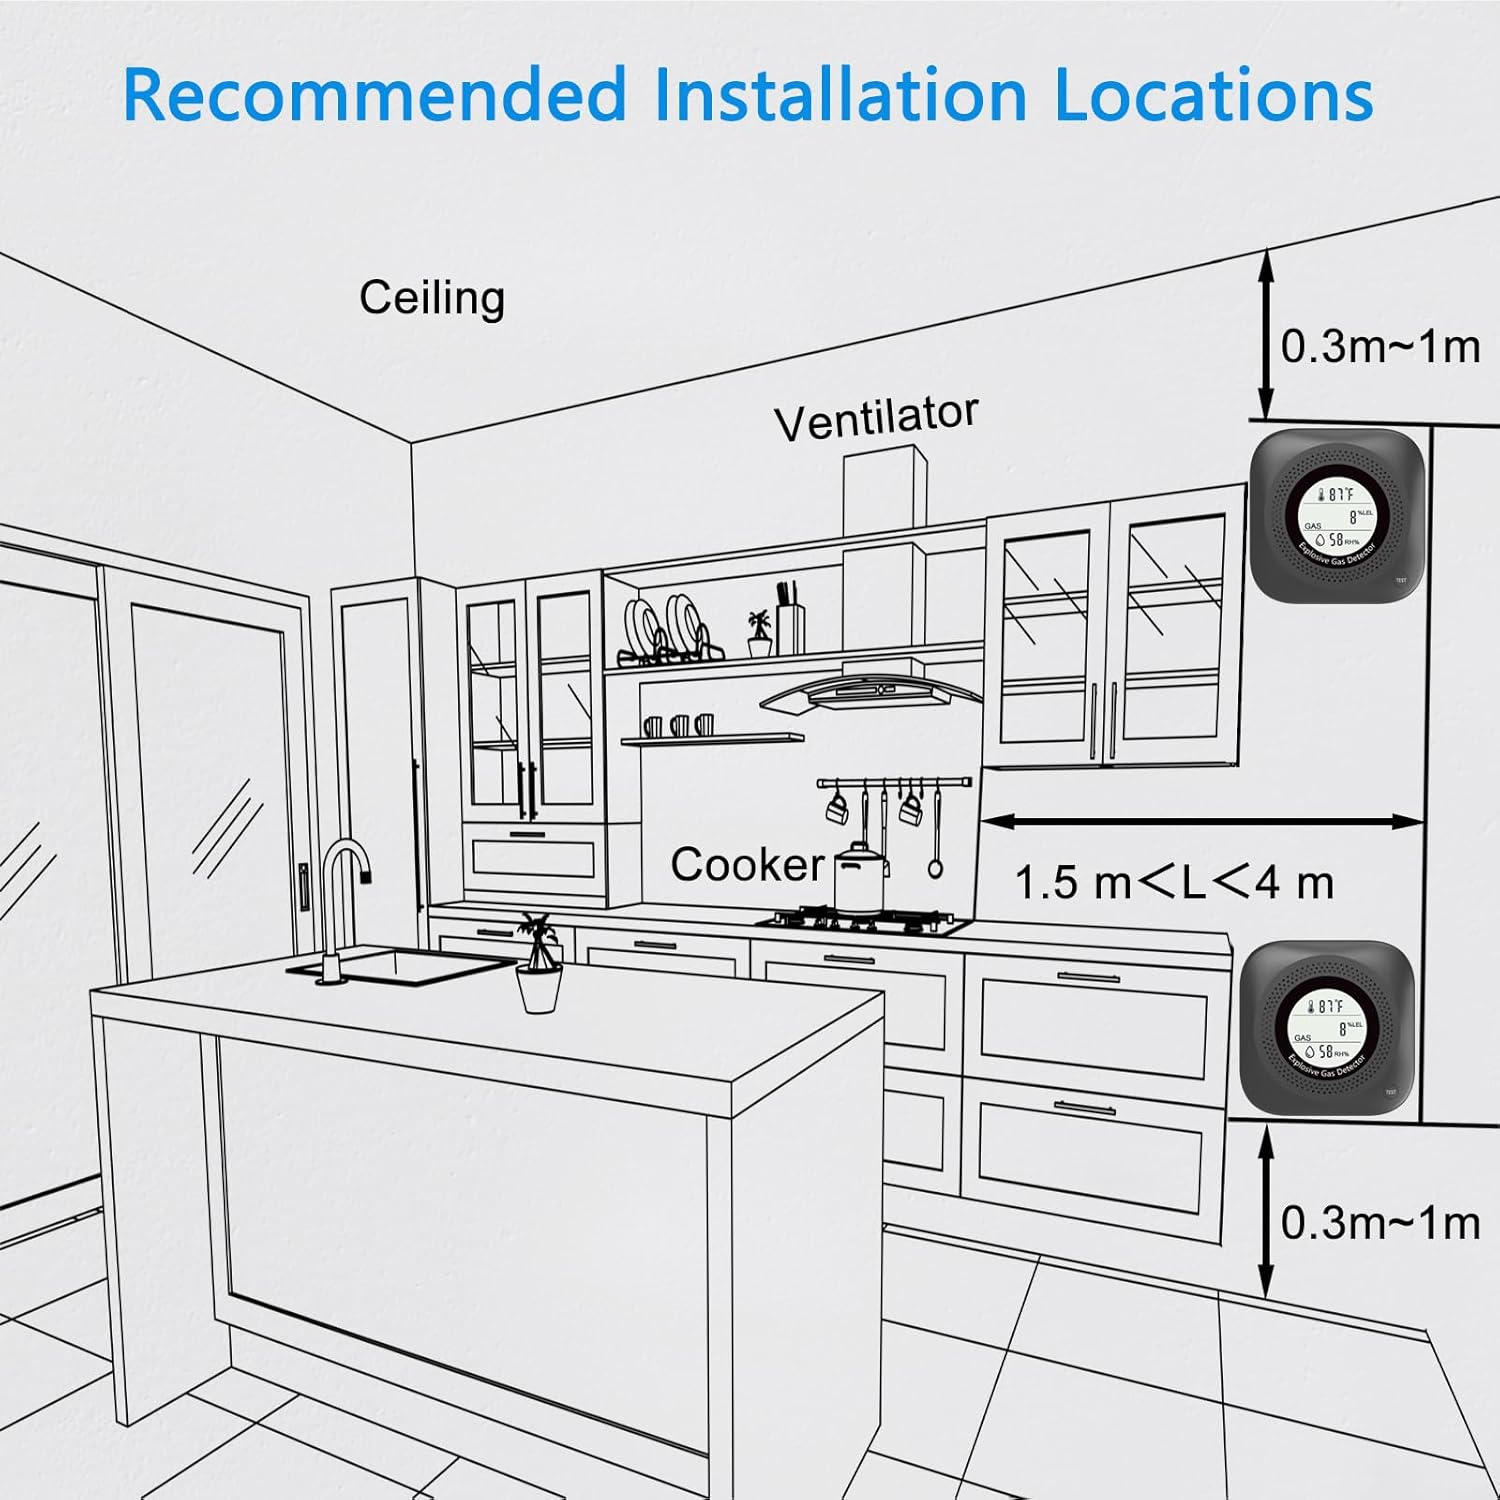
Image 4: A diagram illustrating recommended installation locations for the gas detector in a kitchen. It shows one detector near the ceiling (0.3m-1m from ceiling) and another near the floor (0.3m-1m from floor), with a cooker in between (1.5m-4m from detector).
- For Natural Gas (Methane, Coal Gas): These gases are lighter than air. Install the detector 0.3m to 1m (approximately 1 to 3 feet) below the ceiling and 1.5m to 4m (approximately 5 to 13 feet) horizontally from the gas source.
- For LPG (Propane): This gas is heavier than air. Install the detector 0.3m to 1m (approximately 1 to 3 feet) above the floor and 1.5m to 4m (approximately 5 to 13 feet) horizontally from the gas source.
- Avoid installing near windows, doors, ventilation fans, or areas with strong air currents, as this can affect detection accuracy.
- Avoid installing in dead air spaces, behind curtains, or in corners.
- Suitable environments include kitchens, campers, near stoves, furnaces, water heaters, and washing machines.
4.2 Powering On
Simply plug the Leakbee Y302 Pro into a standard AC 110V~230V electrical outlet. The device will perform a self-test, and the digital display will illuminate, showing current temperature and humidity. The gas concentration will initially display 0%LEL.

Image 5: An image depicting the Leakbee Y302 Pro gas detector plugged into a wall outlet in a kitchen setting, surrounded by labels indicating the types of gases it detects (Propane, LNG, Methane, Natural Gas, Coal Gas). Text highlights 24/7 Monitoring, 0.5-2s Response, and 85dB Alarm.
5. Operating Instructions
5.1 Normal Operation
Once plugged in, the detector continuously monitors the air for combustible gases. The digital display will show the current ambient temperature (in °F or °C), relative humidity (%RH), and gas concentration (%LEL). In normal, gas-free conditions, the gas concentration will read 0%LEL.
5.2 Alarm Conditions
If the gas concentration reaches a dangerous level, the detector will activate an alarm. This includes:
- An audible alarm (85 decibels).
- A visual alarm on the digital display, showing the increasing gas concentration.
- A voice alarm may also sound, indicating a gas leak.
Upon alarm activation, immediately take the following steps:
- Open windows and doors to ventilate the area.
- Turn off all gas appliances and sources.
- Evacuate the premises if the alarm persists or the gas concentration is high.
- Contact your gas supplier or emergency services if you suspect a significant leak.
5.3 Test/Hush Button
Press the 'TEST' button on the front of the device to:
- Test the Alarm: A short press will initiate a self-test, activating the audible and visual alarms to confirm they are functioning.
- Hush/Silence Alarm: During an active alarm, a short press can temporarily silence the audible alarm. The visual alarm will continue to indicate the gas concentration until the gas clears.
6. Periodic Testing
It is recommended to test the detector at least once every 3-4 months to ensure it is functioning correctly. Follow these steps for periodic testing:
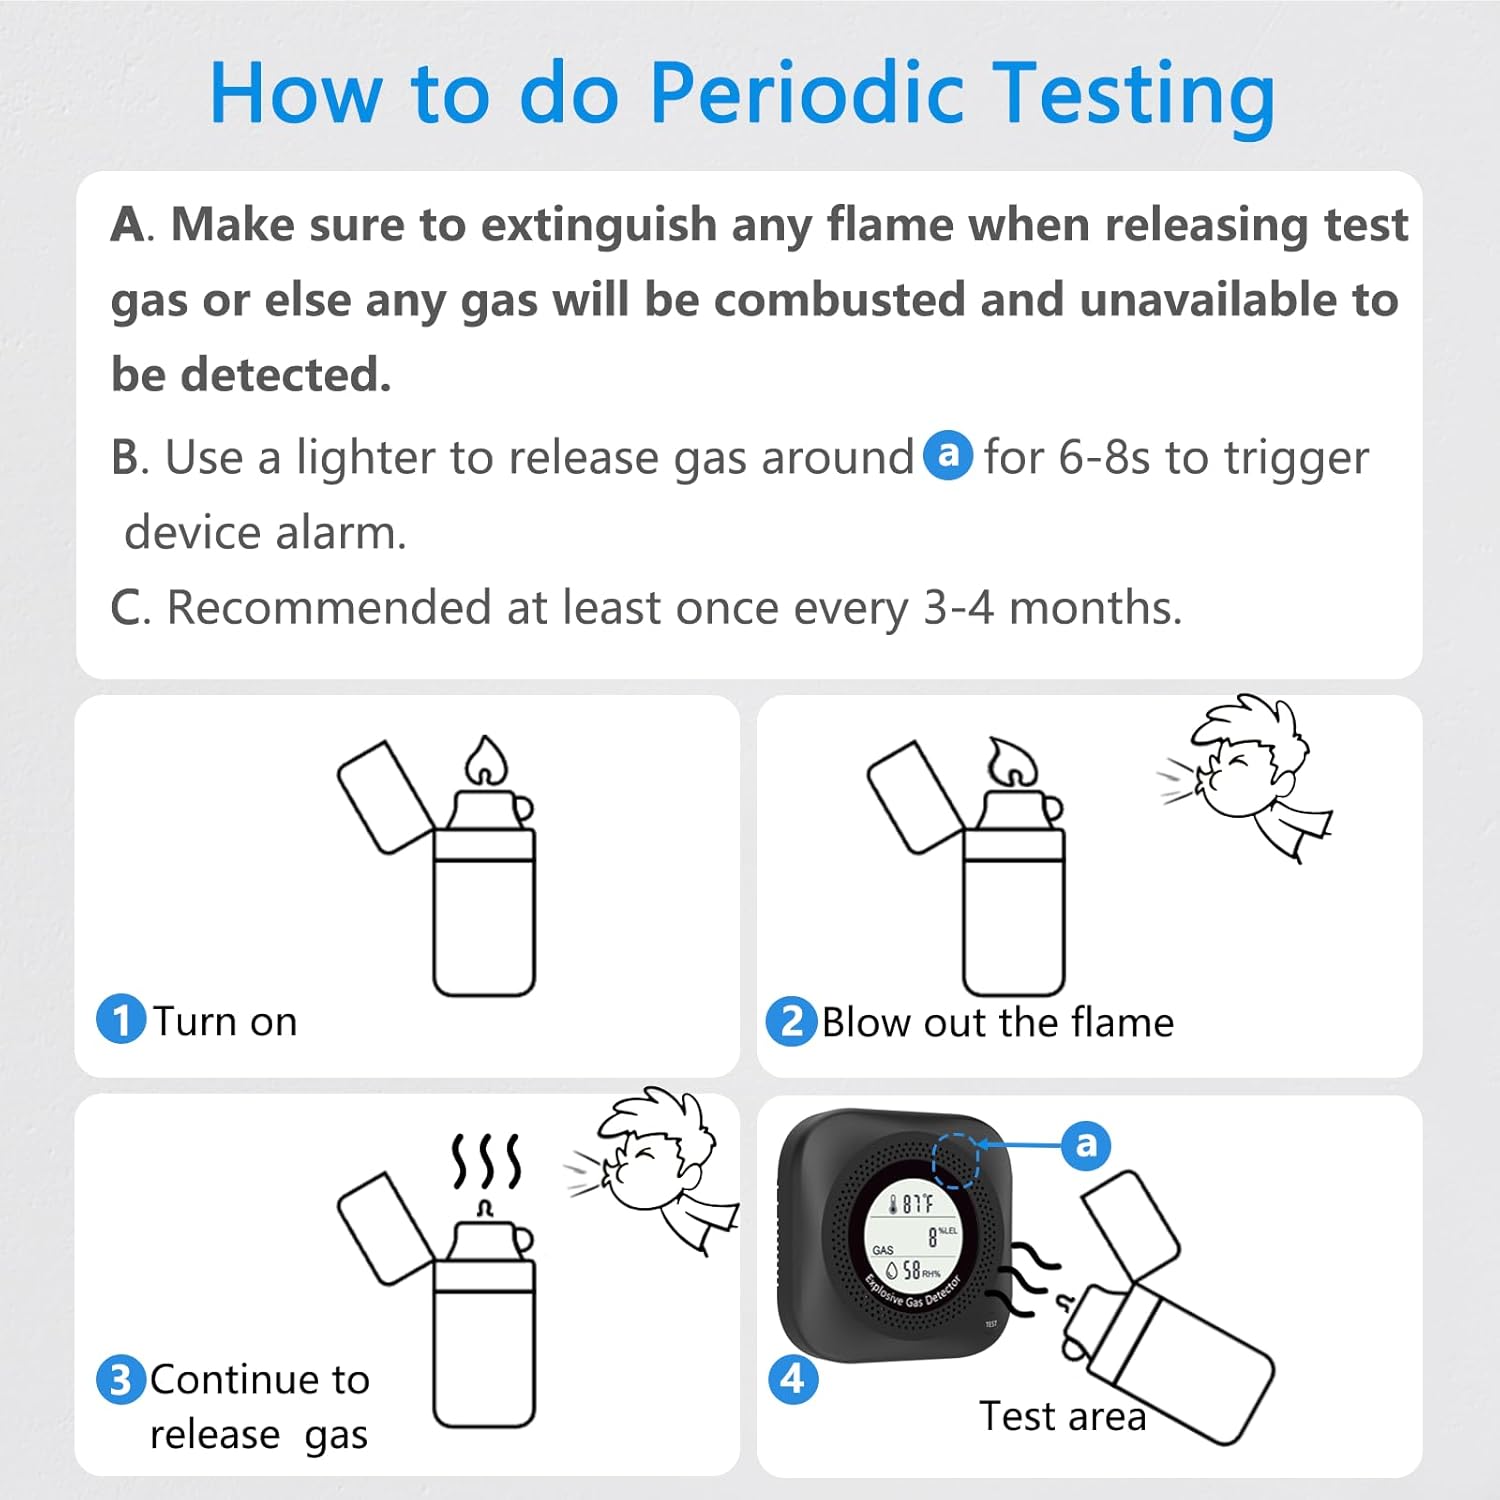
Image 6: A four-step visual guide on how to perform periodic testing using a lighter. Step 1: Turn on lighter. Step 2: Blow out the flame. Step 3: Continue to release gas. Step 4: Hold the lighter near the detector's test area to trigger the alarm.
- Ensure there are no open flames in the vicinity when releasing test gas.
- Use a lighter (or similar gas source) to release a small amount of gas near the detector's test area (indicated on the device diagram) for 6-8 seconds.
- The detector should activate its audible and visual alarms.
- If the alarm does not activate, the device may require cleaning, troubleshooting, or replacement.
7. Maintenance
- Cleaning: Gently wipe the exterior of the detector with a soft, damp cloth. Do not use harsh detergents, solvents, or abrasive cleaners. Do not spray cleaning agents directly onto the device.
- Sensor Care: Ensure the air vents are free from dust and debris. Do not attempt to clean the internal sensor.
- Avoid Obstruction: Do not place objects in front of or on top of the detector that could block the air vents.
8. Troubleshooting
| Problem | Possible Cause | Solution |
|---|---|---|
| Detector does not power on | No power to the outlet; device malfunction | Check the power outlet with another appliance. Try a different outlet. If still no power, contact support. |
| Alarm sounds without gas present | False alarm due to strong fumes (e.g., cleaning products, alcohol); sensor contamination | Ventilate the area. Press the 'TEST' button to hush the alarm. Clean the detector exterior. If false alarms persist, relocate the detector. |
| Alarm does not sound during test | Insufficient gas applied; device malfunction | Ensure sufficient gas is applied directly to the test area for 6-8 seconds. If still no alarm, the device may be faulty and require replacement. |
| Display is dim or blank | Power issue; display malfunction | Check power connection. If power is stable and display remains dim/blank, contact support. |
9. Specifications
| Feature | Detail |
|---|---|
| Model Number | Y302 Pro |
| Power Source | AC 110V~230V |
| Wattage | 3 watts |
| Detected Gases | LNG, LPG (Propane), Methane, Coal Gas |
| Alarm Volume | >85 dB |
| Alarm Type | Visual & Audible Alarm |
| Response Time | 0.5-2 seconds |
| Product Dimensions | 1.57"D x 3.74"W x 3.74"H (40mm D x 95mm W x 95mm H) |
| Item Weight | 6.6 ounces (187 grams) |
| Operating Temperature | Refer to device display for range |
| Operating Humidity | Refer to device display for range |
10. Warranty and Support
Warranty information is typically provided with your purchase documentation or on the manufacturer's official website. For specific warranty details, please refer to the information included with your product or contact Leakbee customer support.
For technical support, troubleshooting assistance, or inquiries regarding your Leakbee Y302 Pro gas detector, please visit the official Leakbee website or contact their customer service department. Contact information can usually be found on the product packaging or the brand's online presence.
Thank you for choosing Leakbee for your home safety needs.