1. Introduction
This manual provides detailed instructions for the safe and efficient operation, maintenance, and troubleshooting of your ROVSUN Commercial Food Warmer, Model food warmer-7. Please read this manual thoroughly before initial use and retain it for future reference.

Figure 1: ROVSUN Commercial Food Warmer with its doors open, revealing four internal shelves holding various food items in aluminum trays. The unit is silver stainless steel with a black control panel.
2. Safety Instructions
To prevent injury or damage, always follow these basic safety precautions:
- Ensure the appliance is connected to a grounded power outlet with the correct voltage (110V / 60Hz).
- Do not operate the appliance with a damaged cord or plug.
- Keep hands and clothing away from hot surfaces during operation.
- Do not immerse the appliance in water or other liquids.
- Unplug the appliance before cleaning or servicing.
- Use only food-grade, high-temperature resistant containers or oil absorbent paper for food placed directly on shelves. Avoid placing juicy or oily food directly on the heating tube to prevent oil from dripping.
- This appliance is for commercial use. Ensure proper ventilation.
3. Product Overview
3.1 Features
- Adjustable Temperature: Temperature range of 86-185°F (30-85°C) for various food types.
- Precise Timer Control: Countdown timer up to 999 minutes for optimal holding time.
- Efficient Heating: PTC heat source ensures even air circulation and overload protection.
- Durable Construction: Made from heavy-duty stainless steel for longevity and corrosion resistance.
- Large Capacity: Four removable shelves provide ample space and flexible configuration.
- Easy Access: 180° opening angle for convenient loading and unloading of food.
- Integrated Water Tray: Helps maintain food freshness and humidity.
- Stable Design: Equipped with anti-skid feet for stability on countertops.
3.2 Components
The ROVSUN Commercial Food Warmer consists of the following main components:
- Main Food Warmer Display Unit
- 4 Removable Shelves
- Water Tray (Sink)
- Control Panel with Digital Display
- Power Cord
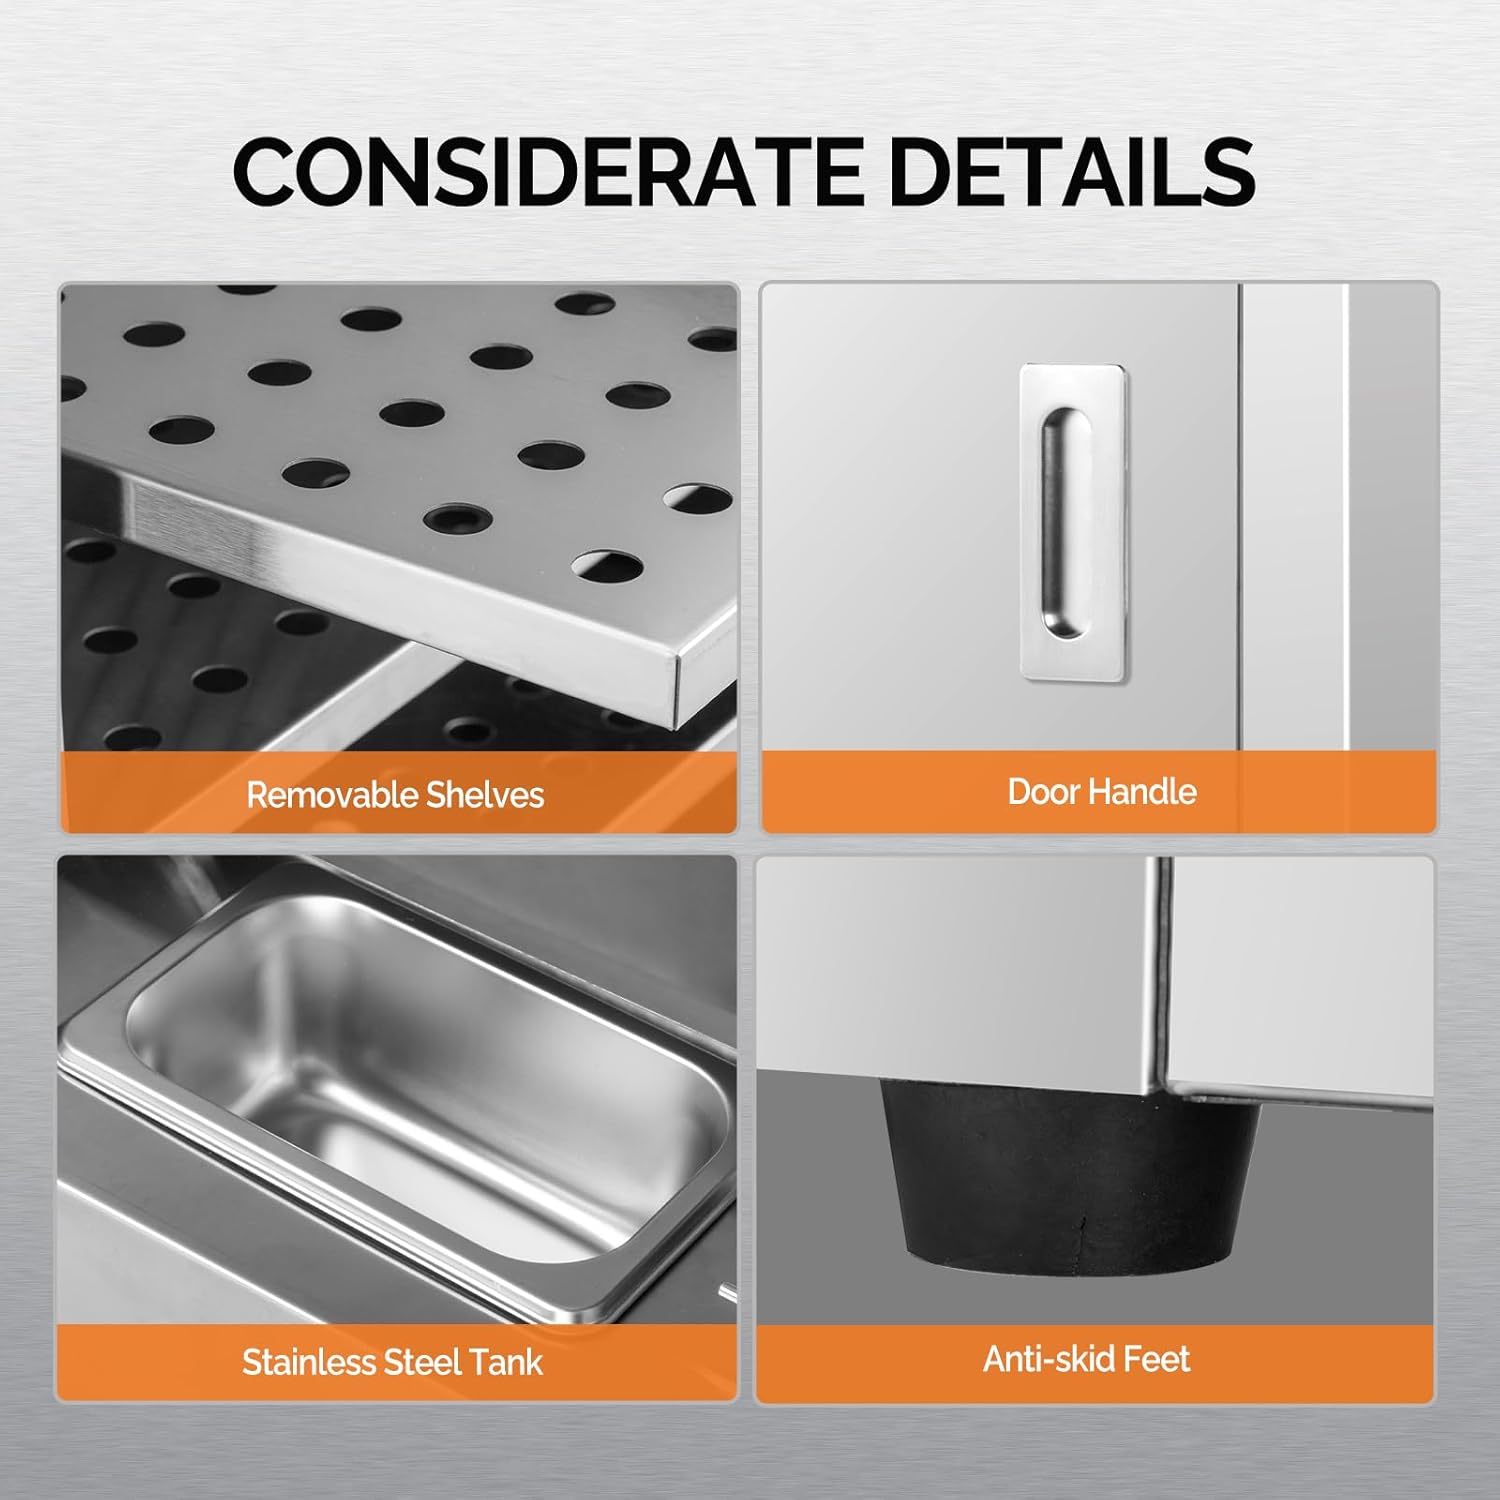
Figure 2: Detailed view of key components including the perforated removable shelves, ergonomic door handle, stainless steel water tank for humidity, and anti-skid feet for stability.
4. Setup
- Unpacking: Carefully remove all packaging materials and inspect the unit for any damage. Retain packaging for potential future transport.
- Placement: Place the food warmer on a stable, level, and heat-resistant surface. Ensure adequate clearance around the unit for ventilation.
- Shelf Installation: Insert the four removable shelves into the desired positions within the cabinet.
- Water Tray: Place the stainless steel water tray into its designated slot at the bottom of the warming cabinet. Fill with a small amount of water to help maintain humidity.
- Power Connection: Plug the power cord into a grounded 110V / 60Hz electrical outlet.
5. Operating Instructions
5.1 Control Panel Overview

Figure 3: The control panel features a digital display for temperature and time, indicator lights (Warm Light, Heat Light), and control buttons (Set, Right, Temp/Time+, Countdown On/Off, Power Switch).
- Power Switch: Turns the unit ON/OFF.
- Temperature Display: Shows the current internal temperature.
- Countdown Display: Shows the remaining holding time.
- Set Button: Used to enter temperature or time setting mode.
- Right Button: Navigates between digits during setting.
- Temp/Time + Button: Increases temperature or time values.
- Countdown On/Off (Start/Stop) Button: Starts or stops the countdown timer.
- Warm Light: Indicates the unit is maintaining temperature.
- Heat Light: Indicates the unit is actively heating.
5.2 Initial Operation
- Turn on the unit using the Power Switch.
- Press the Set Button to enter temperature setting mode. Use the Temp/Time + Button to adjust the desired temperature (86-185°F / 30-85°C). Press Set again to confirm.
- To set the countdown timer, press the Set Button until the timer display flashes. Use the Right Button to select digits and the Temp/Time + Button to adjust the time (up to 999 minutes). Press Set to confirm.
- Press the Countdown On/Off (Start/Stop) Button to start the timer.
- Allow the unit to preheat to the desired temperature before placing food inside.
- Place food in appropriate containers on the shelves.
- Close the doors securely to maintain temperature.
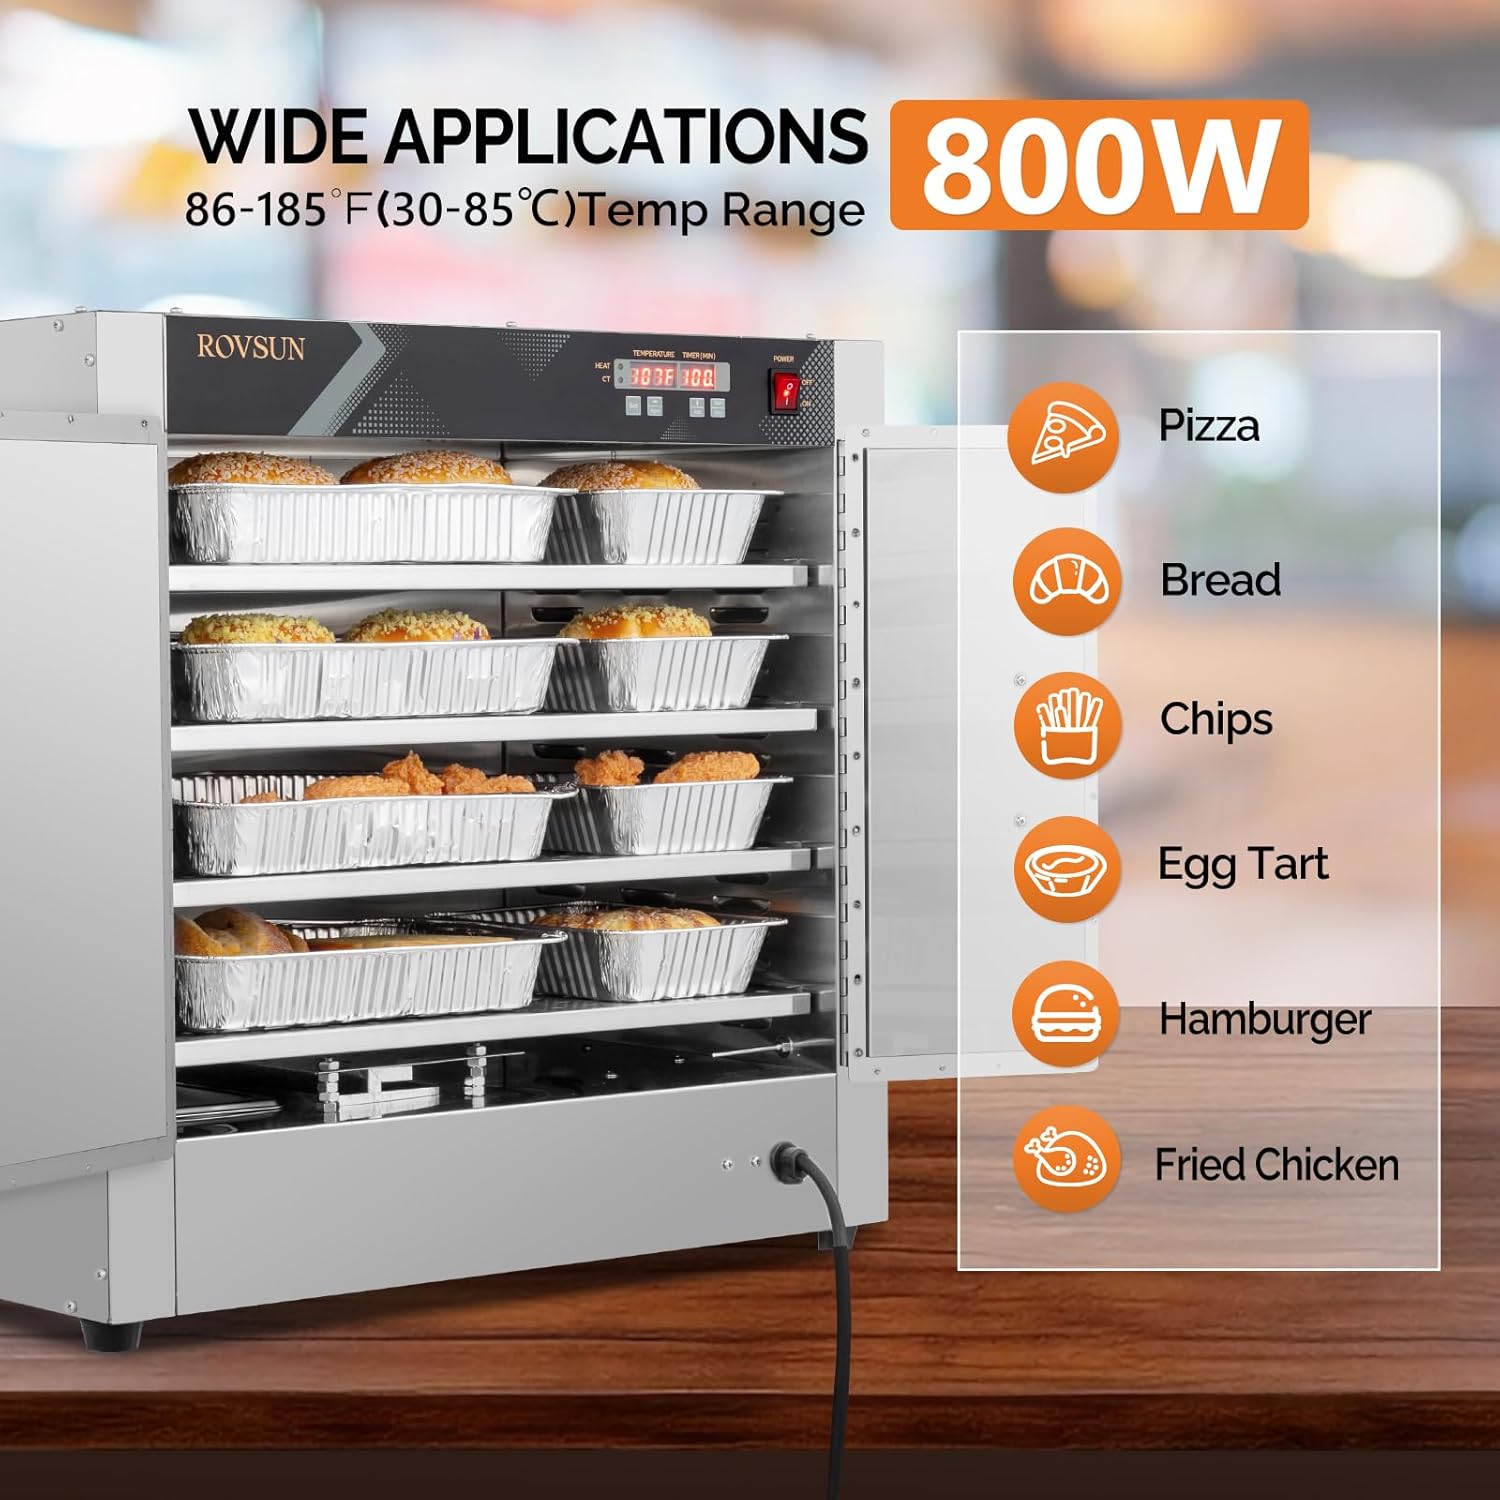
Figure 4: The food warmer is suitable for holding a variety of items including pizza, bread, chips, egg tarts, hamburgers, and fried chicken, maintaining them at optimal serving temperatures.
6. Maintenance and Cleaning
Regular cleaning and maintenance ensure the longevity and hygienic operation of your food warmer.
- Disconnect Power: Always unplug the unit from the power outlet before cleaning.
- Cool Down: Allow the unit to cool completely before cleaning any surfaces.
- Remove Shelves and Water Tray: Take out the removable shelves and the water tray for separate cleaning.
- Clean Surfaces: Wipe down interior and exterior stainless steel surfaces with a damp cloth and mild detergent. Avoid abrasive cleaners or scouring pads that could scratch the finish.
- Clean Water Tray: Empty and clean the water tray regularly to prevent mineral buildup and ensure proper humidity.
- Dry Thoroughly: Ensure all components are completely dry before reassembling and operating the unit.

Figure 5: The unit's construction from thick stainless steel ensures durability, efficient heat retention, and simplifies the cleaning process.
7. Troubleshooting
| Problem | Possible Cause | Solution |
|---|---|---|
| Unit does not power on. | No power supply; Power switch off; Faulty power cord. | Check power outlet and connection; Ensure power switch is ON; Inspect power cord for damage and replace if necessary. |
| Food not staying warm. | Temperature set too low; Doors not closed properly; Unit not preheated. | Increase temperature setting; Ensure doors are fully closed; Allow unit to preheat before loading food. |
| Uneven heating. | Overloaded shelves; Improper food placement. | Avoid overloading shelves; Distribute food evenly for better air circulation. |
| Excessive condensation. | Too much water in the water tray; High humidity in environment. | Reduce water level in the tray; Ensure proper ventilation in the operating area. |
8. Specifications
- Brand: ROVSUN
- Model: food warmer-7
- Material: Stainless Steel
- Number of Layers: 4
- Overall Size: 25" x 15" x 23.6" (L x W x H)
- Shelf Size: 21.7" x 13.2" (L x W)
- Distance Between Shelves: 3"
- Power: 800W
- Voltage: 110V / 60Hz
- Operation Temperature: 86 - 185°F (30 - 85°C)
- Item Weight: 79.2 lbs
- Color: Silver

Figure 6: Dimensional specifications of the food warmer and examples of suitable environments for its use, such as restaurants, concession stands, food trucks, and churches.
9. Warranty and Support
ROVSUN products are designed for reliability and performance. For any questions, technical assistance, or warranty claims, please contact ROVSUN customer support. Information regarding protection plans and return policies can be found at the point of purchase or on the official ROVSUN website.
Please note that a 30-day easy return policy is typically offered for this product. Extended protection plans (e.g., 3-Year or 4-Year) may be available for purchase separately.