VA7810-HGA-2
Generic VA7800 24V On/Off Electric Non Spring Return Valve Actuator Instruction Manual
Model: VA7810-HGA-2
1. Introduction
This manual provides essential information for the safe and efficient installation, operation, and maintenance of the Generic VA7800 24V On/Off Electric Non Spring Return Valve Actuator. Please read this manual thoroughly before installation and operation to ensure proper function and to prevent damage or injury.
The VA7800 series electric valve actuators are designed to control VG7000 series bronze globe valves in Heating, Ventilating, and Air Conditioning (HVAC) systems. These actuators provide a minimum linear output force of 180 lb (800 N) and are compatible with 1/2 through 2 inch VG7000 series bronze globe valves. This model is a non-spring return type.
2. Safety Information
WARNING: Failure to follow these instructions may result in personal injury or property damage.
- Disconnect power supply before installation or servicing to prevent electrical shock.
- Installation and servicing must be performed by qualified personnel only.
- Ensure all wiring complies with local and national electrical codes.
- Do not operate the actuator beyond its specified voltage and torque limits.
- Protect the actuator from moisture and extreme temperatures unless specified for such conditions. The enclosure protection is IP54.
3. Product Overview
The VA7800 actuator is designed for precise control of globe valves. Key features include:
- Automatic Stroke Adjustment: Provides easy, quick, and precise commissioning.
- Manual Override: Allows manual positioning of the valve for easy commissioning and servicing.
- IP54 Enclosure Protection: Suitable for a wide range of environments.
- Unique Swing-Gate Yoke: Ensures fast and secure attachment to the valve.
- Brushless Motor: Ensures low energy consumption and long life.
- Force-Controlled Motor Shut-Off: Reduces energy consumption, wear, and protects the valve.
- Stroke Position Indicator: Visual indication of valve operation and automatic adjustment during the first cycle.
- Status Light-Emitting Diode (LED): Provides visual indication of actuator status and assists with diagnostics.
- Integral Cable with Colored Conductors: Simplifies installation and field wiring.
- UL and CE Compliant: Meets international regulatory standards.
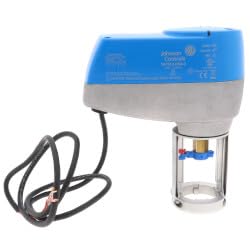
Figure 1: Front view of the VA7800 Electric Valve Actuator. This image shows the main body of the actuator with its blue and grey casing and the attached electrical cable.

Figure 2: Underside view of the VA7800 Electric Valve Actuator, showing the mounting mechanism and valve stem connection point. The swing-gate yoke and brass valve stem adapter are visible.
4. Setup and Installation
4.1 Pre-Installation Checks
- Verify that the actuator model (VA7810-HGA-2) matches the application requirements.
- Ensure the valve is compatible with the actuator (VG7000 series bronze globe valves, 1/2 to 2 inch).
- Confirm power supply (24V) is available and matches actuator specifications.
- Gather necessary tools: screwdriver, wire strippers, multimeter, wrench.
4.2 Mounting the Actuator
- Ensure the valve is in a closed position.
- Align the actuator's swing-gate yoke with the valve bonnet.
- Securely attach the actuator to the valve using the provided hardware. Ensure a tight fit to prevent movement during operation.
- Verify that the valve stem is properly engaged with the actuator's stem coupling.
4.3 Electrical Wiring
Refer to the wiring diagram provided with the actuator or the system documentation. The VA7800 is a 24V On/Off actuator.
- Connect the 24V power supply to the designated terminals.
- Ensure proper grounding.
- Use appropriate wire gauges for the power supply and control signals.
- The integral cable with colored conductors simplifies field wiring.
- An integral connector for 3/8 inch (10 mm) flexible metal conduit (FMC) is provided for secure wiring.
5. Operating Instructions
5.1 Initial Power-Up
- After installation and wiring are complete, apply power to the actuator.
- The actuator will perform an automatic stroke adjustment during its first cycle of operation. Observe the stroke position indicator.
- Check the Status LED for proper operation. Refer to the troubleshooting section for LED indications.
5.2 Manual Override
The actuator includes a manual override feature for commissioning or servicing.
- To engage manual override, locate the manual override lever/button (refer to product diagram if available).
- Follow the specific instructions for your model to disengage the motor and manually position the valve.
- Ensure the manual override is disengaged before returning to automatic operation.
5.3 Control Modes
This actuator supports On/Off, Floating Point, and Proportional control types. The specific control method will depend on the building management system (BMS) or controller it is connected to.
- On/Off Control: The actuator moves the valve to fully open or fully closed based on a binary signal.
- Floating Point Control: The actuator moves the valve incrementally based on pulsed signals, stopping when signals cease.
- Proportional Control: The actuator positions the valve proportionally to an analog input signal (e.g., 0-10VDC or 4-20mA).
6. Maintenance
The VA7800 actuator is designed for long-term, reliable operation with minimal maintenance. Regular checks are recommended.
- Annual Inspection: Visually inspect the actuator and valve for any signs of wear, corrosion, or damage.
- Electrical Connections: Periodically check electrical connections for tightness and integrity.
- Actuator Movement: Observe the actuator's movement during operation to ensure smooth and full stroke.
- Cleaning: Keep the exterior of the actuator clean and free from dust and debris. Do not use harsh chemicals.
- Lubrication: The actuator's internal components are factory-lubricated and do not require additional lubrication.
7. Troubleshooting
This section provides guidance for common issues. For complex problems, contact technical support.
| Problem | Possible Cause | Solution |
|---|---|---|
| Actuator does not move. | No power, incorrect wiring, faulty control signal, internal fault. | Check power supply (24V). Verify wiring connections. Test control signal. Check Status LED. |
| Actuator moves erratically. | Unstable control signal, mechanical obstruction, loose mounting. | Ensure stable control signal. Inspect valve and actuator for obstructions. Tighten mounting hardware. |
| Valve does not fully open/close. | Incorrect stroke adjustment, valve obstruction, actuator undersized. | Allow actuator to complete automatic stroke adjustment. Check for valve obstructions. Verify actuator torque (225 lb-in) is sufficient for the valve. |
| Status LED indicates an error. | Specific error condition. | Consult the actuator's specific LED diagnostic codes (if available in separate documentation) or contact technical support. |
8. Specifications
| Feature | Specification |
|---|---|
| Model Number | VA7810-HGA-2 |
| Actuator Type | On/Off, Floating Point, Proportional |
| Voltage | 24V |
| Torque / Output Force | 225 lb-in (minimum 180 lb / 800 N linear output force) |
| Fail Safe Mode | Non-Spring Return |
| VA Rating | 6 |
| Enclosure Protection | IP54 |
| Compatible Valves | VG7000 Series Bronze Globe Valves (1/2 to 2 inch) |
| Dimensions (L x W x H) | 1 x 1 x 1 inches (Note: These dimensions appear to be placeholder values from the product data and may not reflect actual product size.) |
9. Warranty and Support
For warranty information, please refer to the documentation provided at the time of purchase or contact your supplier. Keep your purchase receipt as proof of purchase.
For technical support or service inquiries, please contact the manufacturer or your authorized distributor. Provide the model number (VA7810-HGA-2) and a detailed description of the issue when seeking assistance.
Ask a question about this manual
Ask about setup, troubleshooting, compatibility, parts, safety, or missing instructions. Manuals+ will review the question and use this page’s manual context to help answer it.