1. Safety Information
Please read all safety instructions carefully before assembly and use. Failure to follow these instructions may result in injury or damage to the product.
- Anti-Tipping Device: Always secure the cabinet to the wall using the dual anti-tipping device provided to prevent tipping. This is crucial for stability and safety, especially in households with children or pets.
- Assembly Caution: Exercise caution during assembly to avoid injury. Keep small parts away from children.
- Clear Area: Ensure the area around the cabinet is clear to prevent tripping hazards.
- Weight Limit: Do not overload the drawers or place excessively heavy items on top of the cabinet.
- Mirror Care: Handle the mirror with care to prevent breakage. Clean with a soft, damp cloth and avoid abrasive cleaners.
2. Product Overview
The Organizedlife Shoe Storage Cabinet is designed to provide organized storage for footwear while offering a full-length mirror for convenience. It features five flip-down drawers, each capable of holding multiple pairs of shoes.

Figure 2.1: Organizedlife Shoe Storage Cabinet with full-length mirror, closed view.

Figure 2.2: Organizedlife Shoe Storage Cabinet positioned in an entryway, demonstrating its compact design.
3. Package Contents
Before beginning assembly, please verify that all components listed in your product packaging are present and undamaged. If any parts are missing or damaged, contact customer support.
- Cabinet panels (top, bottom, sides, back)
- Flip drawer mechanisms (5 sets)
- Full-length mirror panel
- Hardware pack (screws, dowels, anti-tipping device, etc.)
- Assembly instructions manual (this document)
4. Assembly Instructions
Assembly requires basic tools (e.g., screwdriver, hammer) and may be easier with two people. Follow the step-by-step diagrams provided in your physical instruction manual for detailed guidance.
4.1 Unpacking and Preparation
- Unpack all components and lay them out on a clean, soft surface to prevent scratches.
- Identify each part using the provided parts list.
4.2 Frame Assembly
- Connect the side panels to the bottom panel using the designated hardware.
- Attach the back panel to stabilize the frame.
- Secure the top panel to complete the main cabinet structure.
4.3 Drawer Installation
- Assemble each flip drawer mechanism according to the diagrams.
- Insert the assembled drawers into their respective slots within the cabinet frame. Ensure they operate smoothly.
4.4 Mirror Attachment
- Carefully attach the full-length mirror panel to the front of the cabinet as indicated in the instructions.
4.5 Securing the Cabinet (Anti-Tipping Device)
It is mandatory to install the anti-tipping device to prevent the cabinet from falling over. This device significantly enhances safety.
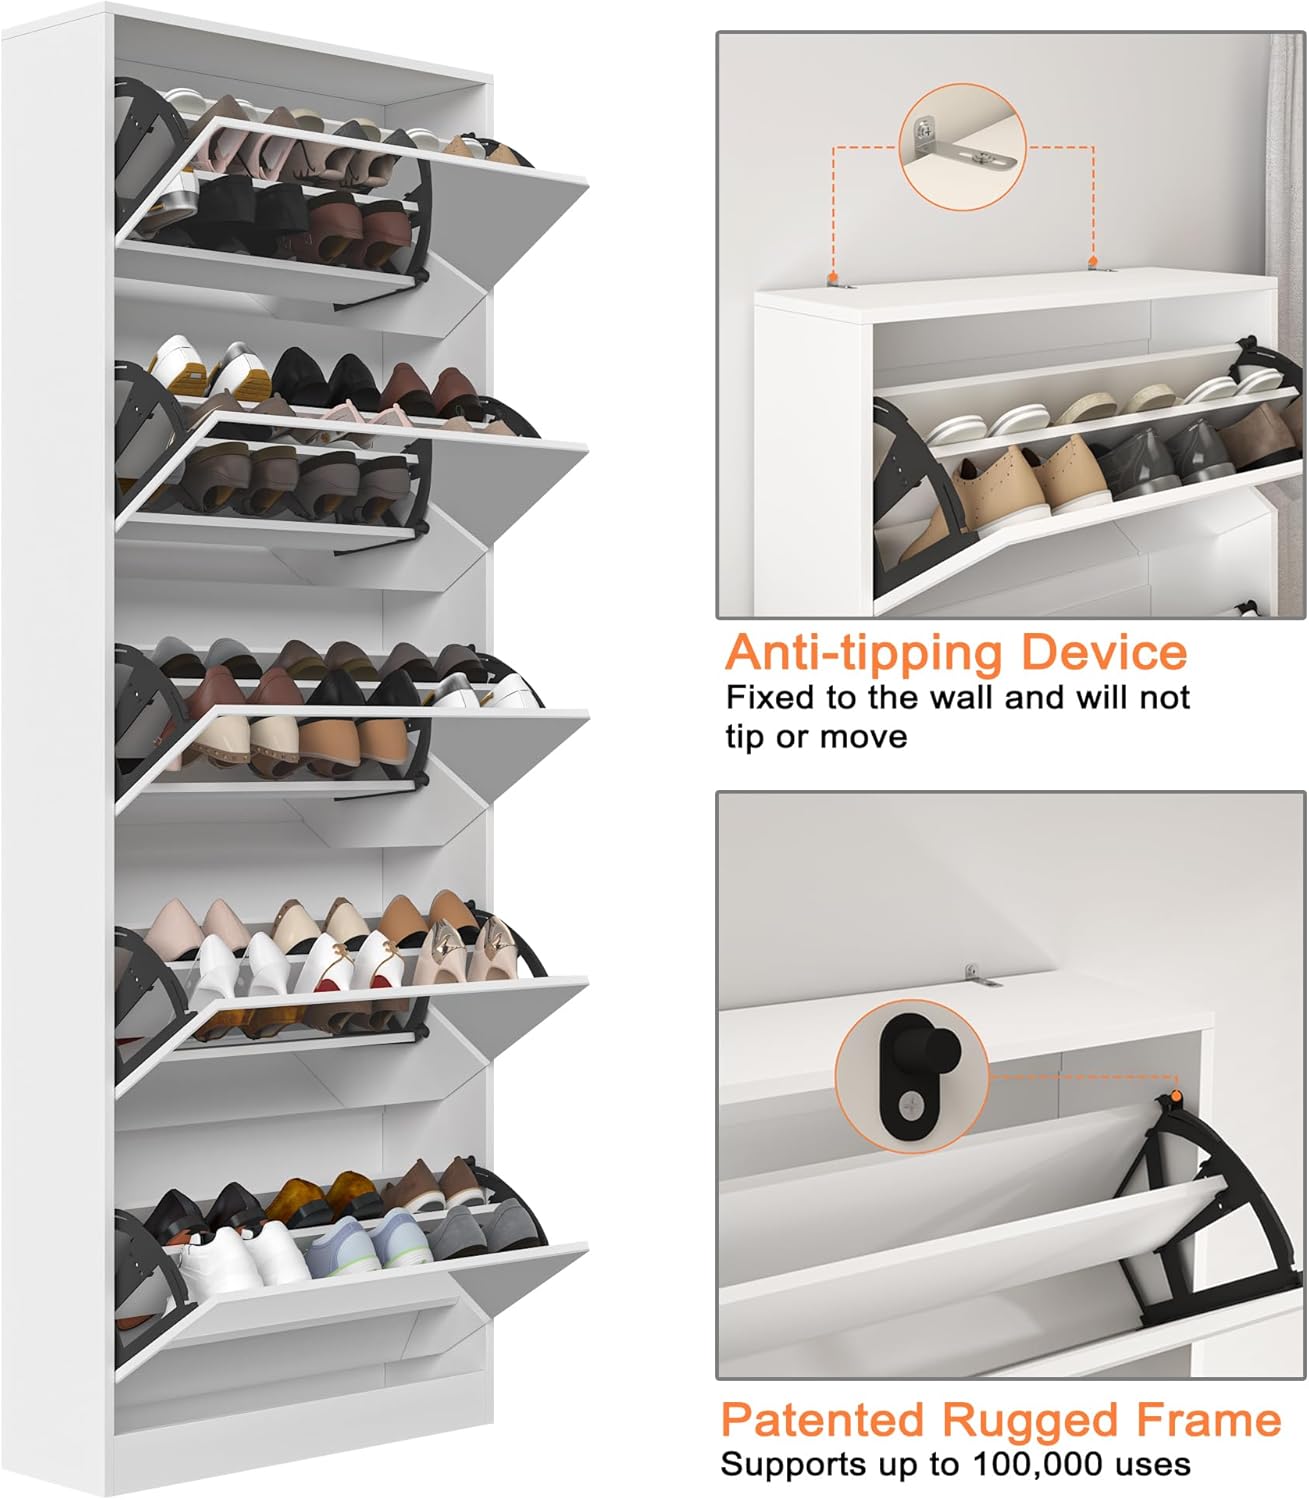
Figure 4.1: Detail of the anti-tipping device and drawer mechanism.

Figure 4.2: Installation of the anti-tipping device to secure the cabinet to a wall.
- Position the cabinet in its desired location.
- Mark the wall through the holes in the anti-tipping brackets located at the top rear of the cabinet.
- Drill pilot holes into the wall at the marked locations.
- Insert wall anchors (if necessary for your wall type).
- Secure the anti-tipping brackets to the wall using the provided screws.
- Ensure the cabinet is firmly attached and stable.
5. Operating Instructions
5.1 Using the Flip Drawers
The cabinet features five flip-down drawers designed for shoe storage. Each drawer can accommodate multiple pairs of shoes, depending on their size and style.

Figure 5.1: Shoe cabinet with drawers open, showing shoe storage capacity.

Figure 5.2: Internal dimensions of a single flip drawer.
- To open a drawer, gently pull the handle outwards. The drawer will flip down, revealing the shoe compartments.
- Place shoes into the compartments. The design allows for shoes up to approximately US Men's size 15.
- To close, push the drawer upwards until it clicks securely into place.
5.2 Using the Full-Length Mirror
The integrated full-length mirror provides a convenient way to check your appearance before leaving your home.
- Ensure the mirror surface is clean for optimal reflection.
- Avoid placing sharp objects near the mirror to prevent scratches or damage.
6. Maintenance and Care
- Cleaning: Wipe the cabinet surfaces with a soft, damp cloth. Avoid harsh chemicals or abrasive cleaners, especially on the mirror.
- Dusting: Regularly dust the cabinet to maintain its appearance.
- Drawer Mechanisms: Periodically check the drawer mechanisms for smooth operation. If they become stiff, a small amount of silicone spray can be applied to moving parts (avoiding contact with shoes).
- Stability Check: Occasionally check the anti-tipping device and all screws to ensure they remain tight and secure.
7. Troubleshooting
- Cabinet is unstable: Ensure the anti-tipping device is correctly installed and securely fastened to the wall. Check that all assembly screws are tightened.
- Drawers do not close properly: Verify that shoes are not obstructing the closing mechanism. Ensure the drawer mechanisms are correctly installed and not damaged. Check for any loose screws in the drawer assembly.
- Mirror appears warped: While mirrors can sometimes have minor distortions, significant warping may indicate a manufacturing defect. Contact customer support if the issue is severe.
- Missing parts: If any parts were missing upon delivery, refer to the contact information for customer support.
8. Product Specifications
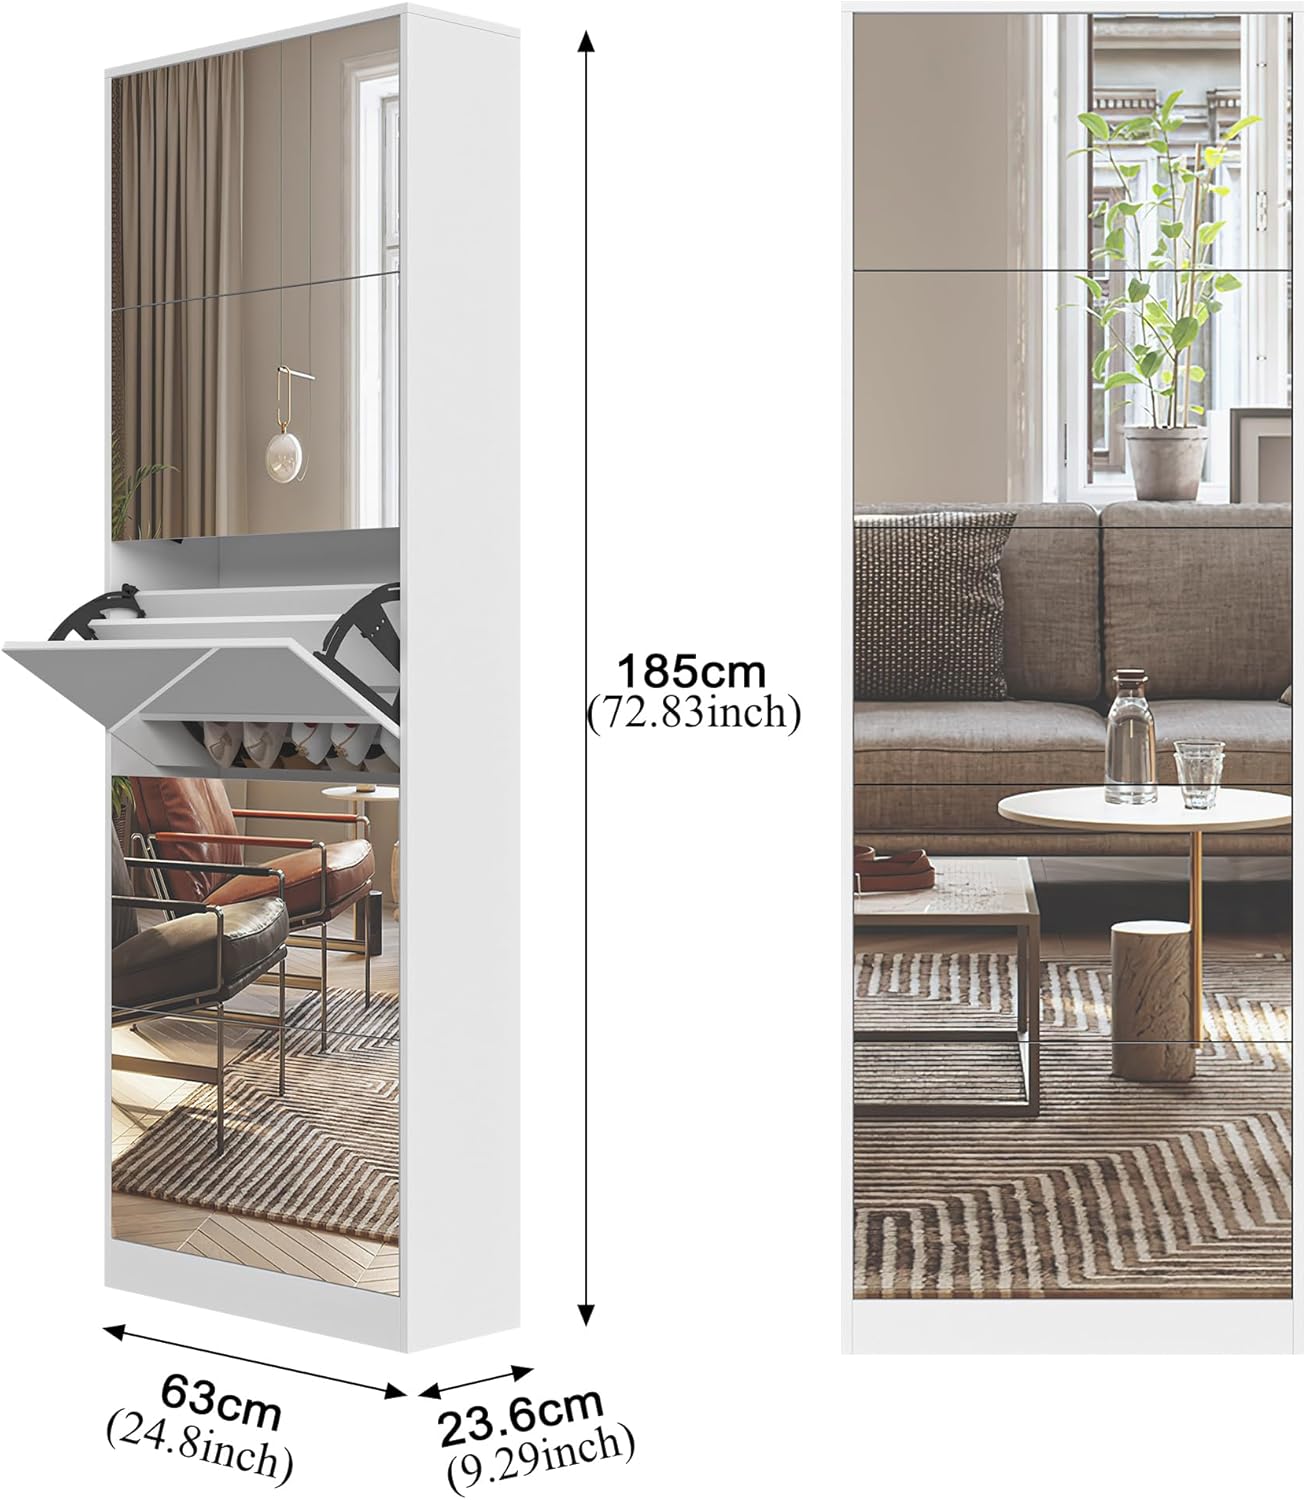
Figure 8.1: Overall product dimensions.

Figure 8.2: Material composition for enhanced stability and durability.
| Feature | Specification |
|---|---|
| Brand | Organizedlife |
| Model Number | ORG-218524 |
| Color | White |
| Product Dimensions (D x W x H) | 9.29" x 24.8" x 72.83" (23.6cm x 63cm x 185cm) |
| Item Weight | 102.4 pounds (46.55 Kilograms) |
| Special Feature | Full Length Mirror |
| Mounting Type | Floor Mount (with wall anchor for stability) |
| Finish Type | Painted |
| Number of Flip Drawers | 5 |
| Assembly Required | Yes |
| Material | E1 high-density board with waterproof and abrasion-resistant surface |
9. Warranty and Customer Support
For warranty information, product support, or to report missing/damaged parts, please refer to the contact details provided with your purchase documentation or visit the official Organizedlife website. Keep your purchase receipt for warranty claims.