1. Introduction
This manual provides essential instructions for the safe and effective installation and use of your IFRESEM 14.4V 2600mAh replacement battery, specifically designed for the iHome AutoVac Juno 1st Gen Robot Vacuum Cleaner (Model IHRV9-BLK).
Important Compatibility Note: This battery is compatible only with the iHome AutoVac Juno 1st Gen Robot Vacuum Cleaner (Model IHRV9-BLK). It is not compatible with the iHome AutoVac Juno 2nd Gen (Model IHRV9-BLKS). Please verify your robot vacuum's model number before proceeding with installation.
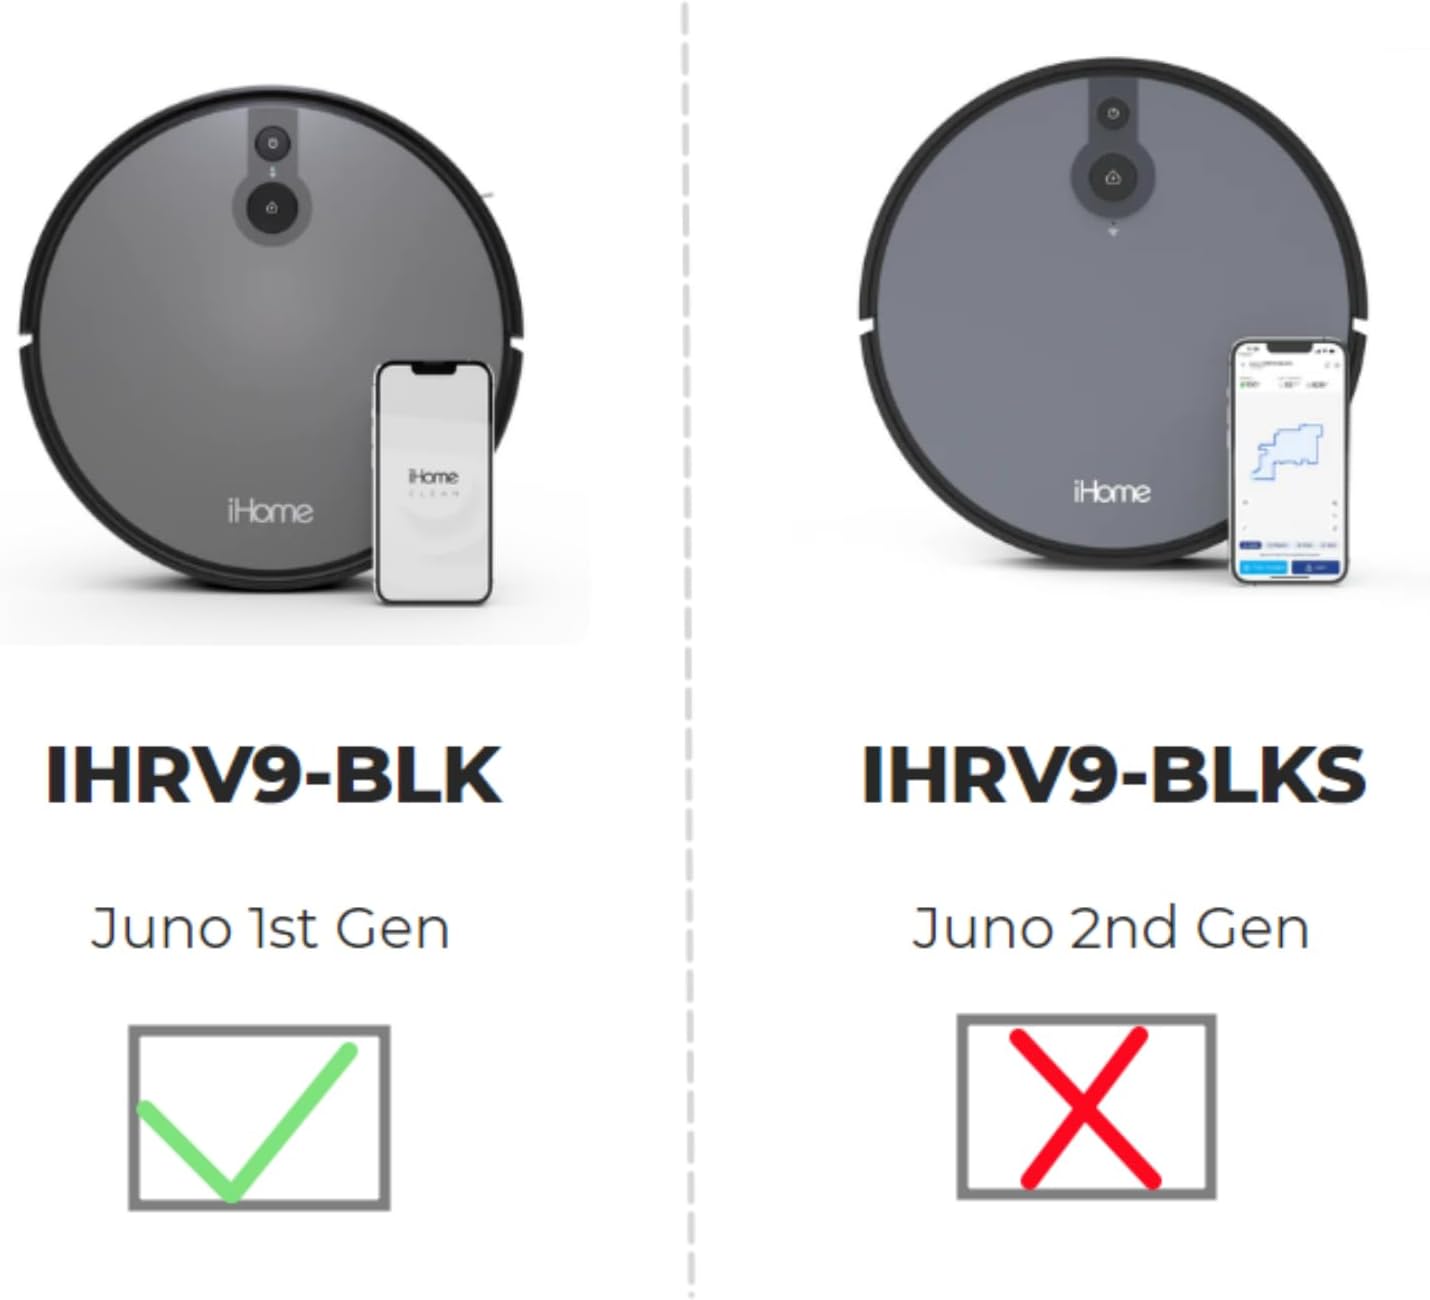
Figure 1: Compatibility comparison between iHome AutoVac Juno 1st Gen (IHRV9-BLK) and 2nd Gen (IHRV9-BLKS). This battery is only for the 1st Gen model.
2. Safety Information
Please read and understand all safety warnings before handling or installing the battery. Failure to follow these instructions may result in fire, electric shock, or other injuries.
- Dry Location Use Only: This battery is intended for use in dry indoor environments.
- Fire Hazard: The battery may explode if disposed of in fire. Do not expose to high temperatures.
- Prevent Short Circuits: To prevent injury or fire, do not allow metal objects to contact the battery terminals.
- Charging: Use only the special charger provided with your iHome AutoVac Juno robot vacuum.
- Disposal: Dispose of used batteries according to local regulations. Do not dispose of with household waste.
- Circuit Protection: The battery features built-in circuit protection for safety and stability.
- Recharge Cycles: Designed for more than 500 recharge cycles over its lifespan.

Figure 2: Battery with caution label, emphasizing safe handling and usage.
3. Package Contents
Verify that all items are present in the package:
- 1x IFRESEM Replacement Battery Pack (14.4V, 2600mAh)
- 1x Screwdriver

Figure 3: Contents of the package, including the battery and a screwdriver for installation.
4. Installation
Follow these steps to replace the battery in your iHome AutoVac Juno 1st Gen robot vacuum cleaner:
- Power Off: Ensure your iHome AutoVac Juno robot vacuum is completely powered off and disconnected from its charging base.
- Position Robot: Carefully turn the robot vacuum upside down on a soft, clean surface to avoid scratching the device.
- Locate Battery Compartment: Identify the battery compartment cover, typically secured by screws on the underside of the robot.
- Remove Cover: Use the provided screwdriver to loosen and remove the screws securing the battery compartment cover. Set the screws and cover aside in a safe place.
- Disconnect Old Battery: Gently lift the old battery. Carefully disconnect its connector from the robot's port. Do not pull on the wires.
- Remove Old Battery: Remove the old battery from the compartment.
- Insert New Battery: Place the new IFRESEM replacement battery into the compartment, ensuring it fits snugly.
- Connect New Battery: Connect the new battery's 4-prong connector to the robot's port. Ensure the connector is aligned correctly and pushed in firmly until it clicks into place.
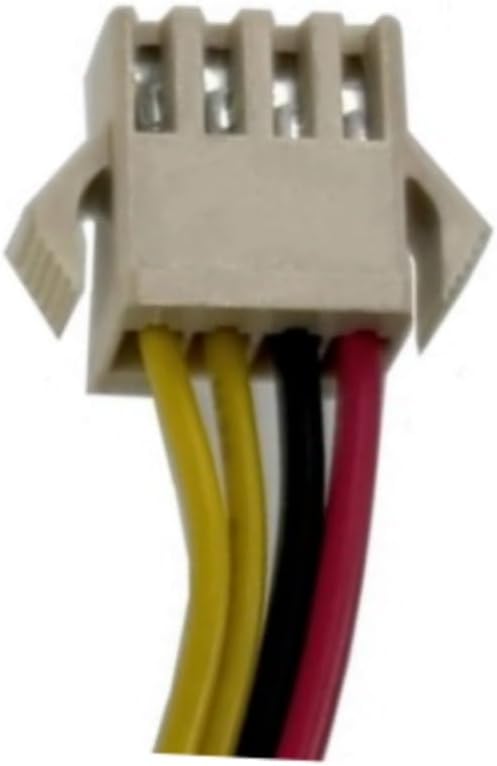
Figure 4: Detail of the 4-prong connector, crucial for proper installation.
- Replace Cover: Position the battery compartment cover back over the compartment and secure it with the screws using the screwdriver. Do not overtighten.
- Initial Charge: Flip the robot vacuum upright and place it on its charging base. Allow the battery to fully charge before its first cleaning cycle.
5. Operating
After successful installation and initial charging, your iHome AutoVac Juno robot vacuum should operate as usual. Refer to your robot vacuum's original user manual for specific operating instructions.
- Ensure the robot is fully charged before each cleaning cycle for optimal performance.
- If the robot exhibits unusual behavior, refer to the troubleshooting section or your robot's manual.
6. Maintenance
Proper battery maintenance can extend its lifespan:
- Regular Charging: Keep the robot vacuum on its charging base when not in use to maintain battery health.
- Avoid Deep Discharge: Do not allow the battery to completely drain frequently, as this can reduce its overall lifespan.
- Storage: If storing the robot vacuum for an extended period, ensure the battery is partially charged (around 50%) and store it in a cool, dry place. Recharge every 3-6 months.
- Cleaning: Keep the battery terminals and compartment clean and free of dust or debris.
7. Troubleshooting
If you encounter issues after battery replacement, consider the following:
- Robot Not Turning On:
- Ensure the battery is correctly installed and the connector is firmly seated.
- Verify the robot is placed on the charging base and the base is powered.
- Allow sufficient time for the battery to charge.
- Short Run Time:
- Ensure the battery has been fully charged.
- Check for any obstructions or issues with the robot's movement that might cause excessive power consumption.
- Charging Issues:
- Confirm the charging contacts on both the robot and the base are clean.
- Ensure the charging base is receiving power.
If problems persist, contact customer support as detailed in the Warranty and Support section.
8. Specifications
| Battery Type | Lithium Ion (Li-ion) |
| Voltage | 14.4V |
| Capacity | 2600mAh / 36.0Wh |
| Number of Cells | 4 |
| Dimensions | 2.76 x 1.5 x 1.5 inches |
| Item Weight | 8.4 ounces |
| Model Number | IHRV9-BLK |
| Certifications | CE, FCC, RoHS |
9. Warranty and Support
Your IFRESEM replacement battery comes with the following:
- 30-Day Money Back Guarantee: If you are not satisfied with your purchase, you may return it within 30 days for a full refund.
- 12-Month Warranty: The battery is covered by a 12-month warranty against manufacturing defects.
For any issues, questions, or concerns, please contact us via email. We aim to respond and resolve problems within 24 hours.


