GRENPRO 071481
GRENPRO 6-in-1 Manual Brad Nailer Staple Gun (Model 071481) Instruction Manual
Introduction
This manual provides essential information for the safe and effective operation of your GRENPRO 6-in-1 Manual Brad Nailer Staple Gun, Model 071481. Please read these instructions carefully before use and retain for future reference. This tool is designed for various DIY projects, carpentry, and upholstery tasks, compatible with multiple staple and brad nail types.
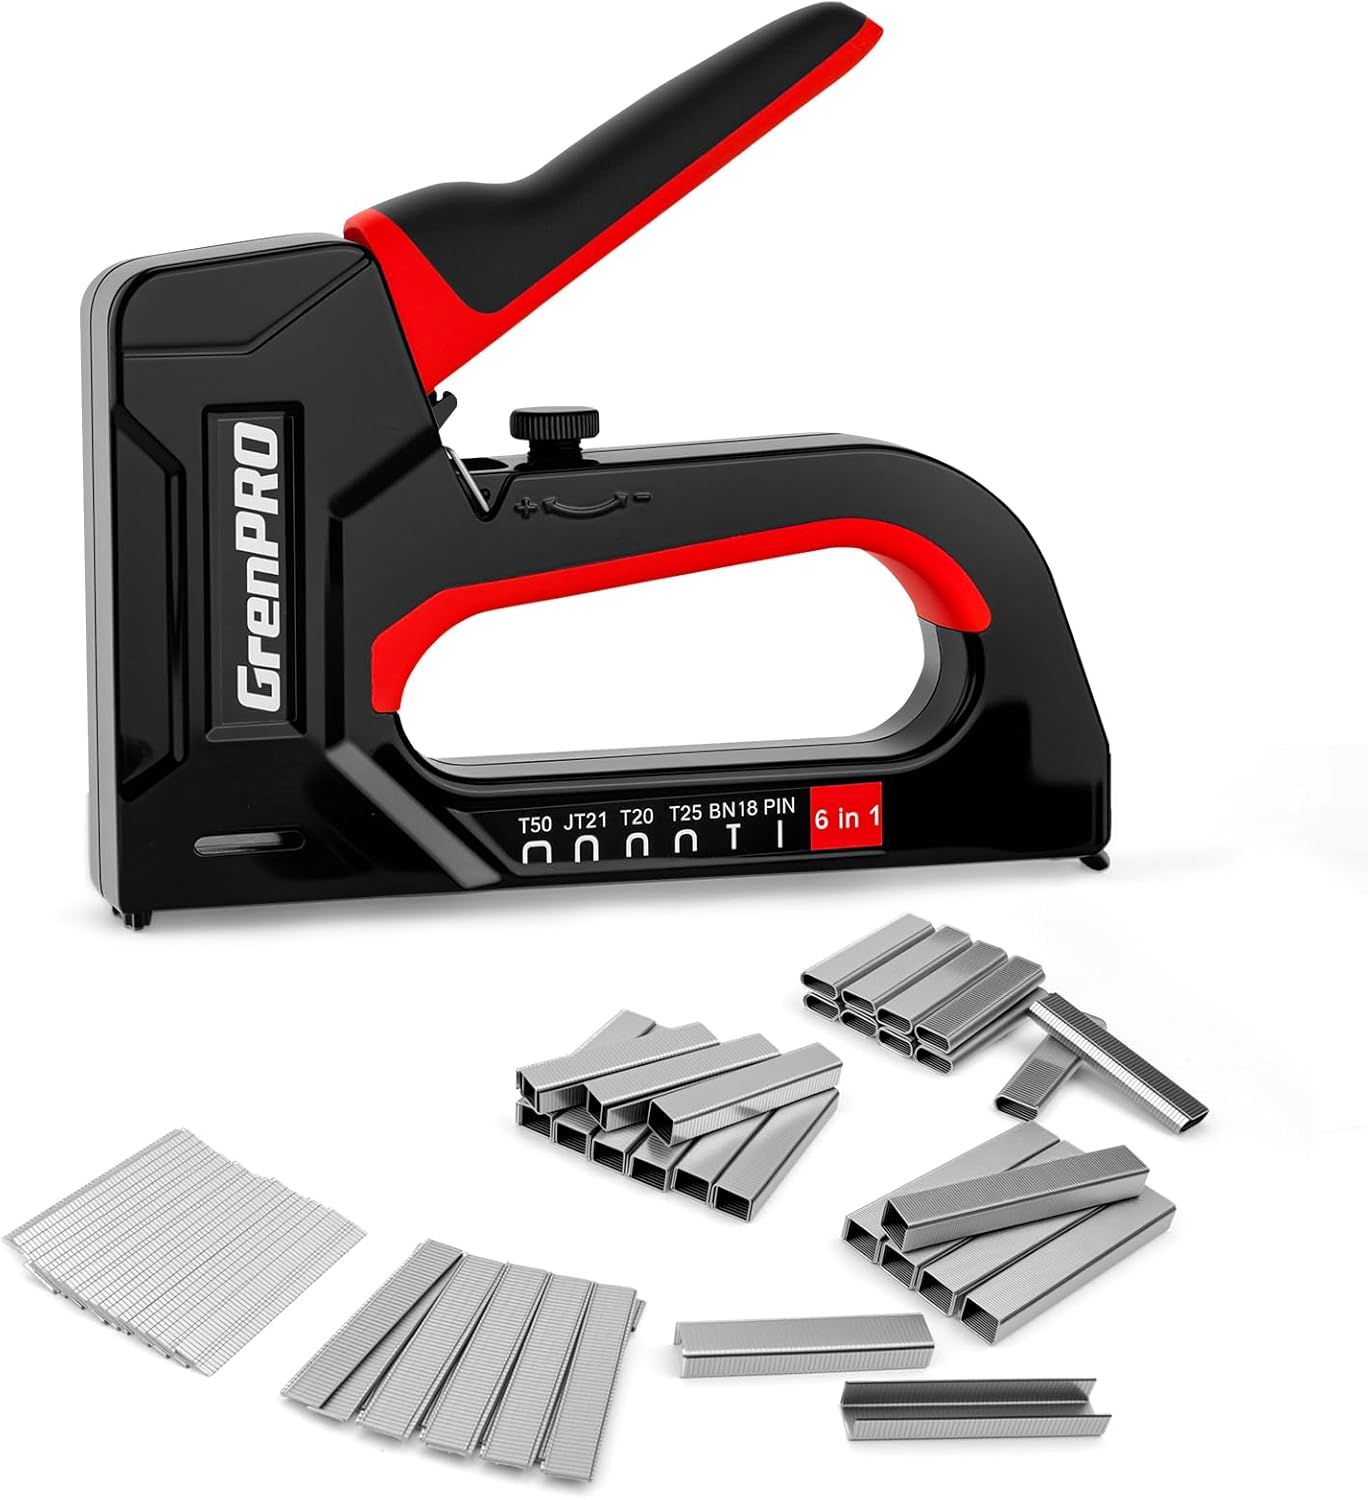
Image: The GRENPRO 6-in-1 Manual Brad Nailer Staple Gun shown with a selection of compatible staples and brad nails.
Safety Instructions
Always follow these safety guidelines to prevent injury and ensure proper tool operation:
- Wear Eye Protection: Always wear safety glasses to protect your eyes from flying debris.
- Keep Hands Clear: Never place hands or fingers near the staple exit area or the firing mechanism.
- Do Not Point: Never point the staple gun at yourself, other people, or animals.
- Unload When Not in Use: Always ensure the tool is unloaded and the handle is locked when not in use, during maintenance, or when clearing jams.
- Use Correct Fasteners: Only use staples and brad nails that are compatible with this tool as specified in the "Specifications" section.
- Inspect Before Use: Before each use, inspect the tool for any damage or loose parts. Do not use if damaged.
- Secure Workpiece: Ensure your workpiece is stable and secure before fastening.
Package Contents
Verify that all items are present in your package:
- GRENPRO 6-in-1 Manual Brad Nailer Staple Gun (Model 071481)
- 5000 assorted fasteners, including:
- 1000 U-Type Staples
- 2000 D-Type Staples
- 1000 T-Type Staples (Brad Nails)
- 1000 I-Type Staples (Brad Nails)

Image: A visual representation of the 5000 assorted staples and brad nails provided with the GRENPRO staple gun.
Product Overview
Familiarize yourself with the components of your staple gun:

Image: Labeled diagram illustrating the key parts of the GRENPRO 6-in-1 Manual Brad Nailer Staple Gun, including the handle, trigger, staple magazine, and force adjustment knob.
- Handle: Ergonomically designed for comfortable grip and operation.
- Trigger/Actuator: Squeeze to drive fasteners.
- Staple Magazine: Holds the fasteners. Located at the bottom rear of the tool.
- Force Adjustment Knob: Located on top, used to adjust the driving power.
- Handle Lock: Mechanism to secure the handle in a closed position for safe storage.
- Staple Exit: The front opening where fasteners are driven out.
Setup: Loading Fasteners
Follow these steps to load staples or brad nails into your staple gun:
- Ensure Safety: Always ensure the handle is locked and the tool is not pointed at anyone before loading.
- Open Magazine: Press the latch at the rear of the staple gun and pull out the staple pusher rod.
- Insert Fasteners: Place the strip of staples or brad nails into the magazine channel. Ensure the points of the fasteners are facing downwards towards the staple exit.
- Specific Fastener Loading:
- For I-shaped Brad Nails: Place the nails flat against the bottom of the magazine channel.
- For U-shaped Staples: Place the staples with the curved top facing upwards, fitting into the channel.

Image: Schematic diagram demonstrating the correct orientation and placement for loading I-shaped brad nails into the staple gun.

Image: Schematic diagram illustrating the correct orientation and placement for loading U-shaped staples into the staple gun.
- Close Magazine: Push the pusher rod back into the magazine until it latches securely.
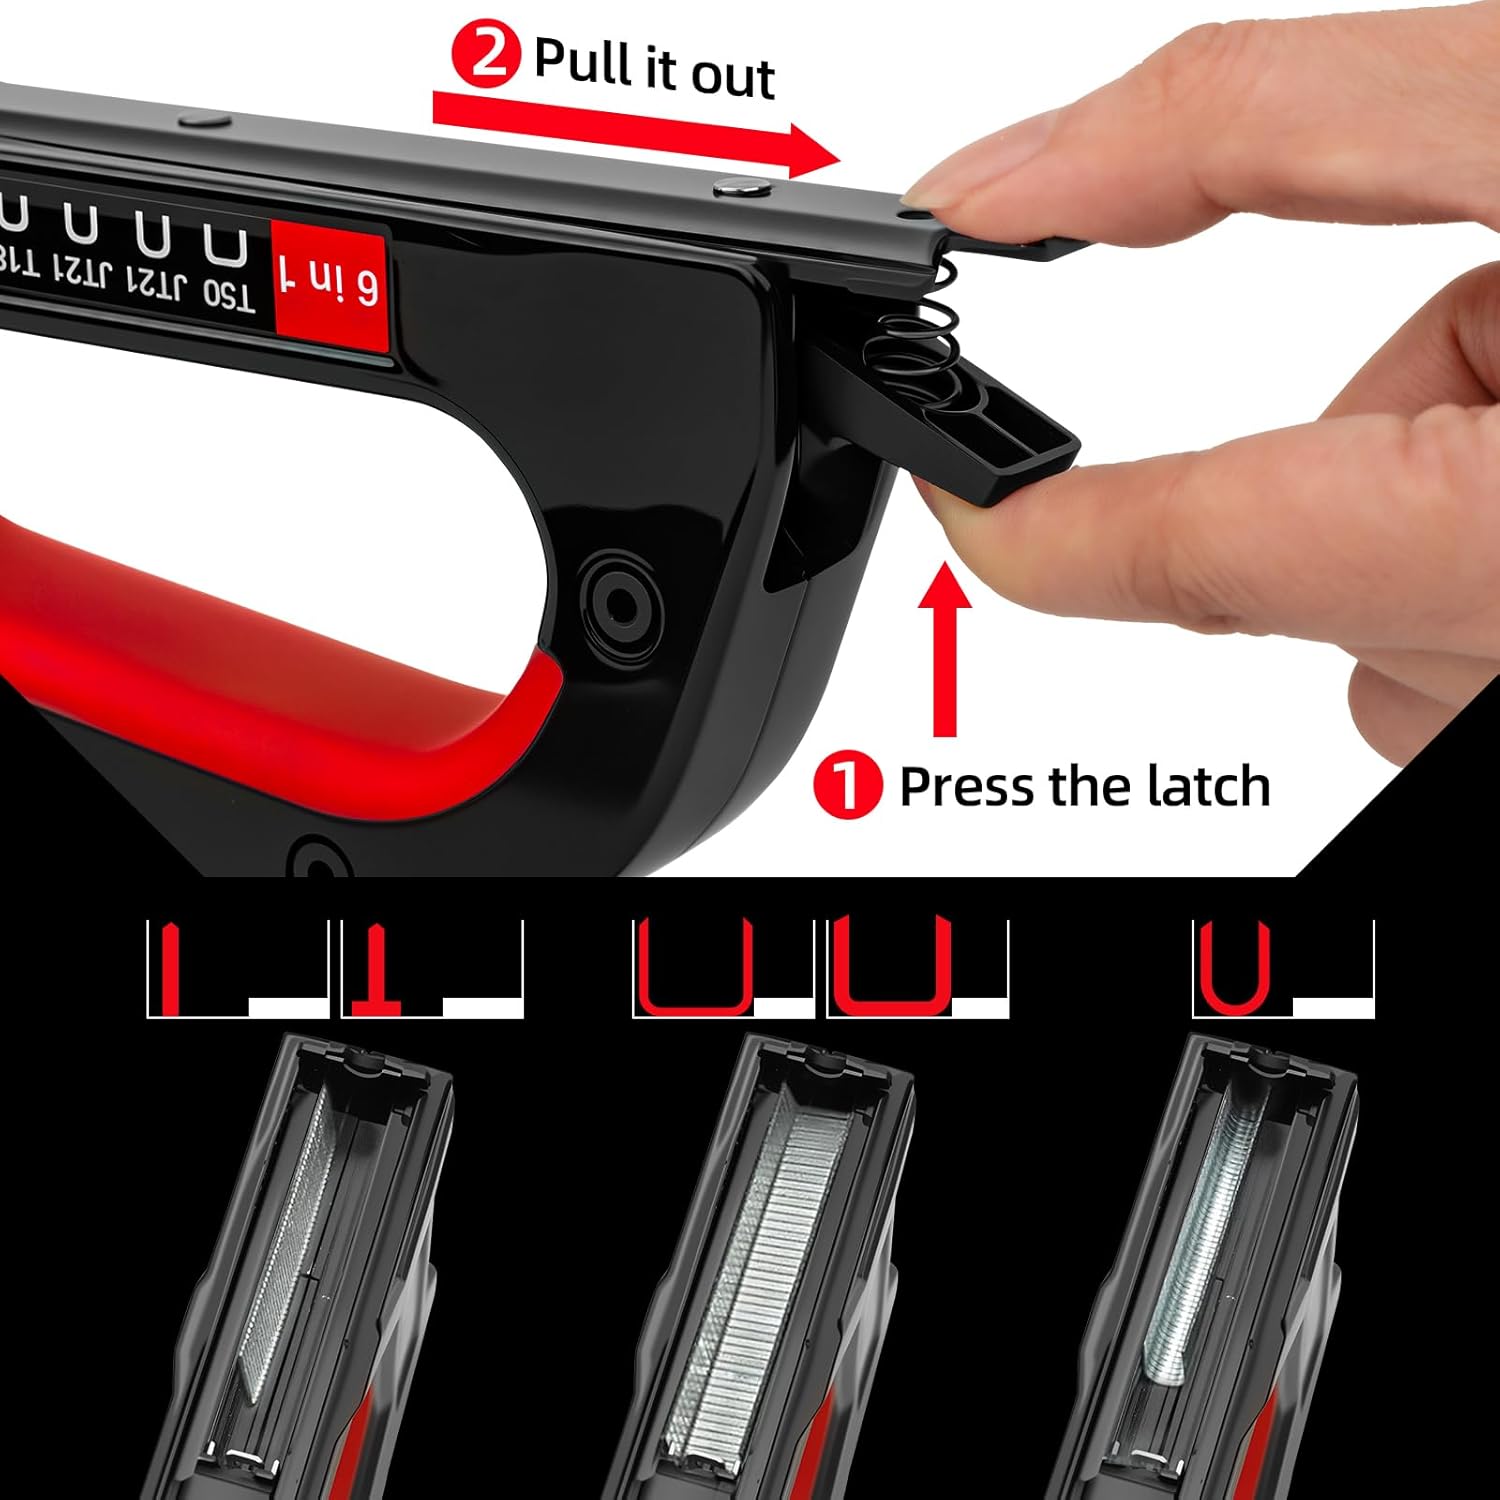
Image: Step 1 of loading, showing how to press the latch and pull out the pusher rod from the staple magazine.

Image: A hand carefully placing a strip of staples into the open magazine of the staple gun.

Image: A hand pushing the staple pusher rod back into the tool's magazine, ensuring it is fully closed and latched.
Operating Instructions
Firing the Staple Gun
- Unlock Handle: If the handle is locked, press the handle down to release the lock, then pull the handle back to its open position.
- Position Tool: Place the staple exit firmly against the material where you wish to drive a fastener.
- Fire: Squeeze the handle firmly and completely to drive the fastener.
- Release: Release the handle to prepare for the next fastener.
Adjusting Driving Force
The GRENPRO staple gun features an adjustable driving force to accommodate different materials and fastener sizes.
- Increase Power: Rotate the force adjustment knob clockwise (to the right) to increase the driving force for harder materials or longer fasteners.
- Decrease Power: Rotate the force adjustment knob counter-clockwise (to the left) to decrease the driving force for softer materials or shorter fasteners.

Image: A detailed view of the force adjustment knob, indicating how to rotate it to increase or decrease the staple gun's driving power.
Handle Lock for Safe Storage
To safely store the staple gun and prevent accidental firing, use the handle lock mechanism:
- Engage Lock: Press the handle completely down.
- Pull Back: While the handle is pressed down, pull the handle lock mechanism back until it engages and holds the handle in the closed position.
- Verify: Ensure the handle is securely locked and cannot be squeezed.

Image: A three-step visual guide showing how to press the handle, pull back the locking mechanism, and confirm the staple gun is in a locked status for safe storage.
Applications
This versatile tool is suitable for a variety of tasks:

Image: Examples of the staple gun in use for various home projects, including crafting, securing electrical wires, upholstery work on chairs, and framing photographs.
- Crafting projects
- Securing low-voltage wiring
- Upholstery and fabric attachment
- Light wood assembly and framing
Maintenance
- Clearing Jams: If a fastener jams, unload the tool, then carefully remove the jammed fastener using pliers or a screwdriver. Never force the trigger when jammed.
- Cleaning: Keep the tool clean and free of dust and debris. Wipe down with a dry cloth. Do not use solvents.
- Lubrication: Periodically apply a small amount of light machine oil to moving parts, such as the pivot points and the staple pusher rod, to ensure smooth operation.
- Storage: Store the staple gun in a dry, safe place, out of reach of children. Always engage the handle lock before storage.
Troubleshooting
| Problem | Possible Cause | Solution |
|---|---|---|
| Staple gun does not fire. | Magazine is empty. Handle lock is engaged. Fastener jam. | Load fasteners. Disengage handle lock. Clear jam. |
| Fasteners not fully penetrating material. | Insufficient driving force. Incorrect fastener type for material. Tool not pressed firmly against workpiece. | Increase driving force using the adjustment knob. Use appropriate fasteners. Press tool firmly against the surface. |
| Fasteners jam frequently. | Damaged or incorrect fasteners. Debris in magazine. Worn parts. | Use new, correct fasteners. Clean magazine. If problem persists, contact support. |
Specifications
- Brand: GRENPRO
- Model: 071481
- Type: 6-in-1 Manual Brad Nailer Staple Gun
- Material: Metal, Plastic
- Item Weight: Approximately 1 pound (454g)
- Product Dimensions: Approximately 8 x 2.5 x 0.1 inches (20.3 x 6.35 x 0.25 cm)
- Fastener Capacity: 5000 fasteners included (assorted types)
- Adjustable Power: Yes
Compatible Fastener Types and Sizes:

Image: A comprehensive chart outlining the compatible D-Type, U-Type, T-Type, and I-Type fasteners, including their width, crown, length, and equivalent models from other brands.
- D-Type Staples:
- Width: 1.2mm, Crown: 10.6mm, Length: 4-14mm (Compatible with Arrow T50 / Rapid 140)
- Width: 0.7mm, Crown: 10.6/11.3mm, Length: 4-14mm (Compatible with Arrow JT21 / Rapid 53 1004-1014)
- U-Type Staples:
- Width: 1.2mm, Crown: 6.3mm, Length: 10-12mm (Compatible with Arrow T18 / Rapid 28 Rocatix 8)
- T-Type Staples (Brad Nails):
- Width: 1.2mm, Crown: 2mm, Length: 10-14mm (Compatible with Esco 300 Novus / Rocatix No.8)
- I-Type Staples (Brad Nails):
- Width: 1.2mm, Crown: 1mm, Length: 14mm (Compatible with Esco 300 Novus / Rocatix No.8)
Warranty and Support
Specific warranty details are not provided in this manual. For warranty information, technical support, or to inquire about replacement parts, please contact GRENPRO customer service through their official channels or the retailer where the product was purchased.
Please have your model number (071481) and purchase date available when contacting support.
Ask a question about this manual
Ask about setup, troubleshooting, compatibility, parts, safety, or missing instructions. Manuals+ will review the question and use this page’s manual context to help answer it.