1. Important Safety Information
Please read and understand all instructions before assembly and use. Retain this manual for future reference.
- Always secure the cabinet to the wall using the provided hardware to prevent tipping.
- Follow the assembly instructions carefully to avoid injury.
- Do not exceed the load limit of the cabinet to maintain its stability and prevent accidents.
- Keep small parts away from children during assembly.
2. Product Overview
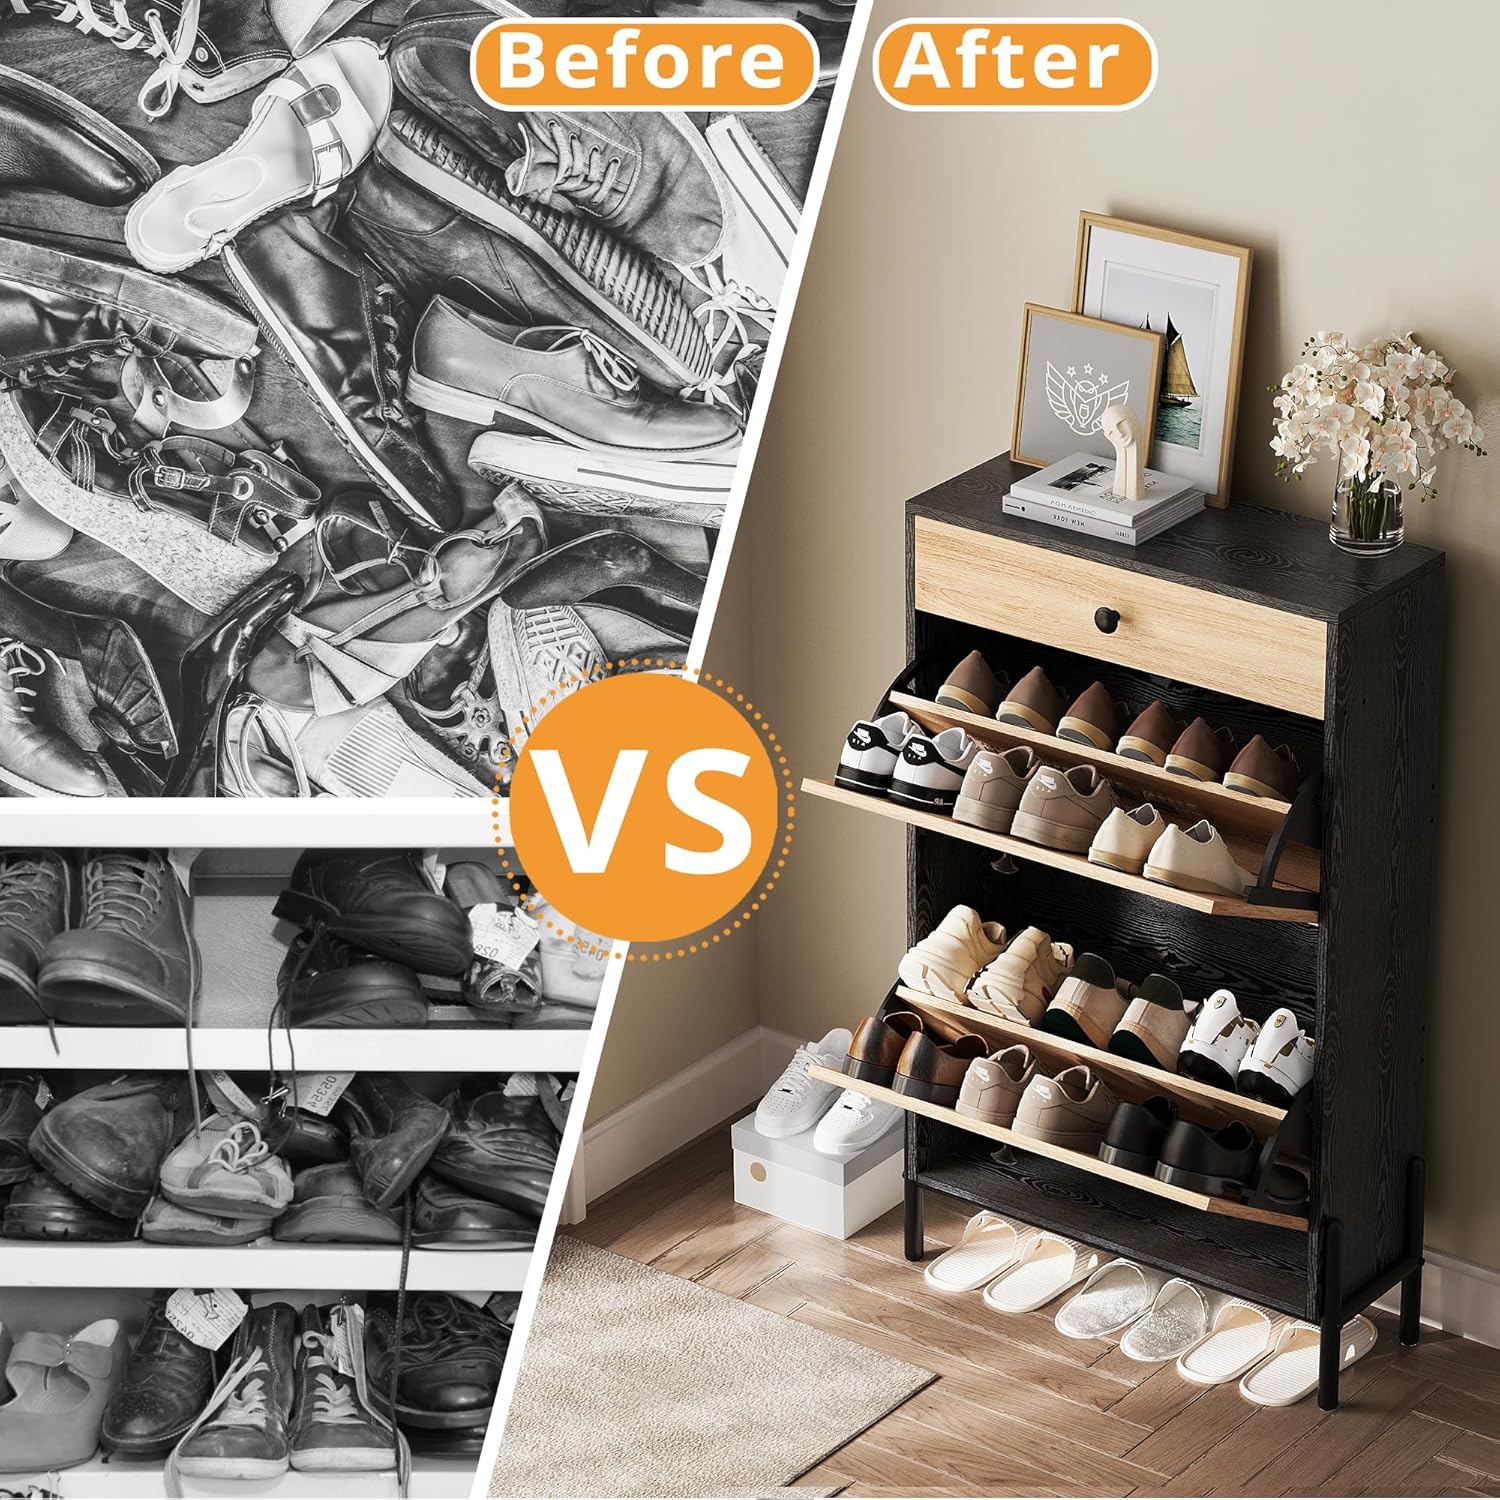
The IRONCK Shoe Cabinet is designed for efficient shoe storage in entryways, hallways, or living rooms. It features a slim profile, two flip-top drawers with adjustable shelves, a top storage drawer, and a bottom compartment for slippers or boots.

3. Package Contents
Verify that all components are present before beginning assembly. If any parts are missing or damaged, please contact customer support.
- Assembly Hardware
- Drawers (2 flip-top, 1 top)
- Instruction Manual
- Legs (4)
- Shelves (adjustable)
- Anti-tipping device
4. Specifications
| Feature | Detail |
|---|---|
| Brand | IRONCK |
| Model Number | HK-XG-E04 |
| Color | Black |
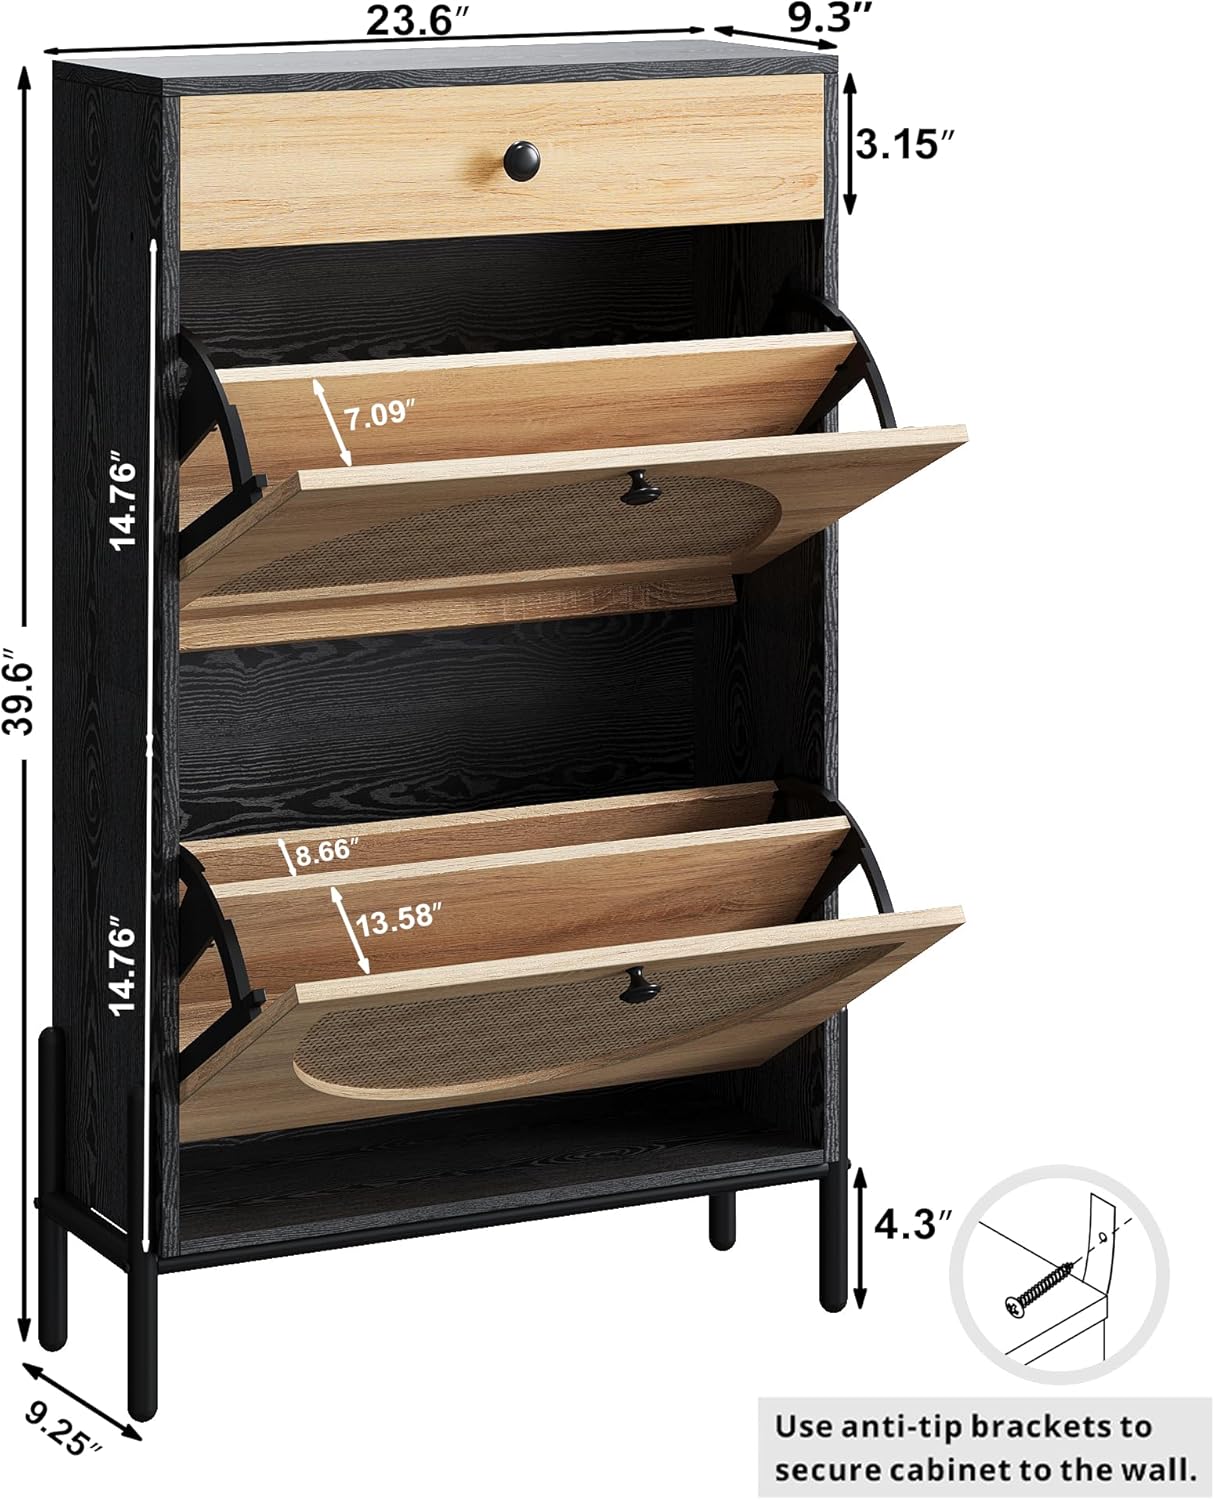
| Product Dimensions | 9.25"D x 23.6"W x 39.6"H |
| Item Weight | 45 Pounds |
| Material | Engineered Wood with Melamine Finish, Rattan |
| Mounting Type | Floor Mount (with anti-tipping device) |
| Number of Shelves | 4 (adjustable) |
| Special Features | Adjustable Shelf, Anti-Tipping, Removable Shelf |
5. Assembly Instructions
Assembly is required for this product. All parts are numbered, and a detailed instruction manual is included in the package. Follow the steps carefully to ensure correct and safe assembly.
- Unpack all components and verify against the parts list in the included manual.
- Follow the step-by-step diagrams and instructions provided in the assembly manual.
- Ensure all screws and fasteners are tightened securely, but do not overtighten.
- Important: Install the anti-tipping device as instructed in the manual. This device secures the cabinet to the wall, preventing accidental tipping and ensuring safety. Refer to Figure 2.2 for a visual representation of the anti-tip bracket.
- Once assembled, place the cabinet on a flat, stable surface.
6. Operation
6.1 Using the Flip Drawers
The cabinet features two flip-top drawers designed for shoe storage. Gently pull the handle to open each drawer. Shoes are stored vertically on the internal shelves.
6.2 Adjustable and Removable Shelves
Each flip-top drawer contains a center divider that can be adjusted to three different positions or removed entirely. This allows for accommodating various shoe sizes and types, including high heels, boots, sneakers, and slippers.

6.3 Top Storage Drawer and Bottom Compartment
The top surface and the small drawer provide additional storage for items such as keys, wallets, glasses, or decorative items. The open compartment at the bottom is suitable for storing slippers or frequently used shoes.

7. Care and Maintenance
- Wipe the cabinet surfaces with a soft, damp cloth. Avoid abrasive cleaners.
- Do not expose the cabinet to excessive moisture or direct sunlight for prolonged periods.
- Periodically check all fasteners to ensure they remain tight. Retighten if necessary.
- Ensure the anti-tipping device remains securely attached to the wall.
8. Troubleshooting
- Missing Parts: If any parts are missing upon unboxing, refer to the included assembly manual for the parts list and contact customer support for replacements.
- Difficulty Assembling: Ensure all steps in the instruction manual are followed precisely. Verify that the correct hardware is used for each step. If issues persist, contact customer support.
- Cabinet Instability: Ensure the cabinet is placed on a level surface. Confirm that all assembly screws are tightened. Most importantly, ensure the anti-tipping device is correctly installed and secured to a wall stud or appropriate anchor.
- Drawers Not Opening/Closing Smoothly: Check for any obstructions within the drawer mechanism. Ensure the drawer slides are correctly aligned and free of debris.
9. Customer Support
For any questions, concerns, or assistance with your IRONCK Shoe Cabinet, please refer to the contact information provided in your original product packaging or visit the official IRONCK website for support resources.