1. Introduction
Thank you for purchasing the Ejoyous Mini LED Projector. This compact and versatile projector is designed to provide a high-definition viewing experience for various applications, from home entertainment to outdoor movie nights. Please read this manual thoroughly before using the product to ensure proper operation and to maximize its lifespan.
2. Safety Information
- Do not look directly into the projector lens when the lamp is on.
- Keep the projector away from water or any liquids to prevent electric shock.
- Ensure proper ventilation around the projector to prevent overheating. Do not block ventilation openings.
- Use only the power adapter supplied with the projector.
- Do not attempt to repair the projector yourself. Refer all servicing to qualified personnel.
- Keep out of reach of children.
- Avoid placing the projector on unstable surfaces.
3. Package Contents
Please check the package for the following items:
- Ejoyous Mini LED Projector
- Remote Control
- Power Cable
- User Manual (this document)
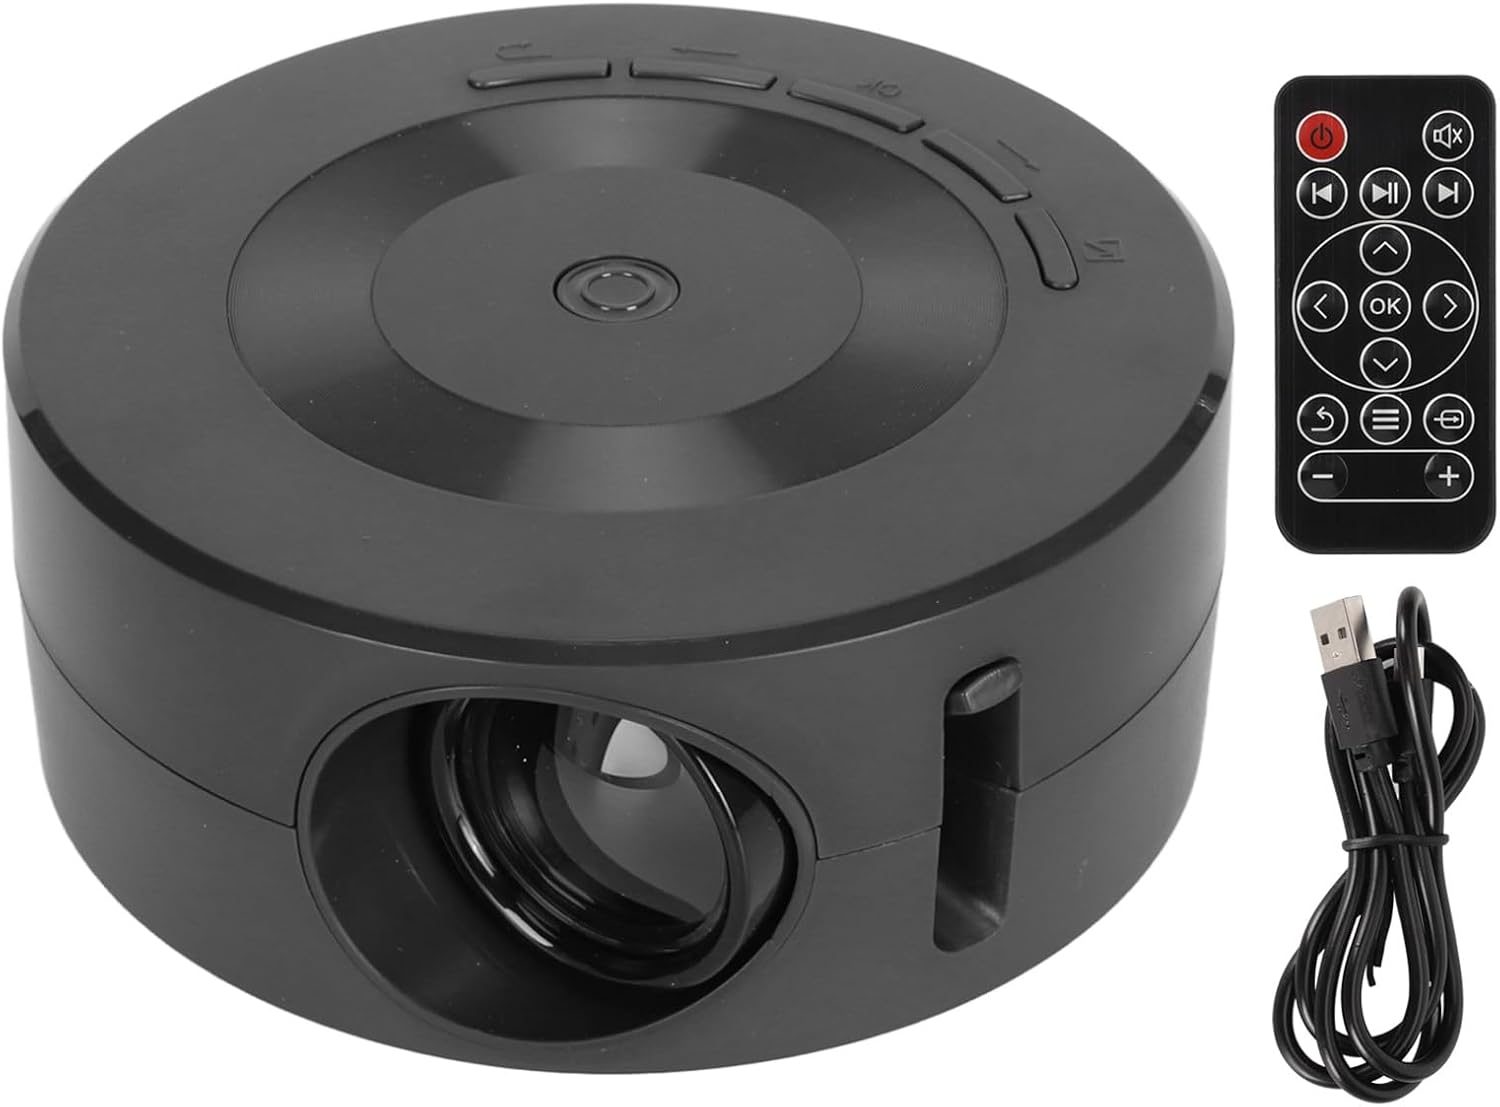
Image: The Ejoyous Mini LED Projector, its remote control, and a USB cable, representing the typical package contents.
4. Product Overview
4.1 Projector Components

Image: A detailed view of the projector's rear panel, highlighting the Audio output, 5V IN power input, USB port, and IR (infrared) input for the remote control.
- Projector Lens: Emits the image.
- Focus Ring: Adjusts image clarity.
- Audio Output (3.5mm jack): Connect external headphones or speakers.
- 5V IN (Micro USB/USB-C): Power input for the projector.
- USB Port: Connect USB flash drives or external hard drives for media playback.
- IR Input: Receives signals from the remote control.
- Control Buttons: Power, navigation, and volume controls on the top panel.
4.2 Remote Control Functions
The remote control allows for convenient operation of the projector from a distance. Key functions include:
- Power Button: Turns the projector on/off.
- Navigation Buttons (Up/Down/Left/Right): Navigate menus.
- OK Button: Confirm selections.
- Back/Return Button: Go back to the previous menu.
- Volume +/-: Adjust audio volume.
- Source Button: Select input source (e.g., USB, screen mirroring).
5. Setup
5.1 Powering On the Projector
- Connect the power cable to the 5V IN port on the projector.
- Connect the other end of the power cable to a suitable power source (e.g., wall adapter, power bank). Ensure the power source provides at least 5V 2A.
- Press the Power button on the projector or the remote control to turn it on.

Image: Illustration of connecting the projector to a power source, either a standard cell phone charger or a power bank. Both require a minimum output of 5V 2A.
5.2 Adjusting Focus
Rotate the focus ring located near the lens until the projected image appears clear and sharp on the screen or wall.
5.3 Positioning the Projector
Place the projector on a stable, flat surface. The optimal projection distance is between 0.6 to 4 meters (2 to 13.1 feet) for a screen size of 14 to 100 inches.

Image: The mini projector in a home setting, demonstrating its compact size and projection capability.
6. Operating Instructions
6.1 Connecting Devices via USB
- Insert a USB flash drive or external hard drive into the USB port on the projector.
- Use the remote control or projector buttons to navigate to the "Media" or "USB" input source.
- Browse and select your desired media files (videos, photos, music) for playback.
6.2 Screen Mirroring (Wired Connection)
The projector supports wired screen mirroring for iOS and Android devices using their charging cable. No separate adapter cable is required.
- Connect your iOS or Android device to the projector's USB port using your device's standard charging cable.
- The projector should automatically detect the connection and prompt for screen mirroring. Follow any on-screen instructions on your device or the projector.
- Ensure your device is unlocked and allows access for screen mirroring.

Image: A smartphone connected to the projector via its charging cable for screen mirroring, demonstrating the wired connection feature. A power bank is also shown connected to the projector for portable power.
6.3 Audio Output
The projector has a built-in 4Ω 2W speaker. For a more immersive audio experience or private listening:
- Connect external headphones or speakers to the 3.5mm Audio Output jack on the projector.
- Adjust the volume using the projector's buttons or the remote control.

Image: An outdoor scene with people watching a movie projected by the Ejoyous Mini LED Projector, illustrating its use as a portable entertainment solution with integrated sound.
7. Maintenance
7.1 Cleaning the Lens
Gently wipe the projector lens with a soft, lint-free cloth specifically designed for optical lenses. Do not use abrasive cleaners or solvents.
7.2 Cleaning the Projector Body
Wipe the exterior of the projector with a soft, dry cloth. For stubborn dirt, slightly dampen the cloth with water, then wipe dry immediately.
7.3 Storage
When not in use, store the projector in a cool, dry place, away from direct sunlight and excessive dust.
8. Troubleshooting
| Problem | Possible Cause | Solution |
|---|---|---|
| No image projected |
|
|
| Image is blurry |
|
|
| No sound |
|
|
| Cannot connect to phone/tablet for screen mirroring |
|
|
9. Specifications
| Brand | Ejoyous |
| Model Number | Ejoyous6mxf2ap9v4 |
| Projection Technology | LED & LCD |
| Supported Resolution | 1080p Full HD |
| Projection Size | 14-100 inches |
| Projection Distance | Approx. 0.6 - 4 meters (2 - 13.1 feet) |
| Contrast Ratio | 3000:1 |
| Aspect Ratio | 4:3, 16:9 |
| Built-in Speaker | 4Ω 2W |
| Power Consumption | 10W |
| Interface | AUX (3.5mm Audio Out), USB, 5V IN |
| Noise Level | 20dB |
| Remote Control Battery | 1 x CR2025 160mAh (included) |
| Material | Eco-friendly ABS |
10. Warranty and Support
For warranty information and technical support, please refer to the contact details provided by your retailer or visit the official Ejoyous website. Keep your purchase receipt as proof of purchase for warranty claims.
Manufacturer: Ejoyous
Country of Origin: China
Note: Information regarding spare parts availability and software updates is not available at this time.