1. Introduction
This manual provides detailed instructions for the safe installation, operation, and maintenance of your Generic 52-inch Low Profile Ceiling Fan with Lights, Model W1367P185623. Please read all instructions carefully before beginning installation and retain this manual for future reference.
This modern black low-profile ceiling fan is designed to provide efficient air circulation and integrated lighting for residential or commercial spaces. It features a DC motor for energy efficiency and an integrated 24-watt LED light kit with adjustable color temperatures (3000K, 4000K, 6000K), all controllable via the included remote.

Image 1.1: The 52-inch low profile ceiling fan with lights, shown installed in a contemporary living space.
2. Safety Information
WARNING: To reduce the risk of fire, electric shock, or personal injury, always follow these safety guidelines:
- Read all instructions and safety information before installing your new fan. Review the accompanying diagrams thoroughly.
- All wiring must be in accordance with national and local electrical codes. If you are unfamiliar with wiring, consult a qualified electrician.
- Before installation, disconnect power by turning off the circuit breakers at the main fuse box.
- Ensure the installation site can support the fan's weight (approximately 15-20 lbs).
- Do not operate the fan with damaged blades or housing.
- Avoid placing objects in the path of the fan blades.
- This fan is ETL safety listed, indicating compliance with safety standards.
3. Product Features
The Generic 52-inch Low Profile Ceiling Fan offers a range of features for enhanced comfort and convenience:
- Remote Control: Full function remote control for fan speed, light dimming, light color temperature, and fan direction.
- Reversible Motor: Allows for both downdraft (summer mode) and updraft (winter mode) operation to optimize air circulation year-round.
- 3 Light Color Temperatures: Integrated LED light kit provides Warm White (3000K), Natural White (4000K), and Cool White (6000K) options.
- Dimmable LED: Adjust the brightness of the integrated LED light.
- Timer Function: Set the fan to turn off automatically after 1, 3, or 6 hours.
- Six Fan Speeds: Choose from six distinct fan speeds for optimal airflow.
- Quiet DC Motor: Energy-efficient DC motor operates quietly.
- Low Profile Design: Ideal for rooms with lower ceilings.
- Matte Black Finish: Modern aesthetic to complement various decor styles.
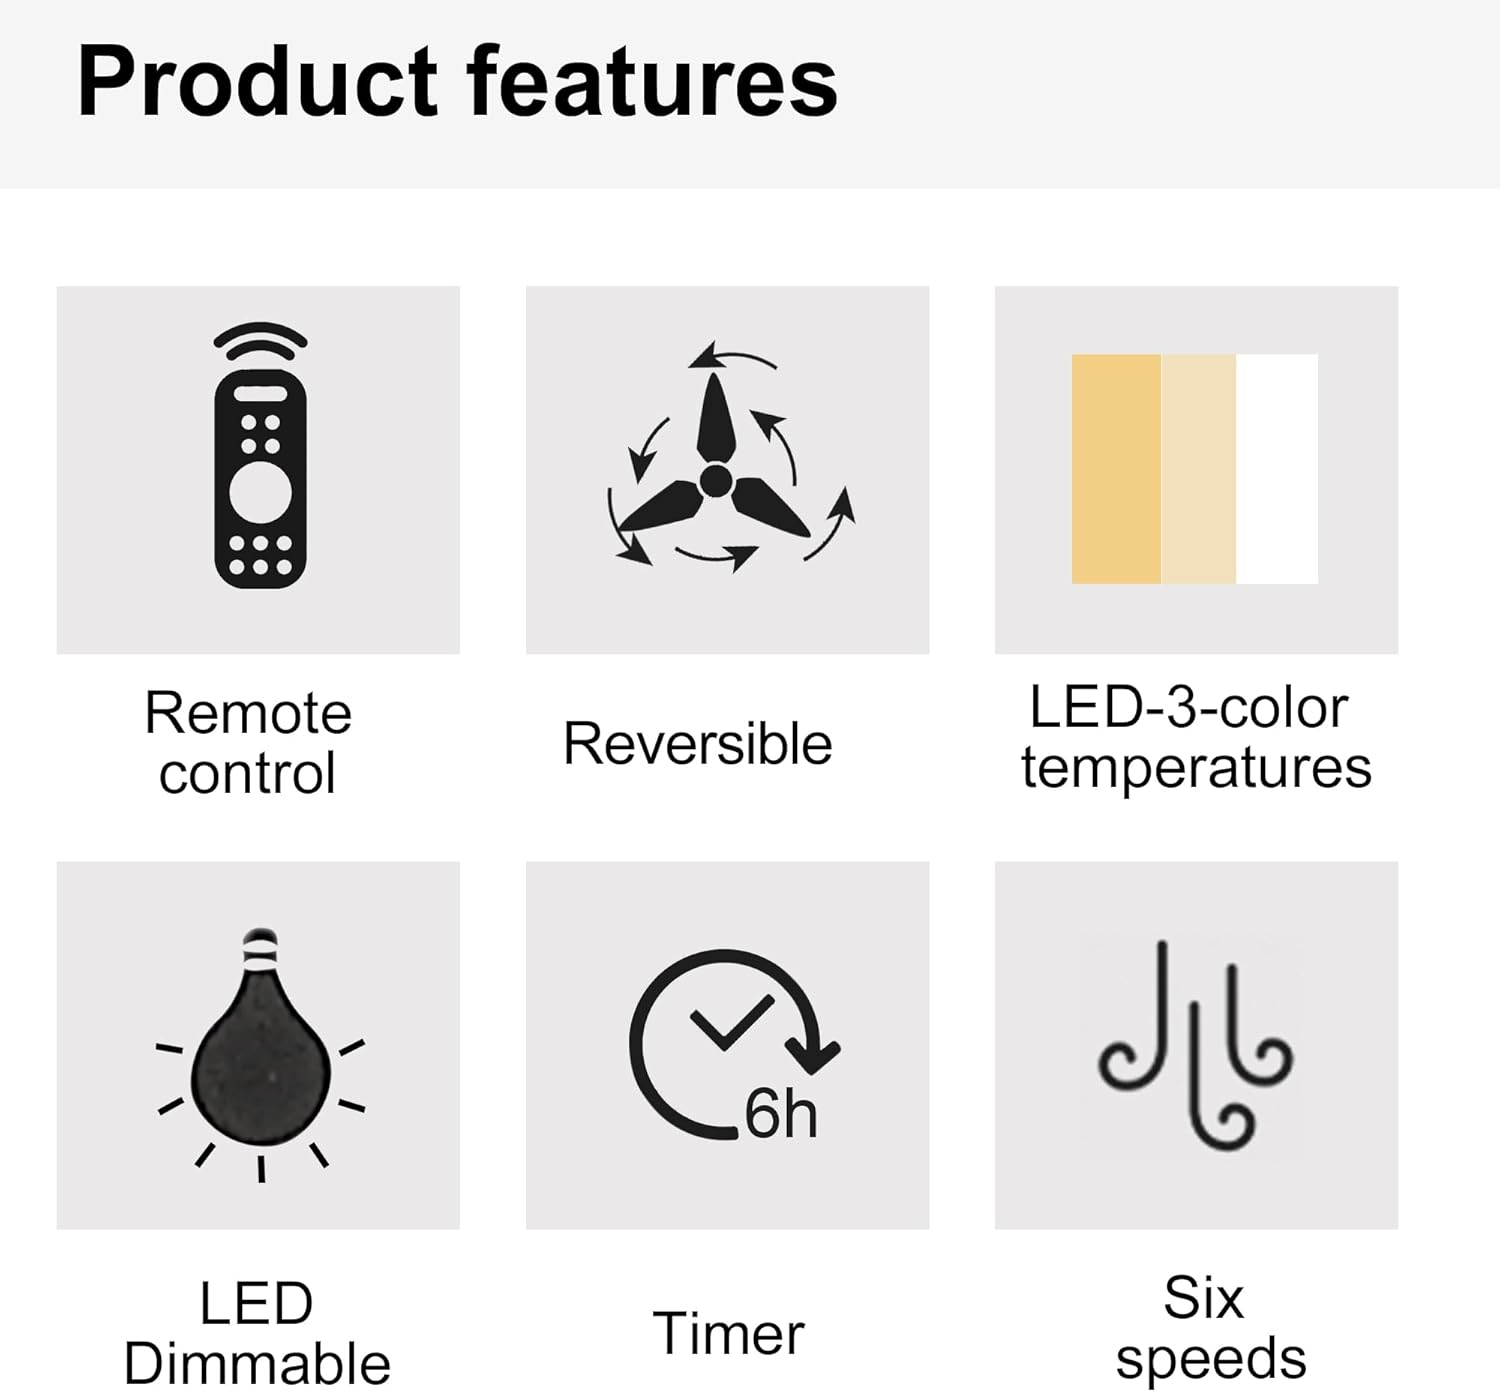
Image 3.1: Visual representation of key product features.

Image 3.2: Details of the fan's canopy and quiet DC motor.

Image 3.3: Details of the light cover and integrated 24W LED light kit.
4. Package Contents
Before installation, verify that all components are present and undamaged. If any parts are missing or damaged, contact customer support.
- Ceiling Fan Motor Assembly
- Fan Blades (5)
- Light Kit Assembly (Integrated LED)
- Remote Control
- Wall Cradle for Remote Control
- AAA Batteries for Remote Control
- Mounting Bracket
- Hardware Pack (screws, wire nuts, washers, etc.)
- Instruction Manual
5. Setup and Installation
Important: Ensure power is disconnected at the circuit breaker before beginning installation.
- Prepare the Mounting Location: Securely attach the mounting bracket to a ceiling joist or an outlet box rated for fan support.
- Wire the Fan: Connect the fan's electrical wires to the household wiring according to the wiring diagram provided in the full installation guide (not included here, but typically in a physical manual). Ensure all connections are secure with wire nuts.
- Attach the Fan Assembly: Carefully lift the fan motor assembly and attach it to the mounting bracket.
- Install Fan Blades: Secure each fan blade to the motor housing using the provided screws.
- Install Light Kit: Connect the light kit wiring and attach the light kit assembly to the bottom of the fan motor housing.
- Install Light Cover: Secure the light cover to the light kit.
For detailed wiring diagrams and step-by-step illustrations, refer to the complete installation guide included with your product.
6. Operating Instructions
Your ceiling fan is operated using the included remote control. Install the AAA batteries into the remote control before use.

Image 6.1: Remote control functions overview.
6.1 Fan Operation
- Power ON/OFF: Press the power button (usually a circle with a vertical line) to turn the fan on or off.
- Fan Speed: Use buttons labeled 1-6 to select the desired fan speed. '1' is the lowest speed, '6' is the highest.
- Fan OFF: Press the dedicated "Fan OFF" button to stop the fan.
- Forward/Reverse Mode: Press the forward/reverse button (often depicted with arrows circulating) to change the fan's direction.
- Summer Mode (Downdraft): Blades rotate counter-clockwise, pushing air downwards to create a cooling breeze.
- Winter Mode (Updraft): Blades rotate clockwise, drawing air upwards to circulate warm air trapped near the ceiling.
- Timer Function: Press the "1H", "3H", or "6H" buttons to set the fan to turn off automatically after 1, 3, or 6 hours, respectively.

Image 6.2: Understanding Forward/Reverse (Summer/Winter) Modes.
6.2 Light Operation
- Light ON/OFF: Press the "LIGHT ON" or "LIGHT OFF" buttons to control the light.
- Adjust Light Color Temperature: Use the "WW" (Warm White), "NW" (Natural White), and "DW" (Cool White) buttons to cycle through the 3000K, 4000K, and 6000K color options.
- Dim the Light: Use the "+" and "-" buttons (often labeled "Dimmable +/-") to increase or decrease the light brightness.

Image 6.3: Adjustable light color temperatures.
7. Maintenance
Regular maintenance ensures optimal performance and extends the life of your ceiling fan.
- Cleaning: Periodically clean the fan blades and motor housing with a soft, damp cloth. Do not use abrasive cleaners or solvents. Ensure the fan is turned off and power is disconnected before cleaning.
- Tighten Fasteners: Check all screws and fasteners annually to ensure they are secure. Loose connections can cause noise or wobble.
- Blade Balance: If the fan wobbles, ensure all blades are securely attached and balanced. A balancing kit (not included) may be used if necessary.
- Light Kit: The integrated LED light kit does not require bulb replacement. If the light malfunctions, consult the troubleshooting section or contact customer support.
8. Troubleshooting
If you experience issues with your ceiling fan, refer to the following common problems and solutions:
| Problem | Possible Cause | Solution |
|---|---|---|
| Fan does not start | No power to the fan; Loose wire connections; Remote control battery dead. | Check circuit breaker; Verify all wire connections; Replace remote control batteries. |
| Fan wobbles | Loose blades or mounting bracket; Unbalanced blades. | Ensure all screws are tight; Check blade balance and adjust if necessary. |
| Light does not work | Loose wire connection to light kit; Remote control battery dead; Light kit malfunction. | Check light kit wiring; Replace remote control batteries; Contact customer support if LED is faulty. |
| Remote control not working | Dead batteries; Remote not paired (if applicable); Obstruction between remote and receiver. | Replace batteries; Refer to pairing instructions (if any); Ensure clear line of sight. |
If the problem persists after attempting these solutions, please contact customer support.
9. Specifications
| Feature | Detail |
|---|---|
| Model Number | W1367P185623 |
| Fan Size | 52 inches |
| Product Dimensions | 52"D x 52"W x 10.63"H |
| Color | Matte Black (Antique Black) |
| Motor Type | DC Motor |
| Light Kit | Integrated 24W LED |
| Light Color Temperatures | 3000K (Warm White), 4000K (Natural White), 6000K (Cool White) |
| Control Type | Remote Controlled |
| Mounting Type | Flush Mount |
| Recommended Room Size | 12 ft. x 12 ft. to 18 ft. x 18 ft. (Large Room) |
| Certification | ETL Safety Listing |
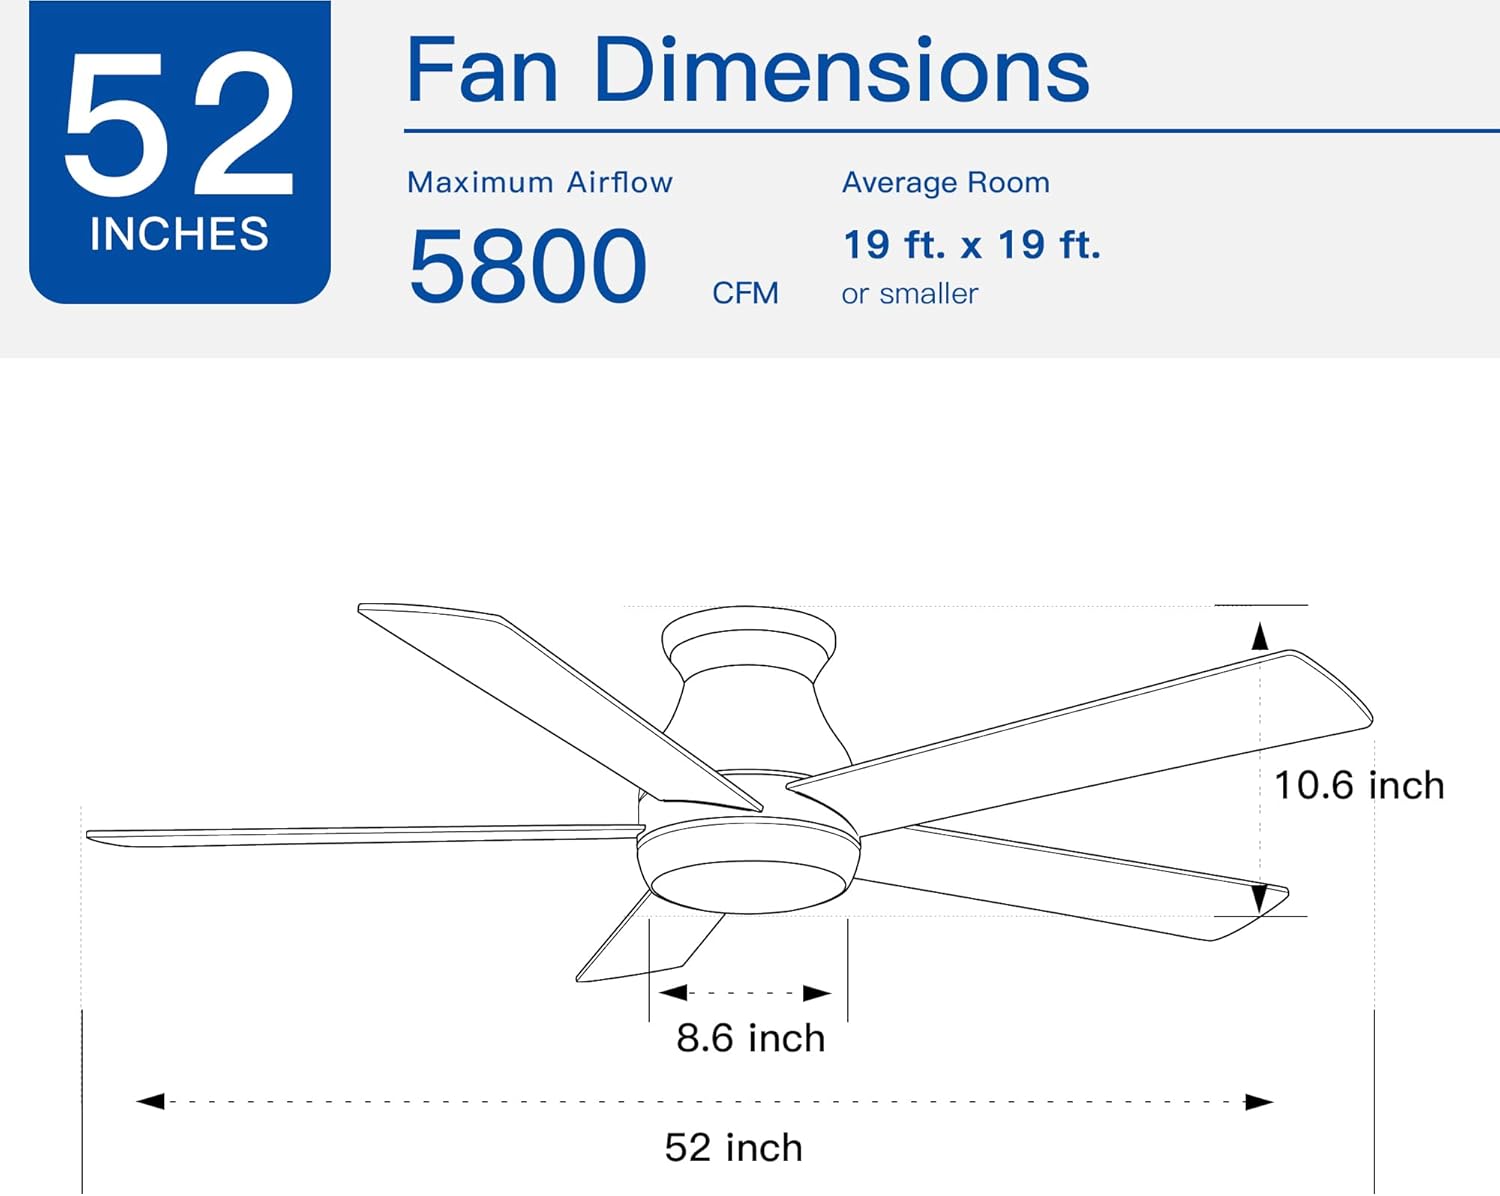
Image 9.1: Fan dimensions and airflow specifications.
10. Warranty and Support
This product comes with a standard manufacturer's warranty. For specific warranty details, including duration and coverage, please refer to the warranty card included in your product packaging or contact the retailer where the product was purchased.
For technical support, replacement parts, or any questions not covered in this manual, please contact Generic customer service through the retailer's support channels or the contact information provided in your product documentation.