1. Introduction
This manual provides detailed instructions for the installation, operation, and maintenance of your Alphabath TPT001-1.01 GPF Single Flush Comfort Height Toilet. Please read all instructions carefully before beginning installation and retain this manual for future reference. Proper installation and care will ensure optimal performance and longevity of your toilet.
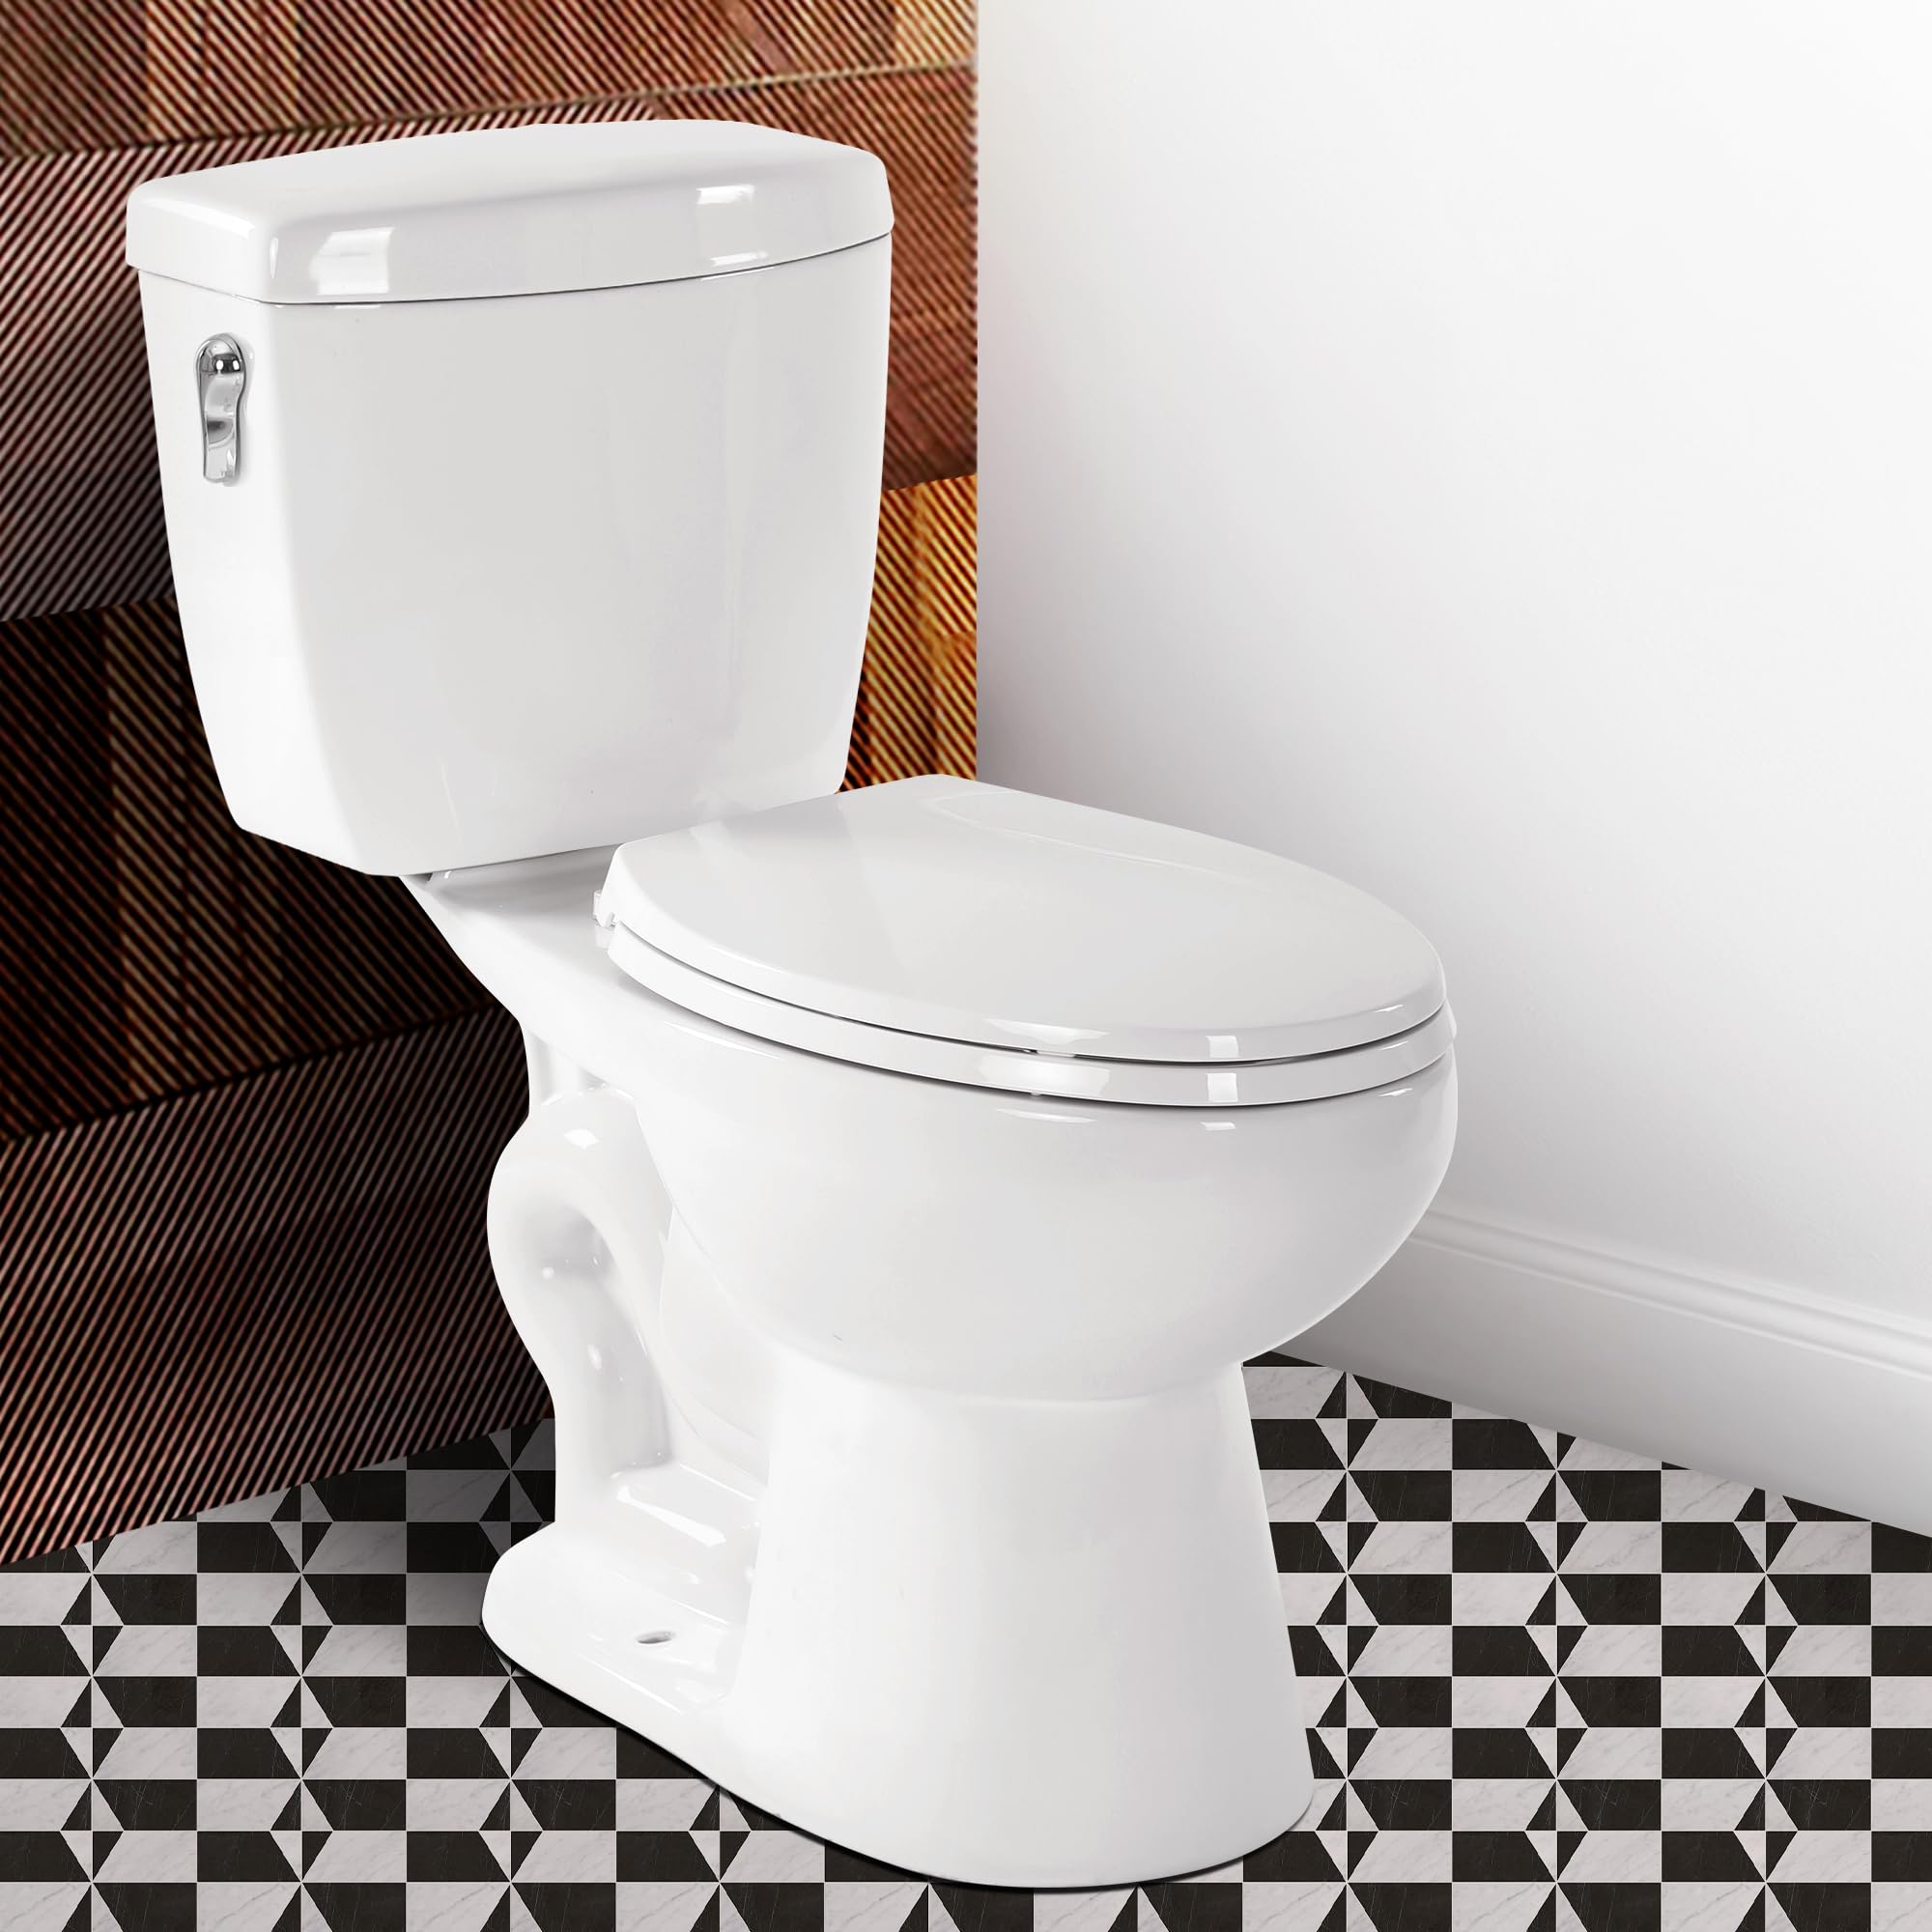
Image 1: Alphabath TPT001-1.01 GPF Single Flush Comfort Height Toilet.
2. Safety Information
- Always wear appropriate personal protective equipment (PPE) such as safety glasses and gloves during installation.
- Ensure the water supply to the toilet area is turned off before beginning any work.
- Handle ceramic components with care to prevent chipping or breakage.
- If you are unsure about any step, consult a qualified plumber.
- Do not overtighten bolts or connections, as this may cause damage.
3. Package Contents
Verify that all components are present before beginning installation:
- Toilet Bowl
- Toilet Tank
- Soft-Close Toilet Seat
- Flush Mechanism (pre-installed in tank)
- Wax Ring with Flange
- Toilet Seat Hardware
- Tank-to-Bowl Gasket and Bolts
- Floor Bolts and Washers
- Bolt Caps

Image 2: Included product accessories for installation.
4. Specifications
| Feature | Specification |
|---|---|
| Model Number | KBF-TPT001 |
| Style | TPT001-1.01 GPF Single Flush |
| Color | White |
| Material | Ceramic |
| Installation Type | Floor Mounted |
| Seat Material Type | Polypropylene (PP) |
| Flush Volume | 1.01 Gallons Per Flush (GPF) |
| Rough-In | 12 inches |
| Seat Height | 17.3 inches (ADA Compliant) |
| Certifications | CUPC, DOE, EPA WaterSense, CEC, ADA Height, Green, MAP 1000 Grams |

Image 3: Key dimensions of the Alphabath toilet.
5. Installation
Follow these steps for proper installation of your Alphabath toilet. It is recommended to have two people for certain steps due to the weight of the ceramic components.
- Prepare the Closet Flange: Install new closet bolts into the closet flange. The length of the closet bolts may need to be cut and shortened to ensure the bolt cap will fit properly.
- Prepare the Toilet Bowl: Turn the toilet bowl upside down onto a soft surface to prevent scratches. Place a new wax ring around the waste flange of the toilet bowl.
- Position the Toilet Bowl: Carefully lower the toilet bowl onto the closet bolts, aligning the mounting holes in the base of the toilet with the bolts. Using a rocking motion, press the bowl down to position the toilet onto the flange.
- Secure the Toilet Bowl: Install plastic washers, followed by metal washers and nuts onto the closet bolts. Tighten the bolts alternately until the toilet is firmly seated on the floor. Do not overtighten.
- Install Bolt Caps: Install the decorative caps over the tightened bolts.
- Connect Water Supply: Connect the water supply line to the fill valve on the toilet tank. Ensure all connections are hand-tightened, then a quarter turn with a wrench. Do not overtighten.
- Install Toilet Seat: Attach the soft-close toilet seat using the provided hardware.

Image 4: Step-by-step diagram for toilet installation.
6. Operation
Your Alphabath toilet features a powerful and water-efficient single flush system.
6.1 Flushing
To flush the toilet, press the chrome single-flush button located on the top of the tank. The 360° siphonic vortex system will activate, ensuring a complete and efficient flush with 1.01 gallons of water.

Image 5: Illustration of the 360° TSUNAMI Flush technology.
6.2 Water-Saving Performance
This toilet is WaterSense certified, designed to conserve water without compromising flush power. It uses significantly less water per flush compared to older models, contributing to reduced water consumption.

Image 6: WaterSense certification and water-saving benefits.
7. Maintenance
Regular cleaning and maintenance will keep your Alphabath toilet in excellent condition.
7.1 Nano Self-Cleaning Glaze
The toilet bowl features an advanced Nano Self-Cleaning Glaze. This smooth, 3-layer glazed surface actively resists grime and minimizes the adhesion of particulates, making cleaning easier. Use mild, non-abrasive cleaners and a soft cloth or sponge to clean the ceramic surfaces. Avoid harsh chemicals or abrasive pads that could damage the glaze.
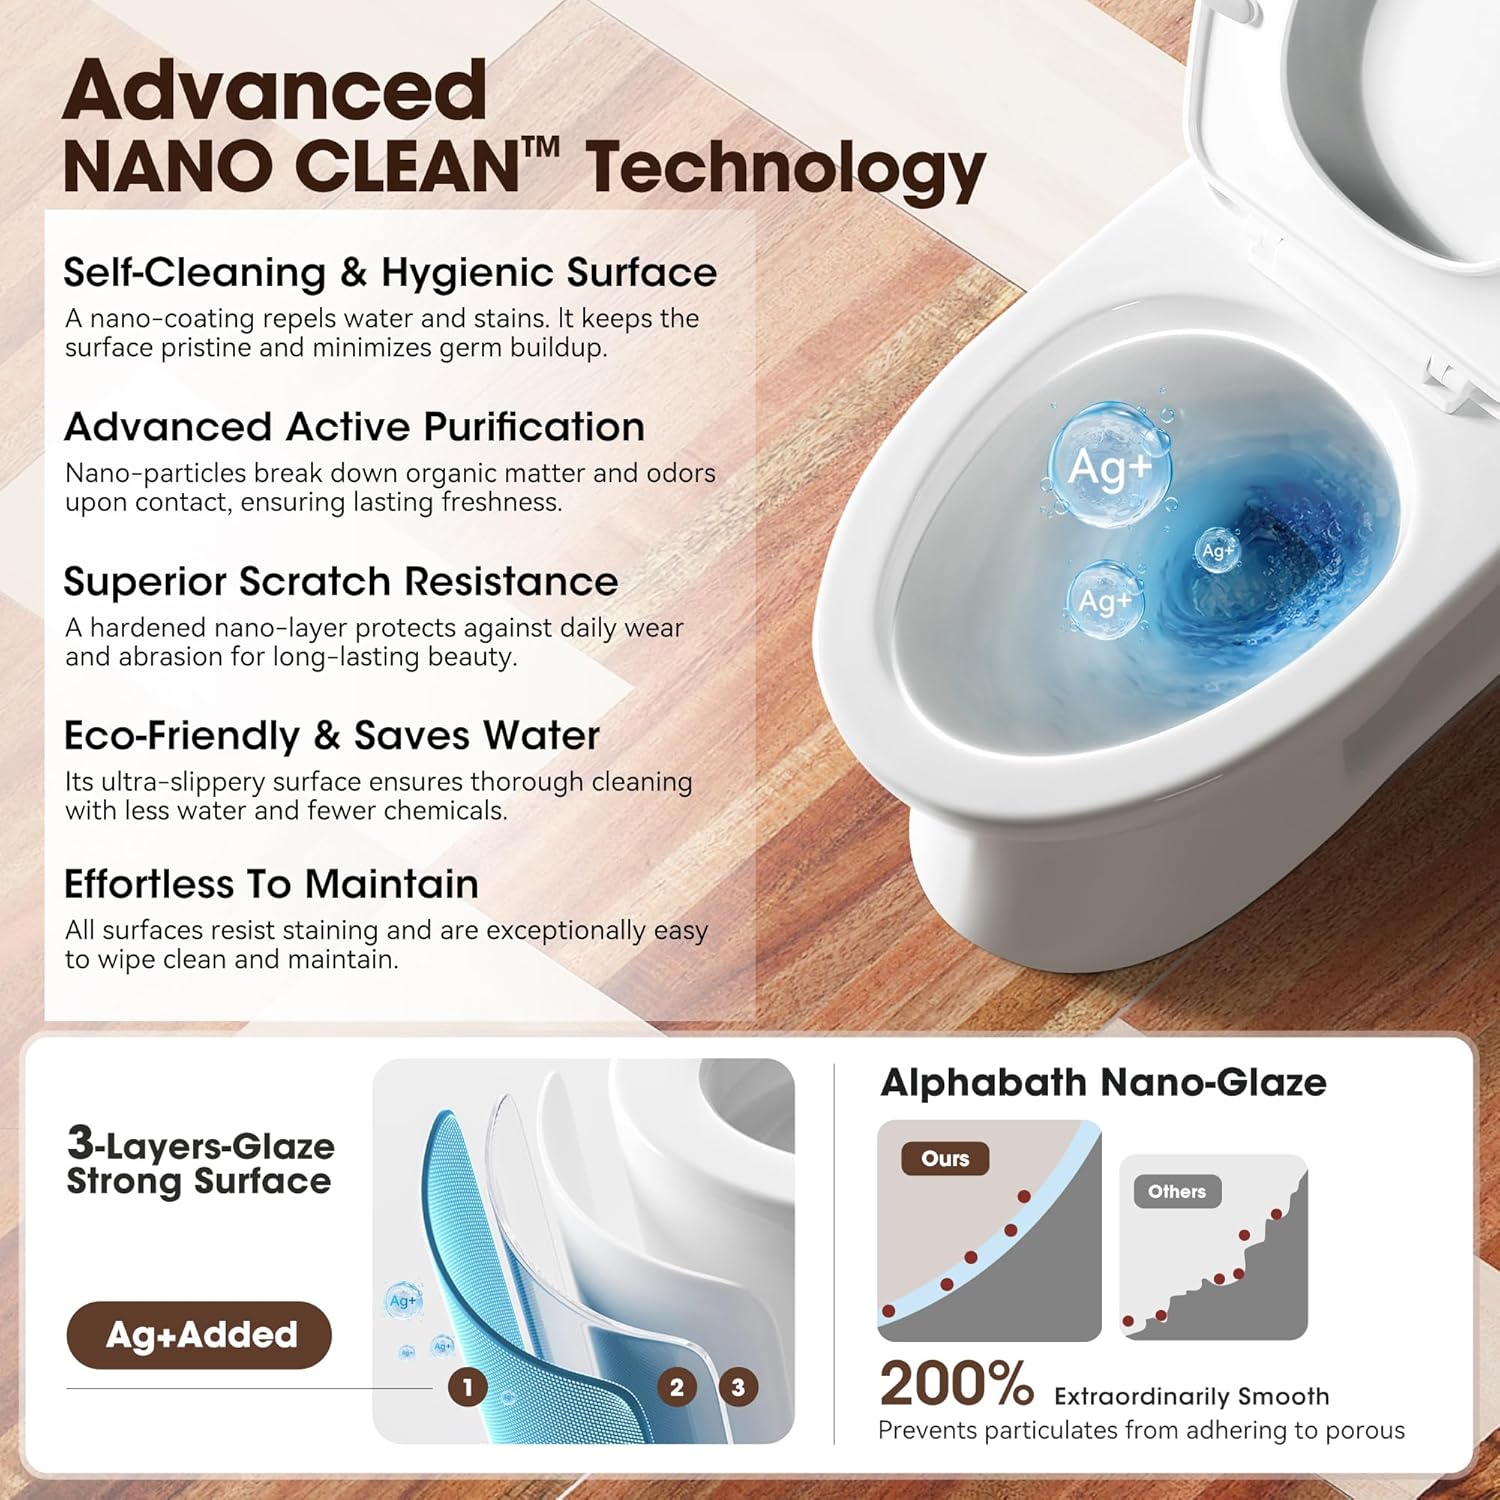
Image 7: Details of the Advanced Nano Clean Technology.
7.2 Soft-Close Seat
The soft-close PP seat is designed for durability and quiet operation. To clean the seat, use mild soap and water. The seat can be easily removed for thorough cleaning or tightening by following the instructions provided with the seat hardware.

Image 8: The soft-close seat feature.
7.3 Clog Prevention
The toilet is designed with a wider, 50mm glazed trapway to minimize clogs. To maintain optimal performance, avoid flushing non-biodegradable items such as wipes, paper towels, or excessive amounts of toilet paper.

Image 9: Comparison illustrating the wider trapway for clog prevention.
8. Troubleshooting
This section addresses common issues you might encounter with your toilet.
| Problem | Possible Cause | Solution |
|---|---|---|
| Toilet does not flush or flushes weakly | Low water level in tank; Flapper/flush valve issue; Clog in trapway | Check water supply valve; Adjust fill valve to increase water level; Inspect flapper for proper seal; Clear any clogs with a plunger. |
| Toilet runs continuously | Flapper not sealing; Fill valve malfunction; Float ball misaligned | Inspect flapper for debris or wear; Adjust or replace fill valve; Ensure float ball is not obstructed. |
| Leaking at base of toilet | Loose floor bolts; Damaged wax ring; Cracked toilet base | Tighten floor bolts (do not overtighten); Replace wax ring; If cracked, the toilet may need replacement. |
| Slow tank refill | Partially closed water supply valve; Clogged fill valve | Fully open the water supply valve; Clean or replace the fill valve. |
9. Warranty and Support
Alphabath products are manufactured to high-quality standards and are certified by various organizations including CUPC, DOE, EPA WaterSense, CEC, and ADA Height, ensuring safety and consistent performance.

Image 10: Certifications for Alphabath products.
For specific warranty details, please refer to the official Alphabath website or contact customer support. Keep your purchase receipt as proof of purchase.
If you require further assistance or have questions not covered in this manual, please contact Alphabath customer service through their official channels.