1. Introduction
This manual provides essential instructions for setting up, operating, and maintaining your Generic Yoka IPX1 4K Android TV Box. Please read this manual thoroughly before using the device to ensure proper functionality and to prevent damage.
2. Package Contents
Carefully unpack the box and ensure all items listed below are present. If any items are missing or damaged, contact your retailer.
- Yoka IPX1 4K Android TV Box
- IR Remote Controller
- HDMI Cable
- IR Extension Cord
- Power Adapter
- User Guide (this document)

Figure 2.1: Contents of the Yoka IPX1 package, including the TV box, remote, cables, and power adapter.
3. Product Overview
The Yoka IPX1 is a 4K Android TV Box designed to deliver home entertainment. It features an Amlogic S905Y4 chipset and runs on Android 11, offering a platform for streaming and applications. The device supports 4K resolution and includes various connectivity options.
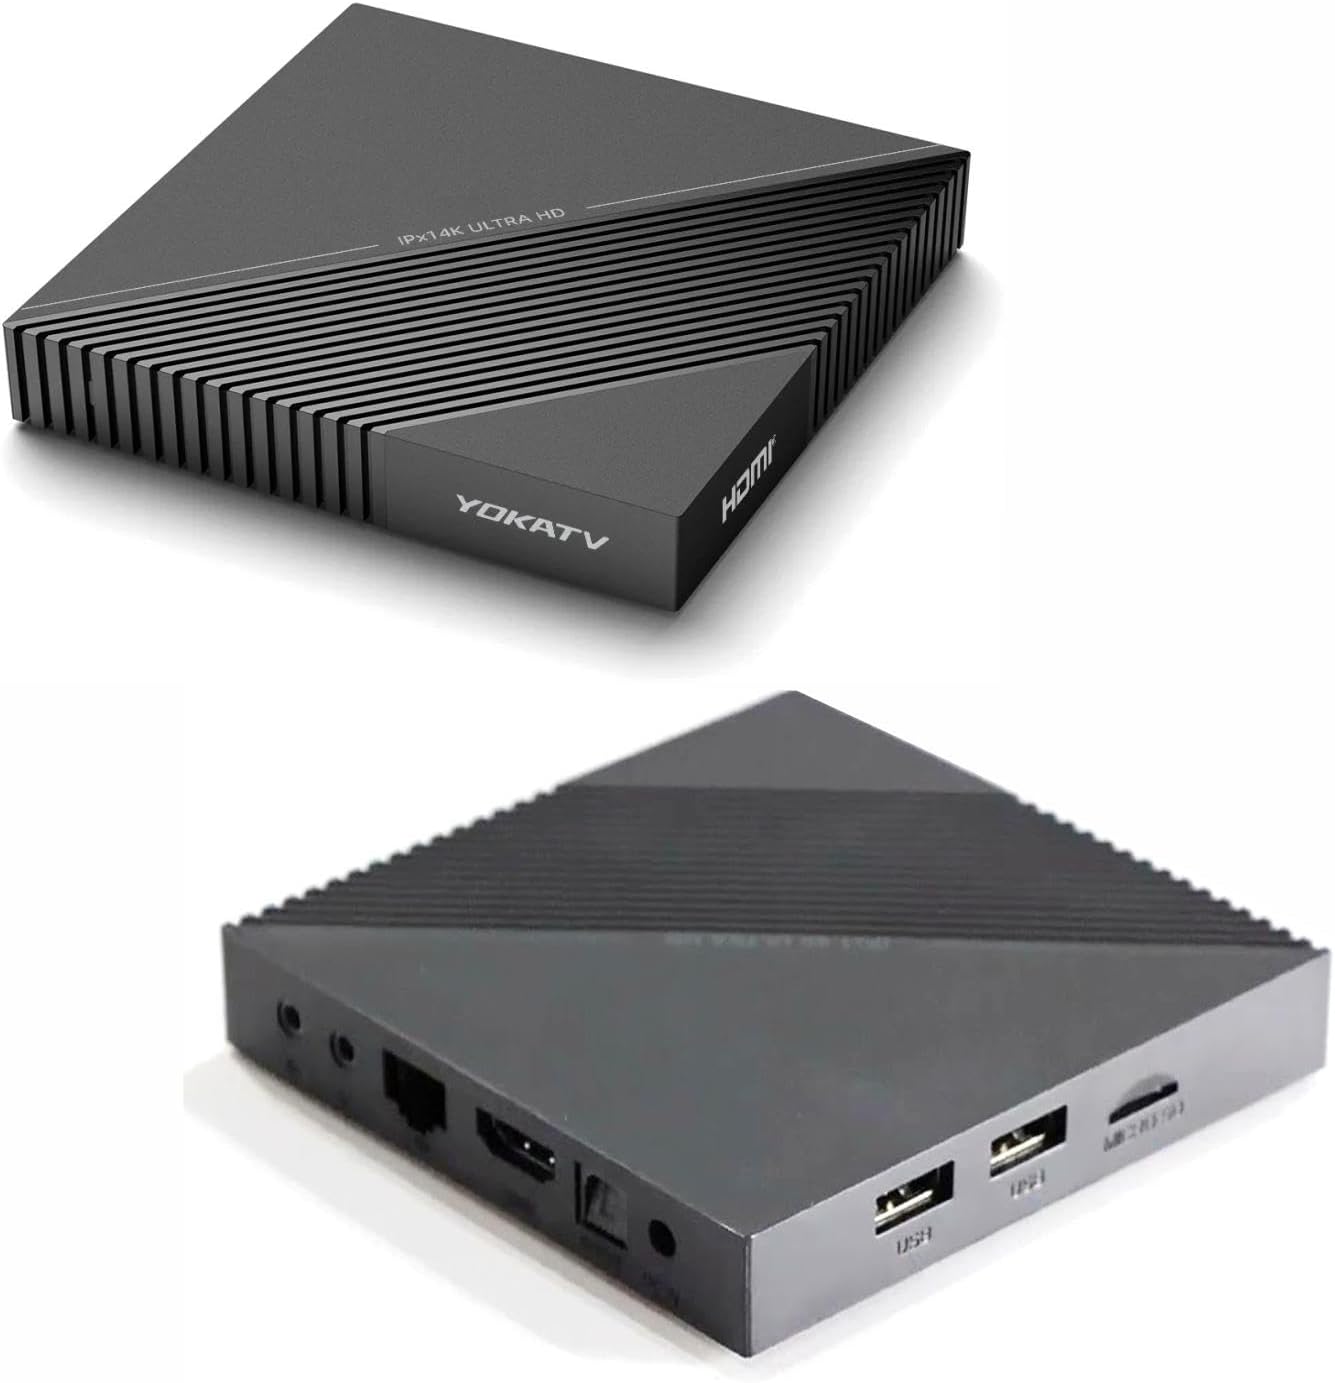
Figure 3.1: Side view of the Yoka IPX1 showing available ports, including USB, Micro SD, HDMI, LAN, and power input.
3.1. Device Ports and Indicators
- DC IN: Power input port.
- HDMI: Connects to your TV or display for video and audio output.
- LAN: Ethernet port for wired network connection.
- USB Ports: For connecting external storage devices or peripherals.
- Micro SD Slot: For expanding storage with a Micro SD card.
- AV Port: For connecting to older TVs using an AV cable (not included).
- Optical (SPDIF): For digital audio output to compatible sound systems.
3.2. IR Remote Controller
The included IR remote controller allows navigation and control of the TV box. Ensure line of sight to the device for optimal performance.

Figure 3.2: Detailed view of the IR remote control for the Yoka IPX1, showing various function buttons.
4. Setup Instructions
Follow these steps to set up your Yoka IPX1 TV Box.
- Connect to TV: Connect one end of the HDMI cable to the HDMI port on the Yoka IPX1 and the other end to an available HDMI input on your television.
- Connect to Power: Plug the power adapter into the DC IN port on the TV box, then plug the adapter into a wall outlet.
- Connect to Network (Optional):
- Wired Connection: Connect an Ethernet cable from your router to the LAN port on the TV box.
- Wireless Connection: You will configure Wi-Fi during the initial setup process.
- Insert Remote Batteries: Open the battery compartment on the back of the IR remote controller and insert two AAA batteries (not included), observing polarity.
- Power On: Turn on your television and select the correct HDMI input source. The Yoka IPX1 should power on automatically or can be powered on using the remote control.
- Initial Setup Wizard: Follow the on-screen instructions to complete the initial setup, including language selection, network configuration, and Google account login.
5. Operating Instructions
5.1. Navigating the Interface
Use the directional pad (up, down, left, right) and the OK button on the remote control to navigate through menus and select items. The Back button returns to the previous screen, and the Home button returns to the main launcher.
5.2. Accessing Applications
From the home screen, you can access pre-installed applications or download new ones from the Google Play Store. Select the desired app icon and press OK to launch it.
5.3. Network Settings
To change network settings, navigate to Settings > Network & Internet. Here you can connect to a Wi-Fi network, forget a network, or view wired network status.
5.4. System Settings
The Settings menu provides access to various system configurations, including display resolution, sound output, storage management, and device information.
6. Maintenance
6.1. Cleaning the Device
Use a soft, dry cloth to clean the exterior of the TV box. Do not use liquid cleaners or abrasive materials, as they may damage the finish or internal components.
6.2. Software Updates
Periodically check for system updates to ensure optimal performance and access to the latest features. Navigate to Settings > Device Preferences > About > System update to check for and install updates.
6.3. Storage Management
To manage internal storage or connected external storage, go to Settings > Device Preferences > Storage. You can view storage usage and uninstall applications if necessary.
7. Troubleshooting
If you encounter issues with your Yoka IPX1, refer to the following troubleshooting guide.
- No Power:
- Ensure the power adapter is securely connected to the device and a working power outlet.
- Try a different power outlet.
- No Display on TV:
- Verify the HDMI cable is securely connected to both the TV box and the TV.
- Ensure your TV is set to the correct HDMI input source.
- Try a different HDMI cable or HDMI port on your TV.
- No Network Connection:
- Wi-Fi: Check if Wi-Fi is enabled in settings. Ensure you have entered the correct Wi-Fi password. Restart your router.
- Ethernet: Ensure the Ethernet cable is properly connected to both the TV box and the router. Check router status.
- Remote Control Not Responding:
- Replace the batteries in the remote control.
- Ensure there are no obstructions between the remote and the TV box's IR receiver.
- Applications Crashing or Freezing:
- Close and restart the application.
- Clear the app's cache (Settings > Apps > [App Name] > Clear cache).
- If the issue persists, uninstall and reinstall the application.
8. Specifications
Detailed technical specifications for the Generic Yoka IPX1 4K Android TV Box.
| Model | IPX1 |
| Chipset | Amlogic S905Y4 |
| Operating System | Android 11 (AOSP) |
| RAM | 2GB |
| ROM | 16GB |
| Resolution Support | 4K |
| Wi-Fi | 2.4G & 5G |
| Ethernet | 10/100M |
| Remote Control | IR Remote |
| Color | Black |
| Ports | HDMI, USB, Micro SD, DC IN, LAN, AV, Optical |
| Dimensions (L x W x H) | 105mm x 105mm x 18mm |

Figure 8.1: Physical dimensions of the Yoka IPX1 device.
9. Warranty and Support
For warranty information, please refer to the documentation provided at the time of purchase or contact your retailer. For technical support or further assistance, please reach out to the seller or manufacturer directly.