1. Introduction
Thank you for choosing the BOJUK Steam & Scrub Mop. This manual provides essential information for the safe and efficient operation, maintenance, and troubleshooting of your new steam mop. Please read it thoroughly before first use and keep it for future reference.

Figure 1: BOJUK Steam & Scrub Mop. This image displays the complete steam mop unit, highlighting its sleek design, rotating mop pads, and integrated LED headlights.
2. Important Safety Instructions
To reduce the risk of fire, electric shock, or injury, always follow basic safety precautions when using your appliance:
- Read all instructions before using the steam mop.
- Use the appliance only for its intended household use as described in this manual.
- Do not immerse the appliance in water or any other liquid.
- Keep the appliance away from children.
- Always unplug the power cord from the electrical outlet when not in use and before performing any maintenance.
- Do not direct steam at people, animals, or electrical outlets.
3. Package Contents
Verify that all components are present in your package:
- Steam & Scrub Mop Main Unit
- 6 Dirt Grip Soft Scrub Washable Pads (2 Light Clean & Dry Polish Soft Pads, 4 Dirt Soft Mop Pads)
- Filling Flask
- Extension Rod
- Handle
- Precision Cleaning Attachments (Flat blade, Bristle brush)
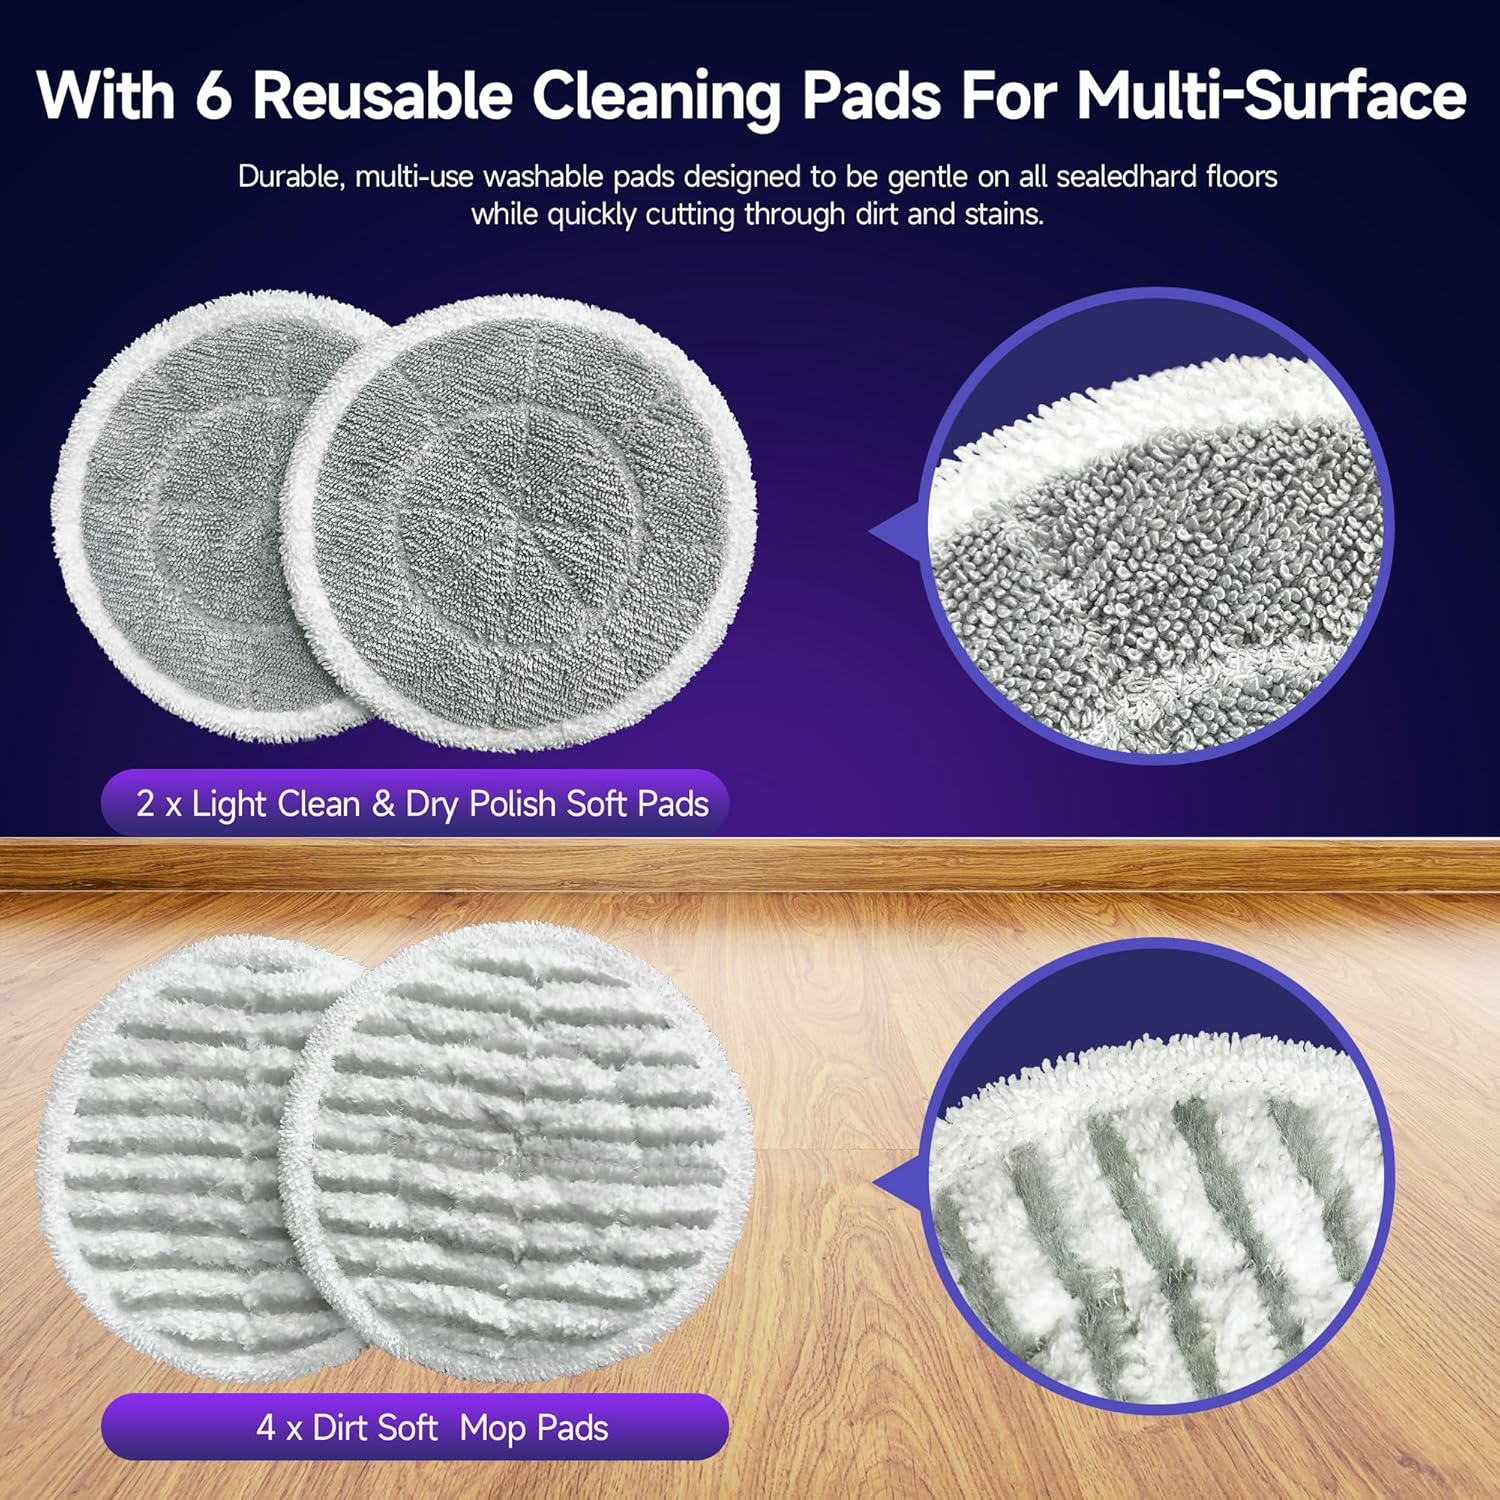
Figure 2: Reusable Cleaning Pads. This image shows the six included reusable cleaning pads, categorized into two types: light clean & dry polish soft pads and dirt soft mop pads.
4. Setup Instructions
4.1 Filling the Water Tank
- Locate the water container on the backside of the main unit.
- Pull the tab to remove the water container.
- Use the provided filling flask to fill the water container with clean water. Do not overfill.
- Securely reinsert the water container into the main unit.
4.2 Assembling the Mop Unit
The steam mop can be used as a handheld unit or a full mop setup.
- For Handheld Use: The main unit can be used directly with precision cleaning attachments.
- For Full Mop Setup:
- Insert the extension rod into the main unit. Align the arrows and push until it clicks into place.
- Attach the handle to the top of the extension rod. Press the metal button on the handle and slide it into place until it locks.
- The handle features a tab to extend it further for increased reach.
- Connect the mop head to the bottom of the main unit. Press it down until it locks securely.
5. Operating Instructions
5.1 Powering On and Steam Settings
- Plug the power cord into a suitable electrical outlet.
- Press the On/Off button to power on the device.
- Select your desired steam level using the steam button:
- Low Steam: Indicated by a green LED light.
- Medium Steam: Indicated by a blue LED light.
- High Steam: Indicated by a red LED light. This setting provides maximum steam output and pressure for tough cleaning tasks.

Figure 3: Control Panel. This image highlights the On/Off button, steam button, and speed control button located on the mop's handle.
5.2 Using the Rotating Mop Pads
The BOJUK Steam & Scrub Mop features dual-spin cleaning with rotating microfiber pads (230 RPM) for effective stain removal.
- Press the speed control button to activate the rotating mode.
- The rotating pads can be used with or without steam for versatile cleaning.
- The powerful LED headlights illuminate hidden debris, ensuring thorough cleaning.

Figure 4: Dual-Motor System. This illustration demonstrates the powerful dual-motor system, showing how rotating microfiber pads radiate steam and effectively wipe away stubborn stains.

Figure 5: Deep Cleanse with Steam. This image illustrates the steam mop effectively tackling various stains like surfacedust, residue, grease & grime, and bacteria on a hard floor.

Figure 6: Safe for the Whole Family. This infographic highlights the mop's ability to clean with 230°F heated steam, remove 99.99% of stubborn stains, and provide a chemical-free cleaning solution.
5.3 Using Precision Cleaning Attachments
For targeted cleaning of tough-to-reach areas or stubborn grime, detach the mop head and attach the desired precision tool to the steam rod:
- Flat Blade Attachment: Ideal for scraping off adhesive or hardened gunk with concentrated steam.
- Bristle Brush Attachment: Excellent for scrubbing built-up dirt and grime from grout lines or textured surfaces.
To attach, press the desired tool onto the steam rod and turn to lock it securely in place.
6. Maintenance
6.1 Cleaning the Mop Pads
The Dirt Grip Soft Scrub washable pads are reusable. After each use, remove the pads from the mop head and wash them according to their care instructions. Allow them to air dry completely before reattaching or storing.
6.2 Emptying and Cleaning the Water Tank
After each use, or when storing the mop for an extended period, empty any remaining water from the tank. Periodically clean the water tank to prevent mineral buildup, especially if using hard water.
6.3 General Care
Wipe the exterior of the steam mop with a damp cloth. Do not use harsh chemicals or abrasive cleaners. Store the mop in a cool, dry place.
7. Troubleshooting
| Problem | Possible Cause | Solution |
|---|---|---|
| No steam output | Water tank empty; Not powered on; Clogged nozzle | Refill water tank; Ensure power is on; Clean nozzle with a small pin. |
| Mop pads not rotating | Rotating mode not activated; Obstruction | Press the speed control button; Check for debris under pads. |
| Water leaking | Water tank not properly sealed; Overfilled tank | Ensure tank is securely inserted; Do not overfill. |
8. Specifications
- Brand: BOJUK
- Model Name: STEAM Mop
- Item Model Number: F2-wm01
- Special Feature: Lightweight
- Surface Recommendation: All Hard Floors
- Included Components: Steam & Scrub Mop, 6 Dirt Grip Soft Scrub washable pads, filling flask.
- Wattage: 1500 watts
- Form Factor: Upright
- Color: Purple
- Item Weight: 10 pounds
- ASIN: B0DW41PF1R
- Date First Available: February 5, 2025
9. Warranty and Support
For warranty information or customer support, please refer to the warranty card included with your product or contact BOJUK customer service directly. Keep your purchase receipt as proof of purchase.