1. Introduction
This manual provides detailed instructions for the proper installation, operation, and maintenance of your TORACK Metal Pegboard System. This system is designed to help organize tools and accessories efficiently in various environments such as workshops, garages, or utility rooms. Please read this manual thoroughly before installation and use to ensure safe and optimal performance.
2. Safety Information
- Always wear appropriate safety gear, including eye protection, during installation.
- Ensure the mounting surface is structurally sound and capable of supporting the weight of the pegboard system and its intended contents.
- Use the provided wall anchors and screws, or suitable alternatives for your specific wall type, to secure the pegboard panels firmly.
- Do not overload the pegboard or individual hooks/shelves beyond their weight capacity.
- Keep small parts and accessories out of reach of children to prevent choking hazards.
- Regularly inspect the installed system for any loose connections or damage.
3. Package Contents
Verify that all components listed below are present in your package. If any parts are missing or damaged, please contact customer support.

Figure 3.1: Illustration of all components included in the TORACK Metal Pegboard System package. This includes four pegboard panels, various hooks, storage bins, and shelves.
- 4 x Metal Pegboard Panels
- 10 x Storage Bins
- 2 x Shelves
- Various Pegboard Hooks (89 pieces total, including different types for diverse tool storage)
- Mounting Hardware (screws and wall anchors)
4. Setup and Installation
The TORACK Metal Pegboard System features a modular design, allowing flexible arrangement of the panels to suit your space and organizational needs. Installation requires basic tools such as a drill, level, and screwdriver.
4.1 Planning Your Layout
Before drilling, determine the desired location and configuration of your pegboard panels. Consider the overall dimensions and the types of tools you plan to store. The total dimensions of the assembled system are approximately 121.92 cm (48 inches) wide by 81.28 cm (32 inches) high.

Figure 4.1: Product dimensions illustrating the overall size of the assembled pegboard system.
4.2 Mounting the Panels
- Mark the desired mounting points on the wall using a pencil and a level to ensure proper alignment.
- Drill pilot holes at the marked locations. The size of the drill bit should match the wall anchors provided.
- Insert the wall anchors into the pilot holes.
- Align the pegboard panels with the anchors and secure them to the wall using the provided screws. Ensure all panels are tightly fastened.
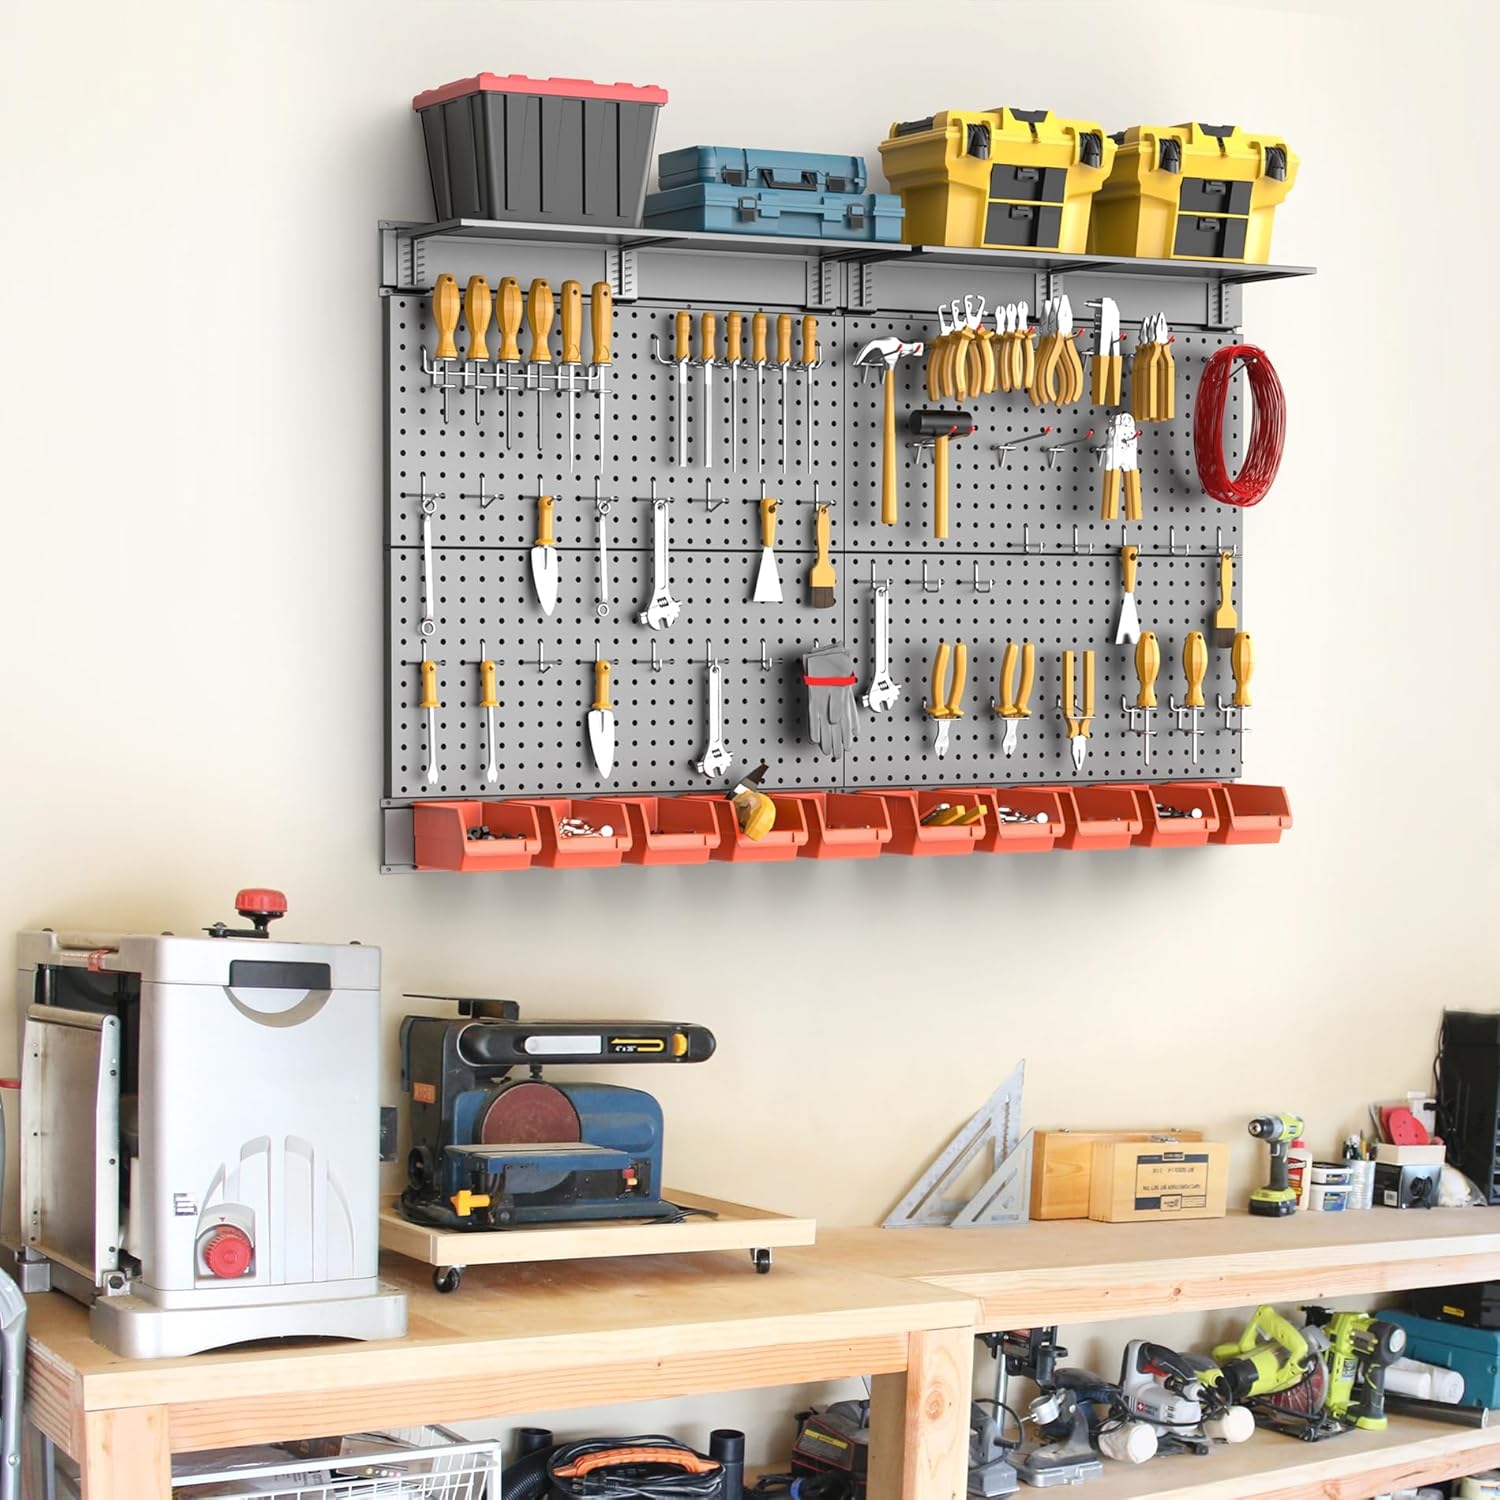
Figure 4.2: An example of the TORACK Metal Pegboard System after successful installation, demonstrating its organizational capacity.
4.3 Quality Features
The TORACK pegboard panels are constructed from high-quality, thicker metal with reinforced corners, ensuring durability and stability for heavy-duty use. The powder-coated finish provides scratch resistance and prevents rust.

Figure 4.3: Detailed view of the robust construction features of the TORACK Metal Pegboard, including all-metal design, material thickness, and reinforced corners.
5. Operating Instructions
Once the pegboard panels are securely mounted, you can begin organizing your tools and accessories using the provided hooks, bins, and shelves.
5.1 Attaching Hooks and Accessories
- The TORACK pegboard is designed for universal compatibility, fitting all standard 1/8" and 1/4" pegboard hooks and accessories with 1" spacing.
- To attach a hook, insert its prongs into the desired holes on the pegboard. Ensure the hook is fully seated and stable before placing items on it.
- The modular design allows for easy rearrangement of hooks and accessories as your storage needs evolve.
5.2 Utilizing Bins and Shelves
- The included storage bins are ideal for small items like screws, nuts, bolts, and other hardware. Attach them to the pegboard at a convenient height.
- The shelves provide additional flat storage space for larger tools, containers, or equipment. Ensure shelves are securely mounted and evenly loaded.
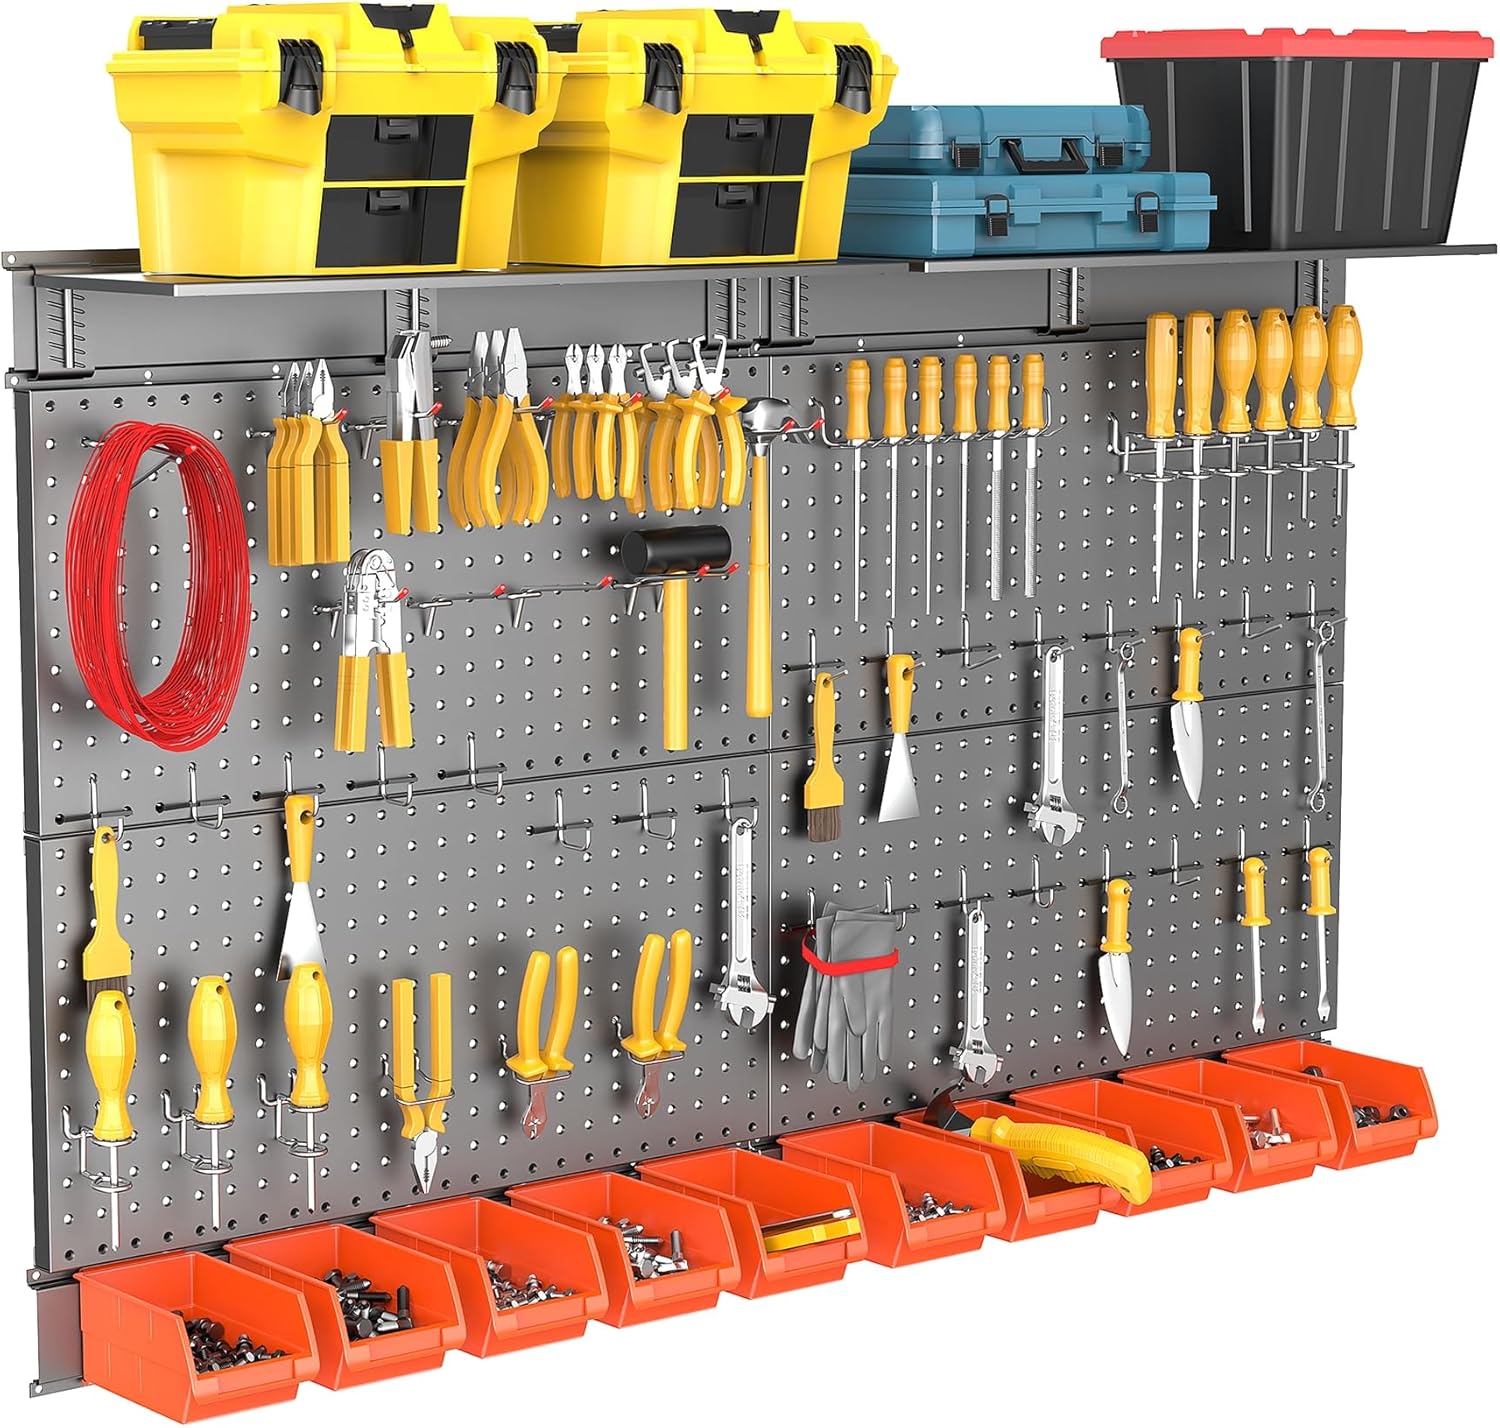
Figure 5.1: Detailed view of the pegboard system demonstrating organized tools, bins, and shelves in use.
6. Maintenance
The TORACK Metal Pegboard System is designed for low maintenance and long-lasting performance.
- Cleaning: The powder-coated finish is scratch-resistant and easy to clean. Use a soft, damp cloth to wipe down the panels and accessories. Avoid abrasive cleaners or harsh chemicals that could damage the finish.
- Inspection: Periodically check all mounting screws and connections to ensure they remain tight. Re-tighten if necessary.
- Rust Resistance: The metal panels are treated for rust resistance, making them suitable for various environments. However, prolonged exposure to extreme moisture or corrosive substances should be avoided.
7. Troubleshooting
If you encounter any issues with your TORACK Metal Pegboard System, refer to the following common solutions:
- Pegboard feels unstable after installation: Ensure all mounting screws are fully tightened and that the wall anchors are properly seated in a suitable wall material. If the wall material is weak, consider using different anchors designed for that specific material.
- Hooks do not fit properly: Verify that you are using standard 1/8" or 1/4" pegboard hooks with 1" spacing. Non-standard hooks may not fit securely.
- Items falling off hooks: Ensure items are balanced on hooks and not exceeding the hook's individual weight capacity. Some hooks are designed for specific tool types.
- Difficulty cleaning: For stubborn grime, a mild soap solution with a soft cloth can be used, followed by drying with a clean cloth.
8. Specifications
| Feature | Detail |
|---|---|
| Model Number | US-TNDK29S093A-TR |
| Product Dimensions (L x W x H) | 121.92 x 1.27 x 81.28 cm (48 x 0.5 x 32 inches) |
| Item Weight | 13.79 kg |
| Material | Metal |
| Color | Black |
| Finish Type | Powder Coated |
| Special Features | Rust Resistant |
| Number of Shelves | 4 (included in accessories) |
| Mounting Type | Wall Mount |
| Required Assembly | Yes |
9. Warranty and Support
This product is manufactured by TORACK. For specific warranty details or customer support inquiries, please refer to the documentation provided at the point of purchase or contact your retailer. Extended warranty options may be available from third-party providers.


