TP-Link LS1016G
TP-Link LS1016G 16-Port Gigabit Unmanaged Switch User Manual
Model: LS1016G
Brand: TP-Link
1. Introduction
The TP-Link LS1016G is a high-performance 16-Port Gigabit Unmanaged Switch designed to expand your network capacity with ease. Featuring a durable metal housing and fanless design, it provides quiet and reliable operation. This switch supports Gigabit Ethernet speeds, making it ideal for high-bandwidth applications such as large file transfers, online gaming, and HD video streaming. Its plug-and-play functionality ensures a straightforward setup without the need for complex configurations, making it suitable for both home and small business environments.

Figure 1: Front view of the TP-Link LS1016G 16-Port Gigabit Unmanaged Switch, showing 16 RJ45 ports and LED indicators.
2. Product Features
- 16 Gigabit Ethernet Ports: Provides 16 10/100/1000Mbps auto-negotiation RJ45 ports, significantly expanding network capacity for multiple devices.
- Durable Metal Housing: The robust metal casing ensures product longevity and provides effective heat dissipation for stable operation.
- Fanless Design: Operates silently, making it suitable for noise-sensitive environments such as offices and homes.
- Plug and Play: Requires no configuration or software installation, allowing for immediate use upon connection.
- Energy-Saving Technology: Incorporates green Ethernet technology to conserve power, reducing energy consumption and operating costs.
- QoS (Quality of Service) Support: Prioritizes network traffic to ensure smooth performance for critical applications like voice and video.
- Auto MDI/MDIX: Eliminates the need for crossover cables, simplifying network setup.
- Rack-Mountable Design: Can be easily installed in a standard 19-inch rack or placed on a desktop.
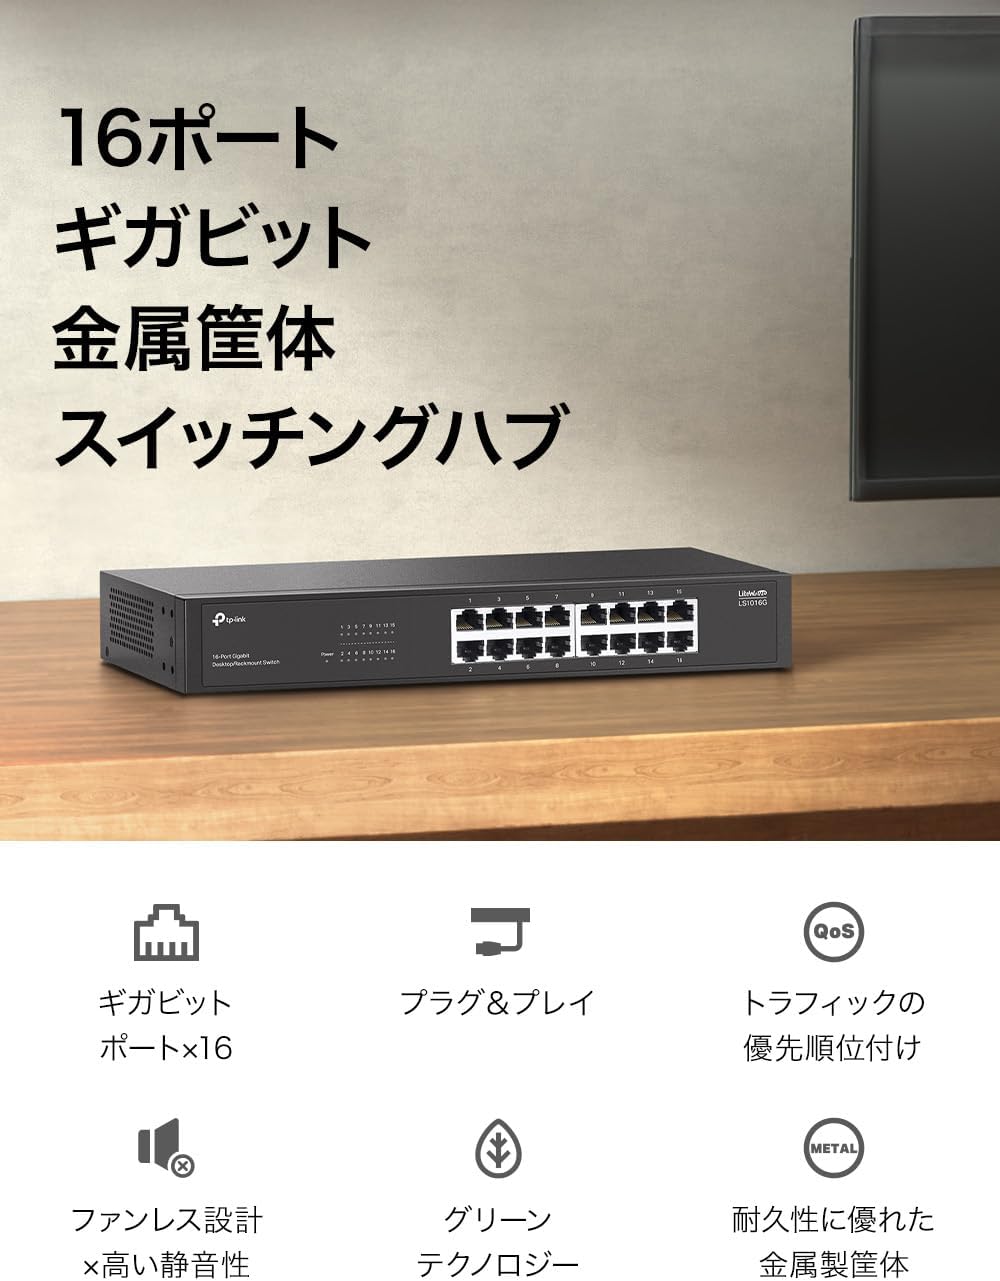
Figure 2: The LS1016G switch featuring 16 Gigabit ports and a durable metal housing, suitable for various environments.

Figure 3: Illustration of the LS1016G's Gigabit speed capabilities and Quality of Service (QoS) functionality, ensuring smooth data flow.

Figure 4: The LS1016G's robust metal casing, fanless design for silent operation, and flexible mounting options including desktop and rack mount.

Figure 5: The LS1016G incorporates green technology for energy efficiency, contributing to lower power consumption.
3. Package Contents
Verify that your package contains the following items:
- TP-Link LS1016G 16-Port Gigabit Unmanaged Switch
- Power Adapter
- User Manual (this document)
- Rackmount Kit (if applicable for your model variant)
4. Setup Guide
The LS1016G switch is designed for simple plug-and-play installation. Follow these steps to set up your switch:
- Power On: Connect the provided power adapter to the switch's power port and then plug the adapter into a standard electrical outlet. The Power LED on the front panel should illuminate.
- Connect to Network: Connect an Ethernet cable from your router or modem to any of the 16 RJ45 ports on the LS1016G switch.
- Connect Devices: Connect your network devices (e.g., computers, printers, IP cameras, gaming consoles) to the remaining RJ45 ports on the switch using Ethernet cables. The corresponding Link/Act LEDs for connected ports will light up, indicating an active connection.
Your network devices should now have network access through the switch.

Figure 6: Simple plug-and-play setup process for the LS1016G switch, showing connections from power to devices and the internet router.
5. Operating Instructions
The LS1016G is an unmanaged switch, meaning it operates automatically without requiring user configuration. Once connected, it intelligently forwards data packets to the correct destination.
LED Indicators:
- Power LED:
- On: The switch is powered on.
- Off: The switch is powered off.
- Link/Act LEDs (for each port):
- On: A device is connected to the corresponding port.
- Flashing: Data is being transmitted or received through the corresponding port.
- Off: No device is connected or the connected device is not powered on.
6. Maintenance
To ensure optimal performance and longevity of your LS1016G switch, consider the following maintenance tips:
- Placement: Place the switch in a cool, dry place away from direct sunlight, heat sources, and excessive dust. Ensure adequate ventilation around the device.
- Cleaning: Regularly clean the exterior of the switch with a soft, dry cloth. Do not use liquid or aerosol cleaners.
- Cable Management: Keep network cables organized and untangled to prevent damage and ensure proper airflow.
- Power Supply: Use only the power adapter provided with the switch.
7. Troubleshooting
If you encounter issues with your LS1016G switch, refer to the following common problems and solutions:
- No Power LED:
- Ensure the power adapter is securely connected to the switch and a working electrical outlet.
- Verify the power outlet is functional by plugging in another device.
- No Link/Act LED for a Connected Device:
- Check if the Ethernet cable is securely plugged into both the switch port and the device's network port.
- Try a different Ethernet cable to rule out a faulty cable.
- Ensure the connected device is powered on and its network adapter is functioning correctly.
- Try connecting the device to a different port on the switch.
- Slow Network Speed:
- Ensure all connected devices and cables support Gigabit Ethernet (Cat5e or higher).
- Check for excessive network traffic or bandwidth-intensive applications running on your network.
- Verify that your internet service provider (ISP) is delivering the expected speeds to your router.
If the problem persists, please contact TP-Link Technical Support for further assistance.
8. Specifications
| Feature | Detail |
|---|---|
| Model | LS1016G |
| Brand | TP-Link |
| Number of Ports | 16 |
| Data Transfer Rate | 1000 Megabits Per Second (Mbps) |
| Switch Type | Unmanaged |
| Interface Type | RJ45 |
| Colour | Charcoal |
| Housing | Metal |
| Fanless | Yes |
| Energy Saving | Yes |
| Dimensions (L x W x H) | 34 x 23.4 x 7.9 cm (approximate parcel dimensions) |
| Weight | 1.68 kg (approximate parcel weight) |
| Included Components | LS1016G, Power Adapter, User Manual |
9. Warranty and Support
Warranty Information:
The TP-Link LS1016G Switching Hub comes with a 5-Year Warranty. Please retain your proof of purchase for warranty claims. The warranty covers defects in materials and workmanship under normal use.
Technical Support:
For technical assistance, product registration, or to download the latest firmware and drivers, please visit the official TP-Link website:
You may also find answers to frequently asked questions (FAQs) and community forums on the support page.
Related Documents - LS1016G
 |
TP-Link UH720/UH700 USB 3.0 Hub User Guide User guide for the TP-Link UH720 and UH700 USB 3.0 Hubs, detailing hardware connection, usage of additional ports, and charging capabilities. Includes safety information and compliance statements. |
 |
TP-Link UH400 USB 3.0 4-Port Portable Hub User Guide User guide for the TP-Link UH400 USB 3.0 4-Port Portable Hub, detailing hardware connection, usage, safety information, and regulatory compliance. |
 |
TP-Link Gigabit Easy Smart PoE+ Switch Installation Guide Installation guide for TP-Link Gigabit Easy Smart PoE+ Switches, including models TL-SG108PE, TL-SG105PE, TL-SG105MPE, and TL-SG1210MPE. This document details LED explanations, connection diagrams, configuration methods (Web-based GUI and Windows utility), technical specifications, and frequently asked questions. It provides essential information for setting up and managing these network switches. |
 |
TP-Link Tapo Smart IoT & IR Hub (H110) Quick Start Guide A comprehensive quick start guide for the TP-Link Tapo Smart IoT & IR Hub (H110). This guide covers powering up, setting up the hub via the Tapo app, adding Tapo accessories and IR remote controls, integrating with Matter and third-party services, installation tips, and safety information. |
 |
TP-Link UH400 USB 3.0 4-Port Portable Hub User Guide User guide for the TP-Link UH400 USB 3.0 4-Port Portable Hub, detailing setup, usage, safety precautions, and regulatory compliance information. |
 |
TP-Link VX420 Modem Setup Guide Comprehensive guide to setting up and configuring your TP-Link VX420 Modem, covering Wi-Fi, LAN, WAN, Port Forwarding, and IPSec VPN. |