1. Introduction and Overview
This manual provides essential information for the safe and efficient operation, installation, and maintenance of your new Generic 7.0 Cu. ft. Chest Freezer. Please read this manual thoroughly before using the appliance and retain it for future reference.
Your 7.0 Cu. ft. Chest Freezer is designed to provide ample storage for your frozen goods, offering a reliable solution for your home or garage. Key features include:
- 7.0 Cu. ft. Capacity: Ample space for frozen items.
- Garage Ready Design: Operates efficiently in temperatures from 0°F to 110°F.
- External Temperature Control: Adjust temperature without opening the lid.
- Power-On Indicator Light: Visual confirmation of operation.
- Manual Defrost System: Maintains consistent freezing temperatures.
- Removable Basket: For organized storage of smaller items.
- Defrost Water Drain: Simplifies the defrosting process.
- Compact and Efficient: Assembled dimensions of 25” L x 32.56” W x 33.31” H.
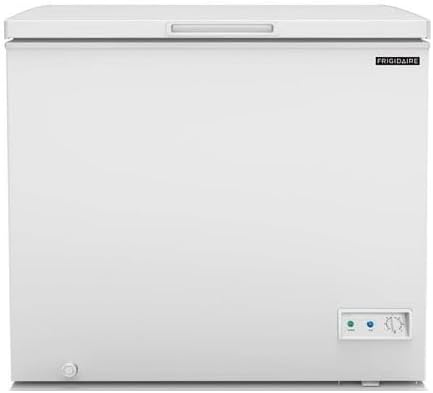
Figure 1.1: Front view of the Generic 7.0 Cu. ft. Chest Freezer, showing its compact design and external controls.
2. Safety Information
Your safety and the safety of others are very important. We have provided many important safety messages in this manual and on your appliance. Always read and obey all safety messages.
General Safety Precautions:
- Electrical Safety: Ensure the freezer is connected to a properly grounded electrical outlet. Do not use extension cords or ungrounded adapters.
- Ventilation: Allow adequate space around the freezer for proper air circulation. Do not block ventilation openings.
- Flammable Materials: Do not store explosive substances such as aerosol cans with a flammable propellant in this appliance.
- Child Safety: Supervise children when they are near the appliance. Old freezers and refrigerators are dangerous if children play inside. Remove doors before disposal.
- Placement: Do not place the freezer in direct sunlight or near heat sources.
- Cleaning: Always unplug the freezer before cleaning or performing maintenance.
- Defrosting: Do not use mechanical devices or other means to accelerate the defrosting process, other than those recommended by the manufacturer.
3. Setup and Installation
Unpacking:
Remove all packaging materials, including foam and adhesive tape. Inspect the freezer for any shipping damage. Report any damage to the retailer immediately.
Placement:
Place the freezer on a flat, stable surface strong enough to support the unit when fully loaded. This freezer is designed to be "Garage Ready" and can operate in ambient temperatures ranging from 0°F to 110°F (-17.8°C to 43.3°C).
- Allow at least 4 inches (10 cm) of space at the back and sides for proper air circulation.
- Do not place the freezer in direct sunlight or near heat-producing appliances like stoves or heaters.

Figure 3.1: Product dimensions for placement planning. The freezer measures approximately 21.9 inches deep, 32.6 inches wide, and 33.3 inches high.
Leveling:
Ensure the freezer is level to prevent vibrations and ensure proper door sealing. Adjust the leveling feet if necessary.
Initial Cleaning:
Before first use, wipe the interior and exterior with a damp cloth and a mild detergent. Dry thoroughly.
Power Connection:
Plug the freezer into a dedicated, grounded 115V, 60Hz electrical outlet. Do not use an adapter or extension cord.
Initial Cool-Down:
Allow the freezer to operate for at least 4 hours empty before loading with food. This ensures the interior reaches the desired temperature.
4. Operating Instructions
Temperature Control:
The freezer features an external temperature control dial located on the front of the unit. This allows you to adjust the temperature without opening the lid, helping to maintain consistent freezing and reduce energy loss.
- Turn the dial to select your desired temperature setting. Lower numbers indicate warmer temperatures, higher numbers indicate colder temperatures.
- The recommended setting for general use is typically midway on the dial.
- Allow several hours for the temperature to stabilize after making adjustments.
Power-On Indicator Light:
A green power-on indicator light is located next to the temperature control. This light illuminates when the freezer is receiving power and operating correctly, providing an easy visual check.

Figure 4.1: Close-up view of the external temperature control dial and the power-on indicator light.
Loading the Freezer:
When loading the freezer, avoid blocking the internal air vents (if present) to ensure proper cold air circulation. Do not overload the freezer, as this can hinder performance.
Using the Removable Basket:
The freezer includes a removable storage basket. This basket is ideal for organizing smaller, frequently accessed items, preventing them from getting lost at the bottom of the freezer. It can be easily removed to accommodate larger items.

Figure 4.2: Interior view of the freezer, highlighting the removable basket for organized storage.
5. Maintenance
Manual Defrost:
This freezer features a manual defrost system. Frost buildup is normal and should be removed periodically to maintain efficiency. Defrost when frost accumulation reaches about 1/4 to 1/2 inch (0.6 to 1.2 cm) thick.
- Unplug the freezer from the power outlet.
- Remove all food items and store them in another freezer or cooler.
- Open the freezer lid and place towels on the floor around the unit to catch melting ice.
- Locate the defrost water drain plug at the bottom of the freezer. Place a shallow pan or tray beneath it to collect water.
- Allow the ice to melt naturally. You can speed up the process by placing bowls of hot water inside the freezer (do not use sharp objects to chip ice).
- Once all ice has melted, clean the interior with a mild detergent and warm water. Dry thoroughly.
- Close the drain plug, plug the freezer back in, and allow it to cool down before returning food.
Cleaning the Interior and Exterior:
- Interior: Clean regularly with a solution of mild detergent and warm water. Rinse with clean water and dry thoroughly.
- Exterior: Wipe with a soft cloth and mild detergent. Avoid abrasive cleaners or solvents.
- Gasket: Clean the door gasket regularly to ensure a tight seal.
Power Outage:
In case of a power outage, keep the freezer lid closed to maintain the internal temperature for as long as possible. Food can remain frozen for several hours depending on the ambient temperature and how full the freezer is.
6. Troubleshooting
Before contacting customer support, please check the following common issues and solutions:
| Problem | Possible Cause | Solution |
|---|---|---|
| Freezer does not operate. | No power to the unit. | Check if the power cord is securely plugged in. Check the circuit breaker or fuse. |
| Freezer is not cold enough. | Temperature setting is too high (warm). Door is not closed properly. Excessive frost buildup. | Adjust the temperature control to a colder setting. Ensure the lid is fully closed. Defrost the freezer. |
| Excessive frost buildup. | Frequent lid opening. High humidity. Door gasket not sealing properly. | Minimize lid openings. Ensure the lid gasket is clean and sealing tightly. Perform manual defrost. |
| Freezer runs too frequently. | High ambient temperature. Lid opened too often. Large amount of warm food added. | This is normal in hot environments. Reduce lid openings. Allow warm food to cool before placing in freezer. |
| Vibrations or unusual noises. | Freezer is not level. Objects touching the back or sides. | Adjust leveling feet. Move the freezer away from walls or other objects. |
7. Specifications
| Feature | Detail |
|---|---|
| Brand | Generic |
| Model Name | 1515152 |
| Item Model Number | 1656151532 |
| Part Number | 1561534 |
| Capacity | 7.0 Cu. ft. |
| Product Dimensions (D x W x H) | 21.9" x 32.6" x 33.3" (inches) |
| Item Weight | 97 pounds |
| Color | White |
| Wattage | 250 watts |
| Door Hinges | Chest |
| Included Components | Basket |
| Country of Origin | USA |
| Date First Available | February 3, 2025 |
8. Warranty and Support
For warranty information and customer support, please refer to the documentation provided with your purchase or contact the seller directly. The manufacturer, Generic, typically provides warranty details with the product or through their official support channels.
For assistance with your product, you may contact the seller, SAS Warehouse, or refer to the customer support options available where you purchased the product.
For general inquiries or to find more information, you can often visit the brand's official website or the retailer's support page.


