1. Product Overview
This motorized projection screen is designed for versatile use in home theaters, offices, and classrooms. It features a silent motor for smooth operation and a high-gain screen surface for optimal image quality. The screen can be controlled via a wireless remote or a wired hand-held controller.

Image 1.1: Electric Lift Push-button Start Control. This image illustrates the motorized projector screen in operation, showing both the wireless remote control and the wired push-button controller for adjusting the screen height.
2. Setup and Installation
2.1 Unpacking
Carefully remove the projector screen from its packaging. Inspect all components for any signs of damage. Retain packaging materials for future transport or storage.
2.2 Mounting Options
The projector screen supports both wall and ceiling installation. Ensure the mounting surface is sturdy enough to support the screen's weight (approximately 13.23 pounds).
- Wall Mounting: Secure the screen housing directly to a wall using appropriate fasteners.
- Ceiling Mounting: Hang the screen from the ceiling using suitable hooks or brackets.
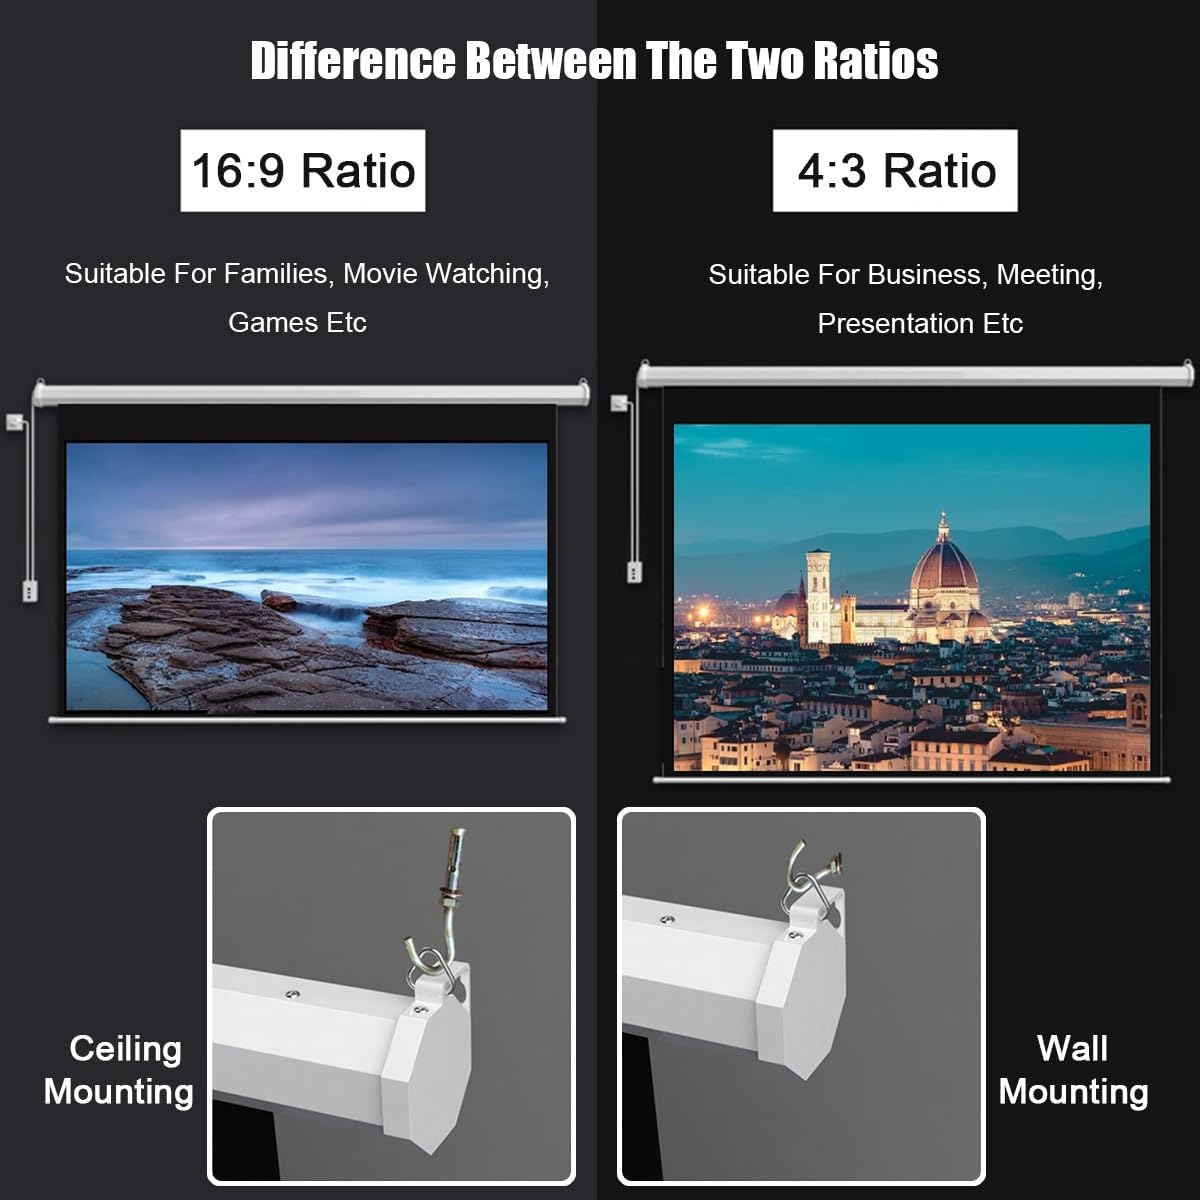
Image 2.1: Difference Between The Two Ratios and Mounting Options. This image shows a comparison of 16:9 and 4:3 aspect ratios for different uses, and illustrates both ceiling mounting and wall mounting methods for the screen housing.
2.3 Concealable Installation
The screen's design allows for a concealable installation, integrating seamlessly into various environments. The dustproof metal casing is durable and aesthetically blends with home and office decor.

Image 2.2: Concealable Installation. This image demonstrates how the projector screen can be installed to be concealed, showing a diagram with reserved depth and width measurements for the socket and shell.
2.4 Dimensions
The specific dimensions for the 72-inch (16:9) model are provided below. Refer to the diagram for detailed measurements.

Image 2.3: Screen Dimensions. This diagram provides detailed measurements for 60-inch (4:3), 60-inch (16:9), 72-inch (4:3), and 72-inch (16:9) projector screens, including overall width and viewing area dimensions.
3. Operating Instructions
3.1 Power Connection
Connect the projector screen to a standard power outlet. Ensure the power cable is securely connected and not obstructed.
3.2 Screen Operation
The screen can be operated using either the wireless remote control or the wired hand-held controller.
- To Extend the Screen: Press the 'Down' button on the remote or controller.
- To Retract the Screen: Press the 'Up' button on the remote or controller.
- To Stop the Screen: Press the 'Stop' button (usually a square or central button) at any desired height.
The motorized system ensures smooth and quiet lifting and lowering without lagging.

Image 3.1: Smooth Lifting And Lowering With Low Noise Motor Design. This image provides an internal view of the projector screen's motor mechanism, highlighting its design for quiet and consistent operation.
3.3 Optimal Viewing
The screen features a 170° viewing angle, providing a clear image from various positions within the room. The high-gain screen surface optimizes picture quality, offering bright colors and rich details.

Image 3.2: Wide Viewing Angle Surrounds Your Senses. This image depicts three individuals comfortably viewing the projector screen from different angles, illustrating the wide 170-degree viewing capability.

Image 3.3: Selection Of High-quality Curtain Surfaces. This image shows a cross-section of the projector screen material, detailing its layers: Gain Layer, PVC Surface, Fiber Layer, and PVC Base Layer, which contribute to its flat and durable surface and significant gain.
4. Maintenance
4.1 Cleaning the Screen Surface
To clean the screen surface, gently wipe it with a soft, damp cloth. Avoid using harsh chemicals or abrasive materials, as these can damage the screen's delicate surface and affect image quality. Ensure the screen is fully retracted and dry before storage or prolonged non-use.
4.2 Cleaning the Casing
The dustproof metal casing can be wiped clean with a dry or slightly damp cloth. Do not spray cleaning liquids directly onto the casing to prevent moisture from entering the motor mechanism.
5. Troubleshooting
- Screen does not extend/retract:
- Check if the power cable is securely plugged into a working outlet.
- Ensure the remote control batteries are not depleted.
- Verify that there are no obstructions preventing screen movement.
- Remote control is unresponsive:
- Replace the batteries in the remote control.
- Ensure you are within the operating range of the remote.
- Try using the wired hand-held controller as an alternative.
- Screen appears wrinkled or uneven:
- Allow the screen to hang fully extended for a period to naturally flatten.
- Ensure the installation is level and the screen housing is not twisted.
If issues persist, please contact customer support for further assistance.
6. Specifications
| Feature | Specification |
|---|---|
| Model Number | EVCFIBFFE-72INCH(16:9) |
| Screen Size | 72 inches (diagonal) |
| Aspect Ratio | 16:9 |
| Screen Material | White Glass Fiber (multi-layered) |
| Gain | High Gain |
| Viewing Angle | 170° |
| Motor Type | Silent Motor |
| Control Methods | Wireless Remote, Wired Hand-held Controller |
| Casing Material | Dustproof Metal |
| Package Dimensions | 58.27 x 5.91 x 5.51 inches |
| Item Weight | 13.23 pounds |
| Assembly Required | No |
| Manufacturer | Generic |
7. Warranty and Support
Information regarding specific warranty terms and customer support contact details is not available in this manual. Please refer to the product packaging or the retailer's website for warranty information and support contacts.


