1. Introduction
Thank you for choosing the Varpoolfaye XKP1307BP 1.8HP Variable Speed Pool Pump. This pump is designed for efficient water circulation and filtration in both in-ground and above-ground swimming pools and spas. Its variable speed technology allows for optimized performance and energy savings, while the self-priming feature and integrated filter basket simplify operation and maintenance. Please read this manual thoroughly before installation and operation to ensure safe and correct use of the product.
2. Safety Information
WARNING: Failure to follow these instructions can result in serious injury or death.
- Always disconnect power to the pump before performing any service or maintenance.
- Installation must be performed by a qualified professional in accordance with all local and national electrical and plumbing codes.
- Ensure the pump is properly grounded to prevent electrical shock.
- Do not operate the pump if it is damaged or has exposed wiring.
- Keep children and pets away from the pump during operation.
- Do not run the pump dry. Ensure the pump is filled with water before starting to prevent damage.
- Protect the pump from direct exposure to rain and harsh weather conditions. The removable rain cover provides additional protection.
3. Product Overview and Components
The Varpoolfaye XKP1307BP pool pump features a robust design with key components for efficient and reliable operation. Familiarize yourself with the parts below.

The pump includes a large filter basket for debris collection and a clear lid for easy inspection. The control panel allows for programming and monitoring of pump settings.
4. Specifications
Below are the technical specifications for the Varpoolfaye XKP1307BP Variable Speed Pool Pump.
| Feature | Specification |
|---|---|
| Model Number | XKP1307BP |
| Horsepower | 1.8 HP |
| Max Flow Rate | 9114 GPH |
| Max Head | 64 ft |
| Voltage | 220-240V |
| Frequency | 60Hz |
| Material | Stainless Steel, PP plastic, Copper Motor |
| Product Dimensions | 26.3"L x 9.8"W x 13.2"H |
| Power Source | Corded Electric |
| Compatibility | In-ground and Above-ground pools/spas |


5. Installation
Proper installation is crucial for the pump's performance and longevity. Please follow these guidelines carefully.
5.1 Site Selection
- Install the pump on a solid, level surface to minimize vibration and noise.
- Ensure adequate ventilation around the pump motor.
- Locate the pump as close to the pool as possible to reduce friction loss in plumbing.
- Protect the pump from direct sunlight, rain, and freezing temperatures.
5.2 Plumbing Connections
The pump is compatible with 2-inch or 2.5-inch Schedule 40 rigid PVC pipe. Adapters are provided for these sizes.

- Use appropriate PVC cement and primer for secure, leak-free connections.
- Ensure all connections are tight but do not overtighten.
- Install shut-off valves on both the suction and discharge sides of the pump for easier maintenance.
5.3 Electrical Connections
- Verify that the power supply matches the pump's voltage requirements (220-240V, 60Hz).
- Connect the pump to a dedicated circuit protected by a Ground Fault Circuit Interrupter (GFCI).
- All wiring must comply with local and national electrical codes.
- Ensure the pump is properly grounded using the earthing terminal.
6. Operation
The Varpoolfaye XKP1307BP features a user-friendly control panel for setting time and speed schedules.
6.1 Initial Start-up and Priming
- Before starting, ensure the pump is filled with water by removing the filter basket lid and filling the basket with water until the water level is above the pump's inlet.
- Replace the lid securely.
- Turn on the power. The pump will self-prime. If it does not prime within 5 minutes, turn it off, recheck water levels, and inspect for air leaks in the suction line.
6.2 Control Panel Overview

6.3 Setting Time and Speed Schedules
The pump allows for setting multiple schedules with different operating times and speeds. Refer to the video below for a visual guide.
Video 6.1: This video demonstrates how to set the timer and speed settings on the Varpoolfaye pool pump's control panel. It guides users through navigating the menu, setting start and stop times, and selecting desired operating speeds for scheduled programs.
- Press the MENU button to access settings.
- Use the arrow keys to navigate to Schedule and press ENTER.
- Select a specific schedule (e.g., Schedule 1) and press ENTER.
- Set the Time On (start time) using the arrow keys and press ENTER to confirm.
- Set the Time Off (stop time) using the arrow keys and press ENTER to confirm.
- Select the desired Speed (Speed 1-4) for this schedule and press ENTER to confirm.
- To enable the schedule, navigate to Function, select Enabled, and press ENTER.
- Press ESC multiple times to exit the menu and save settings.
6.4 Manual Speed Adjustment
You can manually select one of the four preset speeds (Speed 1, Speed 2, Speed 3, Speed 4) directly from the control panel for immediate operation outside of scheduled times.
7. Maintenance
Regular maintenance ensures optimal performance and extends the lifespan of your pool pump.
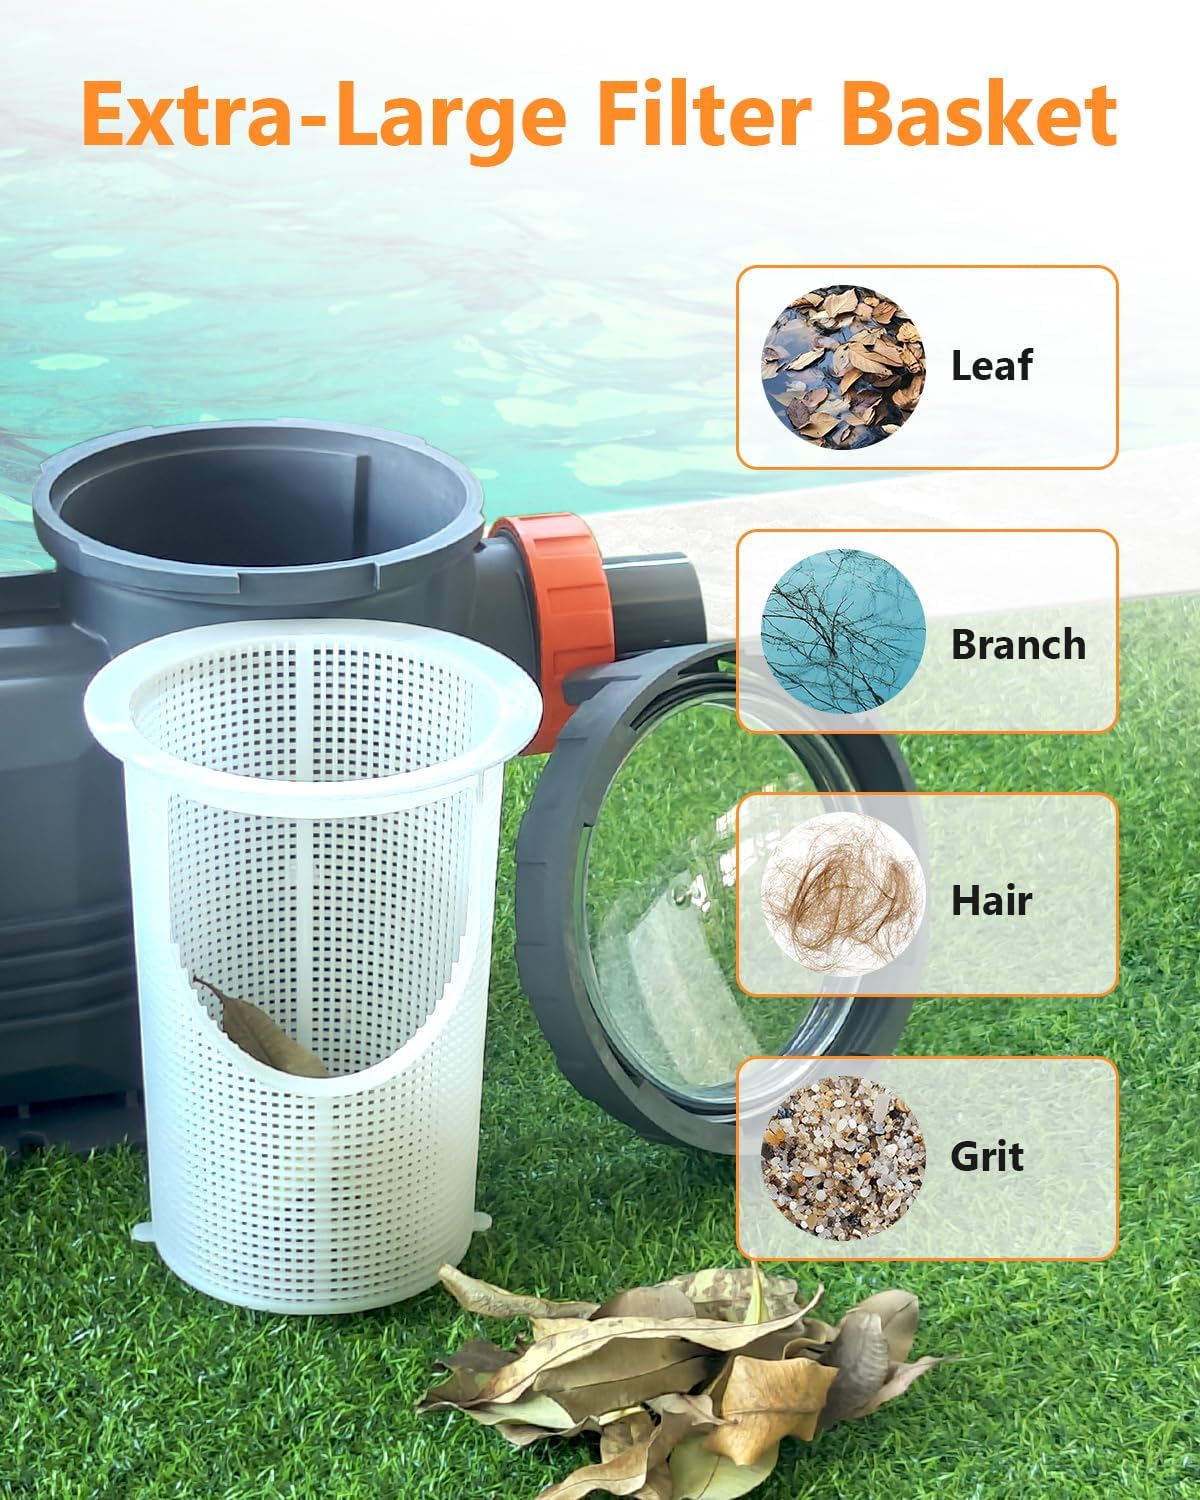
7.1 Cleaning the Filter Basket
The oversized filter basket collects debris and should be cleaned regularly.
- Turn off the pump and disconnect power.
- Rotate the clear lid counter-clockwise to remove it.
- Lift out the filter basket.
- Empty debris and rinse the basket thoroughly with water.
- Inspect the lid O-ring for cracks or wear; replace if necessary.
- Place the clean basket back into the pump and secure the lid by rotating clockwise until tight.
7.2 Motor Protection
The pump includes a removable rain cover to protect the motor.

- Ensure the rain cover is properly installed over the motor section, especially in outdoor installations.
- Periodically check the motor for any signs of moisture ingress or corrosion.
7.3 Winterization
- In areas subject to freezing temperatures, drain all water from the pump and plumbing lines.
- Remove the drain plugs and store them in the filter basket.
- Store the pump in a dry, warm place if possible, or cover it securely to protect it from the elements.
8. Troubleshooting
This section provides solutions to common issues you might encounter with your pool pump.
| Problem | Possible Cause | Solution |
|---|---|---|
| Pump does not start | No power; tripped breaker/GFCI; faulty wiring | Check power supply, reset breaker/GFCI. Consult an electrician if wiring is suspected. |
| Pump runs but does not prime | Low water level; air leak in suction line; clogged filter basket | Ensure pump is filled with water. Check all suction line connections for leaks. Clean filter basket. |
| Low water flow | Clogged filter basket; restricted plumbing; low speed setting | Clean filter basket. Inspect plumbing for blockages. Increase pump speed setting. |
| Excessive noise/vibration | Loose mounting; cavitation (air in pump); worn bearings | Tighten mounting bolts. Check for air leaks in suction line. If bearings are worn, professional service is required. |
| Water leak at pump | Loose connections; damaged O-rings/seals | Tighten plumbing connections. Inspect and replace O-rings or seals as needed. |
9. Warranty & Support
For warranty information, technical support, or to purchase replacement parts, please refer to the official Varpoolfaye website or contact their customer service directly. Keep your purchase receipt as proof of purchase for warranty claims.