1. Introduction
This manual provides comprehensive instructions for the installation, operation, and maintenance of your PRO1 IAQ T701 Non-Programmable Thermostat. The T701 is designed for ease of use and reliable temperature control in your home or office. It features a large backlit display for clear visibility and simple push-button controls.
2. Safety Information
Please read all instructions carefully before installing or operating this thermostat. Failure to follow these instructions could result in property damage, injury, or death.
- Always turn off power to the heating/cooling system at the main fuse or circuit breaker panel before installing or servicing the thermostat.
- This thermostat is designed for 24V AC low voltage systems. Do not use on line voltage applications (120V or 240V).
- Installation should be performed by a qualified technician if you are unsure about wiring procedures.
- Ensure all wiring connections are secure to prevent short circuits.
3. Package Contents
Verify that your package contains the following items:
- PRO1 IAQ T701 Thermostat Unit
- Wall Plate (Sub-base)
- Mounting Hardware (Screws and Wall Anchors)
- 2 AA Batteries (Included for battery-powered operation)
- User Manual (This document)
4. Installation
Proper installation is crucial for the optimal performance of your thermostat. Follow these steps carefully.
4.1 Tools Required
- Phillips Head Screwdriver
- Drill with 3/16" (4.8mm) drill bit (for drywall)
- Wire Stripper/Cutter
4.2 Removing Your Old Thermostat
- Turn off power: Locate the main power switch for your heating and cooling system (usually at the furnace or air handler) and turn it off.
- Remove old thermostat cover: Most covers snap off or are secured with small screws.
- Photograph wiring: Before disconnecting any wires, take a clear picture of the wiring connections. This will serve as a reference.
- Label wires: Use the provided labels or masking tape to label each wire with its corresponding terminal letter (e.g., R, G, Y, W).
- Disconnect wires: Carefully disconnect the wires from the old thermostat terminals.
- Remove old wall plate: Unscrew and remove the old thermostat's wall plate.
4.3 Mounting the New Thermostat
- Position the wall plate: Hold the new T701 wall plate against the wall where you want to mount it. Ensure it is level.
- Mark screw positions: Mark the positions for the mounting screws through the holes in the wall plate.
- Drill holes: If drilling into drywall, drill 3/16" (4.8mm) holes at the marked positions and insert the wall anchors.
- Secure wall plate: Pull the system wires through the opening in the wall plate and secure the wall plate to the wall using the provided screws.
4.4 Wiring the Thermostat
The T701 features color-coded terminals for simplified wiring. Refer to the photograph you took earlier and the table below for common wiring configurations.
| Terminal | Description |
|---|---|
| R | 24V AC Heating Power (often Red wire) |
| C | 24V AC Common (often Blue or Black wire - required for 24V power, optional for battery-only) |
| W | Heating Call (often White wire) |
| Y | Cooling Call (often Yellow wire) |
| G | Fan Call (often Green wire) |
Steps:
- Connect wires: Match the labeled wires from your system to the corresponding terminals on the T701 wall plate. Insert each wire into its terminal and tighten the screw securely.
- Install batteries: If using battery power, insert the 2 AA batteries into the battery compartment on the back of the thermostat unit. Ensure correct polarity.
- Attach thermostat to wall plate: Align the thermostat unit with the wall plate and gently push until it snaps securely into place.
- Restore power: Turn the power back on to your heating and cooling system at the main fuse or circuit breaker panel.
5. Initial Setup and Configuration
After installation and power-up, the thermostat will display the current room temperature. No complex programming is required for this non-programmable model.
5.1 System Type Configuration (Installer Settings)
The T701 is compatible with most single-stage heating and cooling systems. In most cases, the default settings will be appropriate. If your system requires specific configuration (e.g., heat pump), consult a qualified HVAC technician or the full installer manual for advanced settings.
The thermostat includes a 5-minute compressor delay feature to protect your HVAC system. This delay is typically enabled by default and helps prevent damage from rapid cycling.
6. Operating Instructions
The PRO1 IAQ T701 thermostat is designed for straightforward operation. The large backlit display and intuitive controls make it easy to adjust your comfort settings.
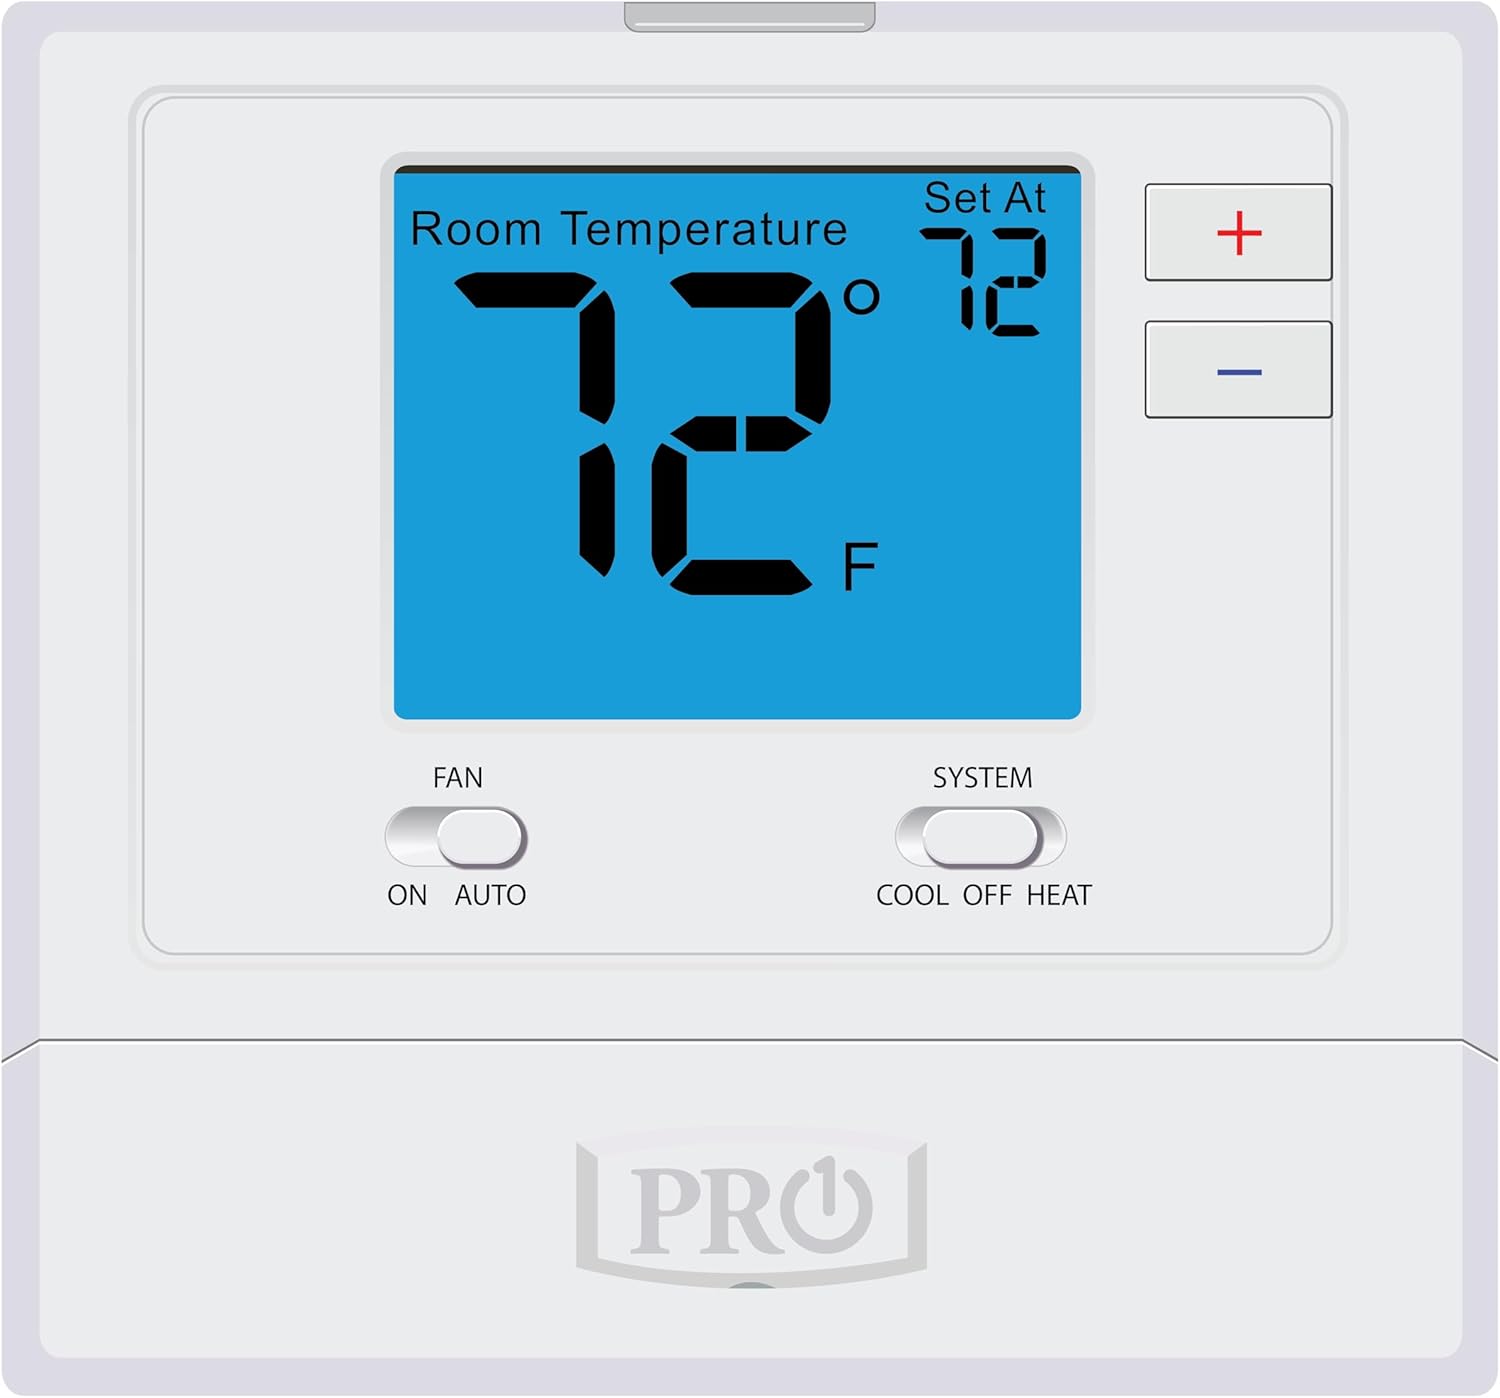
Image 6.1: Front view of the PRO1 IAQ T701 Thermostat, showing the digital display, temperature adjustment buttons, and system/fan mode switches.
6.1 Adjusting the Temperature
- The large number on the display indicates the current room temperature.
- The smaller number labeled "Set At" indicates your desired temperature setting.
- To increase the set temperature, press the + button.
- To decrease the set temperature, press the - button.
- The thermostat will automatically maintain the set temperature.
6.2 Selecting System Mode
Use the "SYSTEM" switch to select the desired operating mode for your HVAC system:
- COOL: The thermostat will activate your air conditioning system when the room temperature rises above your set temperature.
- OFF: The heating and cooling systems are turned off. The fan can still be operated manually.
- HEAT: The thermostat will activate your heating system when the room temperature falls below your set temperature.
6.3 Selecting Fan Mode
Use the "FAN" switch to control the operation of your system's fan:
- AUTO: The fan will run only when the heating or cooling system is actively operating. This is the most common and energy-efficient setting.
- ON: The fan will run continuously, regardless of whether the heating or cooling system is active.
7. Maintenance
Your PRO1 IAQ T701 thermostat requires minimal maintenance to ensure continued reliable operation.
7.1 Battery Replacement
The thermostat uses 2 AA alkaline batteries for power (if not wired for 24V common) or as a backup. When the batteries are low, a low battery indicator will appear on the display. Replace batteries promptly to avoid loss of control.
- Gently pull the thermostat unit straight off the wall plate.
- Open the battery compartment on the back of the unit.
- Remove the old batteries and dispose of them responsibly.
- Insert two new AA alkaline batteries, ensuring correct polarity (+/-).
- Snap the thermostat unit back onto the wall plate.
7.2 Cleaning the Thermostat
To clean the thermostat's exterior, use a soft, damp cloth. Do not use abrasive cleaners, solvents, or chemical sprays, as these can damage the display or plastic components.
8. Troubleshooting
If you experience issues with your thermostat, refer to the following common problems and solutions:
| Problem | Possible Cause | Solution |
|---|---|---|
| Display is blank or dim | Low or dead batteries; No 24V power (if wired for common) | Replace batteries. Check circuit breaker for HVAC system. Ensure 24V common wire (C) is properly connected if used. |
| Heating/Cooling system not responding | System switch in OFF position; Incorrect wiring; Blown fuse in HVAC system; Compressor delay active | Set system switch to HEAT or COOL. Verify wiring connections. Check HVAC system fuse. Wait 5 minutes for compressor delay to reset. |
| Fan not running | Fan switch in AUTO; Incorrect wiring | Set fan switch to ON for continuous operation. Verify G wire connection. |
| Temperature reading seems inaccurate | Thermostat exposed to direct sunlight, drafts, or heat sources | Ensure thermostat is not in direct sunlight, near vents, or other heat/cold sources that could affect its sensor. |
If problems persist after attempting these solutions, contact PRO1 IAQ customer support or a qualified HVAC technician.
9. Specifications
| Model | T701 |
| Brand | PRO1 IAQ |
| Control Type | Non-Programmable, Push Button |
| System Compatibility | 1 Heat / 1 Cool (Conventional Systems) |
| Power Source | 24V AC (C-wire) or 2 AA Batteries |
| Display Type | LCD with Backlight |
| Dimensions (H x W x D) | 4.4" x 4.7" x 1.1" (11.2 cm x 11.9 cm x 2.8 cm) |
| Weight | 9.9 ounces (0.28 kg) |
| Color | White |
| Mounting Type | Wall Mount |
| Special Features | Adjustable Cycles, 5-Minute Compressor Delay, Glow-in-the-Dark Functionality |
| Connectivity Protocol | BACnet MS/TP (Note: This is typically for commercial integration and not user-configurable.) |
| UPC | 095247201396 |
10. Warranty and Support
10.1 5-Year Limited Warranty
The PRO1 IAQ T701 Thermostat is backed by a 5-year limited warranty from the date of purchase. This warranty covers defects in materials and workmanship under normal use and service. For full warranty terms and conditions, please refer to the warranty card included with your product or contact PRO1 IAQ customer support.
10.2 Customer Support
If you have any questions about the installation, operation, or troubleshooting of your PRO1 IAQ T701 Thermostat, please contact PRO1 IAQ customer support. Contact information can typically be found on the manufacturer's website or on the product packaging.
For professional installation or complex system issues, it is recommended to contact a qualified HVAC technician.