1. Introduction and Overview
Thank you for choosing the HOMCOM Rolling Ironing Cabinet. This versatile unit is designed to streamline your laundry routine by combining a functional ironing board with ample storage solutions. Featuring an integrated ironing surface, a convenient L-shaped clothes rail, open shelving, a two-tier cabinet, and smooth-rolling wheels, this cabinet offers both efficiency and mobility for your home.

Figure 1.1: The HOMCOM Rolling Ironing Cabinet, showcasing its compact design with an ironing board, side hanging rail, and internal storage.
2. Safety Instructions
Please read and understand all safety instructions before assembling or using the product. Failure to follow these instructions may result in injury or damage to the product.
- Keep all packaging materials away from children and pets.
- Ensure all components are present and undamaged before assembly. Do not proceed with assembly if any parts are missing or damaged.
- Assemble the unit on a soft, clean surface to prevent scratches.
- Always use the product on a flat, stable, and level surface.
- Lock the wheels when the unit is stationary or in use, especially during ironing, to prevent accidental movement.
- Do not overload the shelves or the hanging rail. Refer to the specifications for weight limits (if available, otherwise use general caution).
- Use caution when placing a hot iron on the designated iron holder. Ensure the iron is cooled before storing it inside the cabinet.
- Do not allow children to climb on or play with the unit.
- Keep hands and fingers clear of moving parts during assembly and operation.
3. Package Contents
Before beginning assembly, verify that all the following components are included in your package:
- Ironing Board Top (with linen-feel fabric cover)
- Cabinet Panels (Side panels, Top panel, Bottom panel, Back panel, Door panels)
- Adjustable Shelf
- L-shaped Clothes Rail
- Side Iron Holder
- Rolling Wheels (4 total, 2 with locking brakes)
- Hardware Pack (Screws, dowels, cam locks, hinges, handles, etc.)
- Assembly Instructions Manual (this document)
4. Assembly and Setup
Follow these steps carefully for proper assembly. It is recommended to have two people for assembly.
- Unpack and Identify Parts: Carefully remove all components from the packaging. Lay them out on a clean, soft surface to prevent damage. Identify each part using the provided parts list (if included in physical manual).
- Assemble Cabinet Frame: Begin by connecting the side panels to the bottom and top panels using the provided hardware (e.g., dowels and cam locks). Ensure all connections are secure.
- Install Back Panel: Slide or attach the back panel into the designated grooves or fasten it to the cabinet frame.
- Attach Doors: Secure the hinges to the cabinet doors and then attach the doors to the main cabinet frame. Install the door handles.
- Insert Adjustable Shelf: Place the adjustable shelf into the desired height within the cabinet. The shelf can be moved to different levels to accommodate items of various sizes.

Figure 4.1: The adjustable shelf offers three height levels for flexible storage.
- Attach L-shaped Clothes Rail: Secure the L-shaped clothes rail to the designated side of the cabinet using the provided screws.
- Attach Side Iron Holder: Mount the metal side iron holder to the exterior side of the cabinet as shown in the diagrams.
- Mount Ironing Board Top: Carefully align and secure the ironing board top to the main cabinet structure. Ensure it is firmly attached and stable.
- Install Rolling Wheels: Attach the four rolling wheels to the bottom of the cabinet. Ensure that the two wheels with locking brakes are installed on the front side of the cabinet for easy access and stability.

Figure 4.2: The four rolling wheels, two of which feature locking brakes for stability.
- Final Check: Once assembled, gently shake the unit to ensure all connections are tight and the cabinet is stable. Tighten any loose screws.
5. Operating Instructions
5.1. Ironing Function
The integrated ironing board provides a convenient surface for pressing clothes. Before ironing, ensure the unit's wheels are locked to prevent movement. Place your iron on the dedicated side iron holder when not in use or when cooling down.
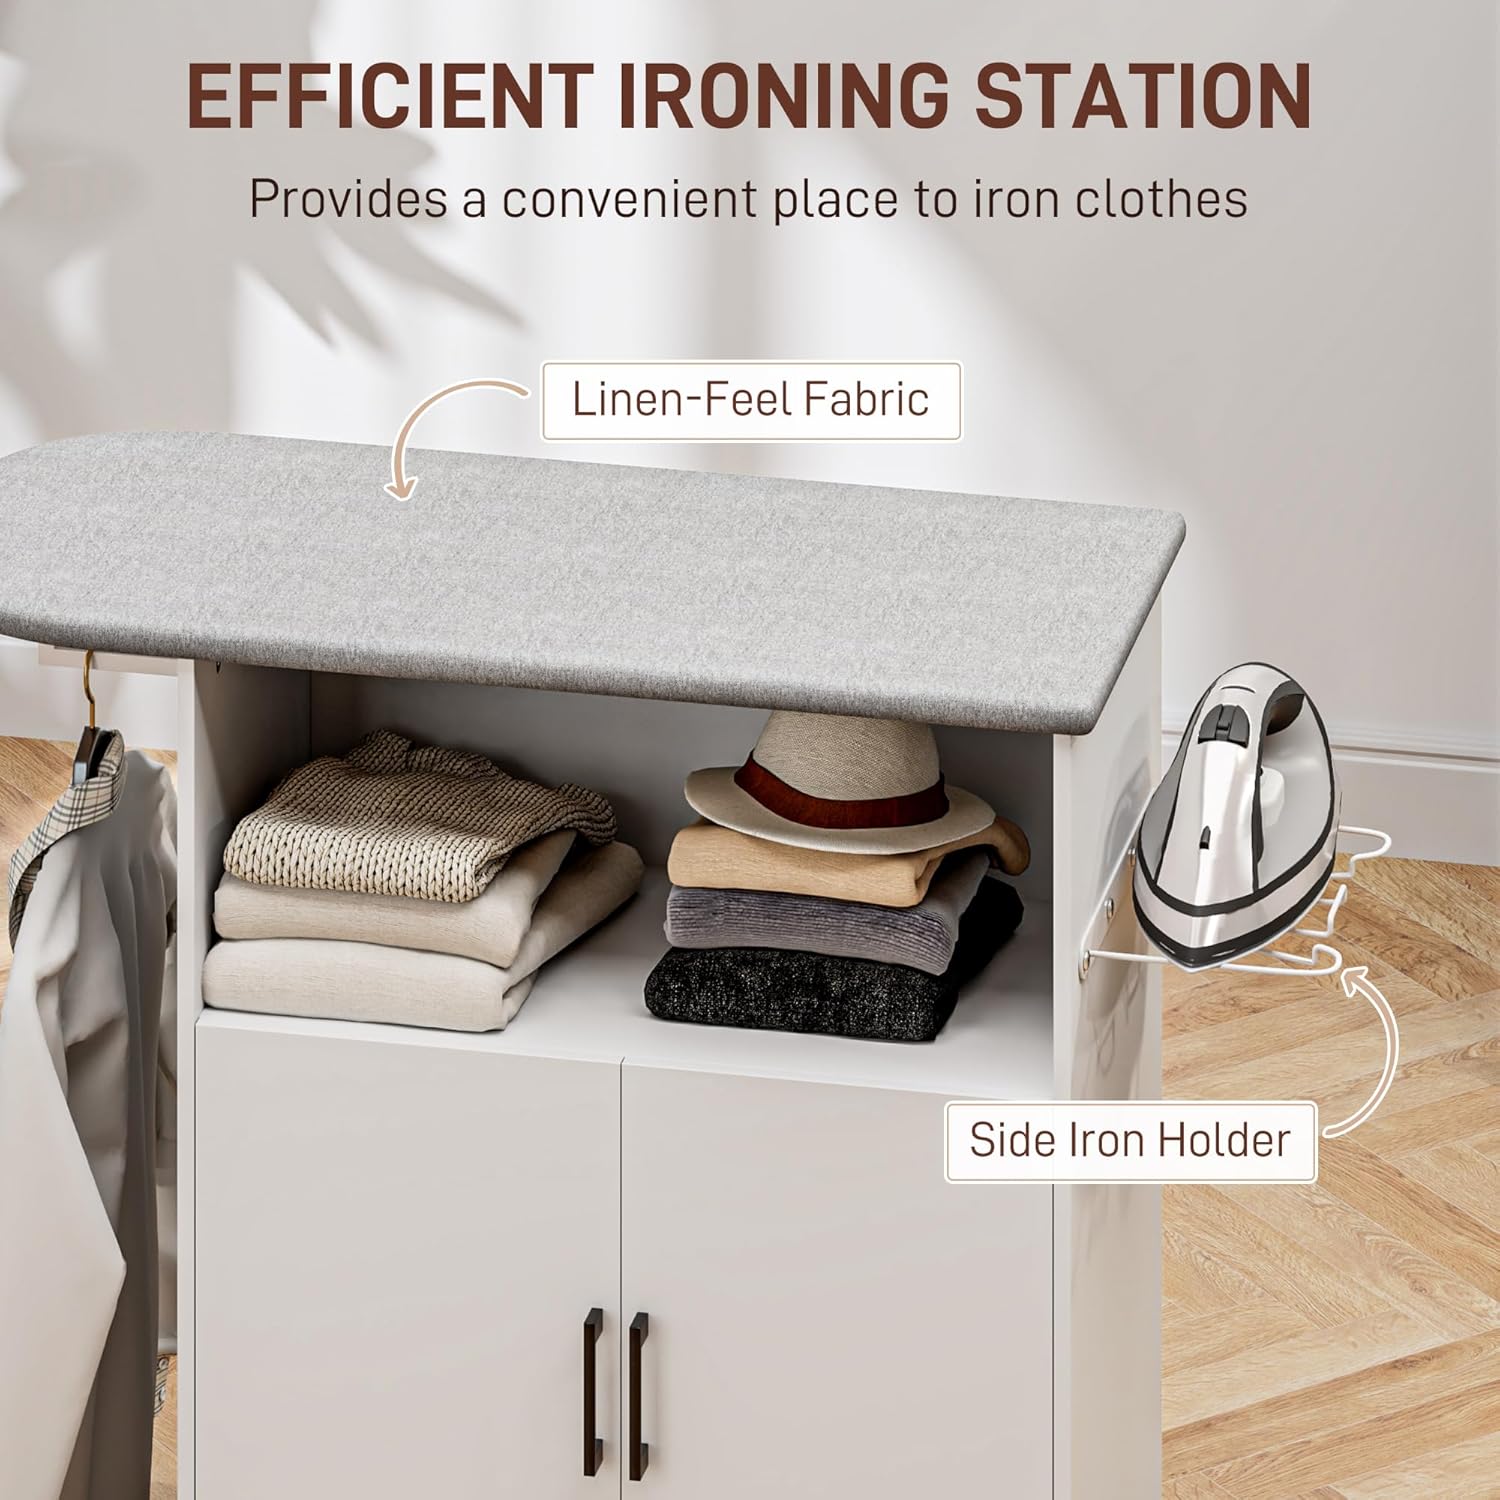
Figure 5.1: The ironing board features a durable linen-feel fabric, and a convenient side holder keeps your iron accessible.
5.2. Storage Utilization
The cabinet offers various storage options:
- Open Compartment: Ideal for frequently used items or neatly folded laundry.
- Two-Tier Cabinet: Provides enclosed storage for clothes, linens, or other household items. The adjustable shelf allows for customized storage space.
- L-shaped Clothes Rail: Use this rail to hang freshly ironed clothes, garments waiting to be ironed, or other items that require hanging.

Figure 5.2: The cabinet provides diverse storage options including an L-shaped rail, open shelf, and a two-tier cabinet.
5.3. Mobility
To move the cabinet, unlock the two braked wheels by flipping their levers. Once the cabinet is in the desired position, engage the brakes on these two wheels to secure the unit in place.
6. Maintenance and Care
Regular maintenance will help prolong the life of your ironing cabinet.
- Cleaning: Wipe down the cabinet surfaces with a soft, damp cloth. Avoid using harsh chemicals or abrasive cleaners, as they may damage the finish.
- Ironing Board Cover: The ironing board cover can be wiped clean with a damp cloth. If the cover becomes heavily soiled or worn, it can be replaced with a suitable universal ironing board cover.
- Hardware: Periodically check all screws and connections to ensure they remain tight. Retighten as necessary.
- Wheels: Keep the wheels free of dust and debris to ensure smooth movement.
7. Troubleshooting
If you encounter any issues with your HOMCOM Rolling Ironing Cabinet, refer to the following common problems and solutions:
- Unit is Wobbly:
- Ensure all assembly screws are fully tightened.
- Verify that the unit is placed on a flat, level surface.
- Confirm that the locking brakes on the wheels are engaged when the unit is stationary.
- Doors Do Not Close Properly:
- Check the alignment of the hinges. Adjust if necessary.
- Ensure no items inside the cabinet are obstructing the doors.
- Difficulty Moving the Cabinet:
- Ensure the locking brakes on the wheels are disengaged.
- Check for any obstructions around the wheels. Clean any debris from the wheels.
8. Specifications
| Feature | Specification |
|---|---|
| Brand | HOMCOM |
| Model Number | ES831-918V80WT0731 |
| Overall Dimensions (L x W x H) | 125 cm x 43.5 cm x 102.5 cm |
| Ironing Board Dimensions (L x W) | 107 cm x 40 cm |
| Weight | 26 kg |
| Material | Particle Board, Metal (frame/hardware), Linen-feel Fabric (ironing board cover) |
| Features | 4 Rolling Wheels (2 with brakes), L-shaped Clothes Rail, Side Iron Holder, Open Compartment, 2-Tier Cabinet with Adjustable Shelf |

Figure 8.1: Detailed dimensions of the ironing cabinet for reference.


