
1. Important Safety Information
Before beginning any installation or maintenance, always ensure the refrigerator is completely disconnected from the power supply. Failure to do so can result in electric shock, injury, or damage to the appliance. Wear appropriate personal protective equipment, such as gloves and eye protection.
If you are unsure about any step, consult a qualified technician. This replacement part is intended for use by individuals with sufficient technical knowledge and experience in appliance repair.
2. Product Overview
This document provides instructions for the replacement control board designed for various Amana refrigerator models. The control board is a critical component responsible for managing the refrigerator's functions, including temperature regulation, defrost cycles, and compressor operation.
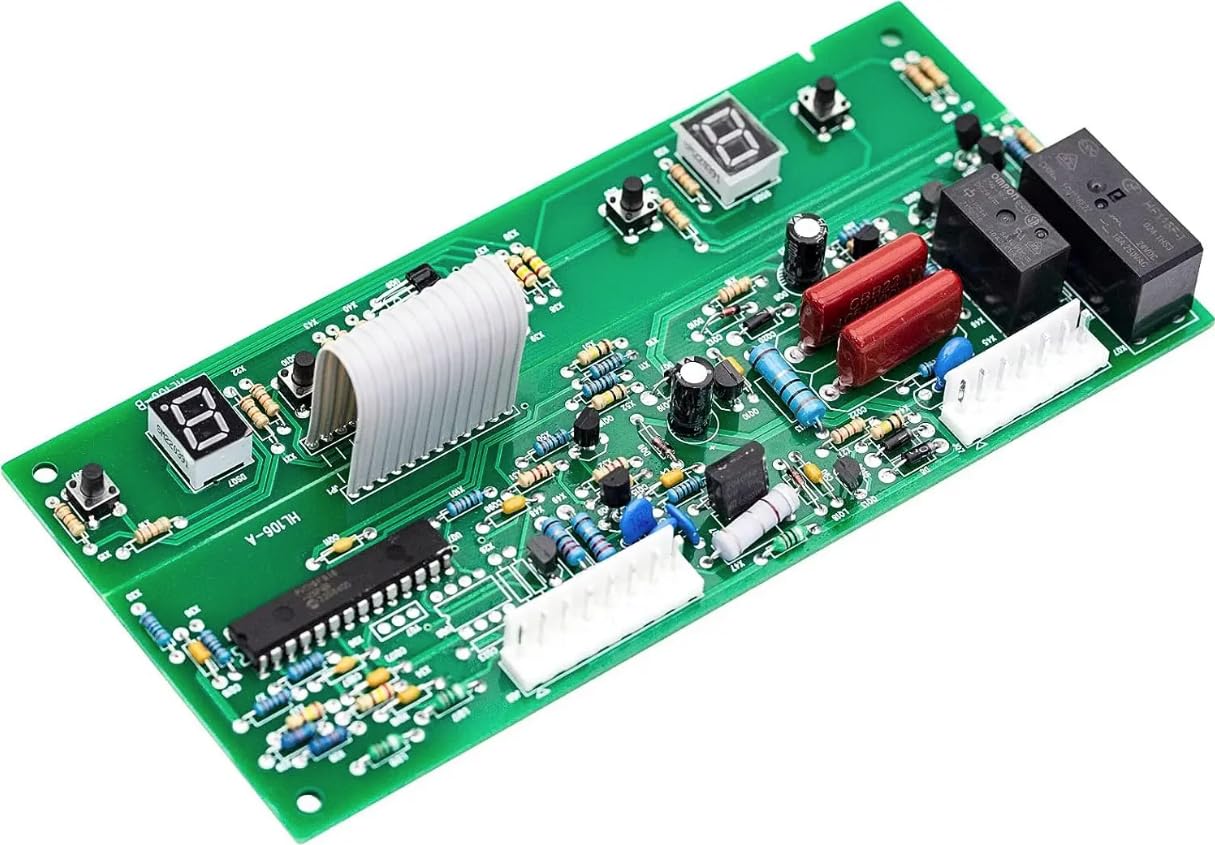
Image 1: Generic Replacement Control Board for Amana Refrigerators. This image shows the general appearance of the control board, including its connectors and electronic components.
Please verify that the model numbers listed in the product description match your refrigerator's requirements before proceeding with installation.
3. Setup and Installation
The following steps outline the general procedure for replacing the control board. Specific locations and fasteners may vary by refrigerator model. Always refer to your refrigerator's original service manual for precise instructions.
Tools Required:
- Screwdriver set (Phillips and Flathead)
- Nut driver set (if applicable)
- Needle-nose pliers
- Multimeter (for testing, optional but recommended)
- Work gloves
Installation Steps:
- Disconnect Power: Unplug the refrigerator from the wall outlet or turn off the circuit breaker supplying power to the refrigerator. This is a critical safety step.
- Locate the Control Board: The control board is typically located at the back of the refrigerator, behind a service panel, or sometimes within the fresh food compartment's ceiling or side wall.
- Access the Control Board: Remove any screws or fasteners securing the access panel. Carefully detach the panel.
- Document Wiring: Before disconnecting any wires, take clear photos of the existing wiring connections to the old control board. This will serve as a reference for connecting the new board.
- Disconnect Wires: Carefully disconnect all wire harnesses and connectors from the old control board. Note their positions.
- Remove Old Control Board: Unscrew or unclip the old control board from its mounting brackets.
- Install New Control Board: Position the new control board in the same location as the old one and secure it with the original screws or clips.
- Connect Wires: Refer to your photos and carefully connect all wire harnesses and connectors to the corresponding terminals on the new control board. Ensure all connections are secure and correctly seated.
- Replace Access Panel: Reattach the access panel and secure it with its screws or fasteners.
- Restore Power: Plug the refrigerator back into the wall outlet or turn on the circuit breaker.
4. Operating the Refrigerator After Installation
After successfully installing the new control board and restoring power:
- Initial Power-Up: The refrigerator may take some time to stabilize its temperature after being powered on. Allow several hours for the internal temperatures to reach their set points.
- Check Basic Functions: Verify that the compressor starts, the interior lights work, and the fan motors (evaporator and condenser) are operating.
- Monitor Temperature: Use a thermometer to monitor the temperatures in both the fresh food and freezer compartments over the next 24 hours to ensure they are within the desired range.
- Adjust Settings: If necessary, adjust the temperature settings using the refrigerator's control panel.
5. Maintenance
While the control board itself typically requires no direct maintenance, ensuring the overall health of your refrigerator can prolong its lifespan and the efficiency of the control board:
- Clean Condenser Coils: Regularly clean the condenser coils (usually located at the back or underneath the refrigerator) to ensure proper heat dissipation. Dirty coils can cause the compressor and control board to work harder.
- Check Door Seals: Ensure door seals are clean and intact to prevent cold air loss, which can overwork the cooling system.
- Maintain Proper Ventilation: Ensure adequate space around the refrigerator for proper airflow.
6. Troubleshooting
If you encounter issues after installing the new control board, consider the following troubleshooting steps:
- Refrigerator Not Turning On:
- Check if the refrigerator is properly plugged into a working outlet.
- Verify the circuit breaker has not tripped.
- Ensure all wire connections to the control board are secure and correctly seated.
- Incorrect Temperatures:
- Allow sufficient time (up to 24 hours) for temperatures to stabilize.
- Check if temperature settings are correctly adjusted.
- Inspect door seals for leaks.
- Unusual Noises:
- Ensure no wires or components are interfering with moving parts (e.g., fan blades).
- Verify the refrigerator is level.
- Error Codes: If your refrigerator displays specific error codes, consult your refrigerator's original user manual or a service technician for diagnosis.
If troubleshooting does not resolve the issue, it is recommended to contact a qualified appliance repair technician.
7. Specifications
| Feature | Detail |
|---|---|
| Product Type | Replacement Refrigerator Control Board |
| Brand (Replacement Part) | Generic |
| Compatible Refrigerator Brand | Amana |
| Model Number (Example) | ABB1921WEW1 |
| Included Components | Control Board Replacement |
8. Warranty and Support
Warranty information for this replacement control board should be obtained directly from the seller or manufacturer at the time of purchase. Please retain your proof of purchase for any warranty claims.
For technical support or further assistance, please contact the seller or the manufacturer of this replacement part. They can provide specific guidance related to this product.
