
1. Introduction
Thank you for choosing the Strong SM-RAZOR-ART1-M Razor Series Single-Arm Articulating Mount. This mount is designed to securely hold 22-50 inch displays, offering a low-profile solution that sits just 1.75 inches off the wall. Its robust steel construction supports up to 50 lbs, and the articulating arm allows for extensive swivel and extension, providing optimal viewing angles. This manual provides essential information for safe installation, operation, and maintenance of your new mount.
2. Safety Information
Please read all instructions carefully before installation and use. Improper installation or use can cause property damage, serious injury, or death. If you do not understand these instructions, or have doubts about the safety of the installation, please contact a qualified installer.
- Ensure the mounting surface can safely support the combined weight of the mount and the display.
- Do not exceed the maximum weight capacity of 50 lbs (22.7 kg).
- This mount is designed for installation on a single wood stud. Do not install on drywall alone.
- Use only the hardware provided or specified by the manufacturer.
- Keep children and pets away during installation.
- Periodically check all screws and connections to ensure they remain secure.
3. Package Contents
Verify that all components are present and undamaged before beginning installation. If any parts are missing or damaged, do not attempt to install. Contact your retailer for assistance.
- Articulating Wall Mount Assembly (3-piece construction)
- TV Attachment Hardware Kit (various screws, washers, spacers)
- Wall Mounting Hardware Kit (lag bolts, concrete anchors if applicable)
- Instruction Manual (this document)
4. Setup and Installation
This mount features an easy one-person installation process due to its three-piece construction. Ensure you have the necessary tools (e.g., stud finder, drill, level, screwdriver, socket wrench) before starting.
- Prepare the Wall: Locate a suitable wood stud using a stud finder. Mark the desired height for the top of your display. Ensure the location allows for full articulation without obstruction.
- Attach Wall Plate: Position the wall plate section of the mount against the stud at your marked height. Use a level to ensure it is perfectly horizontal. Mark the pilot hole locations. Drill pilot holes into the center of the stud. Secure the wall plate using the provided lag bolts.
- Assemble Arm Sections: Connect the articulating arm sections to the wall plate and to the display plate. The three-piece design simplifies handling and attachment.
- Attach TV Brackets: Carefully lay your display face down on a soft, clean surface. Attach the VESA compatible brackets to the back of your display using the appropriate screws, washers, and spacers from the TV attachment hardware kit. Ensure the screws are tightened securely but do not overtighten. This mount supports VESA patterns up to 200x200.
- Mount Display: With assistance if needed, carefully lift the display and hook the attached brackets onto the display plate of the wall mount. Secure the display to the mount according to the specific locking mechanism.
- Adjust and Level: Utilize the post-installation height leveling (+/- 3/8") and tilt adjustments (-11°/+5°) to fine-tune the display's position.

Figure 4.1: The Strong Razor Series mount shown in its compact, folded state, sitting close to the wall. This view highlights the robust construction and the mechanism that allows it to sit just 1.75 inches off the wall.
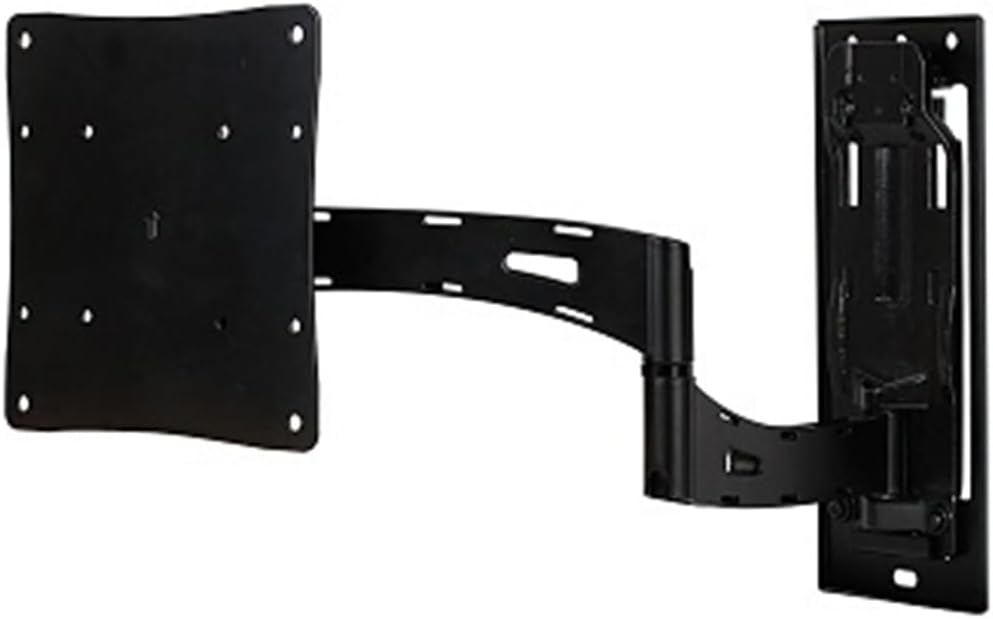
Figure 4.2: The Strong Razor Series mount fully extended, demonstrating its articulating capabilities. This image shows the single arm design and the VESA plate ready for display attachment.

Figure 4.3: The Strong Razor Series mount extended, with a measurement indicating its maximum extension of 22.21 inches from the wall. This illustrates the significant reach for optimal viewing angles.
5. Operating the Mount
Once installed, your Strong Razor Series mount offers flexible viewing options:
- Swivel: The mount allows for swiveling up to 180 degrees (depending on display size and wall clearance) to achieve the perfect viewing angle from various positions in the room. Gently push or pull the display to adjust its horizontal angle.
- Tilt: Adjust the vertical tilt of your display between -11 degrees (downward) and +5 degrees (upward) to reduce glare or optimize viewing comfort. This adjustment is typically made using knobs or levers on the mount.
- Extension: The mount can extend out over 22 inches from the wall, bringing your display closer for an immersive experience or to clear obstacles.
- Integrated Wire Management: Utilize the built-in wire management channels or clips on the mount arms to route and conceal cables for a clean and organized appearance.
6. Maintenance
Regular maintenance ensures the longevity and safe operation of your mount:
- Cleaning: Wipe the mount with a soft, dry cloth. Do not use abrasive cleaners or solvents.
- Inspection: Periodically (e.g., every 6 months) inspect all mounting hardware and connections. Ensure all screws, bolts, and nuts are tight. If any components appear loose or damaged, tighten them or contact support.
- Lubrication: The articulating joints are designed for smooth movement. If movement becomes stiff over time, a small amount of silicone-based lubricant can be applied to the pivot points, avoiding contact with painted surfaces.
7. Troubleshooting
If you encounter issues with your mount, refer to the following common problems and solutions:
- Display is not level after installation:
Solution: Use the post-installation leveling adjustment feature. Refer to the installation section for details on how to adjust the height +/- 3/8".
- Mount feels loose or wobbly:
Solution: Immediately remove the display. Re-check all wall mounting bolts and TV attachment screws for tightness. Ensure the wall plate is securely fastened to a solid wood stud. If the issue persists, consult a professional installer.
- Difficulty swiveling or extending the mount:
Solution: Ensure no cables are snagged or obstructing movement. Check for any physical obstructions around the mount or display. If the joints are stiff, a small amount of silicone lubricant may be applied as per the Maintenance section.
- Display does not fit the mount:
Solution: Verify your display's VESA pattern is compatible (up to 200x200) and its weight does not exceed 50 lbs. Ensure the display size is within the 22-50 inch range. Refer to your display's manual for its specifications.
8. Specifications
| Model Number | SM-RAZOR-ART1-M |
| Brand | Generic (Manufactured by Strong) |
| Compatible Display Sizes | 22 - 50 inches |
| Maximum Load Capacity | 50 lbs (22.7 kg) |
| VESA Compatibility | 100x100, 100x200, 200x100, 200x200 |
| Wall Profile (Retracted) | 1.75 inches (4.45 cm) |
| Maximum Extension | Over 22 inches (55.88 cm) |
| Swivel Range | Up to 180 degrees |
| Tilt Range | -11 degrees to +5 degrees |
| Post-Installation Leveling | +/- 3/8 inches |
| Material | Alloy Steel |
| Mounting Type | Single Wood Stud Wall Mount |
| Item Weight | 30 pounds (13.6 kg) |
| Country of Origin | USA |
9. Warranty and Support
For warranty information or technical support, please refer to the documentation included with your purchase or contact the retailer or manufacturer directly. Keep your proof of purchase for any warranty claims.
Manufacturer: Strong
For further assistance, please visit the official website of the manufacturer or contact their customer service department.


