1ST PLAYER RT7-BK
RT7 Black Edition Gaming Case User Manual
Model: RT7-BK | Brand: 1ST PLAYER
1. Introduction
Welcome to the user manual for the 1ST PLAYER RT7 Black Edition Gaming Case. This manual provides essential information for the proper assembly, operation, and maintenance of your new PC case. The RT7 Black Edition is designed for high-performance builds, featuring triple tempered glass panels, advanced cooling support, and an integrated LED display for real-time system monitoring.
Please read this manual thoroughly before beginning assembly to ensure a smooth and correct installation process.

Figure 1.1: Front-left view of the RT7 Black Edition Gaming Case, showcasing its spacious interior and tempered glass panels.
2. Key Features
The RT7 Black Edition Gaming Case offers a range of features designed to enhance your PC building and gaming experience:
- Triple Tempered Glass Design: Showcases your build from multiple angles with stunning clarity, featuring tempered glass on the top, front, and left panels.
- Enhanced Cooling Capacity: Supports up to 7 fans and a 360mm radiator on the front, ensuring components stay cool under intense operations.
- Versatile Component Compatibility: Offers ample room with support for GPUs up to 400mm, CPU coolers up to 157mm, and various motherboard form factors including ATX, M-ATX, and ITX.
- Integrated LED Monitoring System: Equipped with an LED display to monitor and display critical system stats such as CPU temperature, frequency, and more, providing real-time information.
- Optimized for Maintenance: Features a convenient pull-out dust filter and a well-ventilated structure for easy cleaning and superb airflow, maintaining optimal system performance.

Figure 2.1: Overview of key features and compatibility.
3. Case Components and Overview
Familiarize yourself with the various parts of your RT7 Black Edition case:
- Tempered Glass Panels: Top, front, and left side panels are made of tempered glass for durability and aesthetics.
- Steel Chassis: The main structure providing rigidity and support for internal components.
- Front I/O Panel: Located on the top of the case, providing easy access to connectivity.
- Integrated LED Display: Positioned on the front panel, showing real-time system statistics.
- Dust Filters: Removable filters for easy cleaning and improved airflow.
- Drive Bays: Dedicated spaces for 3.5" HDDs and 2.5" SSDs.
- Fan/Radiator Mounts: Multiple mounting points for cooling solutions.
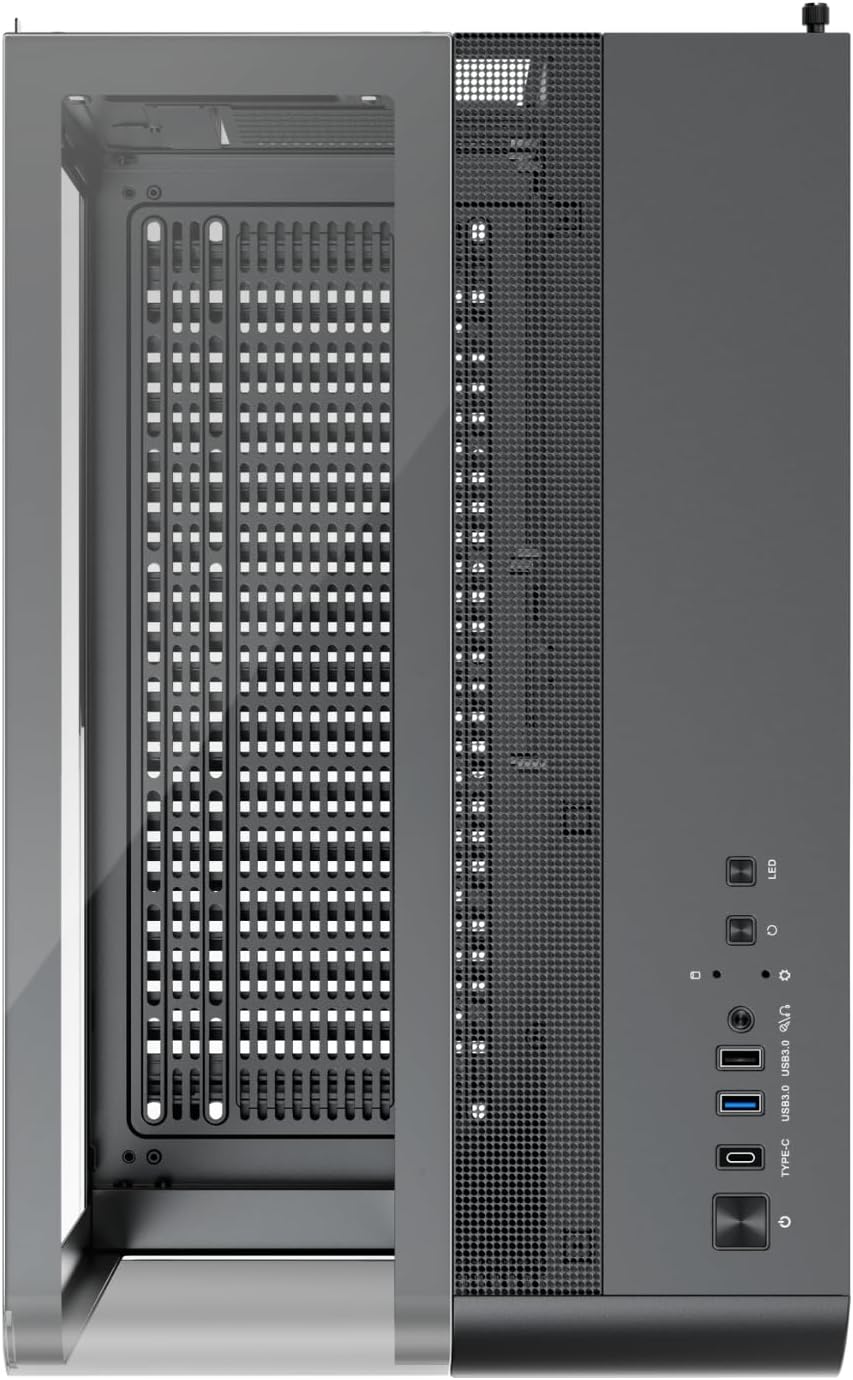
Figure 3.1: Top I/O Panel Layout. Includes LED button, Reset button, HD Audio, USB 2.0, USB 3.0, Type-C, and Power button.

Figure 3.2: Front Panel LED Display. Displays CPU and GPU temperature and usage.
4. Setup and Installation
Follow these steps for proper assembly of your PC components within the RT7 case:
4.1. Preparation
- Unpack the Case: Carefully remove the case from its packaging.
- Remove Panels: The RT7 features a screwless design for easy disassembly. Gently pull to remove the tempered glass panels (top, front, left) and the right-side steel panel.

Figure 4.1: Screwless design for easy disassembly.
4.2. Component Installation
- Motherboard Installation: Install your ATX, M-ATX, or ITX motherboard onto the standoffs. Secure with screws.
- CPU Cooler Installation: Install your CPU cooler. The case supports CPU coolers up to 157mm in height.
- Graphics Card (GPU) Installation: Insert your graphics card into the PCIe slot. The case accommodates GPUs up to 400mm in length.
- Storage Device Installation: Install your 3.5" HDDs and 2.5" SSDs into the designated drive bays.
- Power Supply Unit (PSU) Installation: Mount your PSU in its designated compartment.
- Fan/Radiator Installation: Install cooling fans or radiators. The case supports:
- Front: 3 x 120mm fans or 360mm radiator
- Rear: 1 x 120mm fan
- Bottom: 3 x 120mm fans

Figure 4.2: Component compatibility dimensions.

Figure 4.3: Fan and radiator mounting options.
4.3. Cable Management and Final Assembly
- Cable Management: Route all cables neatly through the designated cutouts and tie-down points to ensure optimal airflow and a clean build.
- Re-attach Panels: Once all components are installed and cables managed, carefully re-attach the steel side panel and the tempered glass panels. Ensure they are securely in place.
5. Operating the Case Features
5.1. Powering On and Front I/O Usage
- Power Button: Press the power button on the top I/O panel to turn your system on or off.
- USB Ports: Utilize the USB 2.0, USB 3.0, and USB Type-C ports for connecting peripherals and external devices.
- HD Audio Jacks: Connect your headphones and microphone to the dedicated audio jacks.
- LED Button: If your system has compatible RGB lighting, this button may control lighting modes or colors. Refer to your component manuals for specific functionality.
- Reset Button: Press to restart your system.
5.2. Integrated LED Display
The front panel LED display provides real-time monitoring of critical system parameters:
- CPU Temperature: Displays the current temperature of your Central Processing Unit.
- GPU Temperature: Displays the current temperature of your Graphics Processing Unit.
- Usage: May display CPU or GPU usage percentage, depending on system configuration.
This display helps you keep track of your system's performance and thermal status at a glance.
6. Maintenance
Regular maintenance ensures optimal performance and longevity of your RT7 Black Edition case and its components.
6.1. Cleaning the Dust Filter
The RT7 case features a convenient pull-out dust filter at the bottom. It is recommended to clean this filter regularly (e.g., monthly, or more frequently in dusty environments) to maintain optimal airflow and prevent dust buildup inside the case.
- Gently pull out the dust filter from the bottom of the case.
- Clean the filter using a soft brush, vacuum cleaner, or by rinsing with water (ensure it is completely dry before re-inserting).
- Slide the clean filter back into its slot until it clicks into place.

Figure 6.1: Bottom pull-out dust filter.
6.2. General Cleaning
- Exterior: Wipe the exterior surfaces, including tempered glass panels, with a soft, damp cloth. Avoid abrasive cleaners or solvents.
- Interior: Periodically use compressed air to blow out dust from internal components and fan blades. Ensure the system is powered off and unplugged before cleaning the interior.
7. Troubleshooting
This section addresses common issues you might encounter. For more complex problems, consult your component manuals or seek professional assistance.
| Problem | Possible Cause | Solution |
|---|---|---|
| System does not power on. | Loose power cables, faulty PSU, incorrect front panel header connection. | Check all power connections (PSU to wall, PSU to motherboard, CPU, GPU). Verify front panel power switch connection to motherboard. Test PSU if possible. |
| Fans are not spinning. | Loose fan cables, incorrect fan header connection, faulty fan. | Ensure fan cables are securely connected to motherboard fan headers. Check BIOS settings for fan control. Replace faulty fans. |
| Front LED display is blank or incorrect. | Loose display cable, software issue, sensor malfunction. | Check the internal cable connection for the LED display. Ensure all drivers and monitoring software are up to date. Restart the system. |
| Poor airflow or high temperatures. | Dust buildup, incorrect fan orientation, insufficient cooling. | Clean dust filters and interior. Verify fan direction for optimal intake/exhaust. Consider adding more fans or upgrading cooling solutions. |
8. Specifications
Detailed technical specifications for the RT7 Black Edition Gaming Case:
| Feature | Specification |
|---|---|
| Model Name | RT7 Black Edition |
| Case Type | Mid Tower |
| Dimensions (L x W x H) | 443 x 280 x 440 mm (17.5"D x 17.5"W x 11"H) |
| Material | Metal, Tempered Glass |
| Side Panel | Tempered Glass (Top, Front, Left) |
| Motherboard Support | ATX, M-ATX, ITX |
| CPU Cooler Max Height | 157 mm |
| VGA (GPU) Max Length | 400 mm |
| Drive Bays | 3.5" HDD: 2, 2.5" SSD: 3 |
| PCI Card Slots | 7 |
| Fan Support | Front: 3 x 12 cm, Rear: 1 x 12 cm, Bottom: 3 x 12 cm |
| Liquid Cooling Support | Front Side: 36 cm |
| I/O Panel | USB 3.0 x 2, USB 2.0 x 2, Type-C x 1, HD Audio |
| Item Weight | 18.5 Pounds |
| Color | Black |

Figure 8.1: Dimensions and detailed specifications.
9. Warranty and Support
For warranty information and technical support, please refer to the official 1ST PLAYER website or contact their customer service directly. Warranty terms may vary by region and retailer.
For the most up-to-date information, visit: www.1stplayer.com