Introduction
This manual provides detailed instructions for the assembly, operation, and maintenance of your new FLEXISPOT L-Shaped Electric Height Adjustable Standing Desk. Please read this manual thoroughly before assembly and use to ensure proper function and safety.
- Spacious Desktop: The expansive L-shaped work surface is seamlessly crafted with environmentally sourced splice board, measuring 70.9" x 63.0". It provides ample space for ongoing projects and office supplies.
- Versatile Orientation: This height-adjustable desk features a wider desktop section that can be positioned on either the left or right side, allowing you to customize the layout to best fit your space.
- Solid Construction: The industrial-grade steel frame and solid desktop (1") combine to support a maximum weight capacity of up to 220 lbs, effortlessly handling your ideal work setup.
- Customizable LED Control Panel: The LED control pad allows you to customize the desk height with 4 different memory settings, enabling easy switching between your preferred standing and sitting positions.
Safety Information
Always ensure the desk is properly assembled and anchored to the floor to prevent tipping. Do not exceed the maximum weight capacity of 220 lbs (100 kg) to maintain stability. Follow the assembly instructions carefully to avoid injury.
The product ships in two separate packages which may arrive separately. Ensure all packages are received before beginning assembly.
Setup and Assembly
Assembly requires two people. Tools recommended for assembly include a drill. Please refer to the detailed video instructions for visual guidance.
Assembly Steps Overview:
- Install Middle Column Connecting Joining Plate: Attach the joining plate to the middle column using the provided screws.
- Install Desk Feet: Secure the long and short side desk feet to the columns.
- Install Crossbeams: Attach the long and short crossbeams between the desk legs.
- Extend Crossbeam: Loosen the screws on the crossbeam and extend it to the desired length.
- Install Drive Rods: Loosen the drive rod, insert it into the mechanism, spin, and tighten.
- Install Support Plate: Attach the support plate to the frame.
- Install Desktop: Insert dowels and connect the desktop sections. Secure them with the provided plates and screws.
- Attach Frame to Desktop: Carefully place the assembled frame, adapter holder, and support tube onto the desktop. Adjust the frame to align with pilot holes and attach it securely.
- Secure Crossbeams and Drive Rods: Ensure all crossbeams and drive rods are firmly secured.
- Install Controller and Wiring: Mount the control panel and power adapter. Connect all necessary wiring for the motors and control panel.
- Install Baffle: Attach the baffle to cover the wiring.
- Turn Over the Desk: With assistance, carefully turn the desk upright.
Visual Guides:
Video: Installation of Right L-Shaped Desk. This video demonstrates the step-by-step assembly process for the right-hand L-shaped configuration of the desk.
Video: Installation of Left L-Shaped Desk. This video guides you through the assembly process for the left-hand L-shaped configuration of the desk.
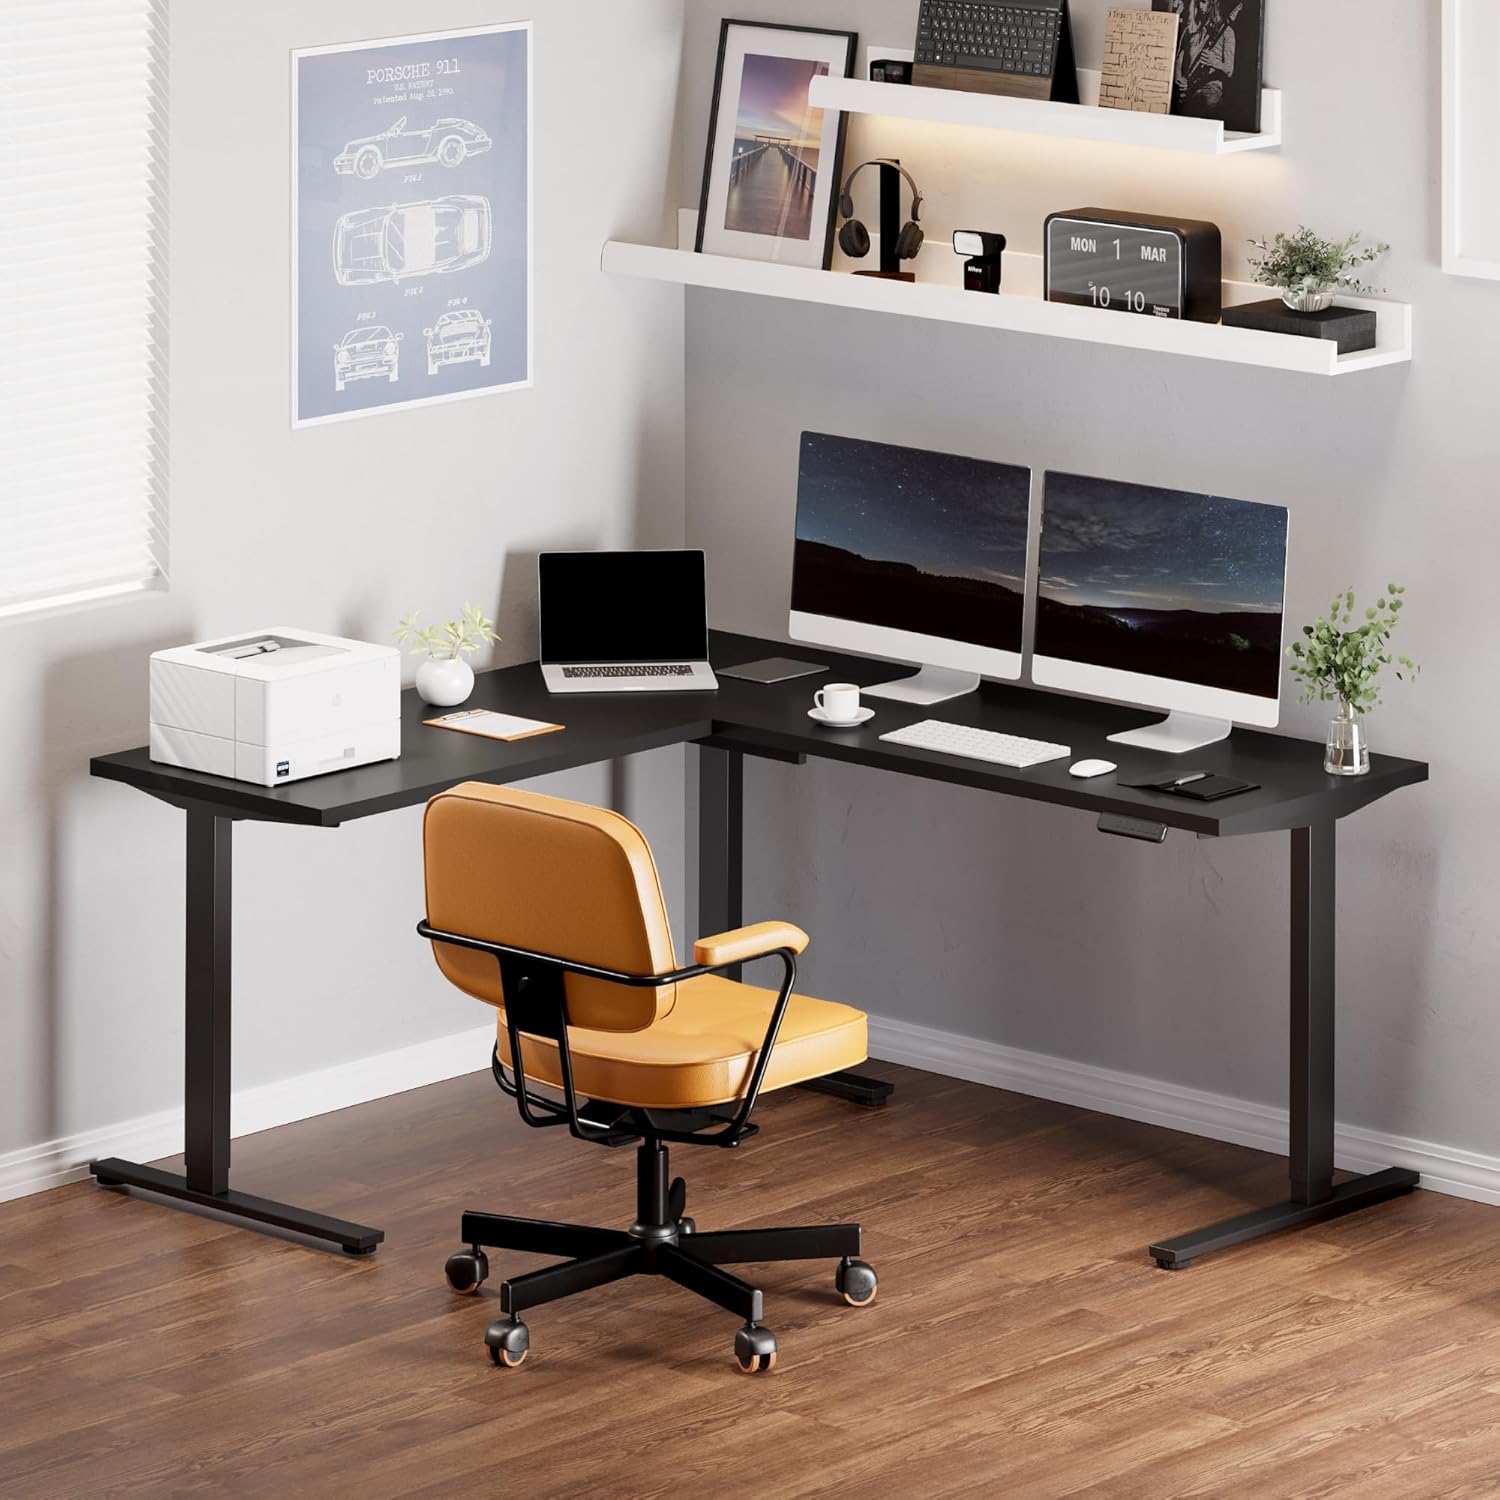
Image: Fully assembled FLEXISPOT L-Shaped Standing Desk in a modern office environment, showcasing its spacious design and functionality.

Image: Detailed dimensions of the L-shaped desk, highlighting its width, depth, and adjustable height range.
Operating Instructions
Control Panel Functions:

Image: The smart control panel with buttons for height adjustment and memory presets.
- Up/Down Buttons (Arrows): Press and hold the up or down arrow to adjust the desk height. Release the button to stop at the desired height.
- Memory Presets (1, 2, 3, 4): To save a height setting, adjust the desk to your preferred height, then press the 'M' button followed by the desired number (1, 2, 3, or 4). The display will show 'S-' and then the number to confirm. To recall a saved height, simply press the corresponding number button.
- Anti-Collision Feature: The desk is equipped with an anti-collision system. If the desktop encounters an obstacle while moving, it will automatically stop and reverse slightly to prevent damage.
Maintenance
- Regularly check all screws and connections to ensure they are tight. Tighten if necessary.
- Clean the desktop surface with a soft, damp cloth. Avoid abrasive cleaners or harsh chemicals.
- Keep the motor and electrical components free from dust and moisture.
- Ensure cables are neatly managed to prevent snagging or damage during height adjustments.
Troubleshooting
| Problem | Possible Cause | Solution |
|---|---|---|
| Desk does not move or respond to controls. | Power cable disconnected; control panel cable loose; motor cable loose. | Check all power and motor connections. Ensure they are securely plugged in. Reset the system by unplugging for 10 seconds and plugging back in. |
| Desk moves unevenly or makes unusual noises. | Loose connections; uneven load; drive rod not properly installed. | Check all frame connections and ensure they are tightened. Distribute weight evenly on the desktop. Verify drive rod installation as per assembly video. |
| Anti-collision feature triggers frequently. | Obstruction in desk's path; sensitivity setting too high. | Remove any objects from the desk's path. Consult the full user manual for instructions on adjusting anti-collision sensitivity (if applicable). |
| Desktop sections do not align perfectly. | Assembly error; pilot holes not used correctly. | Carefully review assembly instructions and videos. Ensure all desktop connecting plates are correctly installed and tightened. Some users have noted that pilot holes are for reference and may require minor adjustments or re-drilling for perfect alignment. |
Specifications
- Brand: FLEXISPOT
- Shape: Rectangular (L-shaped configuration)
- Desk Design: Standing Desk
- Product Dimensions: 63"D x 70.9"W x 45.9"H
- Color: Black Frame + Black Top
- Style: Modern
- Base Material: Alloy Steel
- Top Material Type: Wood
- Finish Type: Polished
- Special Feature: Corded
- Tabletop Thickness: 1 Inches
- Maximum Height: 45.9 Inches
- Minimum Height: 28 Inches
- Maximum Weight Recommendation: 220 Pounds
- Number of Height Positions: 4 (Memory Presets)
- Required Assembly: Yes (Recommended 2 people)
- Tools Recommended For Assembly: Drill
Warranty and Support
5-Year FLEXISPOT Guarantee: Enjoy peace of mind with our 5-year coverage on the desk frame and motor, and 2-year protection on the control panel and electronics.
For further assistance, troubleshooting, or warranty claims, please contact FLEXISPOT customer support through their official website or the retailer where the product was purchased.


