
1. Important Safety Information
Please read and understand all safety instructions before operating the INTBUYING 16-inch Bud Leaf Trimmer. Failure to follow these instructions may result in injury or damage to the product.
- Always wear appropriate safety gear, including gloves, safety glasses, and ear protection.
- Maintain a safe distance from others while operating the machine.
- Do not use the trimmer near flammable materials.
- Unplug the power cord from the electrical outlet before performing any maintenance, cleaning, or adjustments.
- Keep hands and fingers away from the cutting area and moving parts during operation.
- Do not operate the machine if any guard is damaged or missing.
- Always follow the instructions provided in this user manual for proper and safe operation.
2. Product Overview
The INTBUYING 16-inch Bud Leaf Trimmer is a versatile machine designed for precise trimming of plants, buds, flowers, and stems. It offers both electric and manual operation modes, along with interchangeable grates for wet and dry trimming applications.

Figure 2.1: General view of the INTBUYING 16-inch Bud Leaf Trimmer.
Dual-Mode Trimming
This trimmer supports both electric and manual operation. The electric mode provides consistent power for efficient trimming, while the manual mode offers precise control for delicate tasks. To switch to manual operation, remove the motor cover and attach the provided handle.

Figure 2.2: Electric and Manual Control Modes.
Wet and Dry Trimming Capabilities
The machine includes two different grates: a fixed wet leaf trimming grille and a movable dry leaf trimming grille. Select the appropriate grate based on the moisture content of your plant material for optimal trimming results.

Figure 2.3: Interchangeable Grates for Dry and Wet Trimming.
3. Package Contents
Verify that all items listed below are included in your package. If any parts are missing or damaged, please contact customer support.
- Bud Leaf Trimmer Unit (x1)
- Collection Bag (x1)
- Replacement Blade (x2)
- X-type Accessories (x2)
- Power Supply Box (x1)
- Power Cord (x1)
- Small Scissors (x1)
- Screwdriver (x1)
- Wrench (x1)
- User Manual (x1)

Figure 3.1: All items included in the package.
4. Specifications
Detailed technical specifications for the INTBUYING 16-inch Bud Leaf Trimmer.
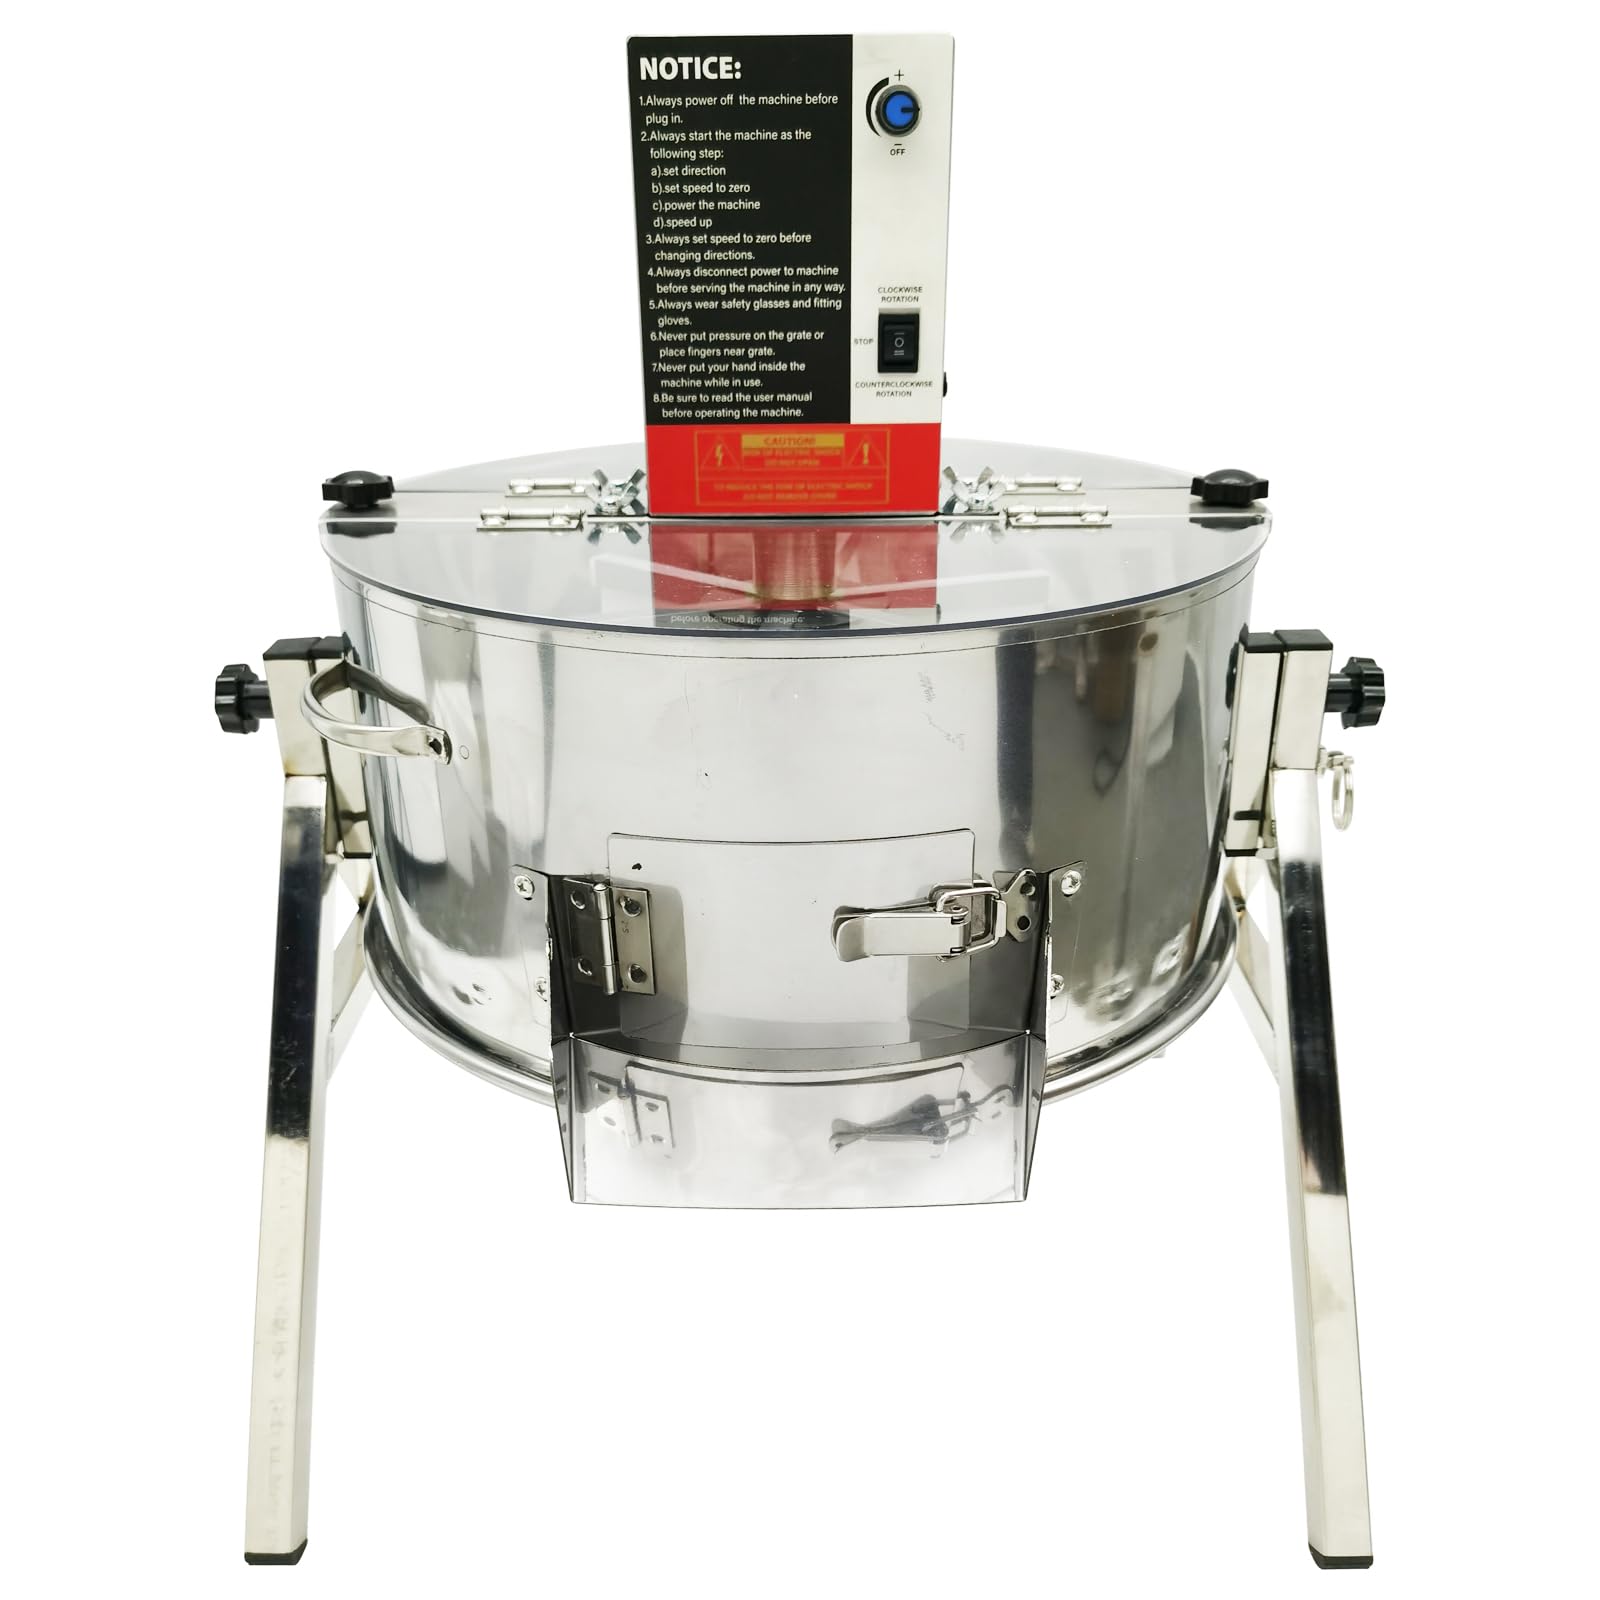
Figure 4.1: Product Dimensions and Parameters.
| Feature | Specification |
|---|---|
| Model Number | D056834 |
| Power Source | AC (100-240V) |
| Motor Power | 52W Brushless Motor |
| Speed | 0-70 RPM |
| Cutting Width | 16 Inches (40.6 cm) |
| Material | 201 Stainless Steel Body, Food-Grade Silicone Fingers |
| Weight Capacity | 5.3 Gallons (20 Liters) |
| Item Weight | 18 Pounds (8.16 kg) |
| Product Dimensions (L x W x H) | 41.6 x 49.2 x 56.4 cm (approximate height based on diagram) |
| Color | Silver |
5. Setup Instructions
Follow these steps to assemble your trimmer before first use.
- Unpack Components: Carefully remove all parts from the packaging and verify against the package contents list.
- Attach Support Legs: Securely attach the three support legs to the main trimmer body using the provided hardware (screws and wrench). Ensure the legs are stable and the unit is level.
- Install Grate: Choose either the wet or dry trimming grate based on your needs and place it inside the trimmer drum. Ensure it sits correctly.
- Motor Unit Installation (Electric Mode): Place the motor unit onto the top of the trimmer, aligning it with the central shaft. Secure it in place according to the locking mechanism.
- Handle Installation (Manual Mode): If using manual mode, remove the motor unit. Insert the manual crank handle into the designated opening on the top of the trimmer and secure it.
- Connect Power (Electric Mode): For electric operation, connect the power supply box to the motor unit and then plug the power cord into a standard 100-240V AC electrical outlet.
- Initial Inspection: Before operation, ensure all connections are tight, moving parts are clear of obstructions, and the unit is stable.
6. Operating Instructions
This section details how to operate your INTBUYING Bud Leaf Trimmer in both electric and manual modes, and how to prepare for wet or dry trimming.
6.1 Electric Trimming Mode
- Preparation: Ensure the motor unit is correctly installed and the power cord is plugged into a suitable outlet. Select the appropriate trimming grate (wet or dry).
- Load Material: Carefully place your plant material into the trimmer drum. Do not overfill.
- Power On: Turn the power switch on the motor unit to the 'ON' position.
- Adjust Speed: Use the speed control knob to set the desired RPM (0-70 RPM). Start with a lower speed and gradually increase as needed for optimal trimming.
- Monitor Trimming: Observe the trimming process through the clear lid. Allow the machine to operate until the desired trim is achieved.
- Power Off: Once trimming is complete, turn the power switch to 'OFF' and unplug the unit before opening the lid or removing material.
- Empty Residue: Use the residue discharge port to empty trimmed material into the collection bag.
6.2 Manual Trimming Mode
- Preparation: Ensure the motor unit is removed and the manual crank handle is securely installed. Select the appropriate trimming grate.
- Load Material: Place your plant material into the trimmer drum, ensuring not to overfill.
- Operate Handle: Grasp the manual crank handle firmly and rotate it clockwise or counter-clockwise at a consistent speed. The blades will rotate, trimming the material.
- Monitor Trimming: Observe the trimming process through the clear lid. Continue rotating until the desired trim is achieved.
- Empty Residue: Once trimming is complete, open the lid and use the residue discharge port to empty trimmed material into the collection bag.
6.3 Switching Between Wet and Dry Grates
To change the trimming grate:
- Power Off and Unplug: Always ensure the machine is powered off and unplugged before attempting to change grates.
- Remove Lid: Unlock and remove the clear top lid of the trimmer.
- Remove Current Grate: Carefully lift out the currently installed trimming grate.
- Insert New Grate: Place the desired wet or dry trimming grate into the drum, ensuring it sits flush and is properly aligned.
- Replace Lid: Securely replace and lock the clear top lid.
7. Maintenance
Regular maintenance ensures the longevity and optimal performance of your trimmer.
7.1 Cleaning
The trimmer's design allows for easy cleaning. The detachable stainless steel blades and food-grade silicone curtains can be cleaned with a damp cloth. The residue discharge port facilitates effortless emptying of trimmed plant material.
- Disconnect Power: Always unplug the trimmer from the power source before cleaning.
- Empty Residue: Empty the collection bag and any remaining plant material from the drum via the discharge port.
- Disassemble: Remove the top lid, motor/handle, and trimming grate. Carefully detach the blades and silicone fingers if necessary for thorough cleaning.
- Wipe Down: Use a damp cloth with mild soap and water to wipe down all stainless steel surfaces, blades, silicone fingers, and grates. Avoid harsh chemicals or abrasive cleaners.
- Rinse and Dry: Rinse components thoroughly with clean water and dry completely before reassembly to prevent rust and mildew.
- Reassemble: Reassemble all components, ensuring they are securely in place.
7.2 Blade Replacement
The trimmer comes with replacement blades. If the cutting performance diminishes, replace the blades following these steps:
- Safety First: Ensure the trimmer is unplugged and wear protective gloves.
- Access Blades: Remove the top lid and the trimming grate to access the blades.
- Remove Old Blades: Using the provided wrench or screwdriver, carefully unfasten the screws holding the old blades in place. Remove the dull blades.
- Install New Blades: Position the new replacement blades, ensuring they are correctly oriented. Secure them with the screws, tightening them firmly but without overtightening.
- Reassemble: Replace the trimming grate and the top lid, ensuring all components are properly secured before resuming operation.
8. Troubleshooting
This section provides solutions to common issues you might encounter with your trimmer.
| Problem | Solution |
|---|---|
| Trimmer does not turn on (Electric Mode) |
|
| Poor trimming performance |
|
| Excessive noise or vibration |
|
| Motor stops during operation (Electric Mode) |
|
9. Warranty and Support
INTBUYING is committed to providing quality products and customer satisfaction.
9.1 Warranty Information
Specific warranty details are typically provided with your purchase documentation. Please refer to the warranty card or contact your retailer for precise terms and conditions regarding defects in materials and workmanship.
9.2 Customer Support
For any questions, technical assistance, or service requests, please contact INTBUYING customer support. We aim to provide a response within 24 hours and offer professional support. A service point is available in Ontario, Canada.
- Contact Method: Refer to your purchase invoice or the INTBUYING official website for contact details.
- When contacting support, please provide:
- Your product model number (D056834)
- Date of purchase
- A detailed description of the issue