
1. Introduction
The Hall Technologies HT-RANGER2 is a 4K BYOD (Bring Your Own Device) presentation switcher designed for modern meeting spaces, classrooms, and collaborative environments. It facilitates seamless connectivity and high-performance content sharing from various devices to a connected display. The HT-RANGER2 integrates a built-in Wi-Fi module, supporting multiple wireless presentation protocols including AirPlay, Miracast, Smart View, and HT-VOYAGER. Additionally, it offers physical connections via HDMI and USB-C ports. This switcher allows users to project content in either full-screen or dual-view modes, supporting HDMI input resolutions up to 4K@30Hz 4:4:4 and outputs up to 4K@60Hz 4:4:4 (4:2:0 for HDBT output). Key features include automatic signal switching, CEC support, a detailed Guide Screen, and an intuitive On-Screen Display (OSD) for an optimized user experience.
2. Key Features
- 2x1 Presentation Switcher: Manages two input sources for presentation.
- USB-C Connectivity: Features a USB-C port for video input, USB 3.0 data transfer, device charging, and Ethernet connectivity. Laptops connected via USB-C can access USB peripheral devices (e.g., cameras, microphones) connected to the HT-RANGER2's USB-A ports.
- Dual View Presentation: Supports displaying content from two sources simultaneously.
- Wireless Presentation: Built-in Wi-Fi module enables wireless connectivity with devices using AirPlay, Miracast, Smart View, and HT-VOYAGER2 protocols.
- High Resolution Support: Supports HDMI input resolutions up to 4K@30Hz 4:4:4 and HDMI output resolutions up to 4K@60Hz 4:4:4 (4:2:0 on HDBT output).
- USB 3.0 Switcher: Includes a 4-input, 2-output USB 3.0 switcher for peripheral management.
- Built-in Ethernet Switch: Provides network connectivity with security design.
- Analog Audio Output: Dedicated output for audio integration.
- On-Screen Display (OSD): Provides detailed information and intuitive control.
- Control Options: Device control via Web UI and Telnet API.
3. Product Overview
3.1 Front Panel

Image: Close-up view of the HT-RANGER2 front panel, showing the Power, Status, USB-C In, HDMI In, USB 3.0 SS ports (1(A), 2(A), 3(A)), Audio Out, RS232, Pairing, and Reset buttons/indicators.
- POWER: Power indicator.
- STATUS: Device status indicator.
- USB-C IN: Input port for USB-C devices.
- HDMI IN: Input port for HDMI devices.
- USB 3.0 SS: USB 3.0 SuperSpeed ports for connecting USB peripherals.
- AUDIO OUT: Analog audio output.
- RS232: Serial control port.
- PAIRING: Button for wireless pairing.
- RESET: Device reset button.
3.2 Rear Panel

Image: Close-up view of the HT-RANGER2 rear panel, showing Wi-Fi antenna connectors, 20V power input, USB-C In, HDMI In, USB Host, HDMI Out, HDBT Out, Utility LAN, and Secure LAN ports.
- Wi-Fi Antennas: Connectors for Wi-Fi antennas.
- 20V Power Input: Power supply connection.
- USB-C IN: Additional USB-C input.
- HDMI IN: Additional HDMI input.
- USB HOST: USB host port.
- HDMI OUT: HDMI output to display.
- HDBT OUT: HDBaseT output for extended transmission.
- UTILITY LAN: Ethernet port for general network use.
- SECURE LAN: Ethernet port for secure network connections.
4. Setup
- Unpack and Inspect: Carefully unpack the HT-RANGER2 and all accessories. Inspect for any signs of damage during transit.
- Connect Antennas: Screw the provided Wi-Fi antennas onto the designated connectors on the rear panel.
- Connect Display: Connect your display device (monitor, projector) to the HDMI OUT or HDBT OUT port on the rear panel using appropriate cables.
- Connect Input Devices (Wired):
- For HDMI sources, connect to the HDMI IN ports on the front or rear panel.
- For USB-C sources (laptops, tablets), connect to the USB-C IN ports on the front or rear panel.
- Connect USB Peripherals: If using USB peripherals (e.g., cameras, microphones) with a USB-C connected laptop, connect them to the USB 3.0 SS ports on the front panel.
- Network Connection (Optional): Connect an Ethernet cable to the UTILITY LAN or SECURE LAN port for network access or control via Web UI/Telnet API.
- Connect Power: Connect the provided power adapter to the 20V Power Input on the rear panel, then plug it into a power outlet. The device will power on automatically.
- Wireless Setup: Follow the on-screen instructions or refer to the OSD for connecting wireless devices via AirPlay, Miracast, Smart View, or HT-VOYAGER.
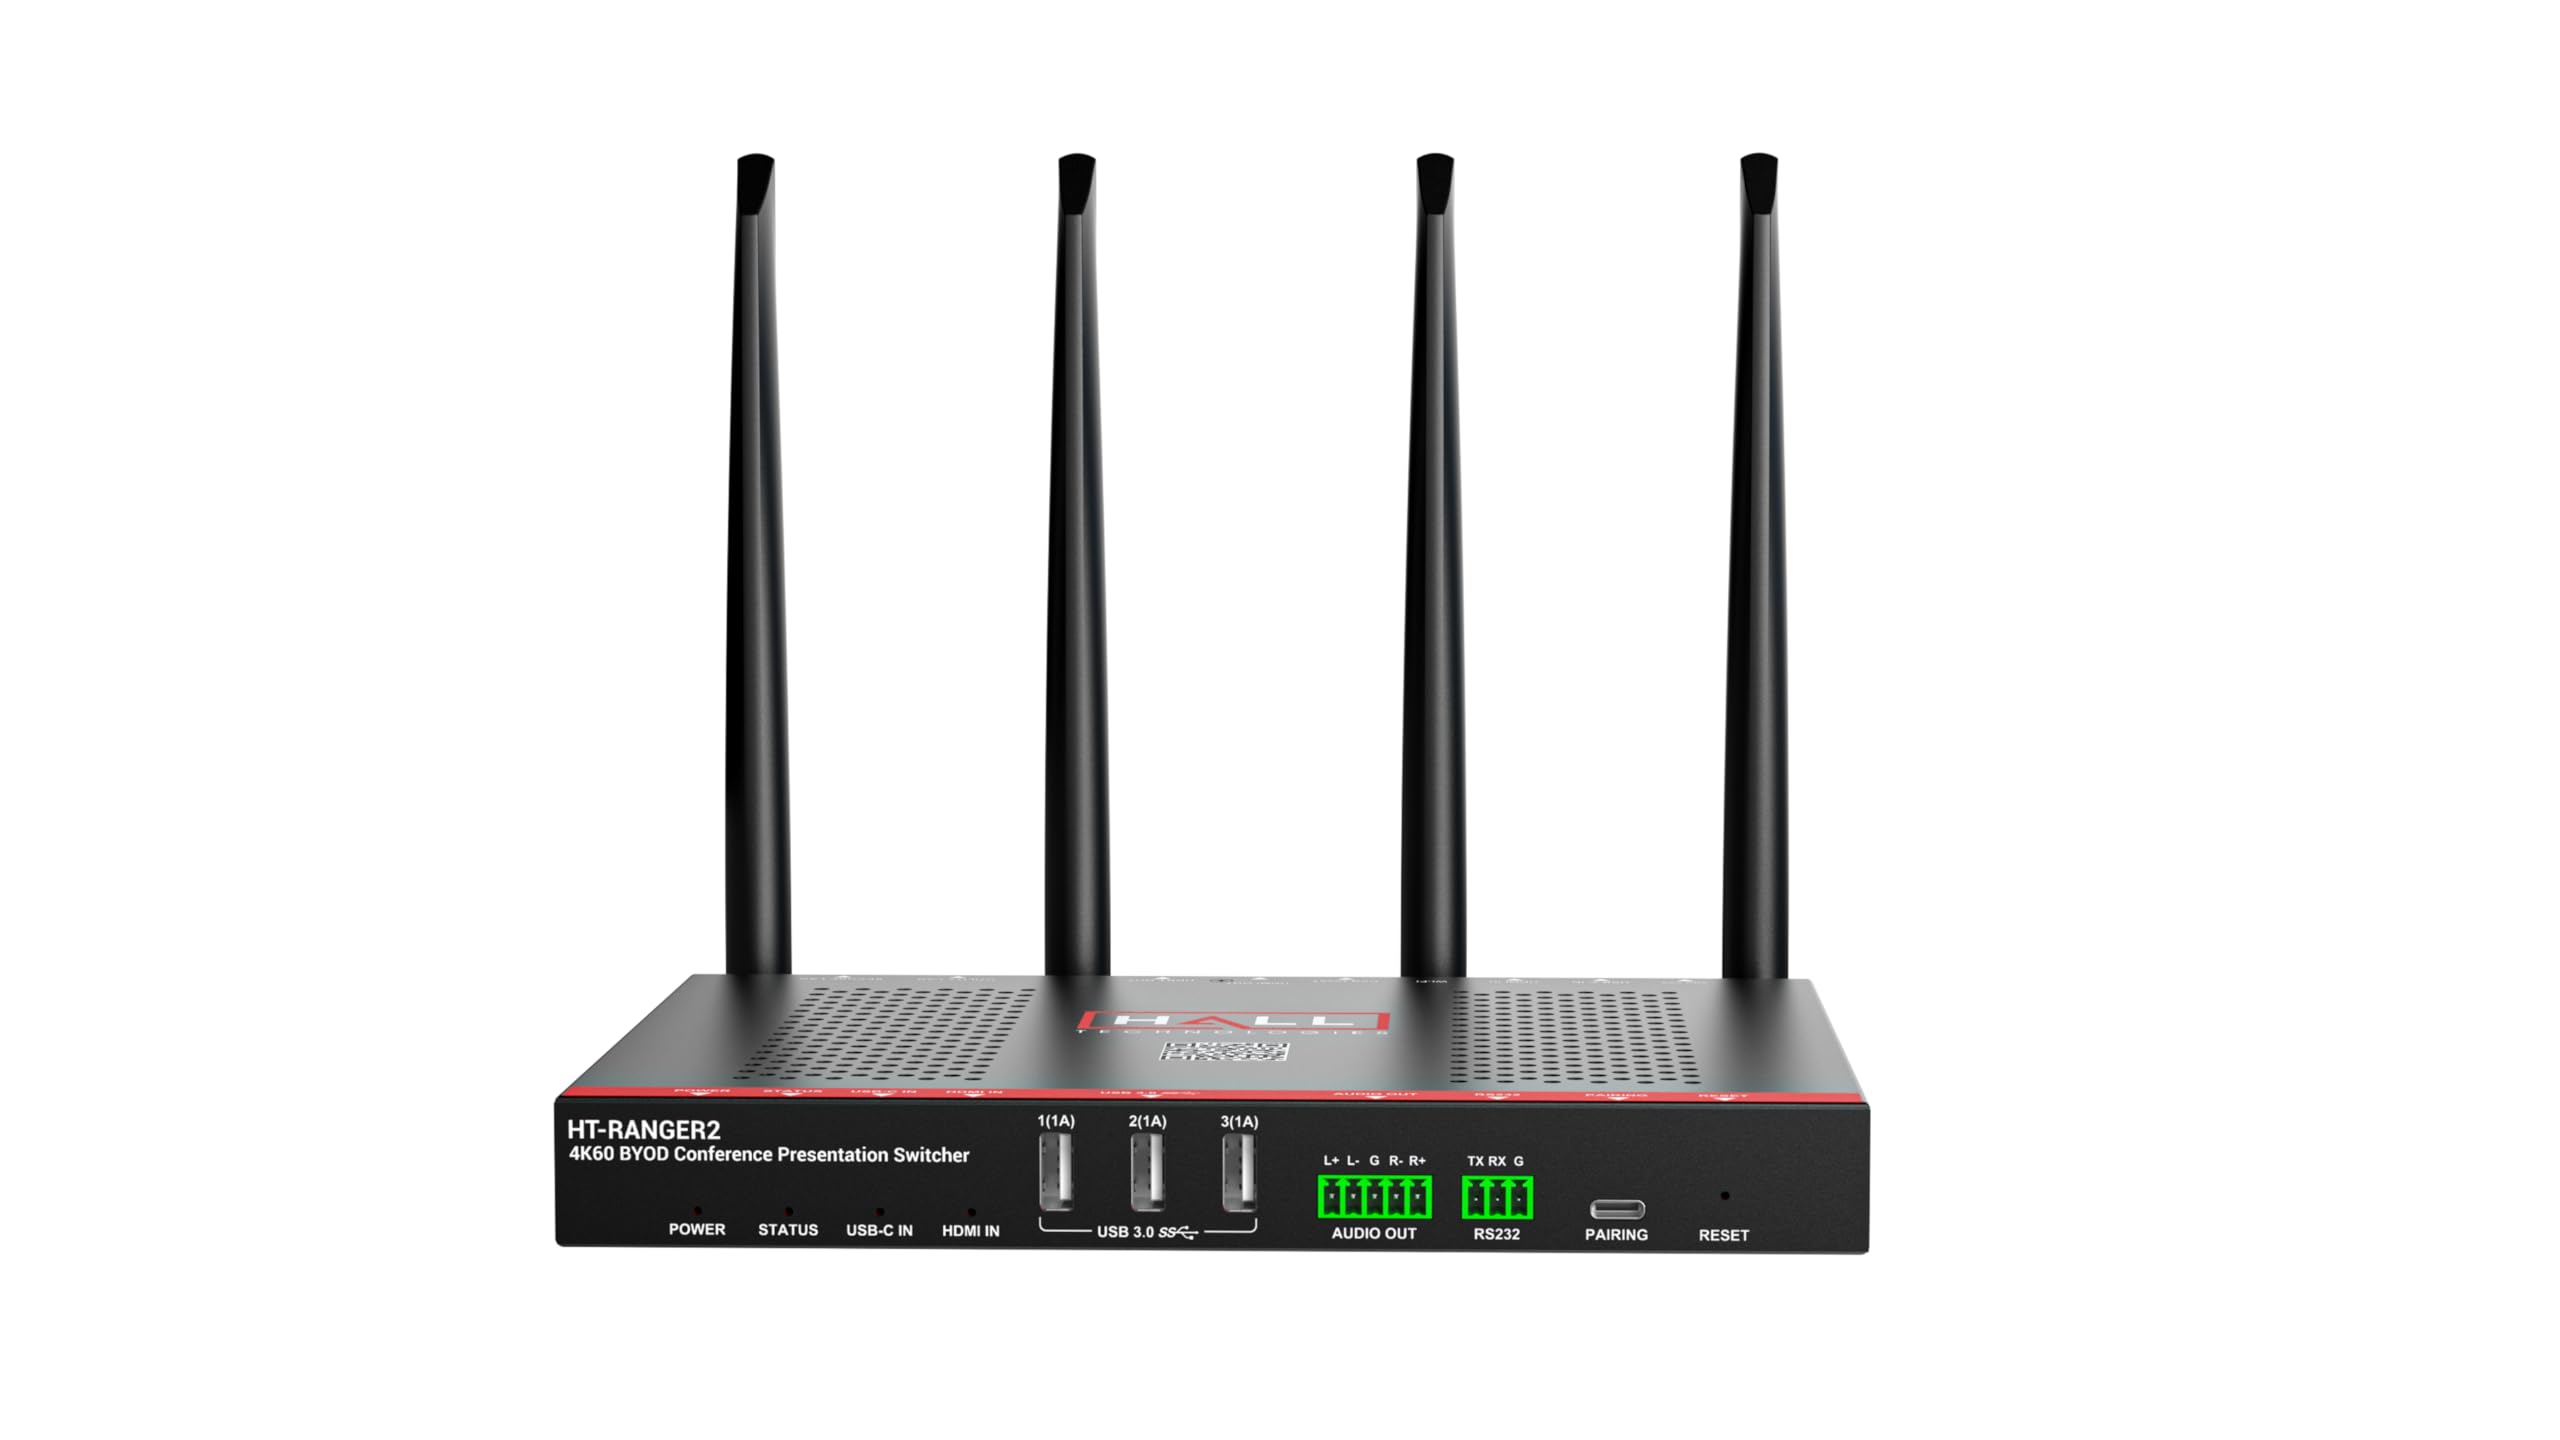
Image: The HT-RANGER2 presentation switcher with its four Wi-Fi antennas attached, viewed from an angle showing the front panel connections.
5. Operation
- Power On: Ensure the HT-RANGER2 is powered on. The POWER indicator on the front panel should be lit.
- Source Selection:
- Automatic Switching: The HT-RANGER2 supports automatic signal switching, which will detect and switch to the most recently connected active source.
- Manual Selection: Use the On-Screen Display (OSD) or Web UI to manually select input sources.
- Wireless Presentation:
- Connect your device (smartphone, tablet, laptop) to the HT-RANGER2's Wi-Fi network.
- Use AirPlay (iOS/macOS), Miracast (Windows/Android), Smart View (Samsung), or the HT-VOYAGER app to cast your screen.
- Follow the on-screen instructions for pairing and sharing.
- Dual View Mode: The HT-RANGER2 can display two sources simultaneously. Access this feature through the OSD or Web UI to configure the layout.
- On-Screen Display (OSD): The OSD provides detailed information about connected sources, resolution, and device settings. Use the connected display's controls or the Web UI to navigate the OSD.
- USB Peripheral Access: When a laptop is connected via USB-C, any USB peripherals connected to the HT-RANGER2's USB 3.0 SS ports will be accessible by the laptop.
6. Connectivity Diagram

Image: A detailed diagram illustrating the connectivity options for the HT-RANGER2. It shows various devices such as MacBooks, Windows PCs, laptops, iPads, iPhones, and Android mobiles connecting wirelessly or via USB-C and HDMI. The HT-RANGER2 outputs to a display (Touch Screen) via HDMI or to an HT-DSCV-RX receiver via Cat6, which then connects to another display. USB peripherals like HT-CAM-4K-DUAL and HT-SATELLITE-BT are also shown connected to the HT-RANGER2.
The diagram above illustrates typical connection scenarios for the HT-RANGER2. It supports a wide range of devices and configurations, including:
- Wireless Devices: iPad, iPhone, Android Tablet, Android Mobile, MacBook, Windows 11 PC, and other compatible wireless devices can connect via the built-in Wi-Fi module (AirPlay, Miracast, Smart View, HT-VOYAGER2).
- Wired Inputs: Laptops and other sources can connect via HDMI or USB-C.
- USB Peripherals: Devices like the HT-CAM-4K-DUAL camera and HT-SATELLITE-BT can connect to the HT-RANGER2's USB ports, accessible by USB-C connected laptops.
- Outputs: The HT-RANGER2 connects to a display via HDMI OUT or to an HDBaseT receiver (e.g., HT-DSCV-RX) via HDBT OUT for extended cable runs to a display.
7. Troubleshooting
| Problem | Possible Cause | Solution |
|---|---|---|
| No image on display. | Incorrect cable connection, power issue, incorrect input selection. |
|
| No audio. | Audio settings, cable issue, display volume. |
|
| Wireless presentation not working. | Network connectivity, incorrect protocol, device compatibility. |
|
| USB peripherals not recognized. | Incorrect USB-C connection, driver issues, power. |
|
8. Specifications
| Feature | Detail |
|---|---|
| Model Number | HT-RANGER2 |
| Brand | Hall Research |
| Connector Types | HDMI, USB Type-C |
| Product Dimensions (D x W x H) | 6.29"D x 8.46"W x 0.98"H |
| Item Weight | 1.75 Pounds |
| HDMI Input Resolution | Up to 4K@30Hz 4:4:4 |
| HDMI Output Resolution | Up to 4K@60Hz 4:4:4 (4:2:0 for HDBT output) |
| Wireless Protocols | AirPlay, Miracast, Smart View, HT-VOYAGER2 |
| USB Switcher | 4 input and 2 output USB3.0 |
| Control Interfaces | Web UI, Telnet API, RS232 |
| UPC | 656750713587 |
| ASIN | B0DTV5XDNT |
9. Maintenance
To ensure optimal performance and longevity of your HT-RANGER2, follow these maintenance guidelines:
- Cleaning: Use a soft, dry cloth to clean the exterior of the device. Avoid using abrasive cleaners, solvents, or strong chemicals, as these can damage the finish.
- Ventilation: Ensure the device is placed in a well-ventilated area. Do not block the ventilation openings on the unit. Proper airflow prevents overheating.
- Power: Always use the provided power adapter. Disconnect power during electrical storms or when the unit is unused for extended periods.
- Environment: Operate the device within its specified temperature and humidity ranges. Avoid exposing it to extreme temperatures, direct sunlight, or moisture.
- Firmware Updates: Periodically check the manufacturer's website for firmware updates. Keeping the firmware current can improve performance and add new features.
10. Warranty Information
The Hall Technologies HT-RANGER2 is sold "As Is". For detailed warranty terms and conditions, please refer to the official Hall Research website or contact their customer support directly. This "As Is" status typically means the product is sold in its current condition, with no implied or explicit warranty from the seller regarding its condition or performance beyond what is legally required.
11. Support and Contact Information
For further assistance, technical support, or to access additional resources such as drivers and updated documentation, please visit the official Hall Research product page:
Hall Technologies HT-RANGER2 Product Page
You may also contact Hall Research customer support through the contact information provided on their official website.


