WAMPAT W01F3097L
WAMPAT 59-inch Farmhouse Sideboard Buffet Cabinet User Manual
Model: W01F3097L
1. Introduction
This manual provides detailed instructions for the assembly, operation, maintenance, and troubleshooting of your WAMPAT 59-inch Farmhouse Sideboard Buffet Cabinet. Please read all instructions carefully before assembly and use to ensure safe and proper functioning of the product.
Important Safety Information
Always secure the cabinet to the wall using the provided hardware to prevent tipping. This cabinet is heavy (approximately 102.4 pounds) and should be assembled and moved by two people to avoid injury. Keep small parts away from children during assembly.

Figure 1: WAMPAT 59-inch Farmhouse Sideboard Buffet Cabinet (Oak)
2. Included Components
Before beginning assembly, ensure all parts listed below are present and undamaged. Refer to the assembly diagram for visual identification of each component.
- 1 x Sideboard Set (all wooden panels and hardware)
- 1 x Instructions Manual
- 1 x Installation Accessories (screws, cam locks, dowels, hinges, handles, anti-tipping hardware)
3. Assembly Instructions
Assembly requires a screwdriver (not included). It is recommended to assemble the cabinet on a soft, clean surface to prevent scratches. Two people are recommended for assembly.
Assembly Video Guide
Video 1: Detailed assembly guide for the WAMPAT Sideboard Buffet Cabinet.
Step-by-Step Assembly Overview
- Prepare Drawer Slides: Separate the drawer slides (Part M) and attach them to the designated panels (e.g., panel 20) using screws (Part D). Ensure correct orientation.
- Assemble Base Panels: Insert cam bolts (Part A) and dowels (Part C) into the base panel (e.g., panel 4). Attach side panels (e.g., panels 5, 6) to the base panel using cam locks (Part B) to secure.
- Construct Main Frame: Insert dowels (Part C) into the side panels (e.g., panel 20). Attach the central support panel (e.g., panel 4) to the side panels using screws (Part R).
- Install Horizontal Supports: Insert dowels (Part C) into the horizontal support panels (e.g., panels 4, 5, 9). Attach these panels to the main frame using cam locks (Part B).
- Secure Back Panel: Carefully slide the back panel (Part 11) into the grooves along the back of the assembled frame. Secure it with screws (Part N) and cover screw holes with stickers (Part U).
- Assemble Top Panel: Insert cam bolts (Part A) and dowels (Part C) into the top panel (Part 1). Attach the support panels (Part 7) to the top panel with screws (Part E).
- Attach Top to Frame: Place the assembled top panel onto the main frame, aligning cam bolts with cam locks. Secure by tightening cam locks (Part B).
- Install Adjustable Shelves: Insert shelf pins (Part P) into the desired holes on the side panels (e.g., panels 1, 2, 3, 4). Place the adjustable shelves (Part K) onto the pins.
- Assemble Drawers: Insert dowels (Part L) into the drawer side panels (Part 17). Attach the front and back panels (Parts 15, 16) to the side panels using screws (Part E). Carefully slide the drawer bottom panel (Part 14) into place.
- Attach Drawer Slides and Handles: Attach the remaining drawer slide parts (Part M) to the drawer side panels (Parts 15, 16) using screws (Part D). Attach handles (Part I) to the drawer front panel (Part 12) with bolts (Part J).
- Install Cabinet Doors: Attach hinges (Part S) to the cabinet doors (Parts 18, 19) with screws (Part T). Attach the doors to the main frame, ensuring proper alignment.
- Install Door Handles: Attach handles (Part H) to the cabinet doors (Parts 18, 19) with bolts (Part J). Cover any visible screw holes with stickers (Part V).
- Insert Drawers: Carefully slide the assembled drawers into the drawer slides on the main cabinet frame.
- Install Anti-Tipping Hardware: Secure the anti-tipping straps to the back of the cabinet and to a wall stud as per the included instructions to prevent accidental tipping.
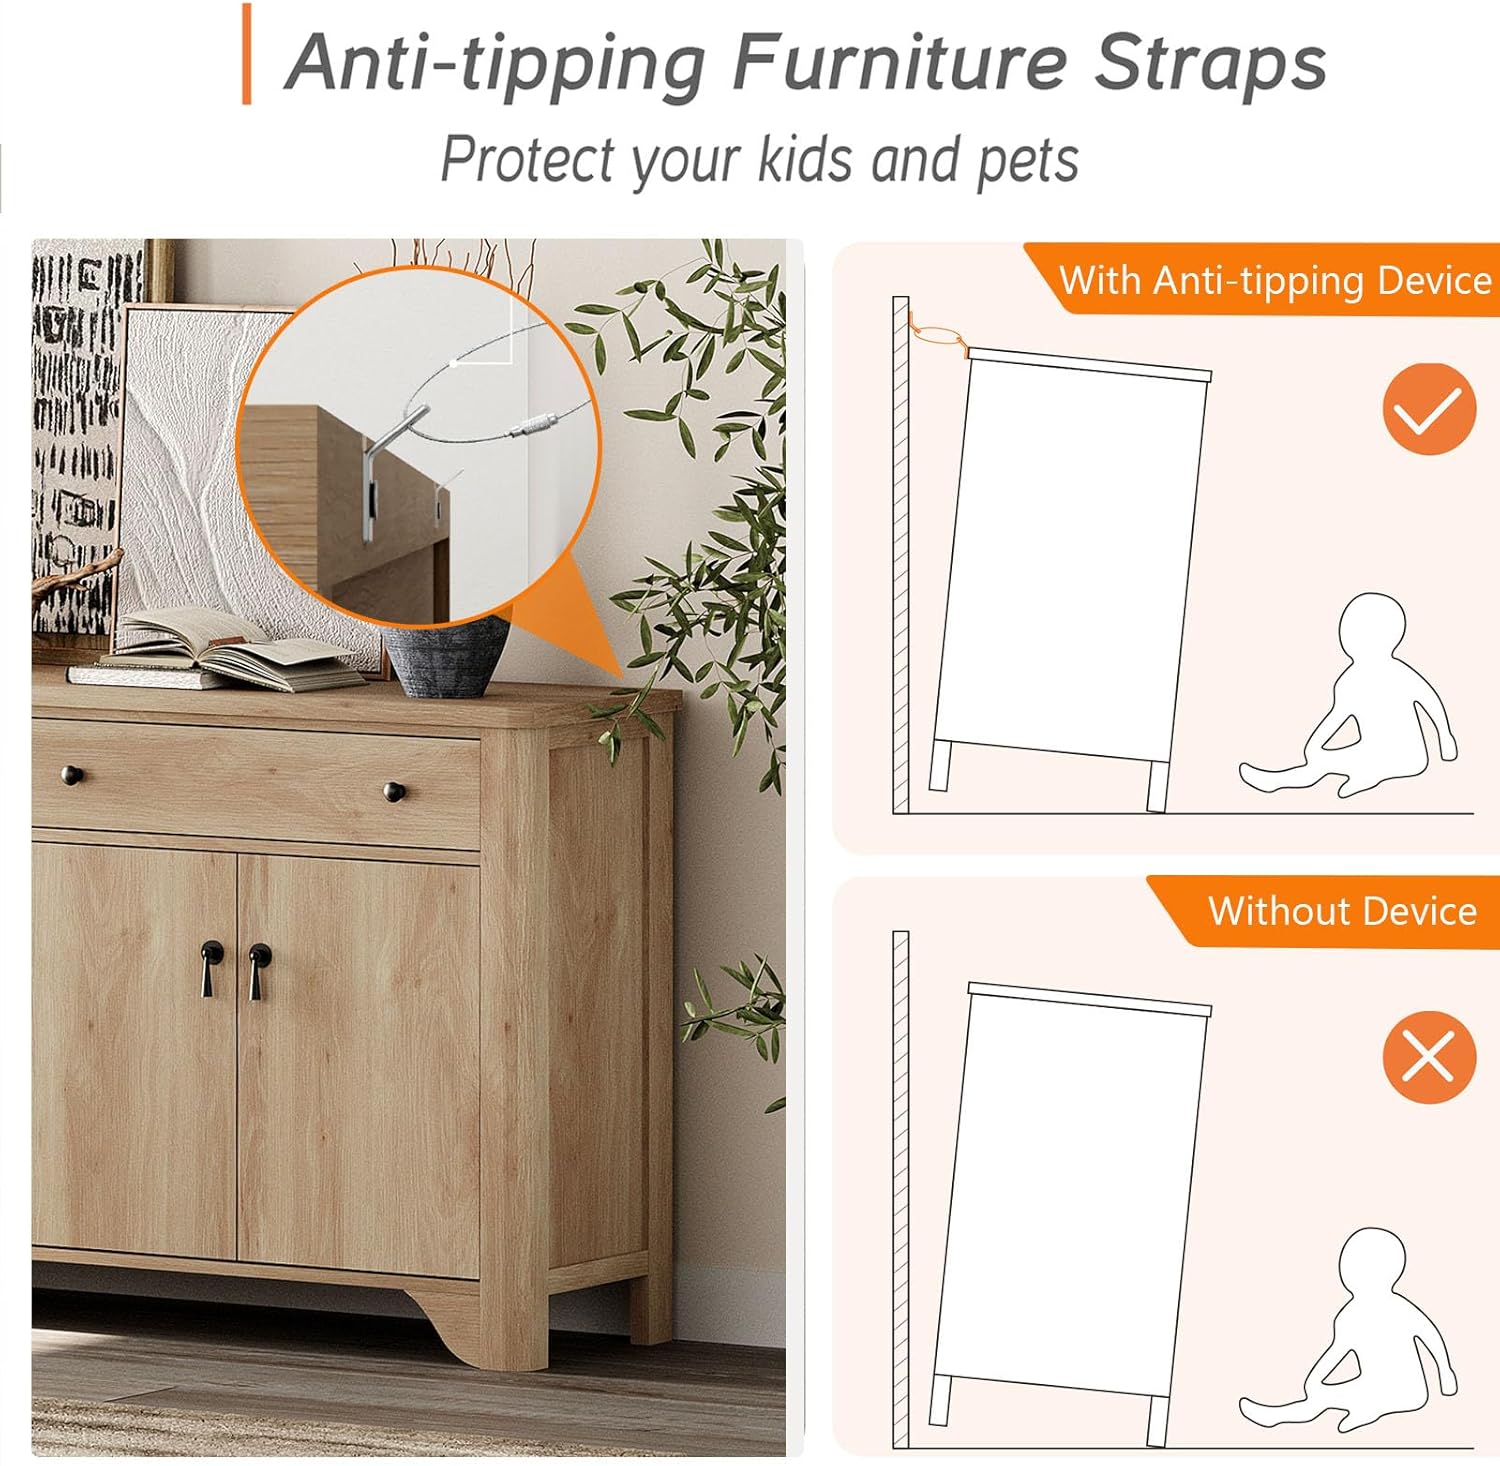
Figure 2: Anti-tipping furniture straps installation for safety.
4. Operation and Usage
Your WAMPAT Sideboard Buffet Cabinet is designed for versatile storage and display in various rooms.
Storage Capacity
The cabinet features two large drawers and four cabinet doors, providing ample space for dishes, glassware, kitchen essentials, or other household items. The tabletop supports up to 120 lbs, and each drawer holds up to 30 lbs.

Figure 3: Interior storage with adjustable shelves.
Adjustable Shelves
The interior shelves offer three height options. To adjust a shelf, remove all items from the shelf, lift the shelf, reposition the shelf pins to the desired height, and then reinsert the shelf. This allows customization for various item sizes, such as tall wine bottles or large serving platters.

Figure 4: Adjustable shelf mechanism.
Soft-Close Hinges
The cabinet doors are equipped with hydraulic soft-close hinges, ensuring quiet and gentle closing to prevent slamming and extend product life.

Figure 5: Hydraulic soft-close hinge.
5. Maintenance
To maintain the appearance and longevity of your WAMPAT Sideboard Buffet Cabinet, follow these simple cleaning guidelines:
- Cleaning: The cabinet features a waterproof and smooth surface. Wipe clean with a damp cloth and mild detergent. Avoid abrasive cleaners or harsh chemicals that may damage the finish.
- Spills: Promptly wipe up any spills to prevent staining or water damage.
- Dusting: Regularly dust with a soft, dry cloth.

Figure 6: Easy-to-clean surface.
6. Troubleshooting
If you encounter issues with your cabinet, refer to the following common solutions:
| Problem | Possible Cause | Solution |
|---|---|---|
| Doors or drawers do not align properly. | Loose cam locks or screws; incorrect hinge adjustment; misaligned panels during assembly. | Review assembly steps, ensuring all cam locks and screws are fully tightened. Adjust hinges as needed (refer to hinge adjustment guides if unfamiliar). If panels are severely misaligned, disassemble and reassemble the affected section carefully. |
| Drawer does not slide smoothly. | Drawer slides are not properly installed or lubricated; debris in the slides. | Check that drawer slides are securely attached and correctly aligned. Clean any dust or debris from the slides. A small amount of silicone lubricant can be applied to the slides if needed. |
| Cabinet feels unstable or wobbly. | Loose connections; uneven floor; anti-tipping hardware not installed. | Ensure all cam locks and screws are tightened throughout the cabinet. Place the cabinet on a level surface. If the floor is uneven, use furniture levelers (not included) if necessary. Install the anti-tipping hardware as instructed in the safety section. |
7. Product Specifications
| Feature | Detail |
|---|---|
| Brand | WAMPAT |
| Model Number | W01F3097L (also W07Q515QA-1) |
| Color | Oak |
| Product Dimensions | 59"W x 15.6"D x 31.4"H (1500mm W x 398mm D x 800mm H) |
| Item Weight | 102.4 Pounds |
| Material | Engineered Wood (Thickened P2 MDF) |
| Finish Type | Polished |
| Number of Drawers | 2 |
| Number of Doors | 4 |
| Number of Shelves | 3 (Adjustable) |
| Tabletop Weight Limit | 120 Pounds |
| Drawer Weight Limit | 30 Pounds (each) |
| Special Features | Adjustable Shelf, Anti-Tipping, Scratch Resistant, Space Saving, Storage, Soft-close hinges |
| Assembly Required | Yes |

Figure 7: Product Dimensions.
8. Warranty and Support
For warranty information or technical support, please contact WAMPAT customer service through the retailer where the product was purchased. Keep your purchase receipt and model number (W01F3097L) handy for faster service.
Ask a question about this manual
Ask about setup, troubleshooting, compatibility, parts, safety, or missing instructions. Manuals+ will review the question and use this page’s manual context to help answer it.