1. Safety Information
Please read all instructions carefully before installation and use. Retain this manual for future reference.
- Always disconnect the power supply at the main circuit breaker before attempting any installation, maintenance, or cleaning.
- Installation should be performed by a qualified electrician if you are not confident in your ability to safely install electrical fixtures.
- Ensure the voltage rating of the fixture matches your local power supply (220V-240V).
- Do not modify the light fixture in any way.
- Keep packaging materials out of reach of children.
- This product is designed for indoor use only.
2. Package Contents
Verify that all components are present and undamaged:
- 1 x DELIPOP LED Ceiling Light fixture
- 1 x Remote Control
- 1 x Installation Accessories Kit (screws, wall anchors, wiring caps)
- 1 x User Manual (this document)

Image: Dimensions of the DELIPOP LED Ceiling Light (62cm x 62cm x 11cm).
3. Specifications
| Feature | Specification |
|---|---|
| Model Number | 30910921 |
| Power | 40W |
| Luminous Flux | 4500 Lumens |
| Voltage | 220V-240V |
| Color Temperature | 3000K-6500K (Dimmable) |
| Brightness Adjustment | 10% - 100% |
| Material | Aluminum, Acrylic |
| Product Dimensions (L x W x H) | 62cm x 62cm x 11cm (24.41" x 24.41" x 4.33") |
| Weight | 1.4 kg |
| Recommended Room Size | 15-20㎡ |
| Light Source | Integrated LED |
| Energy Efficiency Class | E |
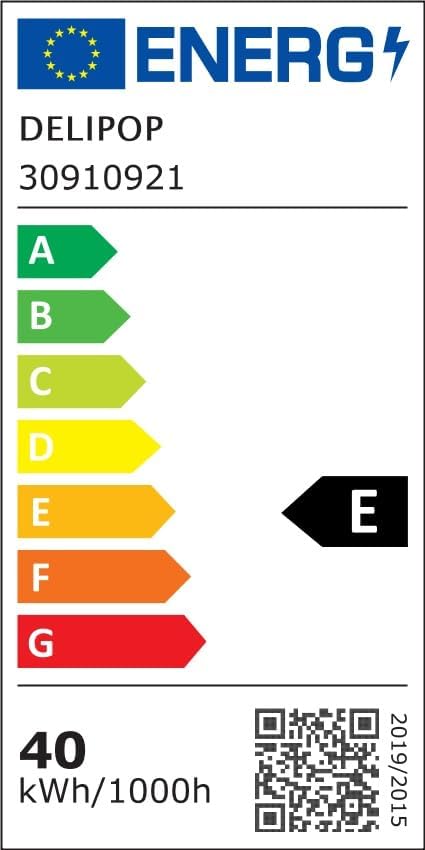
Image: EU Energy Label for DELIPOP Model 30910921. For more details, visit eprel.ec.europa.eu/qr/2298470.
4. Installation Instructions
This ceiling light is designed for flush mounting. Follow these general steps for installation. If you are unsure, consult a qualified electrician.
- Prepare for Installation: Turn off the power supply at the main circuit breaker to avoid electrical shock.
- Mount the Bracket: Secure the mounting bracket (from the accessories kit) to the ceiling using appropriate screws and wall anchors. Ensure the bracket is firmly attached and can support the weight of the fixture.
- Connect Wiring: Carefully connect the household electrical wires to the fixture's wires. Typically, this involves connecting live to live, neutral to neutral, and ground to ground. Use the provided wiring caps to secure connections.
- Attach the Fixture: Align the light fixture with the mounting bracket and secure it in place with the screws provided. Ensure the fixture is flush against the ceiling.
- Restore Power: Once the fixture is securely installed and all connections are checked, restore power at the main circuit breaker.
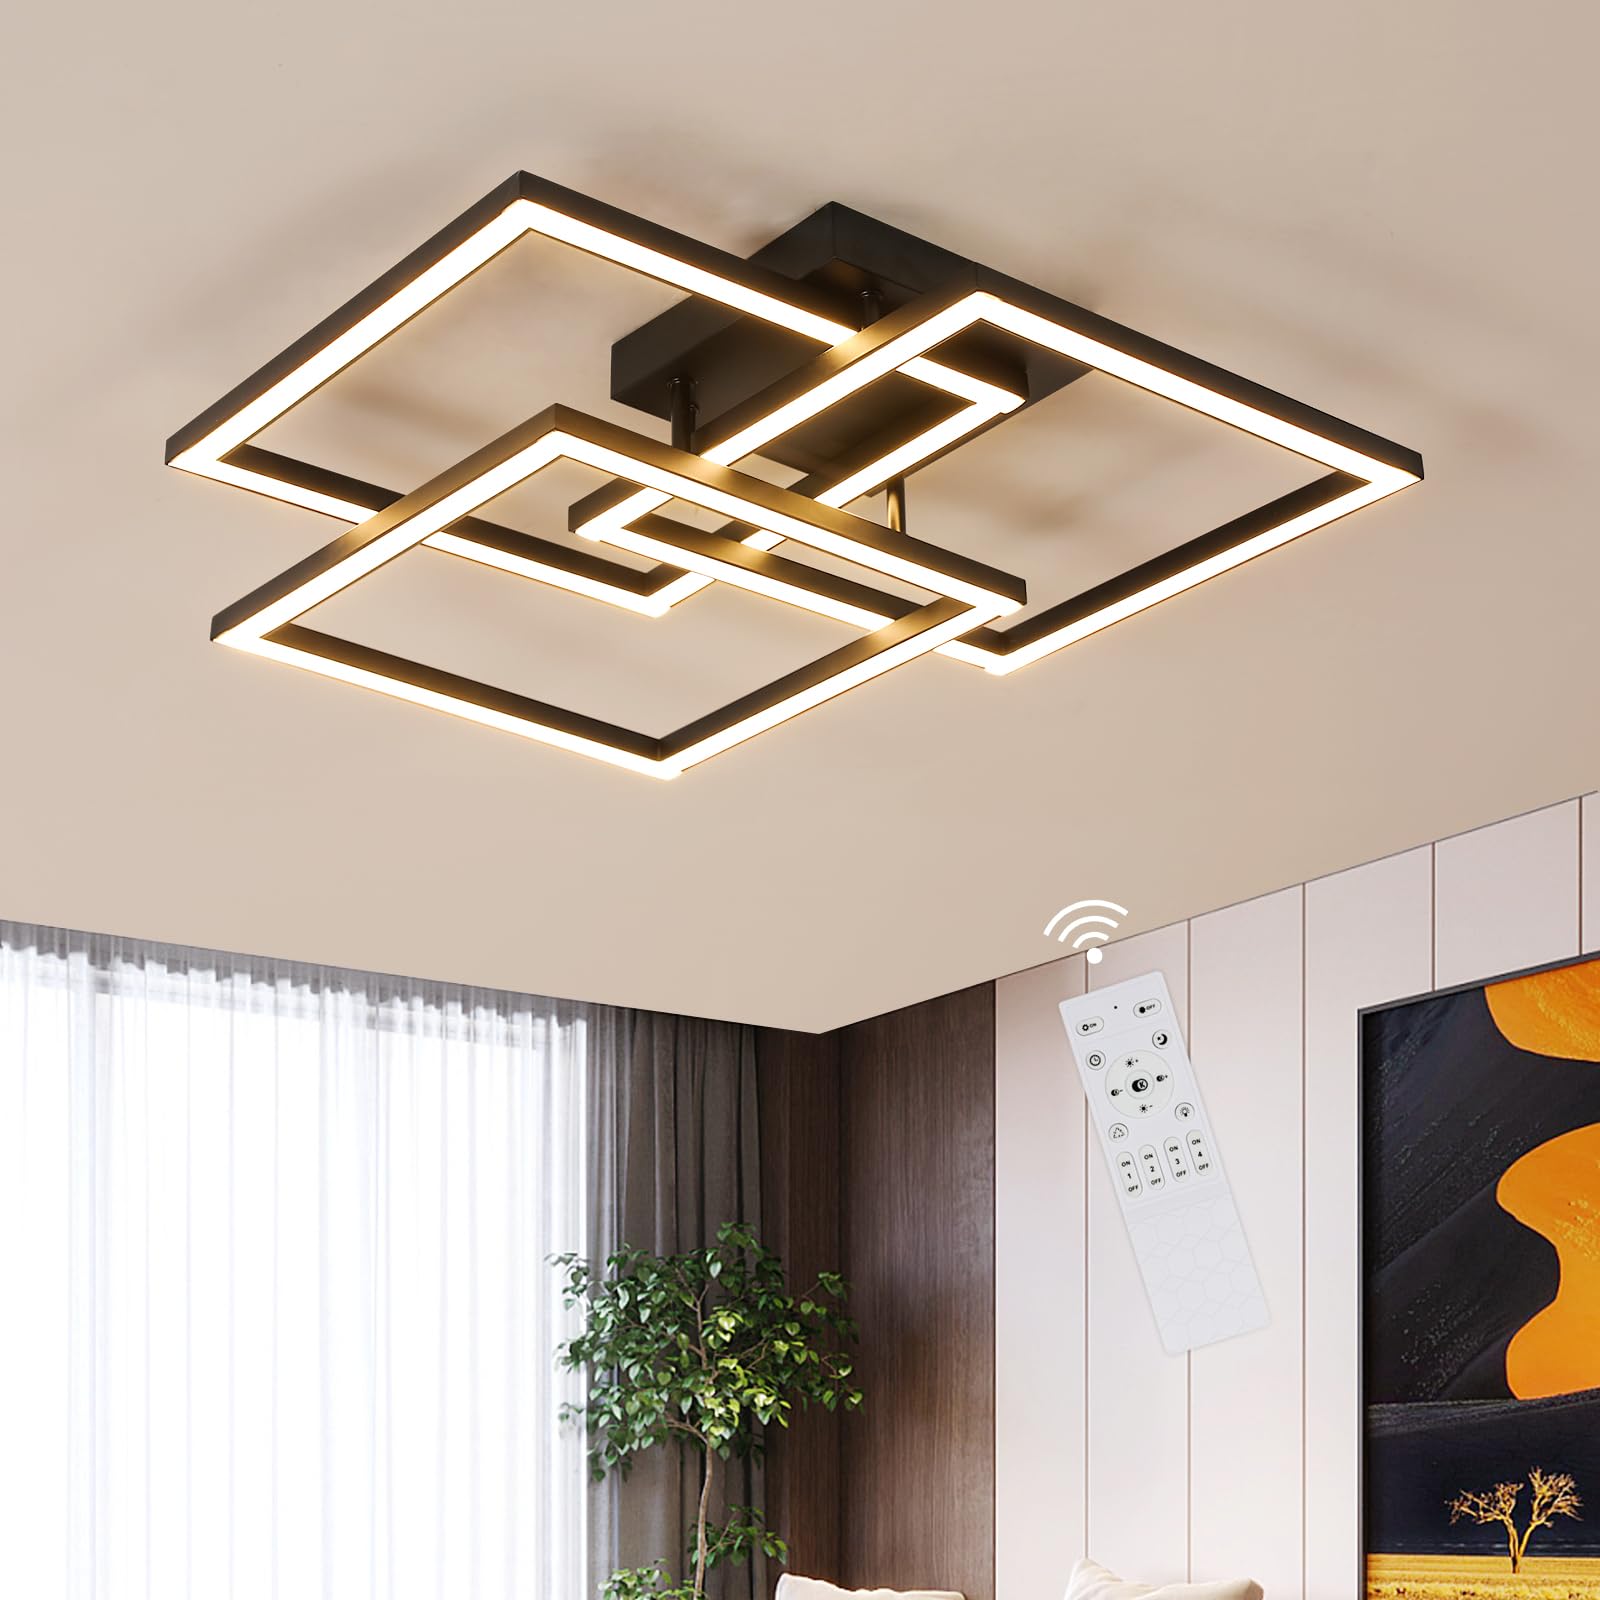
Image: DELIPOP LED Ceiling Light installed in a bedroom.

Image: Components of the DELIPOP LED Ceiling Light, highlighting the metal chassis, acrylic lampshade, and LED light strip.
5. Operating Instructions
The DELIPOP LED Ceiling Light can be controlled using the included remote control.
5.1 Remote Control Functions
- Power ON/OFF: Press the ON or OFF button to turn the light on or off.
- Brightness Adjustment: Use the Brightness Up (
 ) and Brightness Down () buttons to adjust the light intensity from 10% to 100%.
 - Color Temperature Adjustment: Press the Warm Light () or Cool Light () buttons to cycle through color temperatures from 3000K (warm white) to 6500K (cool white).
- Memory Function: The light will remember your last brightness and color temperature settings when turned off and on again.
- Night Light Mode: Press the Night Light (
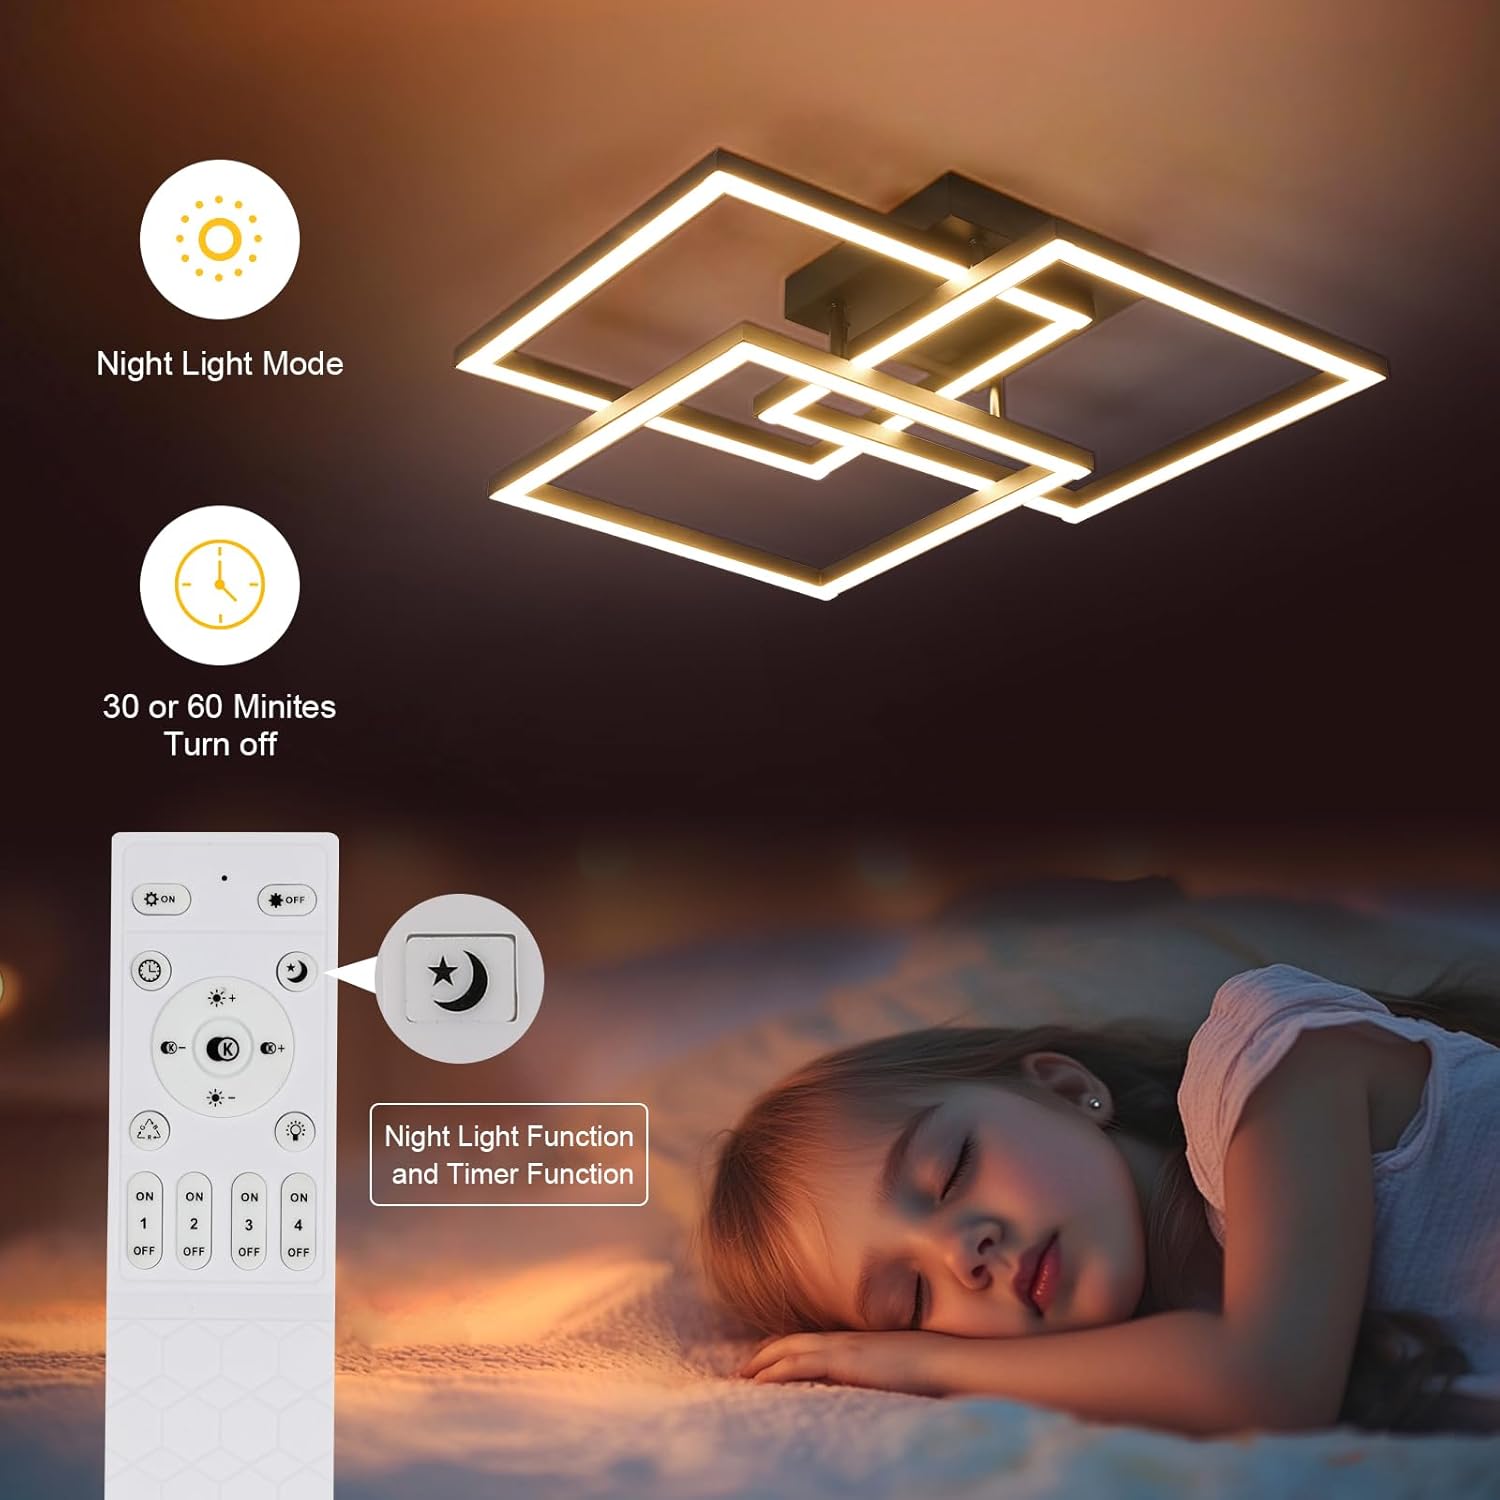 ) button to activate a low-brightness, warm light setting suitable for night use.
 - Timer Function: Use the 30 Min or 60 Min buttons to set the light to automatically turn off after 30 or 60 minutes.
Image: Remote control for the DELIPOP LED Ceiling Light.

Image: Demonstration of color temperature and brightness adjustment.
Image: Night Light Mode and Timer Function.
6. Maintenance
To ensure the longevity and optimal performance of your DELIPOP LED Ceiling Light, follow these maintenance guidelines:
- Cleaning: Before cleaning, ensure the power is turned off at the circuit breaker. Wipe the fixture with a soft, dry, or slightly damp cloth. Do not use harsh chemicals, abrasive cleaners, or solvents, as these can damage the finish or electrical components.
- Inspection: Periodically check the fixture for any signs of damage, loose wiring, or wear. If any issues are found, disconnect power and consult a qualified electrician.
- LEDs: The integrated LED light source is designed for long-term use and is not user-replaceable.
7. Troubleshooting
If you encounter any issues with your DELIPOP LED Ceiling Light, refer to the following common problems and solutions:
- Light does not turn on:
- Check if the power supply at the circuit breaker is on.
- Ensure the remote control has working batteries and is pointed at the light.
- Verify all wiring connections are secure (ensure power is off before checking).
- Remote control not working:
- Replace the batteries in the remote control.
- Ensure there are no obstructions between the remote and the light fixture.
- Light flickers or dims unexpectedly:
- Check for loose wiring connections (power off first).
- Ensure the voltage supply is stable.
If the problem persists after trying these solutions, please contact customer support.
8. Warranty and Support
DELIPOP products are manufactured to high-quality standards. For warranty information or technical support, please refer to the purchase documentation or contact DELIPOP customer service through the retailer where the product was purchased.
Please have your model number (30910921) and purchase date available when contacting support.