
Introduction
This manual provides essential instructions for the safe and efficient operation, maintenance, and troubleshooting of your VELPAX 5.4 Gallon Battery Powered Backpack Sprayer. Please read this manual thoroughly before initial use and retain it for future reference.

Image: The VELPAX 5.4 Gallon Battery Powered Backpack Sprayer, showcasing its design and wheeled cart feature.
Safety Information
WARNING: Failure to follow these safety instructions may result in serious injury or property damage.
- Do not spray chemicals towards yourself or others.
- Handle pressurized liquids with care.
- Avoid contact with moving parts.
- Always wear appropriate personal protective equipment (PPE) such as gloves, eye protection, and protective clothing when operating the sprayer.
- Do not use flammable or corrosive liquids in the sprayer.
- Keep out of reach of children and pets.
- Ensure the sprayer is turned off and depressurized before performing any maintenance or cleaning.
- Charge the battery in a well-ventilated area, away from flammable materials.
- Do not immerse the battery or charger in water.
Package Contents
Verify that all items are present in the package:
- 1 x VELPAX Battery Powered Backpack Sprayer (5.4 Gallon / 20L Tank)
- 1 x 12V 8Ah Lithium-ion Battery (pre-installed)
- 1 x Battery Charger
- 1 x Spray Wand (35.8 inches)
- 4 x Nozzles (Single head misting, Double-ended cone, Fan, Shower head)
- 1 x Set of Backpack Straps
- 1 x Detachable Wheeled Cart with Adjustable Handle
- Necessary Accessories (washers, small parts, etc.)
Specifications
| Feature | Specification |
|---|---|
| Brand | VELPAX |
| Model Name | PWQ-020 |
| Tank Volume | 5.4 Gallons (20 Liters) |
| Battery | 12V 8Ah Lithium-ion |
| Battery Life | 6-8 hours continuous spraying |
| Maximum Pressure | 94 PSI |
| Hose Length | 35.8 Inches |
| Product Dimensions | 12"W x 25"H (Sprayer body) |
| Item Weight | 19 Pounds |
| Material | Plastic, Stainless Steel |
| Power Source | Battery Powered |

Image: Detailed specifications and dimensions of the VELPAX backpack sprayer, including battery, tank material, flow rate, pressure, weight, and hose length.
Setup Instructions
- Charge the Battery:
Before first use, fully charge the 12V 8Ah lithium-ion battery. Connect the charger to the charging port on the sprayer and plug it into a standard electrical outlet. The indicator light on the charger will show charging status (e.g., red for charging, green for fully charged). Charging typically takes several hours.

Image: Illustration of the battery voltmeter indicating charge levels (green for full, yellow for insufficient, red for recharge) and the battery charger.
- Assemble the Spray Wand:
Connect the spray wand to the hose. Ensure all connections are tight to prevent leaks. The wand is 35.8 inches long.
- Attach Nozzles:
Select the desired nozzle from the four included types (single head misting, double-ended cone, fan, shower head) and securely attach it to the end of the spray wand.

Image: Visual representation of the four interchangeable nozzles: single head misting, double-ended cone, fan, and shower head, along with the spray bar.
- Prepare for Backpack Use:
If using as a backpack sprayer, attach the wide, padded shoulder straps to the designated mounting holes on the sprayer body. Adjust the straps for a comfortable and secure fit, ensuring the soft lower back pad is positioned correctly.

Image: Close-up view of the ergonomic backpack design featuring wide padded shoulder straps, adjustable straps, and lumbar support for user comfort.
- Prepare for Wheeled Cart Use:
If using with the wheeled cart, ensure the cart is securely attached. The handle is adjustable; extend it to a comfortable height for pulling. When not in use, the shoulder straps and spray nozzle can be stored in the belt box on the cart.

Image: Diagram showing how to remove the wheeled cart by turning a knob, illustrating the two modes of use.

Image: The mobile cart with a belt box for storing shoulder straps and the spray nozzle when the sprayer is used in cart mode.
- Fill the Tank:
Unscrew the wide mouth lid. The tank has a built-in filter screen to prevent debris from entering. Fill the tank with the desired liquid, observing the translucent tank with gallon markings for precise measurements. Do not overfill. Securely fasten the lid after filling.
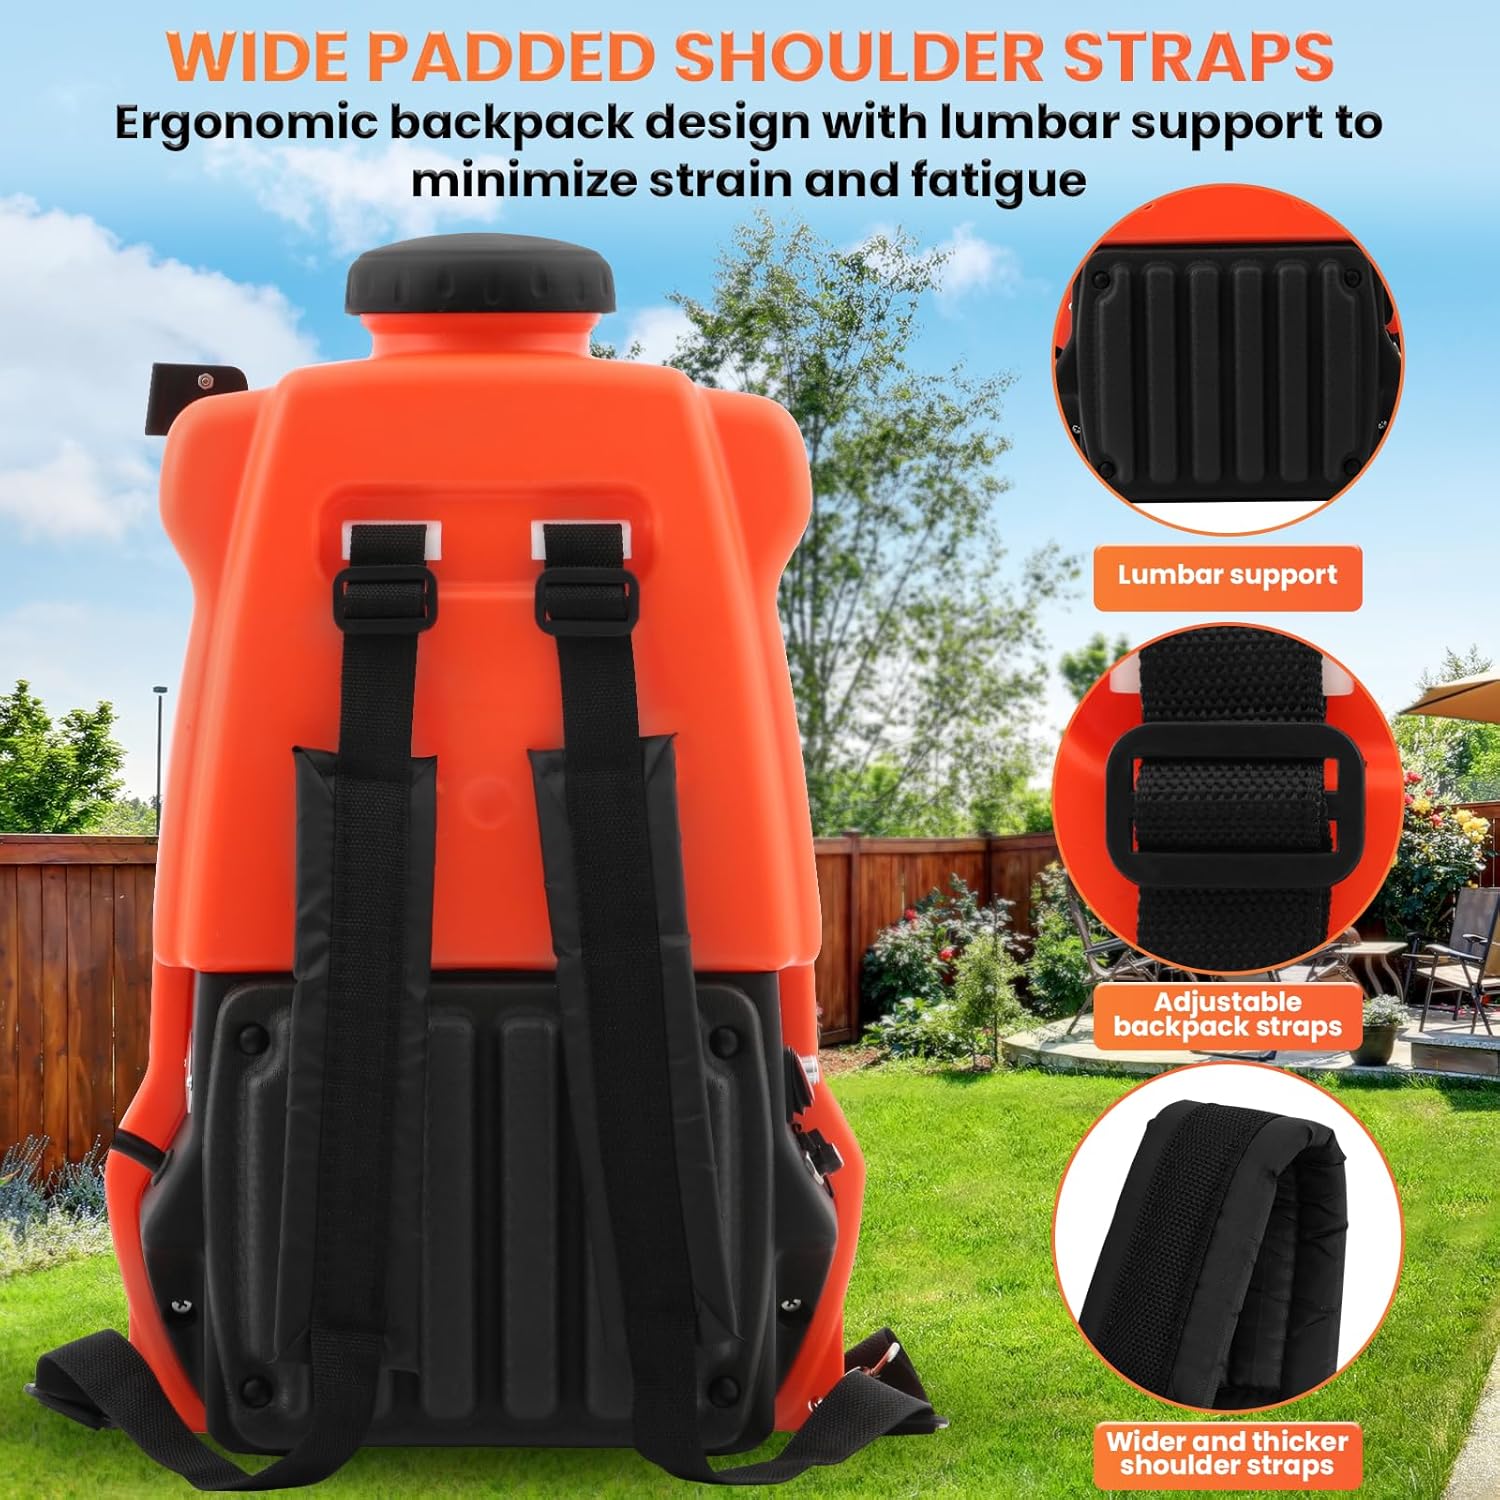
Image: A person filling the sprayer tank, showing the wide opening and internal filter screen.
Operating Instructions
- Power On and Adjust Pressure:
Locate the power switch on the sprayer body and turn it to the "ON" position. Use the adjustable PSI knob to set the desired spray pressure, ranging from 0 to 94 PSI. Rotate the knob clockwise to increase pressure and counter-clockwise to decrease it.

Image: Close-up views of the sprayer's features, including the tank with water level line, wide mouth lid with strainer, power switch, adjustable PSI knob, and spray gun snap.
- Begin Spraying:
Point the nozzle towards the target area. The spray wand features a locking ring for continuous spraying or a trigger for intermittent spraying. Push the red lever forward for continuous spray, or squeeze the trigger for intermittent spray.

Image: Diagram showing the two modes of water switch control: intermittent spray (trigger release) and continuous spray (lever locked forward).
- Switching Modes (Backpack vs. Pulling):
The sprayer can be used as a backpack unit or pulled using the wheeled cart. Choose the mode that best suits your task and terrain.

Image: Comparison of the sprayer being used in pulling mode with the wheeled cart and in backpack mode, demonstrating versatility.
- After Use:
When finished spraying, turn the power switch to "OFF". Depressurize the system by spraying any remaining liquid until the pressure is released. Clean the tank and nozzles as described in the Maintenance section.
Maintenance
Regular maintenance ensures the longevity and optimal performance of your sprayer.
- Cleaning the Tank: After each use, empty any remaining liquid. Rinse the tank thoroughly with clean water. For chemical residues, use a mild detergent solution, then rinse multiple times with clean water.
- Cleaning Nozzles and Wand: Remove the nozzles and rinse them with clean water. If clogged, use a soft brush or needle to clear any blockages. Flush the spray wand with clean water.
- Battery Care: Store the battery in a cool, dry place. For long-term storage, ensure the battery is partially charged (around 50%). Recharge the battery every 3-6 months to maintain its health. Do not store the battery in extreme temperatures.
- Filter Screen: Periodically check and clean the filter screen located at the tank's inlet to prevent debris from entering the pump.
- General Inspection: Regularly inspect hoses, connections, and the wand for any signs of wear, cracks, or damage. Replace damaged parts immediately.
Troubleshooting
| Problem | Possible Cause | Solution |
|---|---|---|
| No spray or weak spray |
|
|
| Sprayer pump runs but no liquid sprays |
|
|
| Handle for wheeled cart detaches or twists |
|
|
Warranty and Support
VELPAX products are manufactured to high-quality standards. For warranty information, technical support, or replacement parts, please contact VELPAX customer service. Keep your purchase receipt as proof of purchase.
Contact Information: Refer to the product packaging or the official VELPAX website for the most current customer service contact details.