Introduction
The ACMER M2 Laser Rotary Roller is an accessory designed to expand the capabilities of your laser engraver, enabling precise 360-degree engraving on cylindrical and irregularly shaped objects. This manual provides detailed instructions for setting up and operating your M2 Rotary Roller.
Package Contents
Please verify that all items are present in your package:
- Rotary Module
- Bracket
- Instruction Manual
- Adapter Cable A
- Adapter Cable B
- Motor Cable

Setup Instructions
Unpacking and Initial Inspection
Carefully remove the rotary module and all accessories from the packaging. Ensure no components are damaged.
Video: Unboxing and initial setup of the ACMER M2 Laser Rotary Roller. This video demonstrates how to unpack the device and prepare it for connection to your laser engraver.
Adjusting the Rotary Roller
The rotary roller's width can be adjusted to accommodate various cylindrical object diameters.
- Loosen the screws on the side of the rotary roller.
- Slide the rollers to the desired width for your object.
- Tighten the screws to secure the rollers in place.
- Ensure the timing belt has proper tension by pushing the tensioner screw and tightening it.

Image: The rotary roller with adjustable width settings for different object sizes. 
Image: Diagram showing the 4-level width adjustment mechanism, supporting a carving diameter range of 4-138mm. Connecting to the Laser Engraver
The M2 Rotary Roller connects to your laser engraver's Y-axis.
- Locate the Y-axis motor cable on your laser engraver.
- Disconnect the Y-axis motor cable from the engraver.
- Connect the provided motor cable (from the rotary module) to the RM female end of the adapter cable.
- Connect the male end of the adapter cable to the female end of the rotary module.
- Connect the male end of adapter cable A into the female end of the rotary module.
- Set the Y/R switch on your laser engraver to the 'R' (Rotary) mode.

Image: The adapter cables and motor cable used for connecting the rotary module.
Operating Instructions
Software Configuration
Before engraving, configure your laser engraving software (e.g., LaserGRBL, LightBurn) for rotary engraving. Refer to your software's documentation for specific settings.
For LaserGRBL and LightBurn, typical step value adjustments involve changing the Y Steps per mm ($101) to '65' for rotary operation.

Image: Software settings for rotary engraving in LaserGRBL and LightBurn, highlighting the Y-axis step value adjustment. Placing the Object
Place the cylindrical object securely on the rotary rollers. Ensure it is centered and stable.
Note:
- Transparent materials like glass cannot be laser engraved directly and require a black coating on the surface for the laser to interact with.
- For irregular objects or those with stems (like wine glasses), use the provided bracket for stable support.
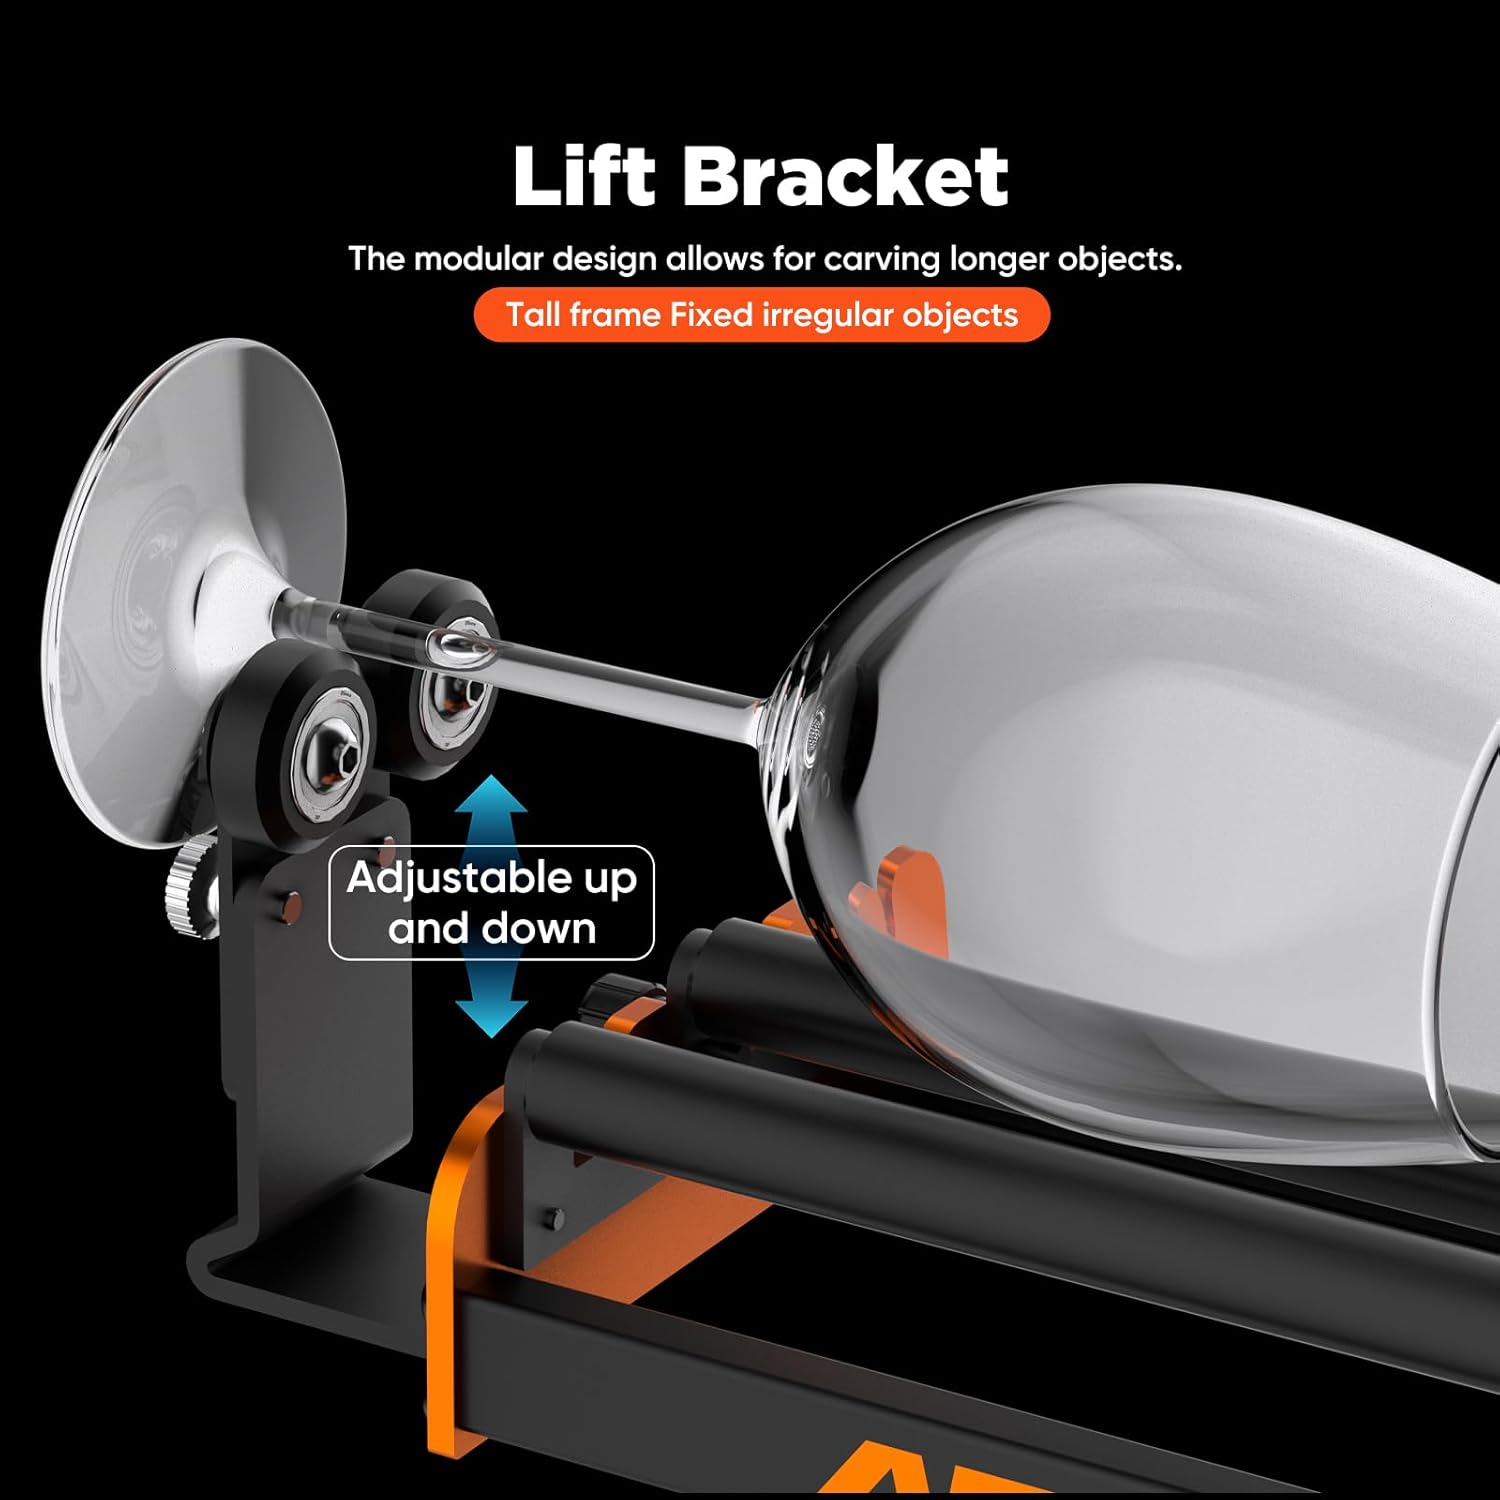
Image: The lift bracket supporting a wine glass for stable engraving of irregular shapes. 
Image: Illustration of the rotary roller securing irregular objects such as tall cups. Focusing the Laser
Move the laser head directly above the object. Lower the laser head and adjust the focus according to your laser engraver's instructions until the laser beam is at its smallest point on the object's surface.
Initiating Engraving
Once the object is placed, software settings are configured, and the laser is focused, you can initiate the engraving process from your software.
Key Features
- Perfectly Matched for Round Objects: Designed for engraving cylindrical objects such as cups, pens, bottles, pipes, bowls, drums, and tubes. Features high hardness and strong friction for precise 360-degree engravings.
- Adjustable Engraving Table Height: Features adjustable axes to process a wide range of cylinder diameters (4-138mm). Ensure sufficient space between your machine's laser head and engraving table.
- Easy Mode Switching: A convenient toggle switch allows easy switching between rotary and non-rotary modes.
- Easy and Fast Sliding Adjustment: Adjusting the distance for different cylindrical object sizes is simple by sliding and fixing screws by hand.
- High-Quality Stepper Motor: Utilizes a 28-step motor for seamless scrolling during 360° rotational engraving.

Image: Detailed view of the high-quality stepper motor ensuring smooth rotational movement. - Durable Construction: Features a high-friction 70A anti-slip rubber shaft and durable steel construction for extended service life.

Image: The rubber rollers with 60A hardness for enhanced friction and support. - Closed-Loop Timing Belt Drive: Equipped with a tensioner to adjust belt tightness, providing greater friction for a smooth rotation process.

Image: Illustration of the closed-loop timing belt drive, designed for smooth and precise rotation.
Maintenance
To ensure optimal performance and longevity of your ACMER M2 Laser Rotary Roller, regular maintenance is recommended:
- Keep the rollers clean and free from dust or debris. Use a soft, dry cloth for cleaning.
- Periodically check the tension of the timing belt. Adjust if it feels too loose or too tight.
- Inspect all screws and connections to ensure they are secure. Tighten any loose fasteners.
- Store the rotary roller in a dry, dust-free environment when not in use.
Troubleshooting
If you encounter issues with your ACMER M2 Laser Rotary Roller, consider the following:
- Object Slipping: Ensure the object is properly centered and the rollers are adjusted to the correct width. Check if the rubber rollers are clean and free of residue.
- Uneven Engraving: Verify that the laser is correctly focused on the object's surface. Check the timing belt tension and ensure smooth rotation. Confirm software settings for Y-axis steps per mm are correct.
- No Rotation: Check all cable connections between the rotary module, adapter cables, and your laser engraver. Ensure the Y/R switch on your engraver is set to 'R' (Rotary) mode.
- Software Not Recognizing Rotary: Confirm that your software is configured for rotary engraving and that the correct Y-axis step values are applied. Restart your software and laser engraver if necessary.
Specifications
| Feature | Detail |
|---|---|
| Model Number | ACMER-M2 |
| Product Dimensions | 11.6 x 7.7 x 3.3 inches |
| Item Weight | 2.18 pounds |
| Engraving Diameter Range | 4-138mm |
| Roller Hardness | 70A (Anti-slip rubber) |
| Compatibility | ACMER P2, P1, and most laser engravers |
Warranty and Support
ACMER products are designed for reliability and performance. For any technical assistance or inquiries, please contact ACMER Official customer support.
ACMER offers 24/7 online support to assist with product usage and troubleshooting.

The product also holds various certifications, ensuring quality and safety standards.
