1. Introduction
This manual provides essential instructions for the safe and efficient operation of your Ymiko YT-6 Fiber Optic Fusion Splicer Heater. This device is designed for quick and automatic heating of fiber optic splice protection sleeves, ensuring reliable fusion splicing results. It features adjustable temperature settings and a compact, durable design for professional use.
2. Safety Information
Please read all safety warnings and instructions carefully before using the device to prevent injury or damage. Keep this manual for future reference.
- Electrical Safety: Ensure the power adapter and cable are in good condition. Do not operate the device with damaged cords or plugs. Use only the provided charger.
- Heat Hazard: The heating element reaches high temperatures. Avoid direct contact with the heating area during and immediately after operation to prevent burns.
- Ventilation: Operate the device in a well-ventilated area.
- Liquid Exposure: Do not expose the device to water or other liquids.
- Children and Unauthorized Personnel: Keep the device out of reach of children and ensure only trained personnel operate it.
- Proper Storage: Store the device in its protective case in a dry, cool place when not in use.
3. Package Contents
Verify that all items are present in the package:
- 1 x Fiber Optic Fusion Splicer Heater (YT-6)
- 1 x Charger (US Plug 100-240V)
- 1 x Storage Box
- 1 x Accessory Rope
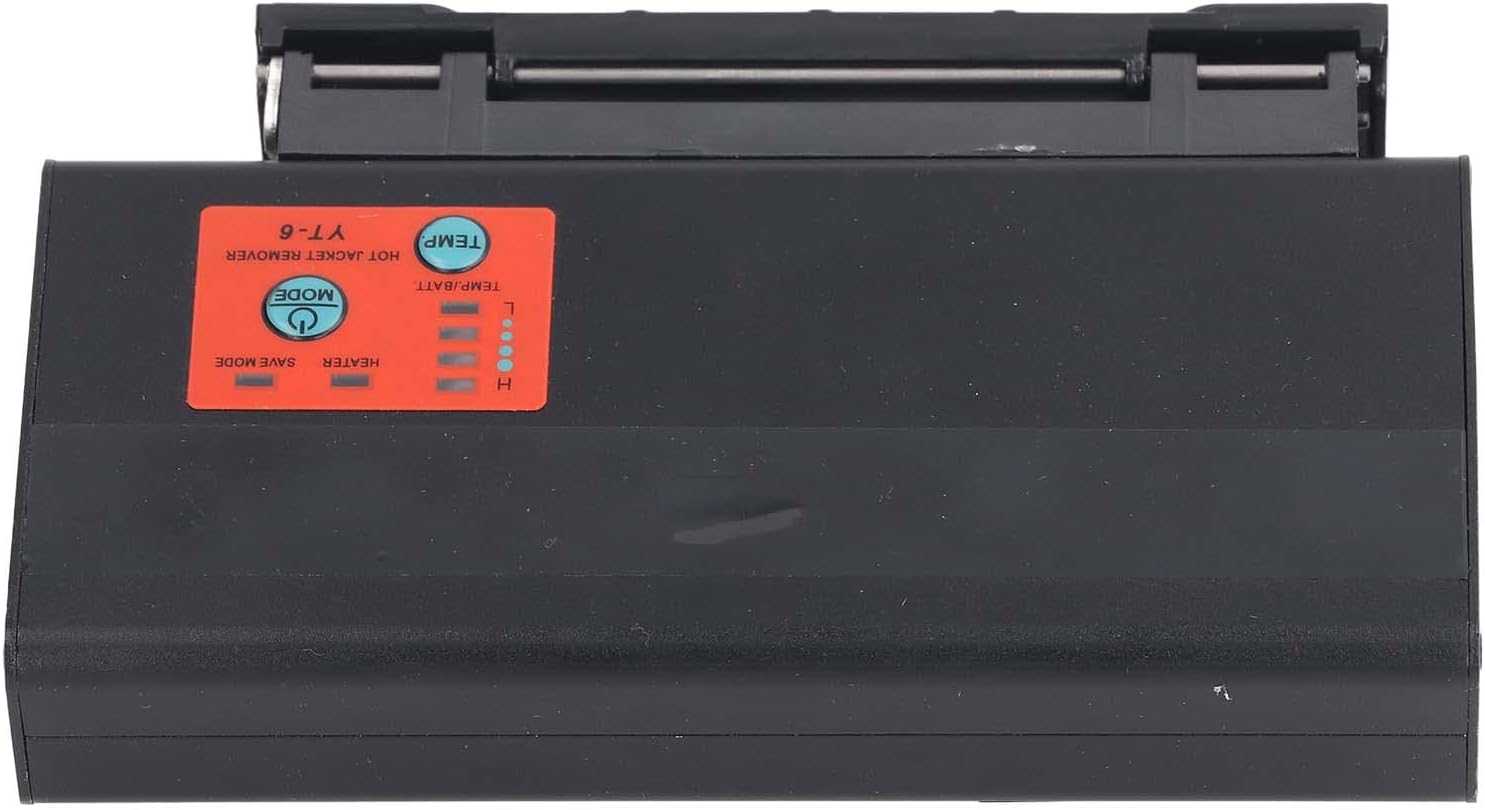
Figure 3.1: Package contents including the heater, charger, storage box, and accessory rope.
4. Product Overview
The Ymiko YT-6 is a vertical external heating splicer heater designed for efficient fiber optic work. It features a robust aluminum alloy construction and an intuitive control panel.
4.1 Device Components
- Heating Chamber: Area where the fiber optic splice protection sleeve is placed for heating.
- Control Panel: Buttons for power, mode selection, and temperature adjustment. Indicators for heater status and battery level.
- Power Input Port: For connecting the charger.
- Battery: Built-in 5200mAh lithium battery for portable operation.

Figure 4.1: Main view of the Ymiko YT-6 Fiber Optic Fusion Splicer Heater.

Figure 4.2: Close-up of the control panel showing temperature and mode buttons.
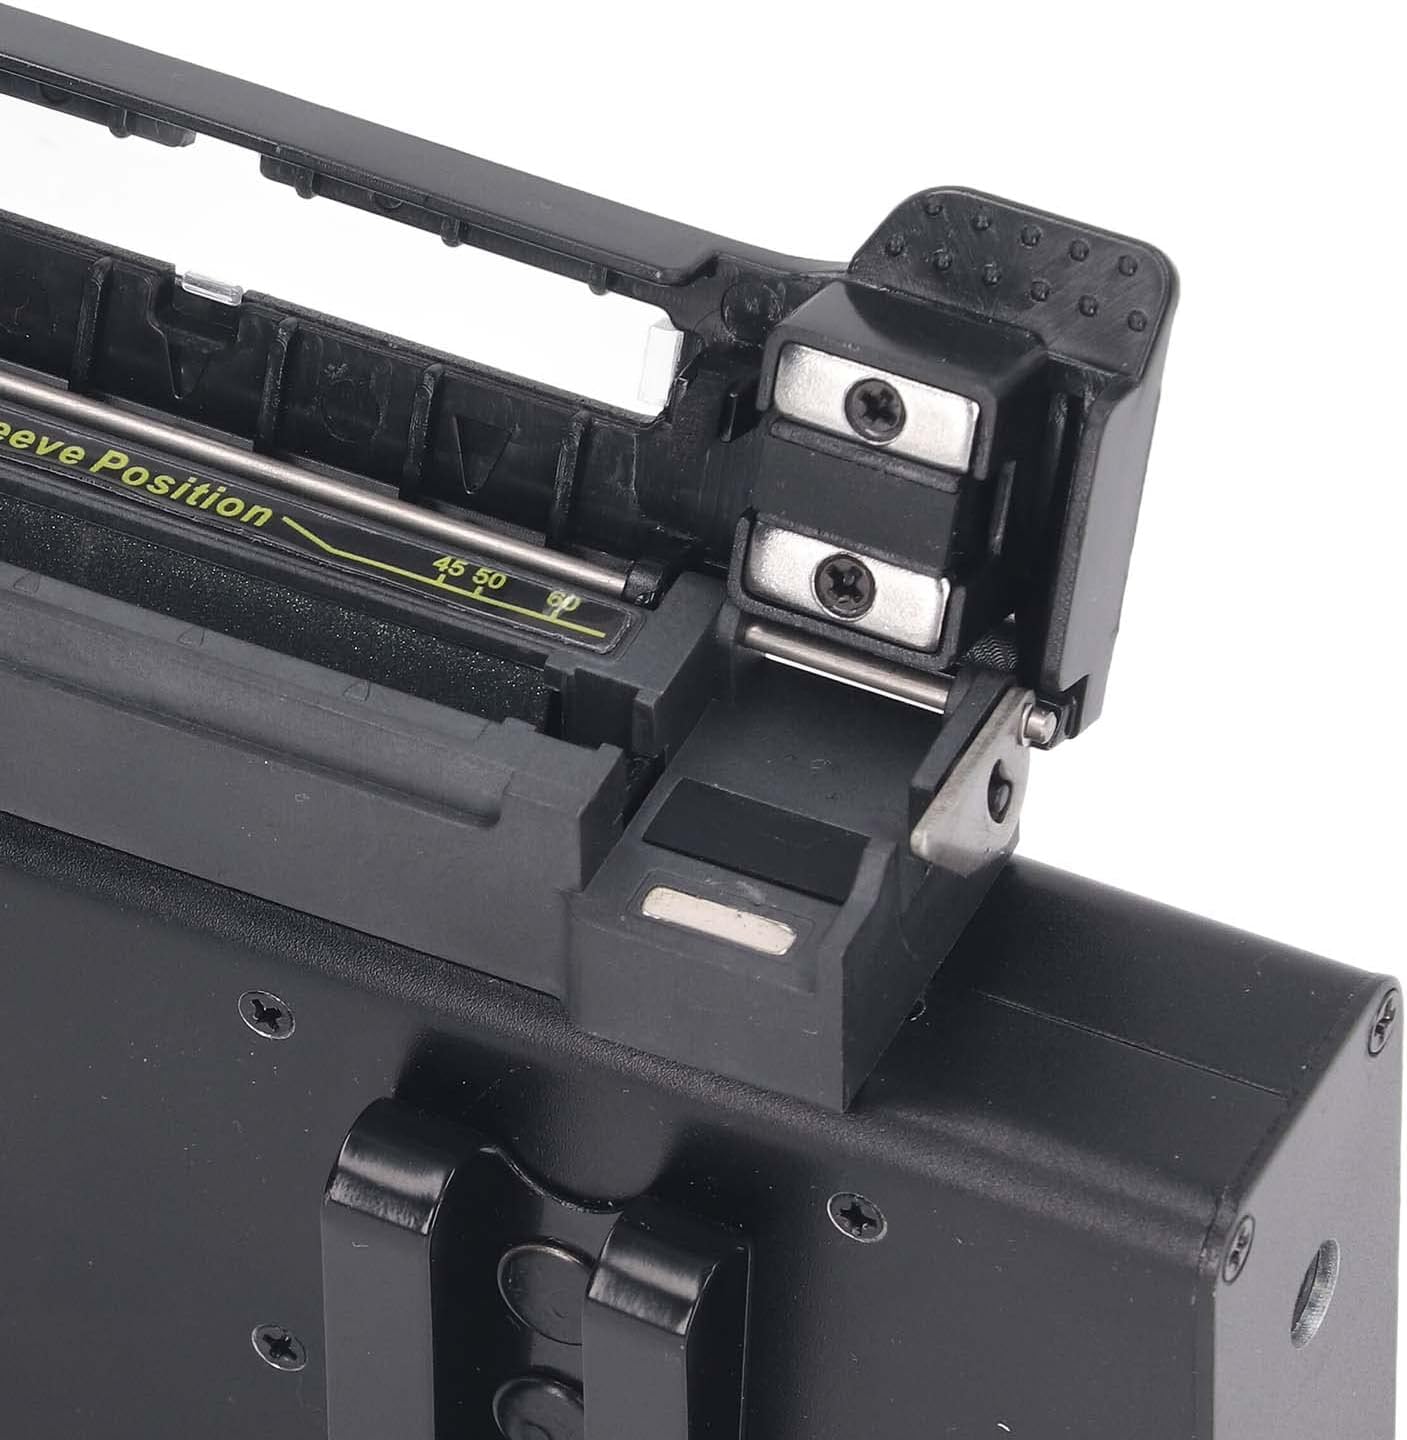
Figure 4.3: Heater with the sleeve position open, ready for fiber placement.
5. Setup
Follow these steps to set up your fiber optic fusion splicer heater for first use:
- Unpack: Carefully remove all components from the storage box.
- Initial Charge: Connect the provided charger to the device's power input port and plug it into a 100-240V AC outlet. Allow the device to fully charge before first use. The battery indicator lights will show charging status.
- Placement: Position the vertical external heating splicer heater beside your welding machine on a stable, flat surface. Ensure there is adequate space for operation and ventilation.
- Power On: Press and hold the power button (usually labeled 'MODE' or with a power symbol) to turn on the device.
6. Operating Instructions
The Ymiko YT-6 heater offers quick and adjustable heating for fiber optic splice protection sleeves.
- Power On: Press and hold the 'MODE' button to power on the device. The heater will typically start in a default temperature setting.
- Select Temperature: Press the 'TEMP' button to cycle through the 4 available temperature settings:
- 1st gear: 130℃
- 2nd gear: 150℃
- 3rd gear: 170℃
- 4th gear: 190℃
- Insert Sleeve: After fusion splicing, carefully place the fiber optic splice protection sleeve into the designated sleeve position within the heating chamber. Ensure it is seated correctly.
- Start Heating: The device will automatically begin heating once the sleeve is properly inserted and the chamber is closed (if applicable). The heating process is designed for fast operation, typically around 18 seconds.
- Remove Sleeve: Once the heating cycle is complete, carefully remove the heated sleeve using appropriate tools to avoid burns. Allow the sleeve to cool before handling the fiber.
- Power Off: After use, press and hold the 'MODE' button to power off the device.
7. Maintenance
Regular maintenance ensures the longevity and optimal performance of your Ymiko YT-6 heater.
- Cleaning: After each use, ensure the heating chamber is free of any debris or fiber fragments. Use a soft, dry cloth to wipe down the exterior of the device. Do not use abrasive cleaners or solvents.
- Battery Care: For optimal battery life, avoid completely discharging the battery frequently. Charge the device regularly, especially if it will be stored for an extended period.
- Storage: When not in use, store the heater in its provided storage box in a cool, dry environment, away from direct sunlight and extreme temperatures.
- Inspection: Periodically inspect the power cable and plug for any signs of damage. If damage is found, discontinue use and contact support.
8. Troubleshooting
If you encounter issues with your Ymiko YT-6 heater, refer to the following common problems and solutions:
- Device does not power on:
- Ensure the battery is charged. Connect the charger and allow it to charge for at least 30 minutes before attempting to power on again.
- Verify the power button is pressed and held for a few seconds.
- Heater not reaching temperature:
- Check the selected temperature setting. Ensure it is set to the desired gear.
- Ensure the splice protection sleeve is correctly placed in the heating chamber.
- If the issue persists, the device may require servicing.
- Battery drains quickly:
- Ensure the device is fully charged before use.
- Operating in very cold environments can affect battery performance.
- Battery life naturally degrades over time.
For problems not listed here or if solutions do not resolve the issue, please contact customer support.
9. Specifications
| Feature | Specification |
|---|---|
| Model | YT-6 (Ymikof79hx1gpiw-11) |
| Item Type | Fiber Optic Fusion Splicer Heater |
| Battery | 1 x Lithium battery 5200mAh (built-in) |
| Product Material | Aluminum Alloy |
| Heating Adjustment | 4 levels, 18s fast heating |
| Temperature Gears | 1st: 130℃, 2nd: 150℃, 3rd: 170℃, 4th: 190℃ |
| Power Input | US Plug 100-240V |
| Dimensions (D x W x H) | 9.84" x 5.51" x 2.75" |

Figure 9.1: Dimensions of the Ymiko YT-6 Fiber Optic Fusion Splicer Heater.
10. Warranty Information
Ymiko products are manufactured to high-quality standards. For specific warranty details, please refer to the warranty card included with your purchase or contact your retailer. Keep your proof of purchase for any warranty claims.
11. Support Information
If you have any questions, require technical assistance, or need to report an issue with your Ymiko YT-6 Fiber Optic Fusion Splicer Heater, please contact the retailer from whom you purchased the product. They will be able to provide the most direct support and guidance.