
Introduction
Thank you for choosing the CROWN SHADES 3x3 Pop-Up Gazebo. This manual provides detailed instructions for the safe and efficient assembly, operation, and maintenance of your gazebo. Please read all instructions carefully before use and retain this manual for future reference.
This gazebo is designed for temporary outdoor use, providing shade and shelter. It features a patented central locking technology for easy setup, UPF 50+ waterproof fabric, adjustable height settings, and a convenient Sto-N-Go system for portability.
Setup Instructions
The CROWN SHADES Pop-Up Gazebo is designed for quick and easy assembly, ideally by two people, without the need for tools.
1. Unpacking and Initial Frame Expansion
Carefully remove the gazebo frame and canopy from the Sto-N-Go cover bag. Place the folded frame in the desired setup location. With a person on each side, gently pull the outer legs of the frame outwards to begin expanding it.

Figure 1: Three-step setup process for the gazebo, illustrating frame expansion, central lock engagement, and height adjustment.
2. Attaching the Canopy Top
Once the frame is partially expanded, drape the canopy fabric over the top of the frame. Ensure the corners of the canopy align with the frame's corners. Secure the canopy to the frame using the integrated fasteners or clips.
3. Engaging the Central Lock (CENTERLOK® Technology)
Locate the patented central locking mechanism at the center of the gazebo frame. With one hand, push upwards on the central hub until it clicks into place, locking the frame securely. This action locks all four legs simultaneously.
Figure 2: Detail of the CENTERLOK® mechanism for one-button, one-person assembly.
4. Adjusting Leg Height
Each leg of the gazebo features a height adjustment button. Press the button and extend the leg to your desired height. There are three height settings available. Ensure all four legs are set to the same height for stability.
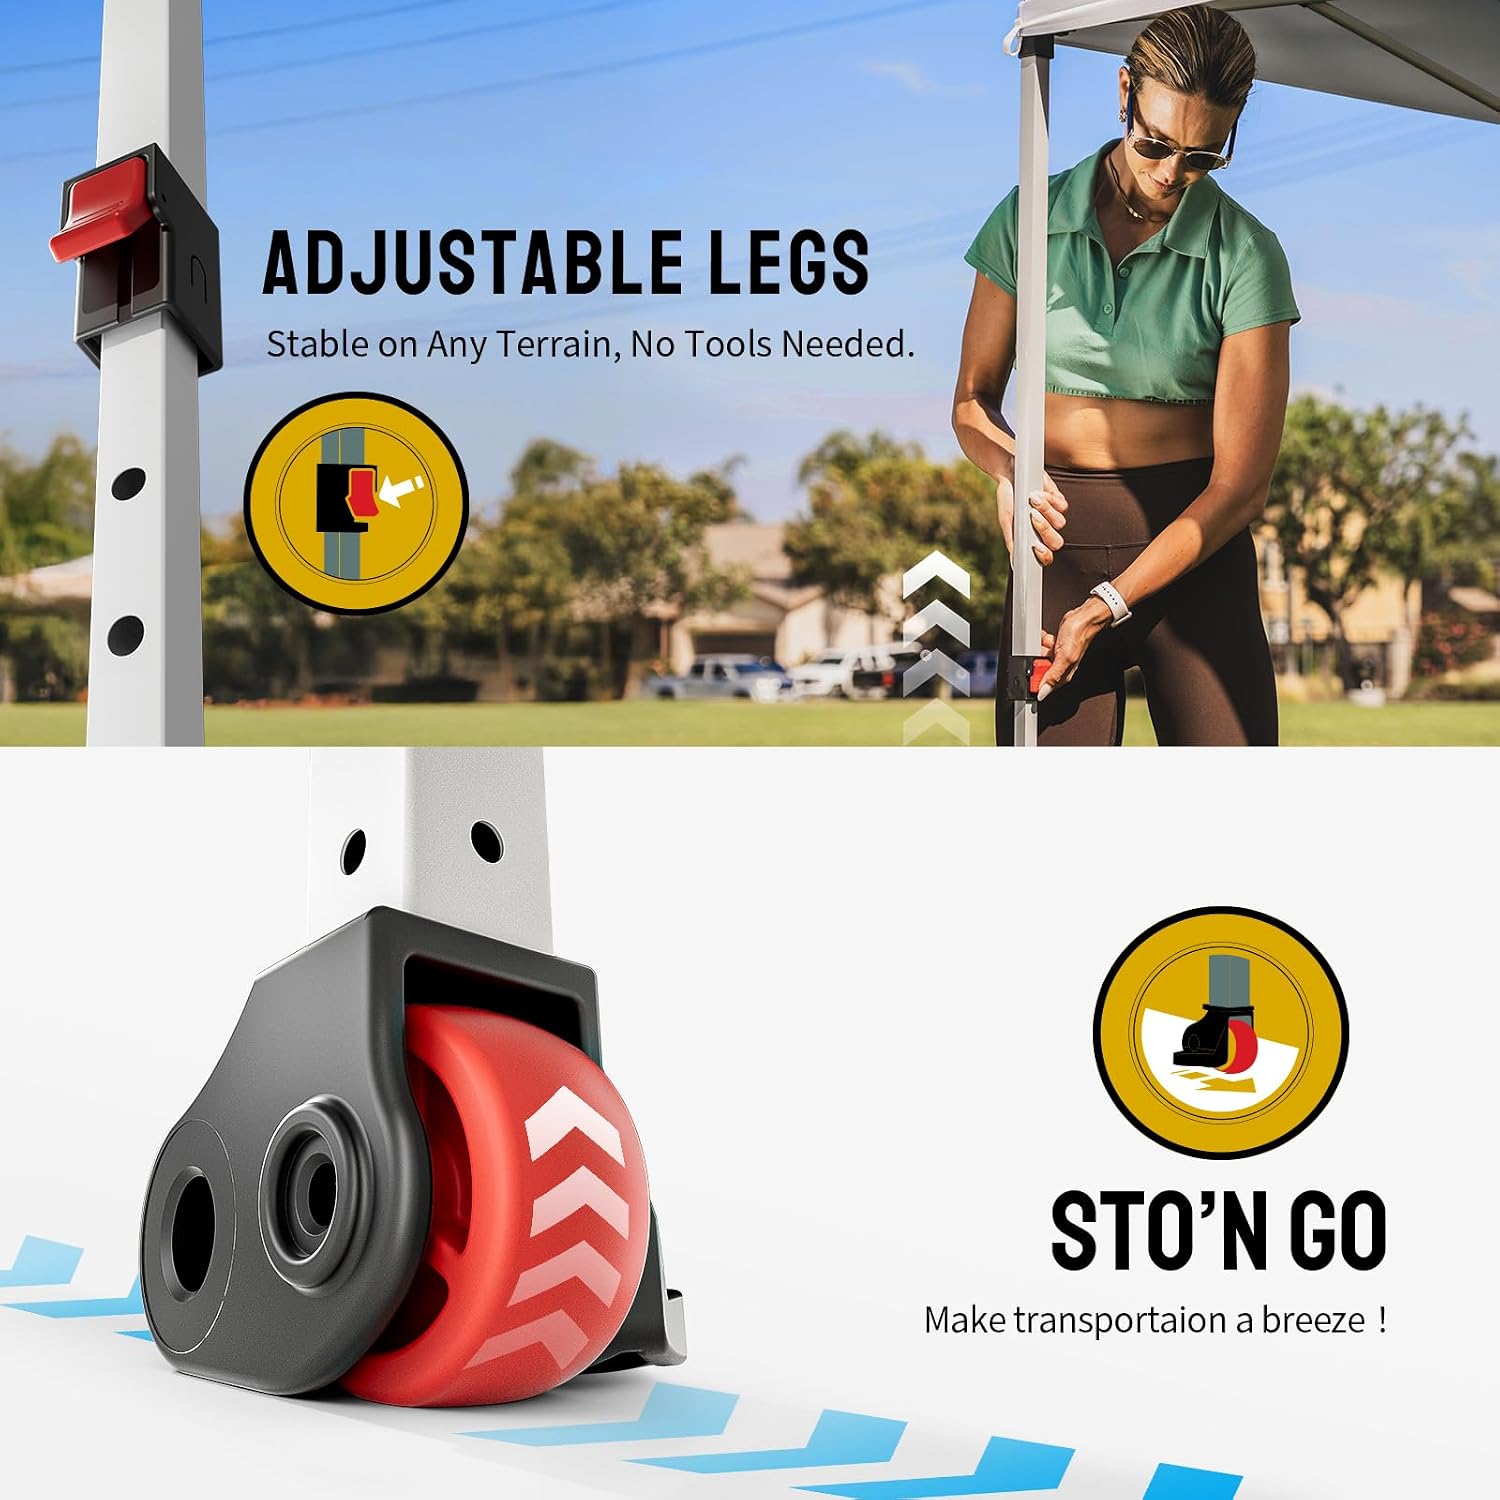
Figure 3: Adjustable leg mechanism and integrated wheel for easy transport.
5. Attaching Sidewalls (Optional)
The gazebo includes four removable sidewalls. These sidewalls feature an innovative suspension tab linking method, which is more secure and convenient than traditional hook-and-loop fasteners. Attach the sidewalls to the frame using these tabs. Two sidewalls have zippers, and two have windows.

Figure 4: Fast clip design for securing the canopy and sidewalls, preventing water accumulation.
6. Securing the Gazebo
For maximum stability, especially in windy conditions, use the provided guy ropes and sandbags. Fill the sandbags with sand and attach them to the gazebo legs. Secure the gazebo to the ground using the anchor pegs through the base of the legs.

Figure 5: Contents of the package, including all components for setup and securing.
Operating Instructions
Height Adjustment
To adjust the height of the gazebo, press the anti-pinch button on each leg and slide the inner leg to one of the three available height positions. Ensure all legs are adjusted evenly for stability.
Sidewall Usage
The four removable sidewalls can be attached or removed as needed to provide additional shade, privacy, or protection from wind and light rain. The innovative suspension tab system makes attachment and removal simple.
Ventilation
The gazebo features upper ventilation vents designed to prevent wind gusts and reduce humidity buildup, enhancing comfort and stability.
Figure 6: The gazebo's 150D heavy-duty waterproof fabric with PU advanced rainproof coating and UPF 50+ UV protection.
Maintenance
Cleaning
Clean the canopy and sidewalls with mild soap and water. Do not use harsh chemicals or abrasive cleaners, as these can damage the fabric and its protective coatings. Rinse thoroughly and allow to air dry completely.
Drying and Storage
Always ensure the canopy and sidewalls are completely dry before folding and storing them. Storing damp fabric can lead to mold, mildew, and degradation of the material. The Sto-N-Go system, including the wheeled cover bag, makes folding, storing, and transporting the gazebo convenient.
Frame Care
Inspect the metal frame periodically for any signs of damage, rust, or loose connections. Clean the frame with a damp cloth and dry thoroughly. Lubricate moving parts if necessary to ensure smooth operation.
Troubleshooting
Gazebo Not Opening/Closing Smoothly
Ensure all locking mechanisms are disengaged before attempting to fold or unfold the gazebo. Check for any obstructions in the frame's joints. Apply a silicone-based lubricant to moving parts if resistance persists.
Water Pooling on Canopy
The canopy is designed with a fast clip system to prevent water pooling. If water accumulates, ensure the canopy is taut and properly secured to the frame. Check that the frame is fully extended and locked, and that the height is evenly adjusted on all legs.
Instability in Wind
Always use the provided guy ropes and sandbags to anchor the gazebo, especially in windy conditions. Ensure the anchor pegs are firmly secured into the ground. The upper ventilation vents help mitigate wind pressure, but proper anchoring is crucial for stability.
Specifications
| Brand | CROWN SHADES |
| Model Number | RM100H-S4 |
| Dimensions (L x W x H) | 3L x 3l x 2.84H meters |
| Material | Polyester |
| Frame Material | Metal (Aluminum poles) |
| Color | White |
| UV Protection | UPF 50+ |
| Water Resistance Level | Waterproof |
| Floor Area | 90000 Square Centimeters |
| Assembly Required | Yes |
| Country of Origin | China |
Warranty Information
This CROWN SHADES product comes with a 2-year parts replacement warranty covering manufacturing defects. If any part included with your product does not function as it should, our support team will provide the necessary replacement part along with clear instructions to assist you with the repair.
Customer Support
For any questions, assistance, or warranty claims, please contact CROWN SHADES customer support. Refer to your purchase documentation or the official CROWN SHADES website for contact details.
When contacting support, please have your model number (RM100H-S4) and proof of purchase readily available.


