1. Product Overview
This manual provides instructions for the RETROSUN HJH13D Replacement Remote Control, designed specifically for use with Milemont and Lucid adjustable beds. It is not a universal remote and is not compatible with other brands of adjustable beds.

Image: Front and back view of the HJH13D remote control, showcasing its ergonomic design and button layout.
2. Compatibility
The HJH13D replacement remote control is exclusively compatible with Milemont and Lucid adjustable bed models. It is not designed to replace remotes for other adjustable bed brands.
Important Note: There are several versions of the HJH13D remote model. Please ensure the buttons on this remote match your original remote. If the button layout differs, this product may not be a suitable replacement. This remote does not include a massage function; if your adjustable bed has a massage function, this remote will not be compatible with that feature.
3. Setup and Pairing Instructions
Follow these steps to pair your new HJH13D remote control with your adjustable bed:
- Insert Batteries: The remote requires 2 AAA batteries (not included). Open the battery compartment on the back of the remote and insert the batteries, ensuring correct polarity.
- Prepare the Bed Base: Disconnect the power cord of the adjustable bed's control box from the electrical outlet. Wait for 1 minute.
- Reconnect Power: Re-insert the power cord into the electrical outlet. Proceed to the next step within 10 seconds of reconnecting power.
- Initiate Pairing on Remote: Simultaneously press and hold the HEAD UP and FOOT UP buttons on the remote control.
- Activate Control Box Pairing: While still holding the HEAD UP and FOOT UP buttons on the remote, press and hold the blue (round) button located on the control box cable (or directly on the control box if no cable button is present) for 3 seconds.
- Confirmation: You will hear two beeps, indicating that the connection is successful.
- Test Functions: Press any button on the remote to test all functions of your adjustable bed.

Image: Visual guide illustrating the step-by-step pairing process, highlighting the remote buttons and the control box pairing button.
4. Operating Instructions (Remote Features)
The HJH13D remote control provides the following functions for your adjustable bed:
- Head Up: Raises the head section of the bed.
- Foot Up: Raises the foot section of the bed.
- Head Down: Lowers the head section of the bed.
- Foot Down: Lowers the foot section of the bed.
- Memory Position (M): Activates a pre-set memory position.
- Flashlight: Activates a built-in flashlight for convenience.
- Flat: Returns the bed to a completely flat position.

Image: Labeled diagram of the remote control, indicating the function of each button.
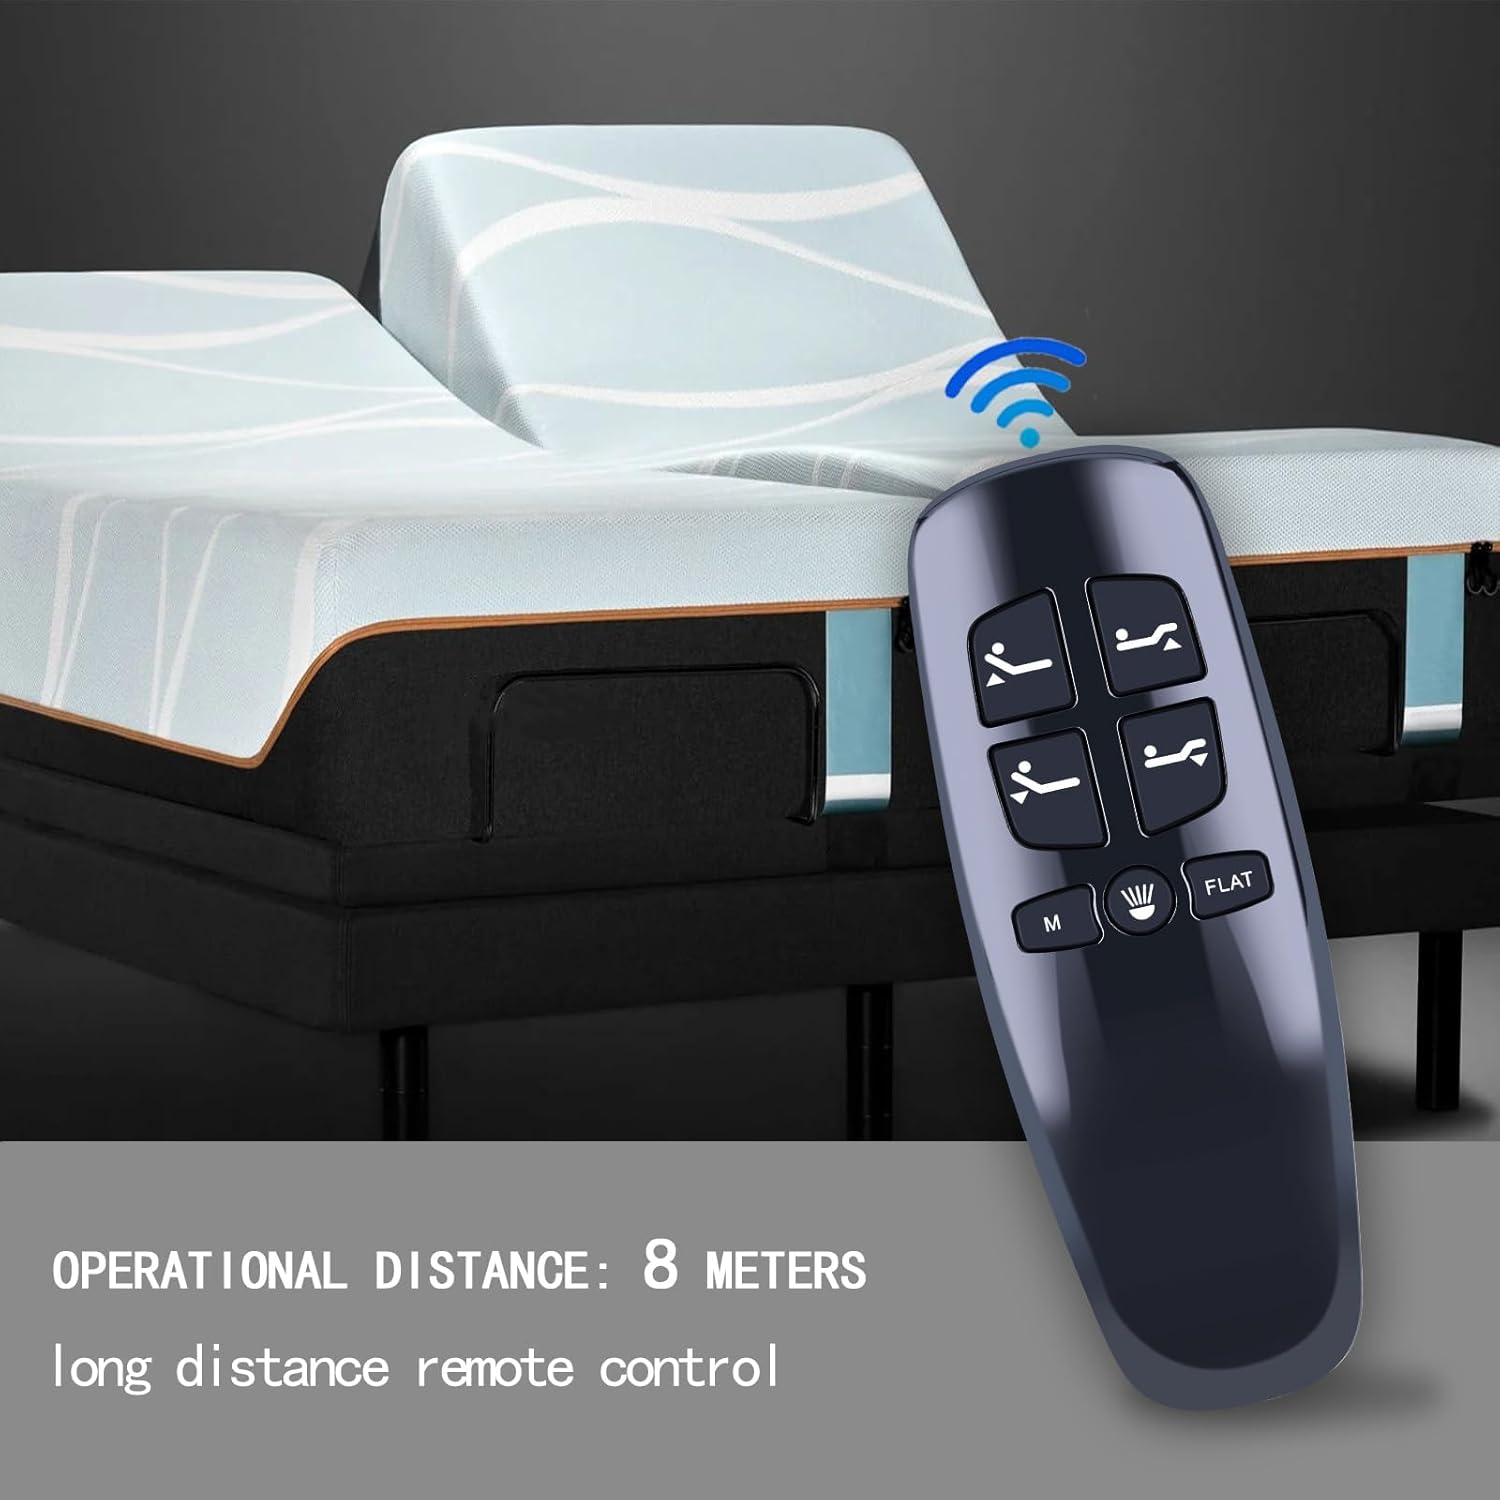
Image: The remote control in use with an adjustable bed, demonstrating an operational distance of up to 8 meters.
5. Troubleshooting
If you encounter issues with your remote control, consider the following:
- Remote Not Responding:
- Check the battery before operation. Ensure 2 AAA batteries are correctly inserted and have sufficient charge.
- Verify that the child lock function (if present on your bed base) is not activated. The bed cannot be operated normally when it is turned on.
- Pairing Issues: If pairing does not work, disconnect the adjustable bed device from the power supply for 1 minute and then attempt the pairing process again from step 1.
- Incompatibility: Confirm that your remote's button layout matches your original remote and that your bed is a Milemont or Lucid model. This remote does not support massage functions.
6. Specifications
| Feature | Detail |
|---|---|
| Model Number | HJH13D (Item Model Number: BW426) |
| Compatibility | Milemont and Lucid Adjustable Beds ONLY |
| Power Source | 2 x AAA Batteries (not included) |
| Color | Black |
| Item Weight | 2.11 ounces |
| Package Dimensions | 5.47 x 1.97 x 0.79 inches |
| Max Number of Supported Devices | 1 (one remote per bed base) |
7. Maintenance
To ensure optimal performance and longevity of your remote control:
- Replace batteries when the remote's response becomes sluggish or inconsistent.
- Keep the remote clean and dry. Avoid exposure to liquids or extreme temperatures.
- Do not attempt to disassemble the remote control.
8. Support and Warranty
If you encounter any issues or have questions regarding your RETROSUN HJH13D Replacement Remote Control, please contact our customer support. We are committed to providing solutions within 24 hours.
For assistance, please refer to the contact information provided with your purchase or visit the RETROSUN store on Amazon.